How to replace the timing belt
Content
Replacing a timing belt is a common job for an auto mechanic. Learn how to change the timing belt on your car with this step by step guide.
The timing belt is a rubber belt that keeps the camshaft and crankshaft in sync so that the valve timing is always correct. If the valve timing is off, your engine will not run properly. In fact, it may not start at all. The timing belt also controls the power steering and water pump.
If your car won't start and you suspect a timing belt, the first thing you can do is inspect the belt. If you notice a problem with your timing belt, you may need to replace it completely.
Part 1 of 3: Preparing to work with the timing belt
Having received the keys to the car, you can start setting up and preparing to work with the timing belt.
Step 1: Set up your workspace. First, set up a 10x10 EZ UP tent if you need one. Then install an extension so you can fill the air compressor.
Then lay out all your tools and equipment, including the following materials.
Necessary materials
- A box of crow gloves
- A couple cans of brakes clean
- Drain pan for coolant
- Jack
- Hose clamps
- Jack stands
- Basic set of tools
- Mityvatsky tow truck
- Miscellaneous hand tools
- New timing belt
- O-ring lubricant
- A piece of wood
- Power tools (including ½ electric impact driver, ⅜ and ¼ electric ratchets, ⅜ mini impact driver, ¾ impact driver, tire air gauge and vacuum coolant filler)
- Air hose reel
- Tarpaulin under the car
- Threaded
- Wrench
Step 2: Place the New Parts. Start laying out new replacement parts and check if everything is in order.
Step 3: Jack up the car.. When changing the timing belt, especially on a front wheel drive vehicle, always jack the vehicle up and at a decent height. You will need to move frequently between the bottom and top of the car, so you have plenty of room to work.
Step 4: Lay out the tarp and drain pan. Once the car is on the jacks, lay down a tarp to catch any coolant you might miss if the water pump breaks.
Place a pan on the ground under the radiator and loosen the drain plug at the bottom of the radiator. On most new cars, they are made of plastic, so be careful not to break or damage them in any way.
Step 5: Let the coolant drain. Once the drain plug is loose and begins to flow into the drain pan, open the radiator cap to allow the air to escape and drain faster.
Step 6: Remove the engine cover. We remove the engine cover and start a bunch of old parts. Try to keep the old parts in the order you removed them, as this makes reassembly much easier.
Step 7: Remove the front passenger wheel. Then remove the front passenger wheel and set it aside.
While most cars have a plastic cover behind the wheel that also needs to be removed, your car may not have one.
Step 8: Remove the Serpentine Belt. Use a hefty breaker or ratchet to get the leverage and push the tensioner away from the belt. Remove the serpentine belt.
Loosen the 2 bolts securing the power steering pump to the block. This step isn't really necessary - you can technically bypass it, but this step makes working with your car a lot easier.
Step 9: Remove Power Steering Fluid. Use a tow truck to remove the power steering fluid from the reservoir. Then use two clamps to pinch the power steering return hose and prevent air from entering the power steering pump.
Step 10: Remove the return hose from the tank. Completely loosen the power steering pump mounting bolts and remove the return hose from the reservoir. Set aside the entire pump and return hose with clamps.
- Functions: Since there will still be some liquid in the hose, put a few shop rags under the reservoir when you disconnect the hose to avoid mess.
Part 2 of 3: Remove the old timing belt
Step 1. Remove the V-ribbed belt tensioner.. Before you can start removing the timing covers, you will need to remove the serpentine belt tensioner as it is blocking several timing cover bolts.
Remove the 2 screws holding it; a main large bolt that goes through one of the pulleys, and a guide bolt for the idler part of the assembly. Remove tensioner.
Step 2: Remove Timing Covers. Once the tensioner is removed, unscrew the 10 bolts holding the 2 upper timing covers and pull the covers out, paying attention to any parts of the wiring harness that may be attached to the timing covers.
Step 3: Loosen the engine mount bracket bolts.. Place a jack under the vehicle, place a piece of wood on the jacking point and raise the engine oil pan slightly.
While supporting the engine, remove the engine mount and loosen the engine mount bracket bolts.
Step 4: Find Top Dead Center or TDC. Use a massive ratchet with two extensions to turn the engine by hand. Always make sure that the motor turns in the same direction as it turns.
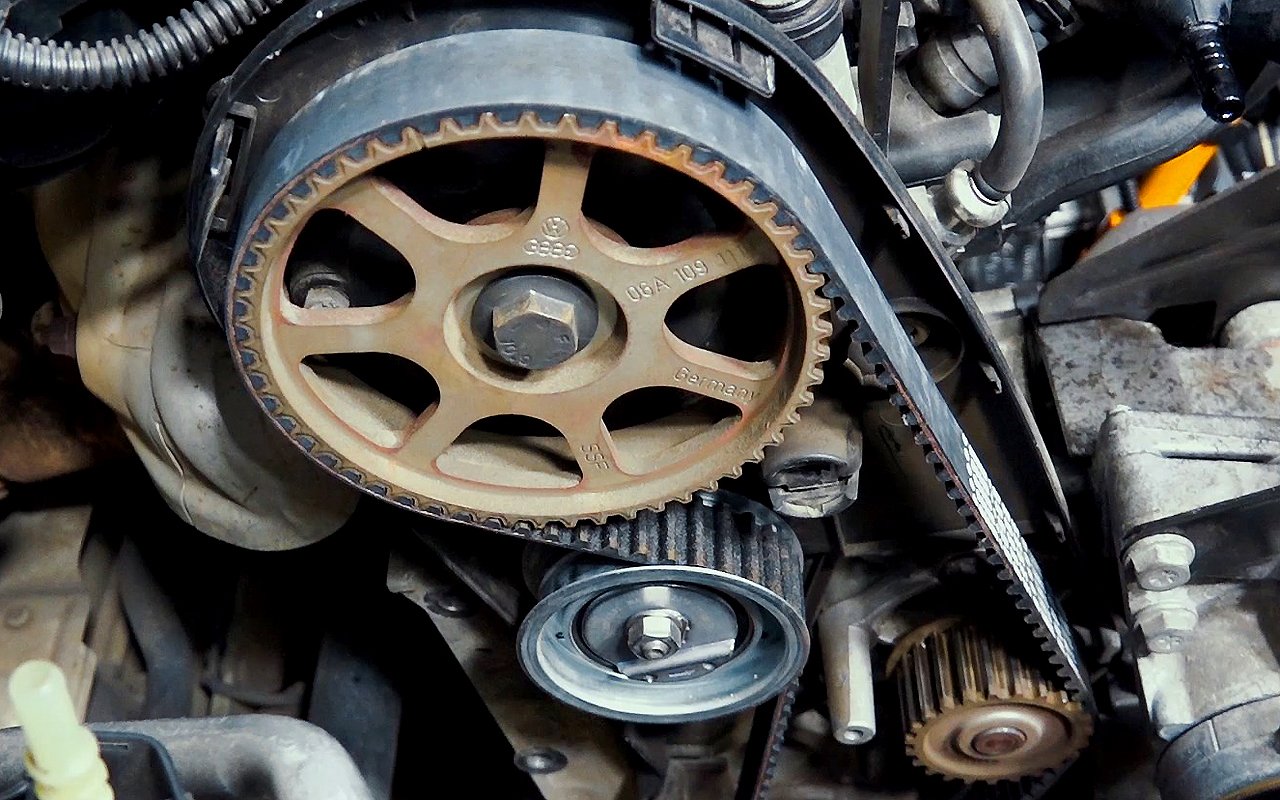
Step 5: Remove the crankshaft pulley. After you have turned the engine over by hand until the 3 marks line up (one on each camshaft sprocket and one on the lower timing cover/crankshaft pulley), remove the crankshaft pulley.
- Functions: If your vehicle has very tight crankshaft bolts, use an impact gun to loosen them. A ¾-powered air impact gun at 170 psi will break it as if it were a flare nut.
Step 6: Remove the Rest of the Timing Cover. Remove the last part of the timing cover by unscrewing the 8 bolts that hold it. Once removed, it gives you access to the sync components.
Step 7: Install the crankshaft bolt. Before doing anything else, remove the metal guide from the nose of the crankshaft - it should just slide off. Then take the crankshaft bolt and thread it all the way back into the crankshaft so you can crank the engine if needed.
Step 8: Check the alignment of the sync marks. If loosening the crankshaft bolt has moved your timing marks at all, make sure you correct them now before removing the belt, as they should be exactly aligned with each other. Now that the crankshaft pulley and lower timing cover have been removed, the crank mark is on the timing belt sprocket and lines up with the arrow on the block. This mark must be exactly aligned with the mark on each camshaft sprocket.
- Functions: Use a marker and make the marks more visible. Draw a straight line on the belt so you can see it lines up perfectly.
Step 9: Add Bolt to Timing Belt Roller Tensioner.. The roller timing belt tensioner has a bolt hole into which a 6 mm bolt can be screwed (at least 60 mm long). Add a bolt and it will press against the roller tensioner, holding it in position. This will make it easier to pull the pin out later.
Step 10: Remove the timing belt. Once you've made sure all three marks are aligned, it's time to remove the timing belt. To do this, try to remove the guide roller slowly, as it is held on by one through bolt.
After removing the belt, go around and remove the belt from each sprocket/pulley. Then remove the two bolts holding the hydraulic tensioner and one bolt holding the roller tensioner.
Step 11: Lower the Jack. Slowly lower the jack and move it to the side. Place a large drain pan under the front of the engine.
Step 12: Remove the water pump. The pump is held on by 5 bolts. Unscrew all the bolts except one - loosen the last one by half, and then simply tap the water pump pulley with a rubber mallet or crowbar until it separates from the block and the coolant begins to drain into the sump.
Step 13: Clean the Surfaces. Once the block is completely empty, use a vacuum cleaner to suck out any coolant you see in the water holes on the block.
Take a can of brake cleaner and spray the entire front of the engine so you can remove all coolant and oil residue. Make sure you clean the sprockets and water pump mating surface well. Also, clean the mating surface for old O-ring or visible coolant corrosion.
Part 3 of 3: Install the new timing belt
Step 1: Install the new water pump. After everything is prepared and cleaned, you can install a new water pump.
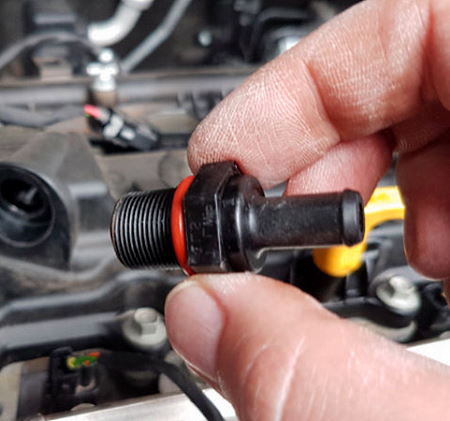
- Functions: Take the o-ring and lubricate it with o-ring grease before placing it in the water pump groove to ensure a good seal on the block.
Install the new water pump onto the dowel pins. Start tightening the 5 bolts in equal sequence and then tighten to 100 lbs. Go over them twice just to make sure they are all tightened properly.
Step 2 Install the hydraulic tensioner, roller tensioner and tensioner.. Apply a drop of red threadlocker to all of the bolts on these parts.
Torque the hydraulic tensioner bolts to 100 lbs and the roller tensioner to 35 ft-lbs. You don't need to tighten the idler until you have a new timing belt installed.
Step 3: Install a new timing belt.. Start at the crank sprocket and move counterclockwise while keeping the new timing belt tight. Make sure the belt is properly seated on the teeth of the camshaft and crankshaft sprockets. Make sure the marks on the belt line up with the marks on the sprockets.
After putting on the belt, there should be a slight slack between the tensioner and the crankshaft sprocket. Once you pull the pin out of the hydraulic tensioner, it will take up the slack and the belt will stay taut all the way around.
After you have pulled out the pin in the hydraulic tensioner, remove the bolt you installed earlier. Now manually turn the motor clockwise 6 times and make sure all marks match. As long as they are aligned, you can start reinstalling the rest of the components in reverse order.
Step 4 Install the coolant vacuum filter.. To use this, you need to have a special tool and fittings for the radiator adapter. First tighten the radiator drain plug you loosened earlier. Then install the adapter on top of the radiator.
With the fitting installed, install our tool and direct the outlet hose into the grate and the inlet hose into a clean bucket.
- Functions: Hold the inlet hose with a long screwdriver to make sure it stays at the bottom of the bucket.
Step 5: add coolant. Pour 2 gallons of 50/50 blue coolant into a bucket. Connect the air hose, turn the valve and let it evacuate the cooling system. Bring the pressure up to about 25-26 Hg. Art., so that it holds a vacuum when the valve closes. This indicates that there are no leaks in the system. As long as it holds pressure, you can turn the other valve to get coolant into the system.
While the system is filling up, you begin to collect the parts in the reverse order of how you removed them.
- Attention: Be sure to install the engine mount bracket and metal guide before installing the lower timing cover.
Install the crank pulley and tighten to 180 ft-lbs.
Step 6: Check the car. Once everything is assembled, it will be possible to start the car. Get in the car and turn on the heater and fan at full blast. As long as the car is running smoothly, the heater is running, and the temperature gauge is at or below the center line of the gauge, you're done.
Allow the vehicle to warm up at idle to operating temperature before a test drive. This gives you the opportunity to clean up all your tools and old parts. By the time you finish cleaning, the car will be ready for a test drive.
If you would like a professional technician from AvtoTachki to replace your timing belt, one of our mechanics will be happy to work on your vehicle at your home or office.