How to replace a wheel seal
Wheel seals are part of the wheel bearing system and protect these bearings from dirt and debris. Replace wheel seals if grease leaks from bearings.
Wheel seals are designed to keep dirt and any other debris out of the bearings so that the bearings stay well lubricated and can do their job as intended. If the wheel seal has gone bad, you will notice grease leaking from the wheel bearings and noise coming from the wheels.
Part 1 of 1: Wheel Seal Replacement
Necessary materials
- Hex socket set with metric and standard sockets
- Pliers in assortment
- Assorted screwdrivers
- Breaker, ½" drive
- brass hammer
- Combination wrench set, metric and standard
- Disposable gloves
- Sandpaper / sandpaper
- flashlight
- Floor jack and jack stands
- Set of metric and standard sockets, ½" drive
- Set of metric and standard keys
- There is a pry
- Ratchet ⅜ drive
- Filling remover
- Socket set metric and standard ⅜ drive
- Socket set metric and standard ¼ drive
- Torque wrench ⅜ or ½ drive
- Torx socket set
- Wheel socket set ½"
Step 1: Prepare your workspace. Make sure the vehicle is on a level, safe surface and that you have applied the parking brake.
Step 2: Loosen the clamp nuts. Use a ½" drive breaker and nut socket set to loosen all nuts before lifting the vehicle into the air.
Step 3: Jack up the car and use the jacks.. Jack up the car and place it on jack stands. Set the wheels aside, away from the work area.
Be sure to jack up the car in the right place; there are usually pinch welds on the sides at the bottom that can be used for jacking. Then make sure you place the stands on the chassis or frame and lower it onto the stands.
Step 4: Remove the old wheel seal. First, disassemble the brakes, starting by removing the caliper bolts. Then remove the caliper bracket so you can get to the hub/rotor.
There is a plug at the end of the hub/rotor; use a thin chisel and hammer to push it out. You can also use a set of large pliers and rock it this way.
Then remove the cotter pin retainer tab and nut. This will allow the rotor/hub to slide off the spindle with the bearings and seal attached. Use a seal removal tool to push the seal out of the back of the hub/rotor.
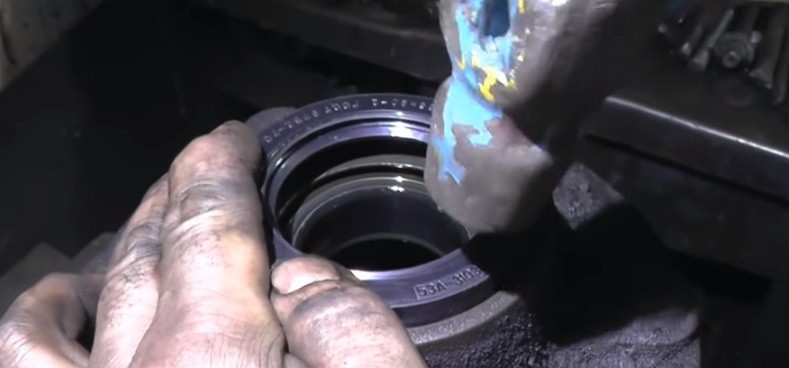
Step 5: Reinstall the wheel bearings and wheel seal.. First, clean all sand and dirt from the bearings. Use a bearing seal and fill with fresh new grease. Make sure the inside where the bearings sit is clean and apply some new grease to the surface.
Put the rear bearing back in and use a seal installer or socket large enough to allow you to drive the new seal straight and flat. Slide the hub/rotor back onto the spindle and reinstall the front bearing along with the washer and nut.
Tighten the nut by hand. Rotate the hub/rotor until there is some resistance on it. Loosen the nut slightly, then install the nut guard and cotter pin.
Using a hammer, tap on the cap until it is flush, then start assembling the brakes. Screw the brake caliper caliper to the spindle, then place the pads back onto the caliper. Reinstall the caliper and torque all bolts to specification found in the service manual or online.
Step 6: Install the wheels. Install the wheels back onto the hubs using the lug nuts. Secure them all with a ratchet and socket.
Step 7 Raise the vehicle off the jack.. Place the jack in the correct place under the car and raise the car until you can remove the jack stands. You can then lower the car back to the ground.
Step 8: Tighten the wheels. Most vehicles use between 80 ft-lbs and 100 ft-lbs of torque. SUVs and trucks typically use 90 ft lbs to 120 ft lbs. Use a ½" torque wrench and tighten the lug nuts to specification.
Step 9: Test drive the car. Take the car for a test drive to make sure it runs smoothly and there are no clicks or bumps in the front end. If everything feels and sounds good, then the job is done.
You can replace the wheel seal at home with the right tool kit. But if you do not have enough tools or experience to do this work yourself, AvtoTachki offers a professional oil seal replacement at home or in the office.

