How to replace the low pressure hose of a car air conditioner (AC)
Content
Automotive air conditioning (AC) low pressure hoses carry the refrigerant back to the compressor to continue supplying cold air to the closed loop system.
The air conditioning (AC) system of modern cars, trucks, and SUVs is a closed-loop system, which means that the coolant and refrigerant inside the system does not leak unless there is a leak. Typically, leaks are found in one of two different locations; high pressure or AC supply lines or low pressure or return lines. When the lines are secure and tight, there's no reason why the air conditioner in your car shouldn't keep blowing cold air unless topping up on refrigerant is needed. However, sometimes there are problems with the AC low pressure hose, which requires replacing and recharging the AC system.
The low pressure side of the air conditioning system in most vehicles is connected from the A/C evaporator to the A/C compressor. It is called the low pressure side because at this point in the cooling process, the refrigerant flowing through the system is in a gaseous state. The high pressure side distributes the liquid refrigerant through the A/C condenser and dryer. Both systems must work together to convert the warm air in your cabin into cool air that is blown into the cabin when the cycle is complete.
Most low pressure AC hoses are made of metal with a flexible rubber hose material for locations where the hose must pass through tight spaces inside the engine bay. Due to the fact that the engine compartment is very hot, small holes can sometimes form in the low pressure hose of the air conditioner, which cause refrigerant to leak and can render the air conditioning system useless. If this happens, you will have to check the A/C system for leaks to determine the exact location that is causing the A/C failure and replace these parts to keep the A/C in your car running smoothly and correctly.
Part 1 of 4: Symptoms of a Broken AC Low Pressure Hose
When the low pressure side of an air conditioning system is damaged, symptoms are usually noticed sooner than if the problem is on the high pressure side. This is because cold air is blown into the vehicle from the low pressure side. When a leak occurs on the low pressure side, it means that less cool air will enter the passenger compartment. If the problem is with the high pressure hose, the symptoms will not be as noticeable at first.
Since the AC system in your vehicle is a closed circuit, it is very important for you to find the source of the leak before deciding to replace parts. If the low pressure hose is leaking or damaged, the following symptoms or warning signs will usually appear.
Lack of cold air blowing. When the low pressure hose is leaking, the first and most obvious sign is that less cold air will enter the cabin. The bottom side is for the refrigerant supply to the compressor, so if there is a problem with the hose, it can negatively affect the entire air conditioning system.
You see a buildup of refrigerant on the hose. If you have a leak on the low pressure side of the A/C system, it's very common to have a greasy film on the outside of the low pressure line. This is because the refrigerant coming from this side of the air conditioning system is gaseous. You will usually find this on the fittings that attach the low pressure AC hoses to the compressor. If the leak is not fixed, the refrigerant will eventually leak out and the air conditioning system will become completely useless. It can also cause other major parts of the AC system to fail.
You may hear refrigerant leaking out of the pressure lines when you add refrigerant to the A/C system.. When there is a hole in the low pressure line itself, you will often hear a hissing sound coming from under the car. At the moment, there are two common ways to check for leaks:
- Put your hand on the hose and try to feel for a refrigerant leak.
- Use a dye/refrigerant that will show the source of the leak using ultraviolet or black light.
Part 2 of 4: Understanding Low Pressure AC Hose Failures
For the most part, low pressure hose failure will be caused by age, time, and exposure to the elements. The low pressure hose is very rarely damaged. In fact, most A/C leaks are caused by worn A/C compressor or condenser seals that crack and cause refrigerant to leak from the system. If the refrigerant level gets too low, the A/C compressor clutch will usually automatically disengage, damaging the system. This is to reduce the chance of a compressor fire as the refrigerant is also used to cool the system.
When it comes to low pressure AC hose failure, it is most often at the rubber parts of the hose or connections to other components that it fails. Most of the rubber parts of the hose are bent and can crack due to age or exposure to heat. The coolant is also corrosive and can cause the hose to rot from the inside of the hose until a hole appears in it. The low pressure hose can also be damaged if there is too much AC refrigerant in the system. This creates a situation where the hose itself cannot withstand excess pressure and either the seal at the junction of the hose with the compressor will burst, or the hose will burst. This is the worst case scenario and not very common.
Part 3 of 4: Checking for AC Leakage
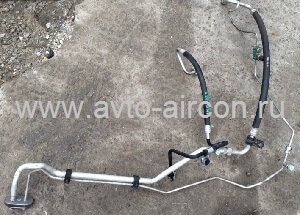
Before you decide to replace the AC low pressure hose, you want to make sure the leak is coming from that particular component. As stated above, most leaks are due to seals in the A/C compressor, evaporator, dryer, or condenser. In fact, when you look at the diagram above, you will see that many A/C systems have multiple low pressure hoses; connected from the compressor to the expansion valve and from the expansion valve to the evaporator. Any of these hoses, connections, or components may be the source of a refrigerant leak. This is the main reason why diagnosing air conditioning problems is a difficult and time-consuming process for even the most experienced mechanics.
However, there is a fairly simple and economical way to diagnose leaks in the air conditioning system, which a novice amateur locksmith can do on his own. In order to perform this test, you need to first secure a few parts and materials.
Necessary materials
- Black light/UV light
- Protective gloves
- Refrigerant R-134 with dye (one can)
- Safety glasses
- Schraeder Valve AC Connector
Step 1. Raise the hood of the car and prepare for service.. To complete this test, you must follow the same steps you would use to fill your A/C system with a can of refrigerant. Each vehicle's system is unique, so refer to your own service manual for instructions on how to charge the AC system.
For the purposes of this article, we will assume that your car is charging from the bottom port (which is the most common).
Step 2: Locate the bottom port of the AC system: On most domestic and foreign cars, trucks and SUVs, the AC system is charged by attaching the Schrader valve connection to the port and to the refrigerant bottle. Locate the low voltage AC port, usually on the passenger side of the engine compartment, and remove the cover (if present).
Step 3: Connect the Schrader Valve to the Port on the Low Pressure Side. Be sure to connect the Schrader valve to the port by snapping the connection tightly. If the connection does not snap into place, the low side port may be damaged and may be the source of your leak.
The ports on the low side and high side are different sizes, so make sure you have the correct type of Schrader valve connection for the port on the low side.
Once the valve is attached to the low side port, attach the other end to the R-134 refrigerant/dye bottle. Ensure that the valve on the cylinder is closed before installing the Schrader valve connection.
Step 4: Start the car, turn on the A/C system and activate the coolant canister.. Once the cylinder is attached to the valve, start the car and let it warm up to operating temperature.
Then turn on the AC system to the maximum cold setting and maximum pressure. Run the A/C system for approximately 2 minutes, then turn the R-134/dye bottle valve to the open position.
Step 5: Activate the canister and add dye to the A/C system.. On your Schrader valve, you should have a pressure gauge that will display the pressure of the refrigerant. Most gauges will have a "green" section that tells you how much pressure to add to the system. Turning the can upside down (as recommended by most manufacturers), turn it on slowly until the pressure is in the green zone or (desired pressure as specified by the dye manufacturer).
The instructions on the can specifically tell you how to check that the system is fully charged. However, most ASE certified mechanics listen for the A/C compressor to turn on and run continuously for 2-3 minutes. As soon as this happens, turn off the canister, turn off the car and remove the Schrader valve head from the cylinder and the valve on the low pressure side.
Step 6: Use Black Light to Find Dye and Leaks. After the system has been charged and has been running for about five minutes with the dye inside, leaks can be detected by shining black light (ultraviolet light) on all the lines and connections that make up the AC system. If the leak is large, you can easily find it. However, if it is a small leak, this process may take some time.
- Functions: The best way to check for leaks with this method is in the dark. As crazy as it sounds, UV light and paint work very well in total darkness. A good tip is to complete this test with as little light as possible.
Once you find that the paint is exposed, use a falling lamp to light up the part so you can visually inspect the part that is leaking. If the leaking component is coming from the low pressure hose, follow the steps in the next section to replace the low pressure AC hose. If it is coming from another component, follow the instructions in your vehicle's service manual to replace that part.
Part 4 of 4: Replacing the A/C Low Pressure Hose
Once you have determined that the low pressure hose is the source of the AC leak, you will need to order the correct replacement parts and assemble the correct tools to complete this repair. To replace hoses or any A/C system components, you will need special equipment to remove refrigerant and pressure from the lines. Listed below are the materials and tools you will need to complete this repair.
Necessary materials
- AC manifold gauge kit
- Empty coolant tank
- Socket wrenches (various sizes/see service manual)
- Replacing the low pressure hose
- Replacing fittings (in some cases)
- Recommended replacement refrigerant
- Set of sockets and ratchets
- Safety glasses
- Protective gloves
Vacuum pump and nozzles for AC lines
A warning: The steps below are GENERAL AC Low Pressure Hose Replacement Steps. Each air conditioning system is unique to the manufacturer, year of manufacture, make and model. Always buy and refer to your service manual for exact instructions on how to safely replace your air conditioning low pressure hose.
Step 1: Disconnect the battery cables from the positive and negative terminals.. It is always recommended to disconnect battery power when replacing any mechanical components. Remove the positive and negative cables from the terminal blocks and make sure they are not connected to the terminals during the repair.
Step 2: Follow the procedures for draining refrigerant and pressure from your A/C system.. Once the battery cables are removed, the first thing you need to do is depressurize the AC system.
There are several ways to perform this process, so it's always a good idea to refer to your vehicle's service manual. Most ASE certified mechanics will use an AC manifold and vacuum system as shown above to complete this step. Typically, this process is completed with the following steps:
Connect the vacuum pump, manifold system and empty tank to the vehicle's AC system. In most kits, the blue lines will be attached to the low pressure fitting and the low pressure side of the manifold gauge. Red fittings are attached to the high side. The yellow lines connect to the vacuum pump and the vacuum pump line connects to an empty refrigerant tank.
Once all lines are secured, open all valves on manifold, vacuum pump and empty tank.
Turn on the vacuum pump and let the system drain until the gauges read ZERO on the low and high pressure lines.
Step 3: Locate the leaking low pressure hose and replace it.. When you completed the pressure test in part XNUMX of this article, I hope you noted which low pressure line was broken and needed to be replaced.
There are usually two different low pressure lines. The line that usually breaks and is made of rubber and metal is the line that connects the compressor to the expansion valve.
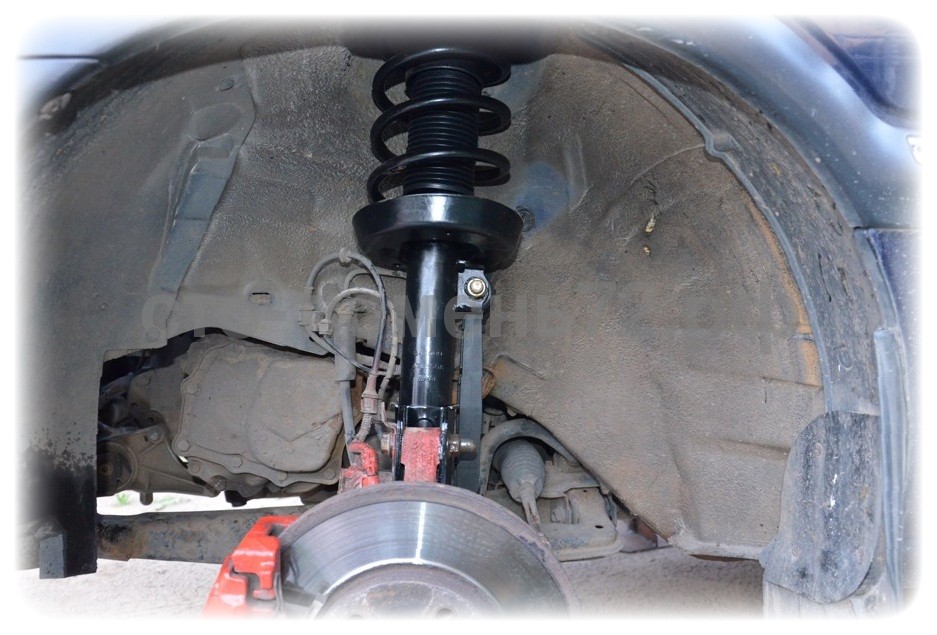
Step 4: Remove the low pressure AC hose from the expansion valve and compressor.. The diagram above shows connections where low pressure lines are connected to an expansion valve. There are two common connections; the connection of this valve to the evaporator is usually completely metallic; so it's very rare that this is the source of your leak. The common connection is on the left side of this image, where the low pressure AC hose connects from the expansion valve to the compressor.
Follow the instructions given in the service manual as each connection and fitting may be different for certain vehicle types. However, the low pressure line removal process usually consists of the following steps:
- The low pressure hose is removed from the compressor using a socket wrench or a spanner.
- The low pressure hose is then removed from the expansion valve.
- The new low pressure hose runs along the side of the vehicle and is attached to clamps or fittings where the old hose was connected (see service manual as this is always different for each vehicle).
- Old low pressure hose removed from vehicle
- New low pressure hose fitted to expansion valve
- The new low pressure hose is attached to the compressor.
Step 5: Check all low pressure AC hose connections: After you have replaced the old hose with the new low pressure hose, you will need to double check the connections to the compressor and expansion valve. In many cases, the service manual explains how to properly tighten new connections. Ensure that each fitting is fastened in accordance with the manufacturer's recommendations. Failure to complete this step may result in refrigerant leakage.
Step 6: Charge the AC System. Charging the AC system after it is completely empty is unique to each vehicle, so always refer to your service manual for instructions. The GENERAL STEPS are listed below, using the same manifold system you used to drain the system.
- A warning: Always use protective gloves and goggles when charging AC systems.
Locate the top and bottom ports. In most cases, they are colored blue (low) and red (high) or have a cap with the letters "H" and "L".
- Make sure all valves are closed before connecting.
- Connect the manifold connections to the low and high pressure side.
- Turn the valves on the Schrader valve attached to the ports to the "fully ON" position.
- Attach the vacuum pump and empty tank to the manifold.
- Turn on the vacuum pump to completely evacuate the system.
- Open the low and high side valves on the manifold and allow the system to test the vacuum (this should be done for at least 30 minutes).
- Close the low and high pressure valves on the manifold and turn off the vacuum pump.
- To check for leaks, leave the vehicle for 30 minutes with the lines connected. If the manifold gauges remain in the same position, there are no leaks. If the pressure gauge has increased, you still have a leak that needs to be fixed.
- Charge the AC system with steam (meaning make sure the tank is down). Although this process takes longer, it is safer and less likely to damage components.
- Connect the refrigerant canister to the manifold
Follow the instructions given in the service manual regarding the amount of refrigerant to be added. It is also recommended to use a refrigerant scale for consistency and accuracy.
FunctionsA: You can also find the amount of coolant sometimes on the hood or front clip of the engine compartment.
Open the canister valve and slowly loosen the center manifold connection to bleed air from the system. This clears the system.
Open the low and high side manifold valves and allow refrigerant to fill the system until the desired level is reached. Using the scale method is really efficient. As a rule, the refrigerant stops flowing when the pressure inside the tank and in the system is equal.
However, you need to start the vehicle and continue the refueling process.
Close the high and low pressure valves before starting the vehicle.
Start the car and turn the AC system on full blast - wait for the compressor clutch to engage, or physically look at the compressor pump for it to activate.
ONLY open the valve on the low pressure side to continue charging the system. Opening the valve on the high pressure side will damage the AC system.
Once the desired level is reached, close the low side valve on the manifold, shut off the tank, disconnect all fittings, and place the fill caps back into the vehicle's AC system.
Once this process is complete, the AC system should be fully charged and ready for years of use. As you can see, the process of replacing an AC low pressure hose can be very complicated and requires the use of special tools to properly and safely install the new line. If you have read these instructions and think this might be too difficult for you, contact one of our local ASE certified mechanics to replace the AC low pressure hose for you.