How to replace the evaporator valve solenoid
Content
Emissions are partly regulated by the EVAP solenoid valve, which fails when your vehicle fails an emissions test or has an overpressurized gas tank.
To register a vehicle for road use in the United States, a car, truck, or SUV must first pass an emissions test. Modern vehicles are equipped with several emission control components that work together to reduce emissions of gases that degrade air quality and create smog. One of the first lines of defense for controlling vehicle emissions or potentially harmful gases and particles is the evaporative valve solenoid, or commonly referred to as the EVAP ventilation solenoid.
The evaporative valve solenoid is an emissions system component that is designed to collect and recirculate evaporative emissions from the EVAP filter, which contains carbon that collects unburned hydrocarbons generated inside the fuel cell. This vapor entering the filter canister is converted into two separate gases. Hydrocarbon is distributed by the EVAP purge solenoid valve to the fuel system and combusted during combustion. The filtered hydrocarbons are converted to carbon dioxide and expelled back into the air by the EVAP ventilation solenoid.
This component is typically in the open position when the vehicle is moving and closed when the vehicle is off. It works by forcing air into a charcoal-based canister, which becomes pressurized as steam enters the chamber. Once the solenoid fires, air enters the EVAP and relieves pressure in most American and domestic cars, trucks, and SUVs. When the EVAP Ventilation Solenoid is working properly, it can operate for the life of the vehicle under normal use. However, there are several reasons why the EVAP ventilation solenoid may wear out prematurely or fail completely.
When this component fails, it usually triggers an OBD-II error code (0499) which indicates a pressure problem in the EVAP system. A component failure by itself prevents fresh air from entering the EVAP system, which will adversely affect the performance of the EVAP system. This triggers the check engine light or can cause the car to not start in some worst scenarios. If the EVAP solenoid valve is defective, it must be replaced.
- Attention: The EVAP ventilation solenoid is usually located near the rear fuel tank. The solenoid is usually removed to fix the problem; however, in some cases the solenoid is attached to a vent tube, which is recommended to be replaced at the same time. Please refer to your vehicle's exact service manual for exact instructions and the location of the EVAP ventilation solenoid.
- AttentionA: As we begin to describe the steps to remove and replace the EVAP ventilation solenoid, we must let you know that the exact location and steps to replace this component will vary depending on your vehicle.
Part 1 of 3: Determining the Symptoms of a Faulty EVAP System Solenoid
Before deciding to replace any mechanical component, it is very important to make sure that you have correctly diagnosed the problem. Typically, when an EVAP ventilation solenoid starts to fail or breaks, it causes several symptoms that alert the driver that there is a problem with this component. However, because these symptoms can also be associated with other parts of the EVAP system, a physical examination or diagnostic scan is required to pinpoint the broken part.
Some warning signs that there is a problem with the EVAP ventilation solenoid and needs to be replaced may include the following:
Check Engine light stays on: The Check Engine light is the first warning light to indicate a possible problem with the EVAP ventilation solenoid. This light comes on if the ECM detects a problem with the EVAP ventilation solenoid position, signal strength, leak, or circuit. If the check engine light comes on, perform a diagnostic scan and look for OBD-II code #0499.
Too much pressure inside the gas tank: A typical physical warning sign of a damaged or failed EVAP solenoid is the presence of too much pressure inside the fuel cell. This is noticeable when the driver removes the fuel tank cap from the tank and notices a strong surge in air pressure after loosening or completely removing the cap. This symptom can also be caused by excessive heat, as pressure naturally rises in warm weather. The EVAP ventilation solenoid will help relieve this pressure in many cases.
When refueling, the fuel tank seems to be full: if the pressure inside the fuel tank is too high, filling the car with gasoline is difficult. In many cases, you will push the knob on the fuel pump and set it to the locked position to fill the tank. If this lever closes frequently, it is usually due to excess vapor pressure inside the fuel cell. This may indicate a problem with the EVAP ventilation solenoid.
Failed emissions test: When you take your car, truck or SUV to an emissions testing center, the vehicle is subjected to a diagnostic scan as well as emissions testing. In many cases, the EVAP system solenoid valve breaks or a vacuum leak occurs, preventing the exhaust system from working. As a result, excessive levels of particulate matter or NO2 may appear on the emissions report.
Part 2 of 3: EVAP Crankcase Ventilation Solenoid Replacement
Necessary materials
- Socket wrench or ratchet wrench
- flashlight
- Flat blade screwdriver
- socket
- Jack stands or hydraulic lift
- Penetrating oil
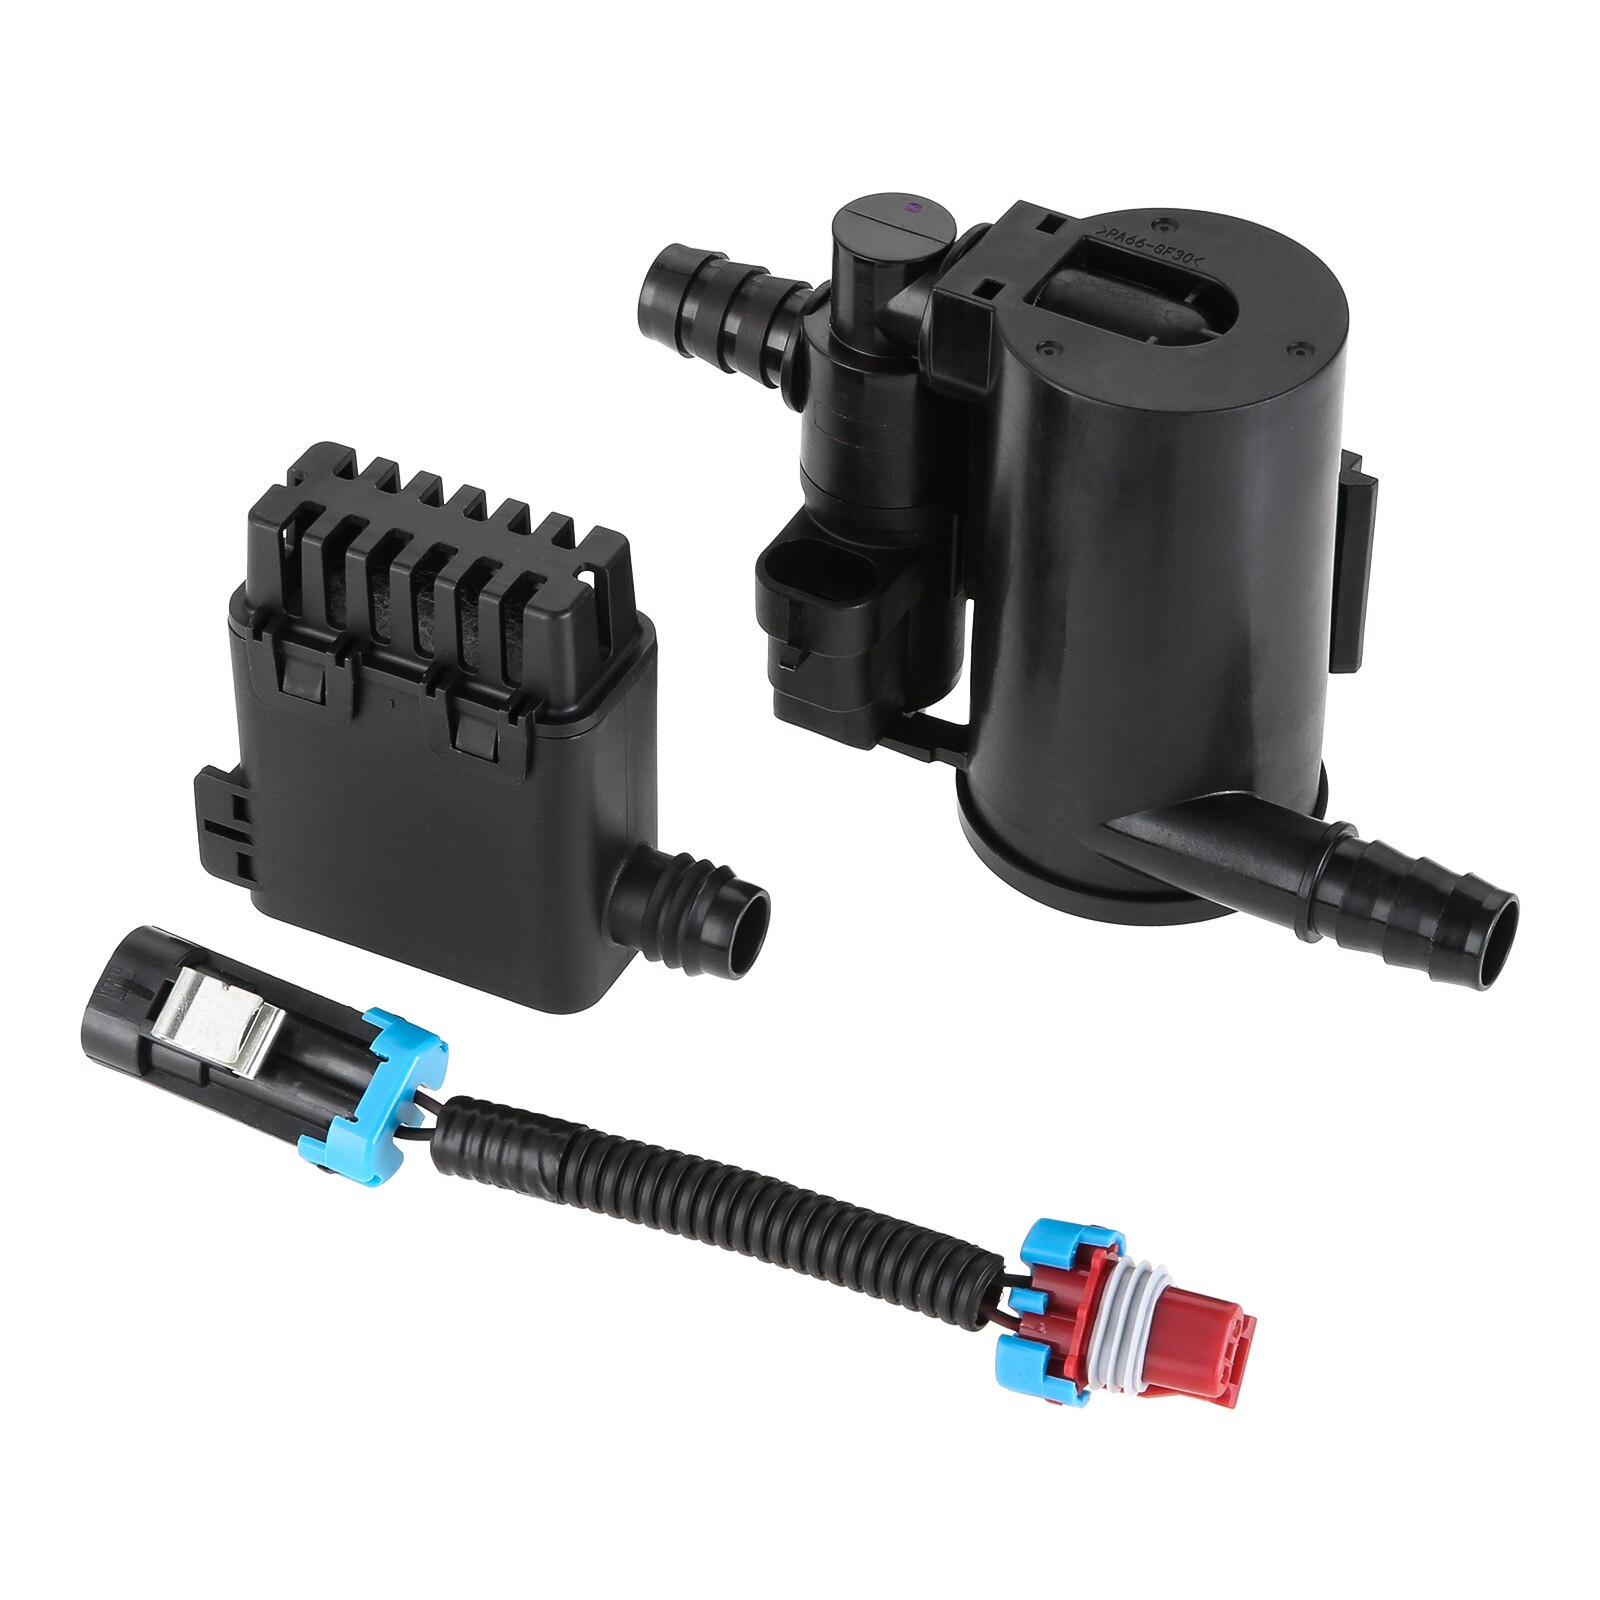
- EVAP ventilation solenoid replacement
- Replacing ventilation hoses
- Safety glasses
Be sure to wear safety goggles at all stages of this project as the chance of getting debris in your eyes is high when working under a vehicle.
Step 1: Disconnect the car battery. The EVAP vent solenoid is connected to the power connector, which supplies the device with electricity to turn the solenoid on and off.
In this regard, the first thing to do before replacing this part is to turn off the power. Locate the vehicle's battery and disconnect the positive and negative battery cables before continuing.
Step 2: Raise the rear of the car. To access the EVAP ventilation solenoid, you need to raise the vehicle.
This part is located on the driver's side next to the rear wheels. Raise the vehicle from the recommended jacking position and place the rear of the vehicle on jack stands. Be sure to keep applying pressure on the jack after lowering the vehicle on the jack for added safety.
Step 3: Locate the bolts and slots that hold the EVAP ventilation solenoid in place.. The EVAP ventilation solenoid is attached to the vehicle with a single bolt (or two in some cases) and also attaches to a series of slots.
Here the tabs on the ventilation solenoid are inserted for support.
Step 4 Lubricate the bolts and slots with penetrating fluid.. Because this component is exposed to the elements, the bolt and slots that hold this part to the vehicle may have rusted.
To avoid stripping bolts, spray penetrating fluid on bolts and rear clips.
Step 5: Remove the wiring harness. An electrical harness is attached to the EVAP solenoid valve.
Remove this wiring harness by inserting a small flathead screwdriver into the slot with the small plastic clip. Lower the clip with a screwdriver and carefully remove the harness from the EVAP ventilation solenoid.
Step 6: Remove the vent hoses from the EVAP vent solenoid.. Two vent hoses will be attached to this component.
One of the hoses goes to the EVAP filter, the other goes to the exhaust pipe. In most cases, these hoses are either held in place with clamps or simply slipped on. Remove both hoses attached to the EVAP ventilation solenoid.
Step 7: Remove the bolt holding the EVAP ventilation solenoid.. There are usually one or two bolts that secure this part to the vehicle.
Remove these two bolts using a ratchet, extension and a 10mm socket (in most cases this will be 10mm).
Step 8: Remove the EVAP ventilation solenoid from the clips.. In many cases, this part is also attached to a row of clips on the back.
You can access these clips after removing the EVAP ventilation solenoid bolts. Using a flat blade screwdriver, gently press the clip and remove the EVAP ventilation solenoid from the bracket.
Step 9: Remove the old EVAP ventilation solenoid.. Once you've released the clips and unscrewed the block, it should be easy to remove from the car.
In some cases, a secondary ground wire is attached to the device. In this case, simply remove the ground wire and the device will turn off.
Step 10: Install a new EVAP ventilation solenoid.. Once the old block is removed from the vehicle, you are ready to install the new block.
To complete this, follow the above instructions in reverse as shown below: Slide the EVAP ventilation solenoid over the clips and secure the solenoid to the bracket with bolts. Connect ventilation hoses and wiring harness
Step 11: Clean the bottom of the car. Before you finish the job, be sure to remove all tools, debris, and equipment from under the vehicle so that you do not run over them with your vehicle.
Step 12: Lower the car off the jack.
Step 13: Connect the battery cables.
Step 14: Check vehicle start and clear error codes with a scanner..
Part 3 of 3: Test driving a car
Once you have successfully replaced the EVAP ventilation solenoid, you will be ready to test drive your vehicle. I hope you wrote down the symptoms that caused you to replace this component, because the test drive is to verify that these symptoms have disappeared. The test drive for this repair is actually very short, due to the fact that in many cases the failure of this part will show up at idle or at startup.
Here are a few tips on how to test drive or verify that this part replacement is done correctly.
Step 1: Start the car. Let it warm up to operating temperature
Step 2: Check the toolbar. Verify that the check engine light does not come on. If this is the case, you should turn off the vehicle and perform a diagnostic scan. Error codes should be cleared on most vehicles after completing this service.
Step 3: Turn off the car. After making sure that the Check Engine or other indicators are off, turn off the car.
Step 4: Remove the gas cap. This test confirms that the vacuum is working.
If you remove the gas tank cap and there is a huge vacuum pressure, recheck the lines you connected to the EVAP ventilation solenoid as they may be crossed.
Step 5: Do a 10km road test with the car.. Return home and make sure the check engine light is off.
This job is quite simple to complete, however, since you are working on the EVAP system and the fuel system, there may be some tricky steps involved. If you have read these instructions and are still not 100% sure about completing this repair, please contact one of your local AvtoTachki ASE certified mechanics to perform the evaporative valve solenoid replacement for you.