How to replace wheel bearings
Wheel bearings are the parts that allow your car's wheels to spin freely and with minimal friction. A wheel bearing is a set of steel balls placed in a metal housing, known as a race, and located…
Wheel bearings are the parts that allow your car's wheels to spin freely and with minimal friction. A wheel bearing is a set of steel balls housed in a metal housing known as a raceway and sits inside the wheel hub. If you hear a groan or hum while driving, it's likely that one of your car's wheel bearings is starting to fail.
Replacing your own wheel bearings is considered an intermediate job that can be done at home, but it will require special mechanical tools. The steps below have been summarized to cover the three most common types of wheel bearings found on most vehicles. Be sure to get your vehicle's service manual and determine the type of wheel bearing your vehicle is equipped with before starting repairs.
Part 1 of 3: Prepare your car
Necessary materials
- Bearing grease
- Side cutters
- Jack
- Gloves
- Pliers
- Ratchet (½" with 19mm or 21mm socket)
- Safety glasses
- Safety jack stand x 2
- Socket set (Ø 10–19 mm socket set)
- Screwdriver
- Wrench
- Chock x 2
- Wire hanger
Step 1: Chock the wheels. Park your vehicle on a flat and level surface.
Use the wheel chock to block the tire against the wheel you will be working on first.
- FunctionsNote: If you are changing the driver's side front wheel bearing, you will need to use wedges under the passenger's rear wheel.
Step 2: Loosen the clamp nuts. Get a XNUMX/XNUMX" ratchet with a suitable size socket for the nuts.
Loosen the lug nuts on the bar you are about to remove, but do not remove them completely yet.
Step 3: Raise the car. Use a floor jack and a pair of safety jack stands to raise and secure the vehicle. This will allow you to safely remove the tire.
- Functions: Be sure to refer to your owner's manual for information on where the proper lifting points are to lift your vehicle.
Step 4: Remove Clamp Nuts. With the vehicle jacked up and secured, loosen the lug nuts completely, then remove the tire and set it aside.
Part 2 of 3: Install new wheel bearings
Step 1: Remove the brake caliper and caliper. Use a ratchet and ⅜ socket set to unscrew the disc brake caliper and caliper from the spindle. Using a screwdriver, remove the caliper itself.
- Functions: When removing the caliper, make sure that it does not hang loosely, as this may damage the flexible brake line. Use a wire hanger to hook it to a safe part of the chassis, or hang a brake caliper from the hanger.
Step 2: Remove the outer wheel bearing.. If the wheel bearings are housed inside the disc brake rotor, as is often the case in trucks, you will need to remove the center dust cap to expose the cotter pin and lock nut.
To do this, use pliers to remove the cotter pin and lock nut, and then slide the rotor forward to release the outer wheel bearing (smaller wheel bearing).
Step 3: Remove the rotor and inner wheel bearing.. Replace the lock nut on the spindle and grasp the rotor with both hands. Continue to remove the rotor from the spindle, allowing the larger inner bearing to hook onto the lock nut, and remove the bearing and grease seal from the rotor.
Step 4: Apply bearing grease to the housing.. Lay the rotor on the floor face down, back side up. Take a new larger bearing and rub bearing grease into the housing.
- Functions: The easiest way to do this is to put on a glove and take a sufficient amount of grease into the palm of your hand and rub the bearing with your palm, pressing the grease into the bearing housing.
Step 5: Install New Bearing. Place the new bearing in the back of the rotor and apply grease to the inside of the bearing. Fit the new bearing seal onto the new larger bearing and slide the rotor back onto the spindle.
- Functions: A rubber mallet can be used to drive the bearing seal into place.
Fill the new smaller bearing with grease and slide it onto the spindle inside the rotor. Now install the thrust washer and lock nut onto the spindle.
Step 6: Install the new cotter pin. Tighten the lock nut until it stops and turn the rotor counterclockwise at the same time.
Tighten the lock nut ¼ turn after tightening, and then install a new cotter pin.
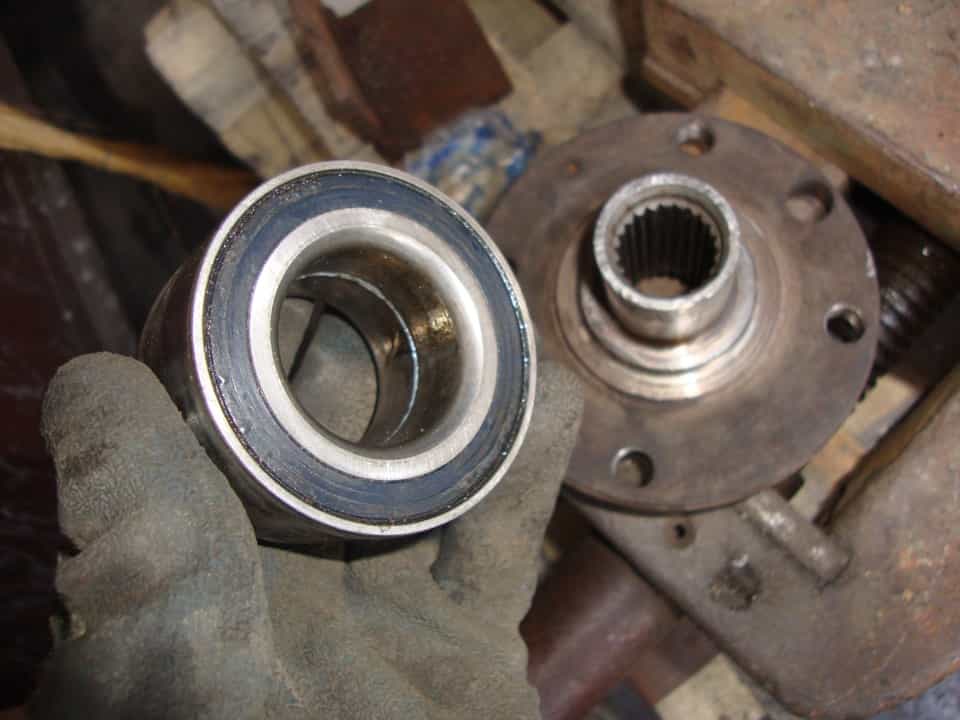
Step 7: Unscrew and Replace the Hub. Some vehicles have permanently sealed front wheel bearings, as shown in the image above. The rotor is mounted on a hub with a pressed wheel bearing.
Bearing units on the front or rear non-driven axles are installed between the wheel hub and a simple spindle shaft.
- FunctionsA: If your bearing is inside a hub that can be unscrewed, simply use a ratchet to disengage the hub from the spindle and install a new hub.
Step 8: Remove the spindle if necessary. If the bearing is pressed into the spindle, it is recommended to remove the spindle from the vehicle and take the spindle and new wheel bearing to a local repair shop. They will have special tools to press out the old bearing and press in the new one.
In most cases, this service can be done inexpensively. Once the new bearing is pressed in, the spindle can be reinstalled on the vehicle.
Part 3 of 3: Assembly
Step 1: Reinstall the brake disc and caliper.. Now that the new bearing is in place, the brake disc and caliper can be installed back onto the vehicle using the ratchet and the appropriate sockets that were used to remove them.
Step 2: Install the tire. Install the wheel and hand tighten the nuts. Support the vehicle with a floor jack and remove the safety jack stands. Slowly lower the vehicle until its tires touch the ground.
Step 3: Complete the installation. Use a torque wrench to tighten the clamp nuts to manufacturer's specifications. Lower the vehicle completely and remove the floor jack.
Congratulations, you have successfully replaced your vehicle's wheel bearing. After replacing wheel bearings, it's important to take a test drive to make sure the repair is complete. If you have problems replacing wheel bearings, call a professional mechanic, for example, from AvtoTachki, to replace them for you.