How to replace the fuel hose
Content
Fuel hoses are found in various locations on vehicles. Older cars have steel lines from the fuel tank to the carburetor or fuel system injectors. Some of the older cars have short fuel lines that connect a steel line to the fuel pump, fuel tank, and carburetor. These hoses tend to loosen and rupture over time, causing gasoline or diesel to leak.
From 1996 to today, cars have become more advanced with better fuel injection systems. All gasoline-powered vehicles have supply, return and steam lines. These lines are plastic and crack over time as they wear. These lines are not protected, so they can fail at any moment as debris distorts them.
Fuel hoses come in several varieties: rubber with an adhesive gasket, plastic or carbon, steel or aluminum.
Rubber fuel hoses are more commonly used on older cars and diesel engines. When it comes to adjusting a fuel hose that needs to be constantly repositioned, a rubber hose is your best bet.
Plastic hoses, known as carbon fiber hoses, are the most common hoses used on many vehicles today. This type of hose is very durable and can withstand pressures up to 250 psi. The plastic hose helps cool the fuel for better performance and reduces fumes. Plastic hoses break very easily when the hose is moved. Most plastic hoses have a quick connect fitting for connecting other plastic hoses or even rubber hoses.
Steel and aluminum hoses are also common on old and new vehicles. These hoses are known as fuel lines. The lines are extremely strong and can withstand pressures up to 1,200 pounds per square inch (psi). However, the lines are subject to bending and twisting, which causes clipping. Restriction can cause a pressure surge beyond 1,200 psi, causing the line to break. In addition, the line heats up in hotter climates, causing the fuel to boil.
Fuel is injected into the combustion chamber at a spray rate. If there is too much vapor in the fuel or it boils, the fuel enters the combustion chamber as vapor, causing a loss of power.
- Attention: It is recommended to replace the fuel hoses with original ones (OEM). Aftermarket fuel hoses may not match, may have the wrong quick connector, may be too long or too short.
There are several engine light codes associated with the fuel hose on vehicles with computers:
P0087, P0088 P0093, P0094, P0442, P0455
- A warning: Do not smoke near the car if you smell fuel. You smell fumes that are very flammable.
Part 1 of 6: Checking the Condition of the Fuel Hose
Step 1: Check for fuel leaks. Use a flashlight and a combustible gas detector to check for fuel leaks in the engine compartment.
Also check for fuel leaks at the supply, return or steam hoses.
Part 2 of 6: Removing the fuel hose
Having all the necessary tools and materials in place before starting work will allow you to get the job done more efficiently.
Necessary materials
- Hex key set
- socket wrenches
- Switch
- Drip tray
- flashlight
- flat screwdriver
- Jack
- Fuel Hose Quick Disconnect Kit
- Fuel resistant gloves
- Fuel transfer tank with pump
- Jack stands
- Pliers with needles
- Protective clothing
- Ratchet with metric and standard sockets
- Safety glasses
- Wrench
- Torque bit set
- transmission jack
- Wheel chocks
Step 1: Park your vehicle on a level, firm surface.. Make sure the transmission is in park (for automatic transmission) or 1st gear (for manual transmission).
Step 2 Install wheel chocks around the tires.. In this case, the wheel chocks will be located around the front wheels, since the rear of the car will be raised.
Apply the parking brake to block the rear wheels from moving.
Step 3: Raise the car. Jack up the vehicle at the indicated points until the wheels are completely off the ground.
Step 4: Install Jacks. The jack stands should pass under the jacking points and then lower the vehicle onto the jack stands.
For most modern cars, the jack stand attachment points are on a weld right under the doors along the bottom of the car.
Step 5: Install a nine volt battery in the cigarette lighter.. This will keep your computer running and save the current settings in the car.
If you don't have a nine-volt battery, no big deal.
Step 6: Open the car hood to disconnect the battery.. Remove the ground cable from the negative battery terminal by turning off the power to the ignition and fuel systems.
On older vehicles before 1996 with a fuel hose in the engine compartment:
Step 7: Locate a damaged or leaking fuel hose.. Remove the clamps that hold the fuel hose.
Step 8: Place a small pan under the fuel hose.. Disconnect the hose from the attached fuel line, fuel pump or carburetor.
Step 9: Clean the surface to which the fuel hose is attached with a lint-free cloth..
On an older car with a fuel hose under the car:
Step 10: Remove the fuel hose from the supply side of the fuel pump..
Step 11: Get under the car and disconnect the fuel line from the car.. This line can be held with rubber bushings.
Step 12: Get a transmission jack or similar jack. Install a jack under the fuel tank.
Remove the fuel tank straps.
Step 13: Remove the fuel filler cap bolts. Open the fuel filler door and you should see this.
Step 14: Lower the fuel tank just enough to remove the rubber fuel hose.. Remove the clamp that holds the fuel hose.
Place a pan under the fuel tank and remove the fuel hose from the fuel pump. Remove the fuel hose from the fuel line.
On vehicles from 1996 to present with a fuel hose in the engine compartment:
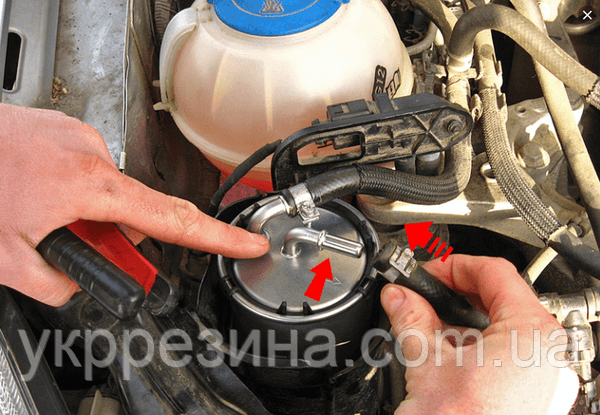
Step 15: Locate a damaged or leaking fuel hose.. Use a fuel hose quick release tool to remove the fuel hose from the fuel rail.
Step 16: Remove the hose from the fuel line.. Use a fuel hose quick disconnect tool and disconnect the fuel hose from the fuel line behind the engine along the firewall.
- AttentionNote: If you have rubber or flexible hoses on the supply line, return line and steam line, it is recommended to replace all three hoses if only one hose is damaged.
On vehicles from 1996 to today with a fuel hose under the vehicle:
Step 17: Remove the fuel hose from the fuel line.. Use a fuel hose quick disconnect tool and disconnect the fuel hose from the fuel line behind the engine along the firewall.
Step 18: Get under the car and remove the fuel plastic hose from the car.. This line can be held with rubber bushings.
- Attention: Be careful when removing plastic fuel lines as they can break easily.
Step 19: Use a quick disconnect tool and disconnect the fuel line from the fuel filter.. If the vehicle does not have an integrated fuel filter, this step can be skipped.
Step 20: Get a transmission jack or similar jack. Install a jack under the fuel tank.
Remove the fuel tank straps.
Step 21: Open the fuel filler door. Turn out bolts of fastening of a mouth of a fuel tank.
Step 22: Lower the fuel tank just enough to remove the plastic fuel hose.. Use a quick disconnect tool to remove the fuel line from the fuel pump.
Place a pan under the fuel tank and remove the fuel hose from the fuel pump.
- Attention: You may need to disconnect other fuel lines to get to the fuel line you are replacing.
If you are removing all three lines, you will need to remove the vapor line from the charcoal tank and the return line from the fuel tank using a quick disconnect tool.
Part 3 of 6: Installing the New Fuel Hose
Necessary materials
- Hex key set
- socket wrenches
- flashlight
- flat screwdriver
- Fuel transfer tank with pump
- Pliers with needles
- Ratchet with metric and standard sockets
- Wrench
- Torque bit set
On older vehicles before 1996 with a fuel hose in the engine compartment:
Step 1: Install new clamps on the new fuel hose.. Make sure the clamp is installed with the correct torque.
Step 2: Install a new fuel hose to the fuel pump, fuel line, or carburetor.. Tighten new clamps and secure the hose.
- Attention: Do not use old clamps. Clamping force is not retained when tightened, resulting in leakage.
On older vehicles prior to 1996 with fuel hose underneath:
Step 3: Install new clamps on the new fuel hose..
Step 4: Install a new fuel hose to the fuel line and fuel pump.. Raise the fuel tank and, if you have a fuel filter, connect the fuel line to the filter and make sure the connections are tight.
Step 5: Install the mounting bolts on the fuel filler neck.. Open the fuel filler door and be sure to tighten the bolts by hand and then 1/8 turn.
Step 6: Attach the fuel tank straps. Apply Loctite to the threads of the mounting bolts. Tighten the bolts by hand and then 1/8 turn to secure the straps.
Step 7: Connect the fuel line to the fuel pump.. Before this, you need to remove the jack from under the car.
On vehicles from 1996 to present with a fuel hose in the engine compartment:
Step 8: Connect the quick connector to the fuel line.. This is located behind the firewall.
Step 9: Connect the fuel line quick connectors to the fuel rail.. Check both connections to make sure they are tight.
If you had to remove any brackets, be sure to install them.
On vehicles from 1996 to today with a fuel hose underneath:
Step 10: Connect the quick connector to the fuel pump.. It is located on the fuel tank.
If you are installing all three lines, you will need to install a vapor line to the activated charcoal canister and a return line to the fuel tank by connecting the quick couplers together.
Step 11: Raise the fuel tank. Align the fuel filler neck so that it can be installed.
Step 12: Install the mounting bolts on the fuel filler neck.. Before doing so, open the fuel filler door and hand-tighten the bolts 1/8 turn.
Step 13: Attach the fuel tank straps. Apply threadlocker to the threads of the mounting bolts.
Tighten the bolts by hand and then 1/8 turn to secure the straps.
Step 14: Connect the fuel hose quick connector to the fuel line.. You will find it behind the firewall in the engine bay.
Be sure to remove the gearbox jack.
Part 4 of 6: Leak Check
Necessary materials
- combustible gas detector
Step 1 Reconnect the ground cable to the negative battery post.. Remove the nine volt fuse from the cigarette lighter.
Step 2: Tighten the battery clamp firmly. Make sure the connection is good.
- AttentionA: If you didn't have a XNUMX-volt power saver, you'll have to reset all of your car's settings, such as the radio, power seats, and power mirrors.
Step 3: turn on the ignition. Listen for the fuel pump to turn on and turn off the ignition after the fuel pump stops making noise.
- AttentionA: You will need to turn the ignition on and off 3-4 times to make sure all fuel lines are filled with fuel.
Step 4: Use a combustible gas detector and check all connections for leaks.. Smell the air for the smell of fuel.
Part 5 of 6: Lowering the car
Step 1: Raise the car. Jack up the vehicle at the indicated points until the wheels are completely off the ground.
Step 2: Remove Jack Stands. Keep them away from the car.
Step 3: Lower the car so that all four wheels are on the ground.. Pull out the jack and set it aside.
Step 4: Remove the wheel chocks.
Part 6 of 6: Test drive the car
Step 1: Drive the car around the block. During the test, drive over various bumps, allowing fuel to slosh inside the fuel lines.
Step 2: Watch the fuel level on the dashboard and check for the engine light to come on..
If the engine light comes on after replacing the fuel hose, this could indicate further fuel system diagnostics or a possible electrical problem in the fuel system. If the problem persists, you should seek the assistance of one of AvtoTachki's certified mechanics who can inspect the fuel hose and replace if necessary.