How to replace the distributor o-ring
Content
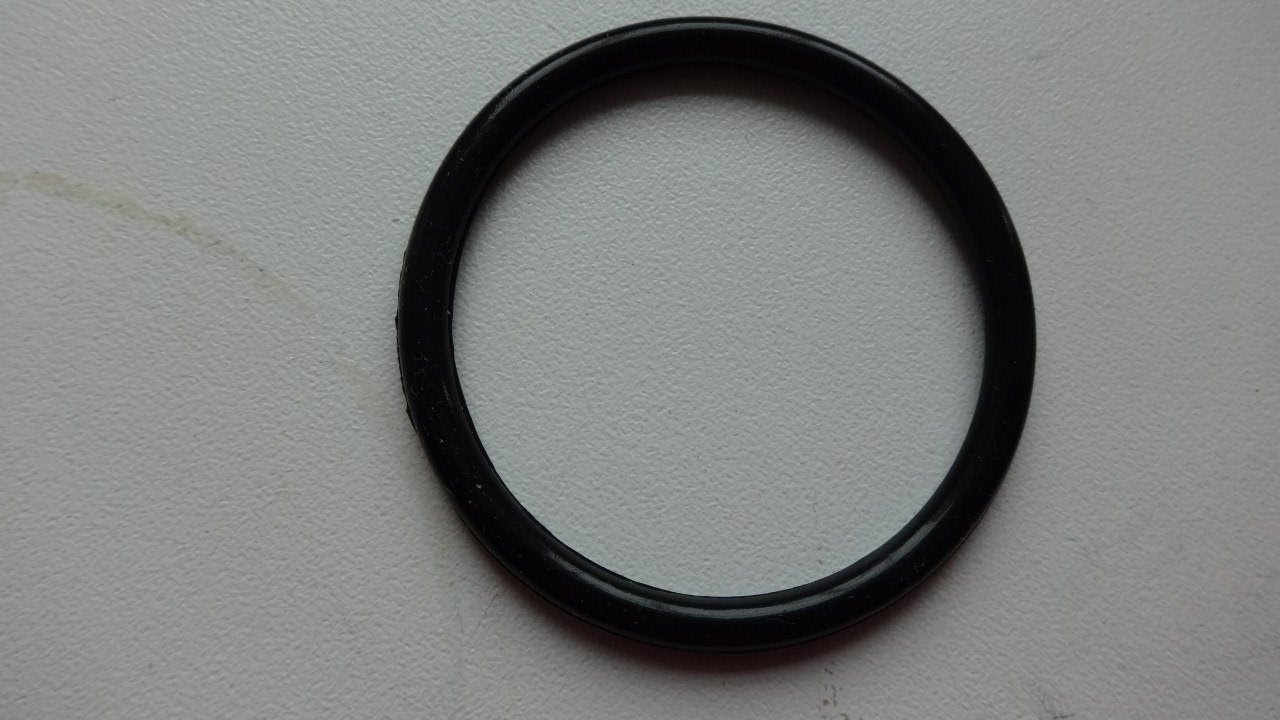
The distributor o-rings seal the distributor shaft to the intake manifold. O-rings prevent engine misfiring, power loss and oil leakage.
In new cars, trucks and SUVs, the electronic ignition system provides and controls the operation of the ignition system based on a number of sensors and complex mathematical calculations. More recently, the distributor has taken a more mechanical approach to ignition timing, measuring camshaft rotation and energizing individual spark plugs at a predetermined length of time. Inserted directly into the engine through the intake manifold, the distributor relies on either a series of seals or a single O-ring to keep oil inside the crankcase while also reducing the chance of debris entering the cylinder block.
In cars manufactured before 2010, a distributor is used as the main part of the car's ignition system. Its purpose is to direct electrical voltage from the ignition coil to the spark plug. The spark plug then ignites the air/fuel mixture in the combustion chamber, keeping the engine running smoothly. The distributor o-ring is an important component that must be in perfect shape to keep the engine oil inside the engine, as well as correctly align the distributor for the smooth operation of the internal combustion engine.
Over time, the O-ring wears out for several reasons, including:
- Impact of the elements inside the engine
- Excessive heat and electricity
- Accumulation of dirt and debris
If the distributor o-ring starts to leak, oil and dirt will accumulate on the outside of the intake port and on the outside of the distributor. One way to prevent this is to service and "tune" the car every 30,000 miles. During most professional adjustments, a mechanic inspects the distributor housing and determines if the o-ring is leaking or showing signs of premature wear. If an O-ring needs to be replaced, a mechanic can perform the process very easily, especially if the components have been removed beforehand.
Like any other mechanical part that wears out over time, a distributor o-ring will exhibit a few common warning signs and side effects if it is damaged or leaking. Some of the more common warning signs include the following:
Engine running rough: When the distributor O-ring is loose, pinched, or damaged, it can cause the distributor to not seal tightly against the housing. If it moves to the left or right, it adjusts the ignition timing by advancing or retarding the ignition timing of each cylinder. This affects the operation of the engine; especially at idle. Typically, you will notice that the engine will run very rough, misfiring or even causing a flashback situation if the O-ring has been damaged.
Engine power loss: Timing changes can also affect engine performance. If the timing is ahead, the cylinder will fire sooner than it should for optimal efficiency. If the timing has been reduced or "slowed down", the cylinder fires later than it should. This will adversely affect the performance and power of the engine, causing stumbling or, in some cases, knocking.
Oil leak at distributor base: Like any o-ring or gasket damage, a damaged distributor o-ring will cause oil to seep out of the distributor base. When this happens, dirt and grime accumulate near the base and can damage the distributor; or cause debris to enter the motor housing.
If your vehicle does not have an electronic ignition system, but still has a distributor and ignition coil, it is recommended to change the distributor O-ring every 100,000 miles. Occasionally, this component can fail or wear out earlier than this 100,000-mile threshold. For the purposes of this article, we will focus on the most recommended methods for replacing a distributor o-ring. The distributor removal process is unique and different for all vehicles, but the O-ring replacement procedures are generally the same for all vehicles.
Part 1 of 3: Causes of broken distributor o-rings
There are several reasons why the distributor o-ring is damaged in the first place. The most common reason revolves around age and heavy use. If the vehicle is used daily and subjected to extreme driving conditions, the distributor o-ring may wear out sooner than a vehicle that is constantly foraging.
In some situations, increased pressure in the engine caused by damage to the vacuum line can lead to displacement of the distributor sealing ring. Although this is extremely rare, it is important to understand why the o-ring is damaged; so that the cause of the problem can also be fixed at the same time as replacing the component.
- A warningNote: Distributor removal procedures are always unique to the vehicle in which it is used. It is always recommended to review the manufacturer's service manual in its entirety before attempting this job. As we stated above, the instructions below are GENERAL STEPS for replacing the o-ring located on the distributor. If you are not comfortable with this job, always contact an ASE certified mechanic.
Part 2 of 3: Preparing the Vehicle for Replacing the Distributor O-Ring
According to most service manuals, the job of removing the distributor, installing a new o-ring, and reinstalling the distributor can take two to four hours. The most time-consuming part of this work will be the removal of auxiliary components that restrict access to the distributor.
It is also very important to take the time to mark the location of the distributor, distributor cap, spark plug wires and rotor on the bottom of the distributor before it is removed; and in the process of removal. Incorrect marking and reinstallation of the distributor exactly as it was removed can cause serious engine damage.
You do not have to lift the vehicle on a hydraulic lift or jacks to do this job. The distributor is usually located at the top of the engine or on the side of it. In most cases, the only part you will have to remove to gain access to it is the engine cover or air filter housing. This job is categorized as "medium" for homemade mechanics on the difficulty scale. The most important part of installing a new o-ring is correctly marking and aligning the distributor and distributor components for the correct ignition timing.
In general, the materials you will need to remove and replace the distributor and o-ring; after removal of auxiliary components will include the following:
Necessary materials
- Clean shop rag
- Bent O-Ring Removal Tool
- Flat and Phillips screwdrivers
- Socket set and ratchet
- Spare O-ring (recommended by the manufacturer, not from the universal kit)
After gathering all of these materials and reading the instructions in your service manual, you should be ready to get the job done.
Part 3 of 3: Replacing the distributor O-ring
According to most manufacturers, this work should be done within a few hours; especially if you have collected all the materials and you have a replacement o-ring from the manufacturer. A huge mistake that many amateur mechanics make is to use a standard o-ring from an o-ring kit. The o-ring for the distributor is unique, and if the wrong type of o-ring is installed, it can cause serious damage to the inside of the engine, the distributor rotor and the ignition system.
Step 1: Disconnect the battery cables. You will be working on the ignition system, so disconnect the battery cables from the terminals before removing any other components. Remove the positive and negative terminals and place them away from the battery before proceeding.
Step 2: Remove the engine cover and air filter housing.. On most domestic and imported vehicles, you will need to remove the engine cover and air filter housing in order to have easy access to remove the distributor. Refer to the service manual for exact instructions on how to remove these components. A good tip is to change the air filter while you are working on the distributor, which you can do now.
Step 3: Mark Distributor Components. Before removing any parts on the distributor cap or the distributor itself, you should take some time to mark the location of each component. This is vital for consistency and to reduce the chance of misfires when reinstalling the distributor and associated distributor parts. Typically, you need to label the following individual components:
Spark Plug Wires: Use a marker or tape to mark the location of each spark plug wire as you remove them. A good tip is to start at the 12 o'clock mark on the distributor cap and mark them in order, moving clockwise. This ensures that when you reinstall the spark plug wires to the distributor, they will be in order.
Mark the distributor cap on the distributor: While in most cases you don't need to remove the distributor cap to replace the O-ring, it's good practice to get used to the finish. Mark the cap and distributor as shown. You will use this same method to mark the placement of the distributor on the engine.
Mark the distributor on the engine: As stated above, you want to mark the location of the distributor when it aligns with the engine or manifold. This will help you align it during installation.
Step 4: Disconnect spark plug wires: After you have marked all the elements on the distributor and the places where it should match with the engine or manifold, disconnect the spark plug wires from the distributor cap.
Step 5: Remove the distributor. Once the plug wires have been removed, you will be ready to remove the distributor. The distributor is usually held in place with two or three bolts. Locate these bolts and remove them with a socket, extension and ratchet. Delete them one by one.
After all the bolts have been removed, carefully begin to pull the distributor out of its body. In this case, be sure to pay attention to the position of the distributor drive gear. When you remove the o-ring, this gear will move. You want to make sure you put that gear in the exact spot it was when you removed the distributor when you put it back on.
Step 6: Remove the old o-ring and install the new o-ring.. The best way to remove the o-ring is to use an o-ring removal tool with a hook. Hook the end of the tool into the O-ring and carefully pry off the bottom of the distributor. In many cases, the o-ring will break during removal (it's normal if this happens).
To install a new o-ring, you need to place the o-ring in the groove and install it with your fingers. Sometimes applying a small amount of oil to the o-ring will help you complete this step.
Step 7: Reinstall the distributor. After installing the new distributor o-ring, you will be ready to reinstall the distributor. Be sure to do the following before doing this step:
- Install the distributor gear in the same place as when removing the distributor.
- Align the distributor with the marks on the distributor and engine
- Set the distributor straight until you feel the distributor gear "click" into position. You may need to gently massage the distributor until this gear engages with the cam body.
Once the distributor is flush with the engine, install the bolts that secure the distributor to the engine. In some cases, you may need to install a clip or bracket; therefore, always refer to the service manual for exact instructions.
Step 8: Replace spark plug wires. After making sure you have placed them exactly as they were removed, reinstall the spark plug wires to complete the distributor assembly and installation.
Step 9: Make sure the distributor is aligned with the marks on the engine.. After installing the plug wires and before reassembling other removed engine covers and air filters, double check the alignment of the distributor. If it is not aligned correctly, it could damage the engine when trying to restart the engine.
Step 10. Replace the engine cover and air cleaner housing..
Step 11: Connect the battery cables. When you complete this task, the job of replacing the distributor o-ring will be complete. If you have gone through the steps in this article and are unsure about completing this project, or if you need an additional team of professionals to help solve the problem, contact AvtoTachki and one of our local ASE certified mechanics will be happy to help you replace the distributor . sealing ring.