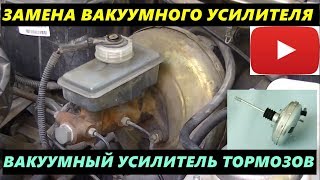
How to replace the brake booster
The brake booster provides boost when braking. Inside is a disc-shaped diaphragm that separates the two halves of the booster. When the engine is running, a vacuum is created on both sides of the booster. When the driver applies the brake, the pedal actuates a valve that allows outside air to enter. This allows atmospheric pressure to flow into the booster, creating a pressure differential that directs the booster's power forward into the master cylinder for more power. When the brakes are released, the vacuum returns to both sides of the booster and the spring returns the diaphragm to its original position.
If the brake booster is not working properly, you will notice problems such as the brake pedal being very hard to press and the vehicle taking longer than usual to stop. It may be time to replace the brake booster.
Necessary materials
- Pliers
- Protective gloves
- Ratchet, sockets and extension
- Repair manuals (optional)
- Replacing the brake booster
- Safety glasses
- Screwdriver and/or small pick
Part 1 of 2: Remove the faulty brake booster
Step 1: Find the brake booster. The brake booster will be attached to the firewall on the driver's side.
Step 2: Remove the master cylinder from the brake booster.. Remove the master cylinder mountings with a ratchet or wrench. Then pull the master cylinder away from the booster. As a general rule, brake lines are long enough that this can be done without disconnecting the lines.
Step 3: Disconnect the Booster Vacuum Supply Line. Remove the hose clamp by squeezing it with pliers and sliding it away from the booster. Then carefully remove the hose by pulling it away from the amplifier.
Step 4: Disconnect the booster pushrod from the brake pedal.. Using a small screwdriver or pickaxe, remove the retaining clip from the booster pushrod. Then remove the pusher from the brake pedal.
Step 5: Remove the brake booster mountings.. Remove the fasteners securing the amplifier to the bulkhead. They are usually located under the dashboard. The best way to get to them is to use a ratchet with an extension.
Step 6: Remove the brake booster. Pull the amplifier away from the firewall and remove it from the vehicle.
Part 2 of 2: Install the new brake booster
Step 1: Install the new brake booster. Install the new brake booster in the same place where the old one was removed from.
Step 2: Put the mounts back in place. Reinstall the brake booster mountings and tighten them with a ratchet and extension.
Step 3: Connect the push rod to the brake pedal.. Install the pushrod back on the brake pedal and put the clamp back on.
Step 4: Reconnect the booster vacuum hose.. Put the vacuum hose back on the booster. Then install the clamp in place by squeezing it with pliers and sliding it over the amplifier.
Step 5: Reinstall the Master Cylinder. Reinstall the master cylinder and tighten the mounting bolts with a ratchet or wrench.
Replacing a brake booster can be a daunting task. If it seems to you that this is what you would prefer to entrust to professionals, AvtoTachki offers a qualified brake booster replacement, which is convenient to do at a convenient time and in any place of your choice.

