How to replace the vacuum brake booster
Content
The vacuum brake booster creates extra force for the car's brakes. If your vehicle is hard to stop or wants to stall, replace the brake booster.
The vacuum brake booster is located between the brake master cylinder and the fire wall. Replacing the booster involves removing the brake master cylinder, so if you suspect the brake master cylinder is not up to par, it's time to replace it.
If your brake booster fails, you may notice that it takes a little more leg power than before to stop the car. If the problem gets worse, the engine may want to turn off when you stop. Pay attention to these warnings. You can drive with a faulty brake booster in normal traffic, but when something unexpected happens and you really need to stop the car immediately, if the brake booster is not in good condition, you will have problems.
Part 1 of 3: Removing the Booster
Necessary materials
- Brake bleeder
- Brake fluid
- Brake line caps (1/8″)
- Trap with transparent plastic tube
- Combination wrench set
- Jack and Jack stand
- Light source
- Line keys
- Wrench
- Pliers with thin jaws
- Pusher measuring tool
- Rubber plugs for openings of pipelines in the main cylinder
- Safety glasses
- Phillips and straight screwdrivers
- Socket wrench set with extensions and swivels
- turkey buster
- Repair manual
Step 1: Drain the brake fluid. Using a turkey attachment, suck the liquid from the main cylinder into a container. This fluid will not be reused, so please dispose of it properly.
Step 2: Loosen the brake lines. You may not want to remove the brake lines at this point because fluid will start to drip out of them once they are disconnected. But it's best to disconnect the lines from the master cylinder before any bolts holding it to the vehicle are loosened.
Use your line wrench to loosen the lines, then just screw them back in slightly until you're ready to remove the master cylinder.
Step 3: Disconnect the vacuum line. The large vacuum hose is connected to the booster via a plastic check valve that looks like a right angle fitting. Disconnect the vacuum hose and pull the valve out of the fitting in the booster. This valve should be replaced along with the booster.
Step 4: Remove the Master Cylinder. Remove the two mounting bolts securing the master cylinder to the booster and disconnect any brake light switches or electrical connectors. Unscrew the brake lines and install rubber caps on the ends of the lines, then insert the plugs into the holes of the master cylinder. Firmly grasp the master cylinder and remove it from the booster.
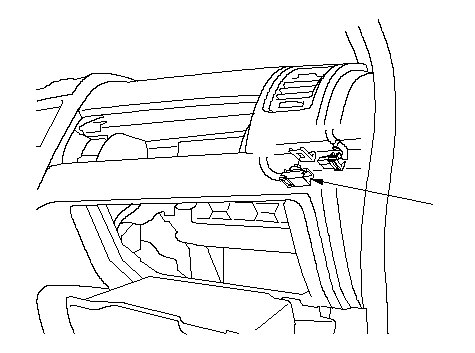
Step 5: Unscrew and remove the brake booster.. Locate and remove the four bolts securing the brake booster to the firewall under the dashboard. They probably won't be very easy to get to, but with your swivels and extensions you can get an advantage.
Disconnect the pushrod from the brake pedal and the booster is ready to come out. Go back under the hood and take it off the firewall.
Part 2 of 3: Booster Adjustment and Installation
Step 1: Install the brake booster. Install the new amplifier the same way you removed the old one. Connect the brake pedal link and the vacuum line. Start the engine and let it idle for about 15 seconds, then turn it off.
Step 2: Adjust the brake pedal pushrod. This adjustment on the brake pedal will probably already be correct, but still check it. If there is no free play, the brakes do not release while driving. Most cars will have about 5mm of free play here; check the repair manual for the correct size.
Step 3: Check the booster pushrod. The pushrod on the booster may be set correctly from the factory, but don't count on it. You will need a pusher measuring tool to check the size.
The tool is first placed on the base of the master cylinder and the rod is moved to touch the piston. Then the tool is applied to the amplifier, and the rod shows how much distance will be between the booster pusher and the master cylinder piston when the parts are bolted together.
The clearance between the pusher and the piston is specified in the repair manual. Most likely, it will be around 020”. If adjustment is necessary, this is done by turning the nut on the end of the pusher.
Step 3: Install the Master Cylinder. Install the master cylinder to the booster, but do not fully tighten the nuts yet. It's easier to install in-line fittings while you can still jiggle the master cylinder.
After you have connected the lines and tightened them by hand, tighten the mounting nuts on the amplifier, then tighten the line fittings. Reinstall all electrical connections and fill reservoir with fresh fluid.
Part 3 of 3: Bleeding the brakes
Step 1: Jack up the car. Make sure the car is parked or in first gear if it is a manual transmission. Set the brake and place wheel chocks under the rear wheels. Jack up the front of the car and put it on good stands.
- A warning: Working under a car is potentially one of the most dangerous things a home mechanic can do, so you shouldn't risk the car shifting and falling on you while you're working under it. Follow these instructions and make sure the car is safe.
Step 2: remove the wheels. It may not be necessary to remove the wheels to access the air bleed screws, but it will make the job easier.
Step 3: Attach the catch bottle. Connect the tubing to the catch bottle before bleeding the wheel furthest from the master cylinder. Have an assistant get into the car and depress the brake pedal several times.
If the pedal responds, ask them to pump it until it becomes firm. If the pedal does not respond, ask them to pump it a few times and then press it to the floor. While keeping the pedal depressed, open the air outlet and allow fluid and air to escape. Then close the bleed screw. Repeat this process until the fluid exiting the screw contains no air bubbles.
Continue to bleed the brakes on all four wheels, moving towards the left front wheel closest to the master cylinder. Refill the tank periodically. Don't let the tank empty during this process or you'll have to start over. When you're done, the pedal should be firm. If it doesn't, repeat the process until it does.
Step 4: Check the car. Screw the master cylinder back on and put the cover back on. Install the wheels and place the car on the ground. Ride it and try the brakes. Be sure to drive long enough to warm up the brakes. Pay special attention to whether they are released correctly to ensure that the pushrod is properly adjusted.
Replacing the brake booster can take a few hours or a couple of days, depending on the vehicle you drive. The newer your car, the harder the job will be. If you look under the hood of your car or under the dashboard and decide it's better not to take it on yourself, professional help is always available at AvtoTachki, whose mechanics can do the brake booster replacement for you.