How to replace the steering rack bushing
You'll know the steering rack bushings are bad when the steering wobbles or shakes, or if you hear a noise like something is falling off the car.
Every car, truck or SUV on the road today is equipped with a steering rack. The rack is driven by the power steering gearbox, which receives a signal from the driver when he turns the steering wheel. When the steering rack is turned left or right, the wheels also turn, usually smoothly. However, there are times when the steering may wobble or shake a little, or you may hear a sound like something is about to fall off the vehicle. This usually indicates that the steering rack bushings are worn out and need to be replaced.
Part 1 of 1: Replacing the Steering Rack Bushings
Necessary materials
- ball hammer
- Socket wrench or ratchet wrench
- flashlight
- Impact Wrench/Air Lines
- Jack and jack stands or hydraulic lift
- Penetrating Oil (WD-40 or PB Blaster)
- Replacing the bushing(s) of the steering rack and accessories
- Protective equipment (safety goggles and gloves)
- steel wool
Step 1: Disconnect the car battery. After the car has been raised and jacked up, the first thing to do before replacing this part is to turn off the power.
Locate the vehicle's battery and disconnect the positive and negative battery cables before continuing.
Step 2: Remove the bottom trays/protective plates.. To have free access to the steering rack, you need to remove the bottom pans (engine covers) and protective plates located under the car.
On many vehicles, you will also have to remove the cross member that runs perpendicular to the engine. Always refer to your service manual for exact instructions on how to complete this step for your vehicle.
Step 3: Remove the driver's side steering rack mount and bushing.. Once you've cleared access to the steering rack and all of the fasteners, the first thing you should remove is the bushing and driver's side fastener.
For this task, use an impact wrench and socket wrench of the same size as the bolt and nut.
First, spray all the steering rack mounting bolts with a penetrating oil such as WD-40 or PB Blaster. Let it soak in for a few minutes. Remove any hydraulic lines or electrical harnesses from the steering rack.
Insert the end of the impact wrench (or socket wrench) into the nut facing you while you place the socket wrench in the box on the bolt behind the mount. Remove the nut with an impact wrench while holding down the socket wrench.
After the nut has been removed, use a ball-faced hammer to strike the end of the bolt through the mount. Pull the bolt out of the bushing and install as soon as it loosens.
Once the bolt has been removed, pull the steering rack out of the bushing/mount and leave it hanging until you have removed the other mountings and bushings.
- A warningA: Any time you replace bushings, it should always be done in pairs or all together during the same service. NEVER install only one bushing as this is a serious safety issue.
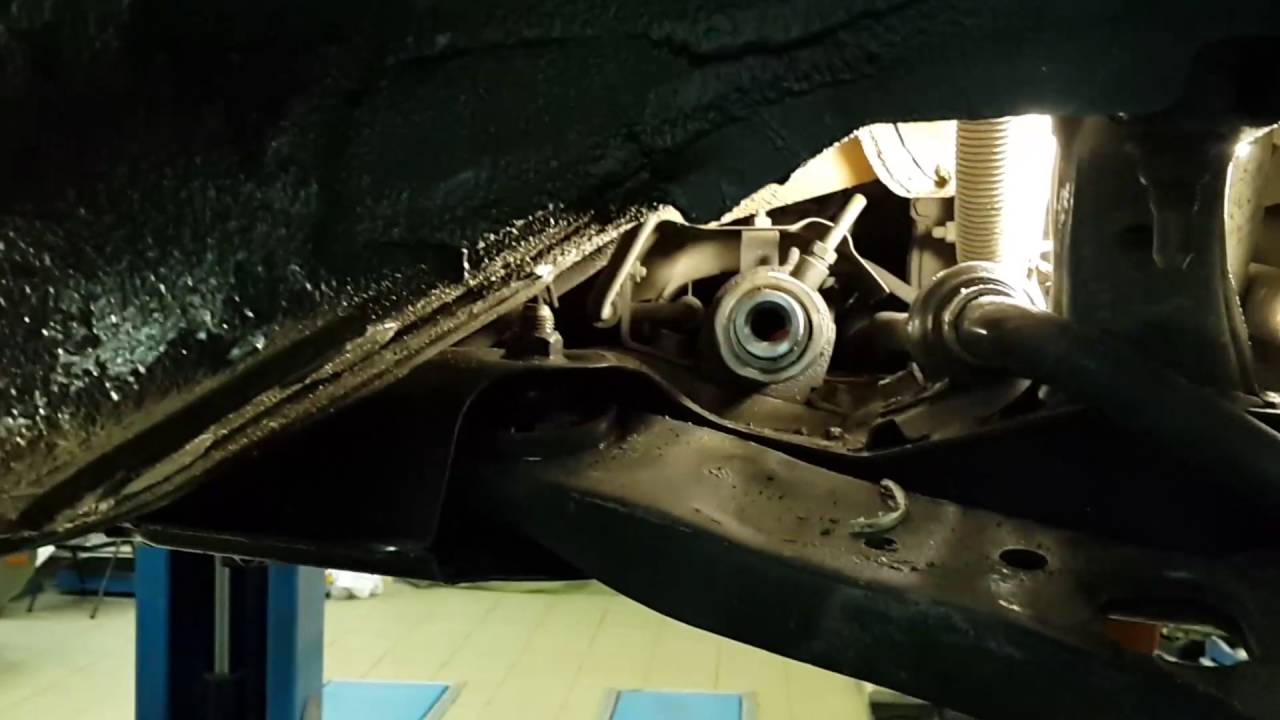
Step 4: Remove the bushing/passenger side cross member.. On most non-XNUMXWD vehicles, the steering rack is held in place by two fasteners. The one on the left (in the image above) is usually on the driver's side, while the two bolts on the right in this image are on the passenger side.
Removing the passenger side bolts can be tricky if the support bar is blocking the way.
On some vehicles, you will have to remove this anti-roll bar to gain access to the top bolt. Always refer to your vehicle's service manual for exact instructions on how to remove the passenger side steering rack mounts and bushings.
First remove the top bolt. Using an impact wrench and an appropriate socket wrench, first remove the top nut and then remove the bolt.
Second, once the bolt is off the top mount, remove the nut from the bottom bolt, but don't remove the bolt yet.
Third, after the nut has been removed, hold the steering rack with your hand while you drive the bolt through the bottom mount. When the bolt goes through, the steering rack may come off on its own. That's why you need to support him with your hand so that he doesn't fall.
Fourth, remove the mounting brackets and lay the steering rack on the ground.
Step 5: Remove the old bushings from both mounts. After the steering rack is released and moved to the side, remove the old bushings from two (or three, if you have a center mount) supports.
- Functions: The best way to remove the steering rack bushings is to hit them with the spherical end of a ball hammer.
Refer to the service manual for the manufacturer's recommended steps for this process.
Step 6: Clean the mounting brackets with steel wool.. Once you've removed the old bushings, take the time to clean the inside of the mounts with a steel wool.
This will make it easier to install the new bushings, and it will also fix the steering rack better, as there will be no debris on it.
The image above shows what the hub mount should look like before installing the new steering rack bushings.
Step 7: Install new bushings. The best way to install new bushings depends on the type of attachment. On most vehicles, the driver's side mount will be round. The passenger side mount will consist of two brackets with bushings in the middle (similar in design to the connecting rod main bearings).
Refer to your vehicle's service manual for instructions on how to properly install the steering rack bushings for your vehicle.
Step 8: Reinstall the steering rack. After replacing the steering rack bushings, you must reinstall the steering rack under the vehicle.
- Functions: The best way to complete this step is to install the stand in the reverse order of how you removed the stand.
Follow the GENERAL steps below, but also follow the instructions in the service manual:
Install the passenger side mount: place the mounting sleeves on the steering rack and insert the bottom bolt first. Once the bottom bolt secures the steering rack, insert the top bolt. Once both bolts are in place, tighten the nuts on both bolts, but DO NOT fully tighten them.
Install the driver side bracket: After securing the passenger side, install the steering rack bracket on the driver side. Reinsert the bolt and slowly guide the nut onto the bolt.
Once both sides are installed and the nuts and bolts are connected, tighten them to the manufacturer's recommended torque. This can be found in the service manual.
Reconnect any electrical or hydraulic lines attached to the steering rack that you removed in the previous steps.
Step 9: Replace engine covers and skid plates.. Reinstall all engine covers and skid plates removed previously.
Step 10: Connect the battery cables. Reconnect the positive and negative terminals to the battery.
Step 11: Fill with power steering fluid.. Fill reservoir with power steering fluid. Start the engine, check the power steering fluid level and top up as directed in the service manual.
Step 12: Check the steering rack. Start the engine and turn the car left and right a few times.
From time to time, look under the bottom for drips or leaking liquids. If you notice a fluid leak, turn off the vehicle and tighten the connections.
Step 13: Test drive the car. Lower the vehicle from the lift or jack. After you have checked the installation and double checked the tightness of each bolt, you should take your car for a 10-15 minute road test.
Make sure you drive in normal urban traffic situations and DO NOT drive off-road or on bumpy roads. Many manufacturers recommend that you handle the car carefully at first so that the new bearings take root.
Replacing the steering rack bushings is not particularly difficult, especially if you have the right tools and access to a hydraulic lift. If you have read these instructions and are not 100% sure about the completion of this repair, contact one of the local ASE certified mechanics from AvtoTachki to do the job of replacing the steering rack mounting bushings for you.