How to replace the door lock switch
Content
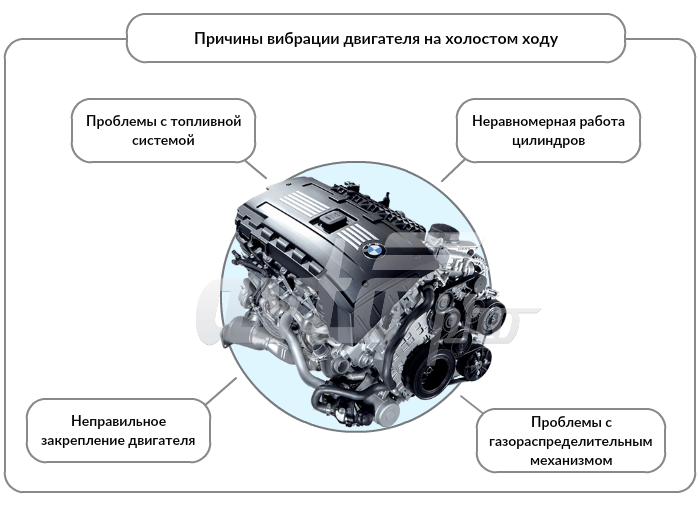
The door lock switch fails if pressing the button does not lock or unlock the door or normal functions do not work.
Power door locks (also known as power door locks or central locking) allow the driver or front passenger to simultaneously lock or unlock all of the car's or truck's doors by pressing a button or flipping a switch.
Early systems only locked and unlocked car doors. Many cars today are also equipped with systems that can unlock things like the luggage compartment or the fuel cap. In modern cars, it is also common for the locks to be activated automatically when the car shifts into gear or reaches a certain speed.
Today, many vehicles with power door locks also have an RF keyless remote system that allows a person to press a button on the remote control fob. Many luxury goods manufacturers now also allow windows to be opened or closed by pressing and holding a button on the remote control fob, or by inserting the ignition key and holding it in the lock or unlock position in the driver's door external lock.
The remote locking system confirms successful locking and unlocking with a light or sound signal and usually offers the possibility of easy switching between the two options.
Both provide almost the same functionality, although the lights are more subtle, while the beeps can be a nuisance in residential areas and other busy parking lots (such as short-term parking lots). Some manufacturers offer the ability to adjust the volume of the siren signal. The remote locking device can only be used within a certain distance from the vehicle.
However, if the battery in the remote locking device runs out, the distance to the vehicle's location becomes shorter. More and more drivers are relying on a remote locking device to lock their cars after they've left. The system may show signs that the locking device is working, but the doors may not lock properly.
Part 1 of 5: Checking the Status of the Door Lock Switch
Step 1: Locate a door with a damaged or defective door lock switch.. Visually inspect the door lock switch for external damage.
Gently press the door lock switch to see if the locks activate the door locks.
- Attention: On some vehicles, the door locks will only open when the key is in the ignition and the toggle switch is turned on or in the "accessories" position.
Part 2 of 5: Removing the Door Lock Switch
Having all the necessary tools and materials in place before starting work will allow you to get the job done more efficiently.
Necessary materials
- socket wrenches
- crosshead screwdriver
- Electric cleaner
- Flat head screwdriver
- lyle door tool
- Pliers with needles
- Pocket flathead screwdriver
- Ratchet with metric and standard sockets
- Torque bit set
Step 1: Park your car. Make sure it is parked on a firm, level surface.
Step 2: Place wheel chocks around the base of the rear wheels.. Apply the parking brake to block the rear wheels from moving.
Step 3: Install a nine volt battery in the cigarette lighter.. This will keep your computer running and save the current settings in the car.
If you don't have a nine-volt battery, no big deal.
Step 4: Open the car hood to disconnect the battery.. Disconnect the ground cable from the negative battery terminal by turning off power to the door lock actuator.
On vehicles with a retractable door lock switch:
Step 5. Locate the door with the faulty door lock switch.. Using a flat-tip screwdriver, slightly pry up the entire door lock panel.
Slide out the cluster panel and remove the wiring harness from the cluster.
Step 6: Slightly pry up the locking tabs on the door lock switch.. Do this with a small flathead screwdriver.
Pull the switch out of the cluster. You may need to use pliers to pry the switch out.
Attention: Please note that some door and window units are not serviceable and require the entire unit to be replaced.
Attention: Before connecting the harness, be sure to clean it with an electric cleaner.
On vehicles with a panel-mounted door lock switch from the 80s, early 90s and some modern vehicles:
Step 7. Locate the door with the faulty door lock switch..
Step 8: Remove the outer door handle on the door panel.. It is secured with a single Phillips head screw on the outer edge of the door.
The top of the two screws is visible directly above the locking mechanism and partially hidden under the rubber door seal. Remove the two screws that secure the door handle to the door skin. Push the handle forward to release it and pull it away from the door.
- Attention: Be sure to inspect the two plastic seals on the door handle and replace if necessary.
Step 9: Remove the interior door handle. To do this, pry the cup-shaped plastic lining from under the door handle.
This component is separate from the plastic rim around the handle. The front edge of the cup-shaped lid has a gap into which a flathead screwdriver can be inserted. Remove the cover, under it there is a Phillips screw, which must be unscrewed. After that, you can remove the plastic bezel around the handle.
Step 10: Remove the power window handle. After making sure that the window is closed, lift the plastic trim on the handle (the handle is a metal or plastic lever with a metal or plastic clip).
Remove the Phillips screw securing the door handle to the shaft, and then remove the handle. A large plastic washer will come off along with the handle. Take notes or take a picture of how it is attached to the door.
Step 11: Remove the panel from the inside of the door.. Carefully bend the panel away from the door around the entire perimeter.
A flathead screwdriver or a door opener (preferred) will help here, but be careful not to damage the painted door around the panel. Once all the clamps are loose, grab the top and bottom panel and pry it slightly away from the door.
Lift the entire panel straight up to release it from the latch behind the door handle. This will release the large coil spring. This spring is located behind the power window handle and is quite difficult to put back in place when reinstalling the panel.
- Attention: Some vehicles may have bolts or socket screws that secure the panel to the door.
Step 12: Slightly pry up the locking tabs on the door lock switch.. Do this with a small pocket flathead screwdriver.
Pull the switch out of the cluster. You may need to use pliers to pry the switch out.
- Attention: Before connecting the harnesses, be sure to clean them with an electric cleaner.
On cars with a door lock switch installed in the panel and power windows on cars of the late 90s. up to current:
Step 13: Remove the panel from the inside of the door.. Carefully bend the panel away from the door around the entire perimeter.
Remove the screws that hold the door handle in place. Remove the screws in the middle of the door panel. Use a flathead screwdriver or a door opener (preferred) to remove the clips around the door, but be careful not to damage the painted door around the panel.
Once all the clamps are loose, grab the top and bottom panel and pry it slightly away from the door. Lift the entire panel straight up to release it from the latch behind the door handle.
- Attention: Some vehicles may have torque screws that secure the panel to the door.
Step 14: Disconnect the Door Latch Cable. Remove the speaker wire harness in the door panel.
Disconnect the wiring harness at the bottom of the door panel.
Step 15 Disconnect the lockout switch harness from the cluster control panel.. Using a small pocket flathead screwdriver, slightly pry the locking tabs on the door lock switch.
Pull the switch out of the cluster. You may need to use pliers to pry the switch out.
- Attention: Before connecting the harness, be sure to clean it with an electric cleaner.
Part 3 of 5: Installing the Door Lock Switch
Required material
- Screwdriver
On vehicles with a retractable door lock switch:
Step 1: Insert the new door lock switch into the door lock box.. Make sure the locking tabs snap into place on the door lock switch, holding it in a secure position.
Step 2: Connect the wire harness to the door lock box.. Insert the door lock block into the door panel.
You may need to use a flat-tip pocket screwdriver to slide the lock latches into the door panel.
On vehicles with a panel-mounted door lock switch from the 80s, early 90s and some modern vehicles:
Step 3: Insert the new door lock switch into the door lock box.. Make sure the locking tabs snap into place on the door lock switch, holding it in a secure position.
Step 4: Connect the wire harness to the door lock box..
Step 5: Install the door panel on the door. Slide the door panel down and towards the front of the vehicle to make sure the door handle is in place.
Insert all door latches into the door, securing the door panel.
Step 6: Install the power window handle. Make sure the power window handle spring is in place before attaching the handle.
Install the small screw on the window handle handle to secure it. Install the metal or plastic clip to the power window handle.
Step 7: Install the interior door handle. Install the screws to attach the door handle to the door panel.
Snap the screw cover in place.
On cars with a door lock switch installed in the panel and power windows on cars of the late 90s. up to current:
Step 8: Insert the new door lock switch into the door lock box.. Make sure the locking tabs snap into place on the door lock switch, holding it in a secure position.
Step 9: Connect the lock switch harness to the cluster control panel..
Step 10: Connect the door latch cable to the door panel.. Install the wiring harness to the speaker in the door panel.
Connect the harness at the bottom of the door panel.
Step 11: Install the door panel on the door. Slide the door panel down and towards the front of the vehicle to make sure the door handle is in place.
Insert all door latches into the door, securing the door panel. Install the screws in the middle of the door panel. Install the door handrail handle and the fixing screws to the handle.
Part 4 of 5: Connecting the Battery
Necessary materials
- wrench
Step 1: Open the car hood. Reconnect the ground cable to the negative battery post.
Remove the nine volt fuse from the cigarette lighter.
Step 2: Tighten the battery clamp. This will ensure a good connection.
- AttentionA: If you didn't have a XNUMX-volt power saver, you'll have to reset all of your car's settings, such as the radio, power seats, and power mirrors.
Part 5 of 5: Checking the Door Lock Switch
The door lock switch has two functions: locking and unlocking. Press the lock side of the switch. The door must be locked when the door is in the open position and in the closed position. Press the side of the switch on the side of the door release. The door should unlock when the door is in the open position and in the closed position.
Insert the key into the ignition switch and turn on the key. Turn on the door lock switch. When closed, the door must be locked. When the driver's door lock switch is pressed while the door is in the open position, the door should first lock and then unlock.
From outside the vehicle, close the door and lock it electronically only. Click on the outside handle of the door and you will find that the door is locked. Unlock the door with an electronic device and turn the outside door handle. The door should open.
If your door won't open after replacing the door lock actuator, or if you're not comfortable doing the repair yourself, contact one of our certified AvtoTachki technicians to replace the door lock switch to get your system working properly again.