How to replace the steering regulator plug
Maintaining reliable steering is important for every driver. A common symptom of a bad steering control plug is a loose steering wheel.
Maintaining control of the car is extremely important for all drivers, especially in bad weather conditions. One of the biggest problems that drivers face is when the steering wheel becomes loose due to the play that develops inside the steering gear. This condition is often referred to as "steering wheel play" and on many vehicles an experienced mechanic can adjust it by tightening or loosening the steering adjuster plug. If the steering adjuster plug is wearing out, there will be several common symptoms, including loosening of the steering wheel, steering wheel springback when turning, or power steering fluid leaking.
Part 1 of 1: Steering Adjuster Plug Replacement
Necessary materials
- Hex key or special screwdriver to insert the adjusting screw
- Socket wrench or ratchet wrench
- flashlight
- Jack and jack stands or hydraulic lift
- Liquid containment bucket
- Penetrating Oil (WD-40 or PB Blaster)
- Standard size flat head screwdriver
- Replacing the adjusting screw and shims (according to manufacturer's recommendations)
- Replacing the sector shaft cover gaskets (on some models)
- Protective equipment (safety goggles and gloves)
Step 1: Disconnect the car battery. After the car has been raised and jacked up, the first thing to do before replacing this part is to turn off the power.
Locate the vehicle's battery and disconnect the positive and negative battery cables before continuing.
Step 2: Remove the pan from under the car.. To gain access to the transmission, remove the underbody or lower engine covers/protective plates from the vehicle.
See your service manual for exact instructions on how to complete this step.
You will also need to remove any accessories, hoses or lines that are preventing access to the steering universal joint and transmission. You need to remove the transmission from the car, so you also need to remove the hydraulic lines and electrical sensors attached to this component.
Step 3: Remove the steering column from the transmission. Once you have accessed the steering gear and removed all hardware connections from the steering gear, you will need to disconnect the steering column from the transmission.
This is usually completed by removing the bolts that secure the universal joint to the power steering gearbox (gearbox).
Please refer to your vehicle's service manual for instructions on how to properly remove the steering column from the transmission so you can easily remove the transmission in the next step.
Step 4: Remove the power steering gearbox from the vehicle.. On most vehicles, the power steering gearbox is mounted with four bolts to support brackets on the upper control arm or chassis.
Refer to your vehicle service manual for detailed instructions on removing the power steering gearbox.
Once the gearbox is removed, place it on a clean work bench and spray it with a high quality degreaser to remove any excess debris from the unit.
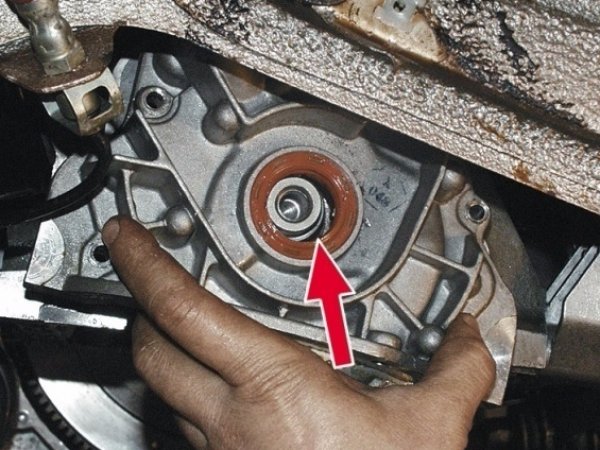
Step 5: Locate the sector shaft cover and spray the bolts with penetrating liquid.. The image above shows the basic installation of the sector shaft cover, adjusting screw and lock nut that needs to be replaced.
After you've cleaned the gearbox and sprayed penetrating oil on the cover bolts, let it soak in for about 5 minutes before attempting to remove the cover.
Step 6: Remove the Sector Shaft Cover. It is usually necessary to remove four bolts to gain access to the sector shaft screw.
Remove the four bolts using a socket and ratchet, socket wrench, or impact wrench.
Step 7: Loosen the center adjustment screw. To remove the cover, loosen the central adjustment screw.
Using a hex wrench or flathead screwdriver (depending on the adjusting screw insert) and a socket wrench, hold the center adjusting screw firmly while loosening the nut with the wrench.
Once the nut and four bolts have been removed, you can remove the cover.
Step 8: Remove the old adjustment plug. The sector shaft adjustment plug will be attached to the slot inside the chamber.
To remove the old adjustment plug, simply slide the plug left or right through the slot. It comes out pretty easy.
Step 8: Install the New Adjustment Plug. The image above shows how the adjusting plug is inserted into the sector shaft slot. The new plug will have a gasket or washer that needs to be installed first.
This gasket is unique to your car model. Be sure to install the gasket FIRST, then insert the new plug into the slot on the sector shaft.
Step 9: Install the Sector Shaft Cover. After installing the new plug, place the cover back on the transmission and secure it with the four bolts holding the cover in place.
Some vehicles require a gasket to be installed. As always, refer to your vehicle's service manual for exact instructions for this process.
Step 10: Install the center nut on the adjusting plug.. Once the four bolts have been secured and tightened to manufacturer's specifications, install the center nut onto the adjusting plug.
This is best done by sliding the nut onto the bolt, holding the center adjustment plug securely with a hex wrench/screwdriver, and then hand-tightening the nut until it is flush with the cap.
- Attention: Once the adjusting screw and nut are assembled, refer to your vehicle's service manual for instructions on proper adjustment. In many cases, the manufacturer recommends measuring the adjustment before fitting the cap, so be sure to check your service manual for exact tolerances and adjustment tips.
Step 11: Reinstall the gearbox. After properly adjusting the new steering gear adjustment plug, you need to reinstall the gear, connect all hoses and electrical fittings, and mount it back to the steering column.
Step 12: Replace engine covers and skid plates.. Reinstall any engine covers or skid plates that you had to remove to gain access to the steering column or transmission.
Step 13: Connect the battery cables. Reconnect the positive and negative terminals to the battery.
Step 14: Fill with power steering fluid.. Fill the power steering fluid reservoir. Start the engine, check the power steering fluid level and top up as directed in the service manual.
Step 15: Check the car. Start the vehicle while it is still in the air. Check underbody for power steering fluid leaks from hydraulic lines or connections.
Turn the wheels left or right several times to check the operation of the power steering. Stop the vehicle, check the power steering fluid and add if necessary.
Continue this process until the power steering is working properly and the power steering fluid needs to be topped up. You only need to take this test twice.
Replacing the steering control plug is a lot of work. Adjusting the new fork is very detailed and can give inexperienced mechanics a lot of headaches. If you've read these instructions and don't feel 100% sure about doing this repair, have one of the local ASE certified mechanics at AvtoTachki have the job of replacing the steering adjuster plug for you.