How to replace the rear view mirror
Content
The rear view mirror was originally designed so that the driver can use it to determine if it is safe to change lanes. If the driver can see the front of the other vehicle and both headlights, then it is safe to drive. Most people who have children tend to look at them in the rearview mirror. Kids love to ride in the back seats and the rear view mirror is a good way to keep an eye on them; however, this can be distracting for the driver.
Rearview mirrors are standard size, but there are several models that can dazzle the car. These types include: Standard DOT, Wide DOT, Wide Deflector DOT, Custom Character Cut, Custom Cab Fit (Fits all over the cab), Wide Tire DOT, and Power DOT.
Pickups are also equipped with rear-view mirrors. When the pickup is used as a passenger car, the mirror notices the cars behind it. On the other hand, when there is a large trailer or load in the back of a pickup truck, a rear-view mirror can be used.
DOT (Department of Transportation) rated mirrors are certified for permanent vehicle use and are factory installed for safety purposes. Other non-DOT certified rear view mirrors may interfere with the driver's vision and compromise their judgment. Power DOT rearview mirrors are controlled by a switch or knob. Mirrors can also be equipped with a clock, radio and temperature settings buttons.
If the rear view mirror does not stay on the windshield, it is dangerous for the vehicle to move. In addition, cracked rearview mirrors interfere with the driver's view of vehicles or objects behind the vehicle. Rear-view mirrors that have an anti-reflective deflector lose their strength and cause the mirror to move up and down while the vehicle is moving. This not only distracts the driver, but also reflects sunlight or other light sources into the field of view of other drivers.
The mirror can also be bad if the dimming function does not work, the mirror is discolored, or even if the mirror is completely missing.
Attention: Driving with a missing or cracked rearview mirror is a safety hazard and is illegal.
Attention: When replacing a mirror on a vehicle, it is recommended to install a mirror from the factory.
Part 1 of 3. Checking the condition of the outside rearview mirror
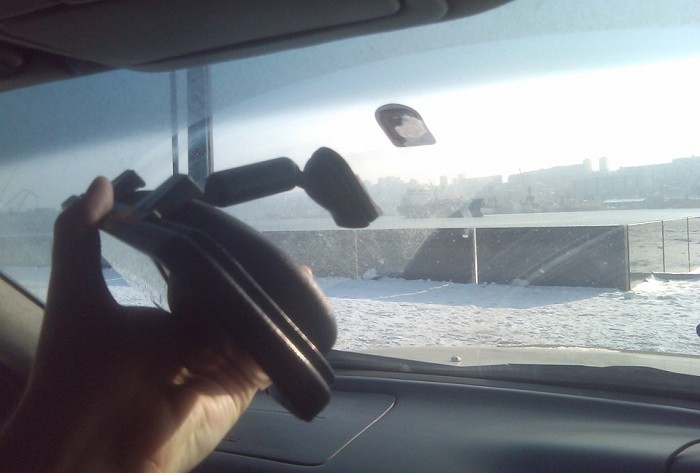
Step 1: Find your broken or cracked rearview mirror.. Visually inspect the rearview mirror for external damage.
For electronically adjustable mirrors, carefully tilt the mirror glass up, down, left, and right to see if the mechanism inside the mirror is binding.
On other mirrors, feel the glass to make sure it is loose and can move, and if the body moves.
Step 2: Locate the mirror adjustment switch on the electronic rear view mirrors.. Move the selector or press the buttons and make sure the electronics work with the mirror mechanics.
Step 3: Determine if the buttons work. For mirrors with clocks, radios, or temperatures, test the buttons to make sure they are working properly.
Part 2 of 3: Rear View Mirror Replacement
Necessary materials
- Hex key set
- transparent silicone
- crosshead screwdriver
- Disposable gloves
- Electric cleaner
- Flat head screwdriver
- Permanent marker
- Ratchet with metric and standard sockets
- Torque bit set
- Wheel chocks
Step 1: Park your vehicle on a level, firm surface..
Step 2 Install wheel chocks around the tires.. Apply the parking brake to block the rear wheels from moving.
Step 3: Install a nine volt battery in the cigarette lighter.. This keeps your computer up and running and maintains the current settings in the car.
If you don't have a nine-volt battery, no big deal.
Step 4: Disconnect the battery. Open the car hood to disconnect the battery.
Remove the ground cable from the negative battery terminal by turning off the power to the vehicle.
For a standard pillbox, a wide pillbox, a wide pillbox with a deflector and mirrors of an individual design:
Step 5: Loosen the fixing screw. Unscrew it from the base of the mirror attached to the windshield.
Remove the screw from the mirror housing.
Step 6: Lift the mirror off the mounting plate..
On DOT power mirrors:
Step 7: Loosen the Mounting Screws. Unscrew them from the base of the mirror attached to the windshield.
Remove the screws from the mirror housing.
Step 8: Remove the harness plug from the mirror.. Use an electric cleaner to clean the harness and remove moisture and debris.
Step 9: Use a hair dryer or heat gun to heat up the mounting plate.. When the mounting plate feels warm to the touch, move it back and forth.
After a few moves, the mounting plate will come off.
Step 10: Mark the Mirror's Starting Position. Before removing all the adhesive, use a pencil or permanent marker to mark the original position of the mirror.
Make a mark on the outside of the glass so you don't have to remove it when cleaning the adhesive.
Step 11: Use a razor scraper to remove excess adhesive from the glass.. Place the edge of the blade on the glass and keep scraping until the surface is smooth again.
Leave the mounting plate inside the bracket on the mirror and use a scraper to remove any excess adhesive.
Step 12: Remove Dust. Dampen a lint-free cloth with isopropyl alcohol and wipe the inside of the glass to remove any dust left by scraping off the adhesive.
Let the alcohol evaporate completely before attaching the mirror to the glass.
- Attention: You will need to apply isopropyl alcohol to the mounting plate if you plan to reuse the plate.
DOT tires are also suitable for a custom cabin:
Step 13: Loosen the Mounting Screws. Unscrew them from the base of the mirror attached to the cab.
Remove the screws from the mirror housing.
Step 14: Remove the mirror. Remove gaskets, if any.
Step 15 Get the glue from the rear view mirror glue kit.. Apply glue to the back of the mounting plate.
Place the mounting plate on the glass area where you marked it.
Step 16: Gently press down on the mounting plate to adhere the adhesive.. This heats up the adhesive and removes all the drying air from it.
For a standard pillbox, a wide pillbox, a wide pillbox with a deflector and mirrors of an individual design:
Step 17: Place the mirror on the mounting plate.. Insert the mirror into a place where it fits snugly and does not move.
Step 18: Install the mounting screw into the base of the mirror using clear silicone.. Tighten the screw by hand.
- Attention: The transparent silicone on the mirror fixing screw will prevent the screw from getting out, but will allow you to easily remove it the next time you replace the mirror.
On DOT power mirrors:
Step 19: Place the mirror on the mounting plate.. Insert the mirror into a place where it fits snugly and does not move.
Step 20: Install the wiring harness to the mirror cap.. Make sure the lock clicks into place.
Step 21: Install the mounting screw into the base of the mirror using clear silicone.. Tighten the screw by hand.
For custom cab and DOT bus mirrors:
Step 22: Install the mirror and spacers, if any, on the cab.. Screw the fixing screws with transparent silicone into the base of the mirror, attaching it to the cab.
Step 23: Finger Tighten the Mounting Screws. Remove the mirror and remove the gaskets, if any.
Step 24 Reconnect the ground cable to the negative battery post.. Remove the nine volt fuse from the cigarette lighter.
- AttentionA: If you didn't have a nine-volt power saver, you'll have to reset all settings in your car, such as the radio, power seats, and power mirrors.
Step 25: Tighten the battery clamp. Make sure the connection is good.
Part 3 of 3: Checking the Rear View Mirror
For standard DOT, wide DOT, wide DOT with deflector and custom design mirrors:
Step 1: Move the mirror up, down, left and right to check if the movement is correct.. Check the mirror glass to make sure it is tight and clean.
For DOT power mirrors:
Step 2: Use the adjustment switch to move the mirror up, down, left and right.. Check the glass to make sure it is securely attached to the motor in the mirror housing.
Make sure the mirror glass is clean.
If your rearview mirror does not work after installing a new mirror, further diagnosis may be required on the required rearview mirror assembly, or there may be an electrical component failure in the rearview mirror circuit. If the problem persists, contact one of the certified AvtoTachki specialists for a replacement.