How to replace gears
Content
Timing gear control has to do with the crankshaft and camshafts and how much fuel and air goes into the cylinder to keep your car running smoothly.
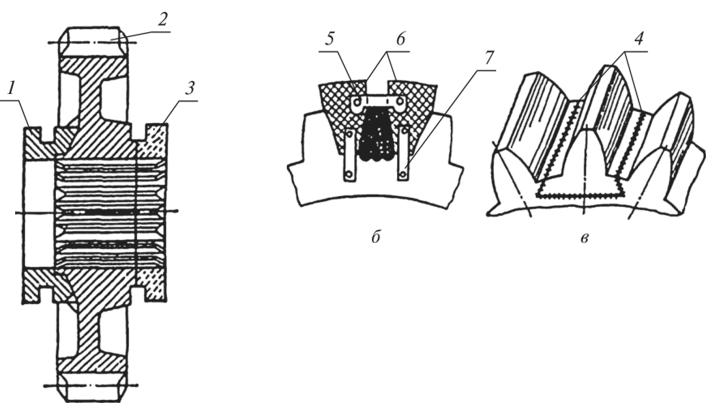
The engine camshaft should rotate exactly at half the crankshaft speed. There can be no deviations and no room for error. The earliest method to achieve this was to use a simple set of gears.
Real gears instead of chains used to be much more common than they are now. With the proliferation of overhead cam engines, their use has been reduced to a few engine types. Even many engines that have a camshaft located in the block have switched to timing chains rather than gears, mainly because they are quieter and cheaper to manufacture. However, the term gearing stuck and is still commonly used to describe sprockets that also drive timing chains and belts. Changing gears and changing sprockets on other types of engines is similar, but often more difficult due to the location of the camshafts in the head.
A worn gear train can become noisy or show no signs at all. They rarely fail completely, but if they do, you could have other serious engine damage. At the very least, you will be in a quandary. So do not neglect the worn timing gear.
Part 1 of 3: Remove the Timing Cover
Necessary materials
- Belt Tension Tool
- Switch
- combination keys
- Crankshaft holding tool
- Hammer with a dead blow
- Storage tray and jugs
- Gear puller or harmonic balancer puller
- Impact wrench (pneumatic or electric)
- Jack and Jack stand
- Safety glasses
- Screwdrivers (cross and straight)
- Socket wrench set
- Repair manual
Step 1: Jack up the car. Make sure the vehicle is in park mode or in first gear if it is a manual transmission. Set the brake and place wheel chocks under the rear wheels.
Jack up the front of the car and put it on good stands. Working under a car is potentially one of the most dangerous things a home mechanic can do, so you shouldn't risk the car moving and falling on you while you're working under it.
Step 2: Drain the coolant. There are several types of engines that do not have coolant passages in the timing cover.
A good visual inspection can tell you if this is the case. Older cars had drain cocks or plugs in the radiators and engine, many newer cars don't have a drain hole in the radiator, but most of them still have engine drain holes.
Remove the radiator or coolant reservoir cap, locate the drain holes using the repair manual, and drain the coolant into the drain pan. If your vehicle does not have a drain port, you may need to loosen the hose at the bottom of the engine.
Make sure you know where your dogs or cats are at this stage! They like car antifreeze. They will drink it if they find a pot or puddle and it will destroy their kidneys! Drain the coolant from the sump into liter jugs for reuse or disposal.
Step 3: Remove the heatsink. Not all vehicles require radiator removal. If there is enough room in front of the engine to work on, leave it alone! If there is not enough room to work, He must go out.
Remove the hose clamps and disconnect the hoses. If your vehicle has an automatic transmission, disconnect the oil cooler lines as well. We unscrew the fasteners and remove the radiator.
Step 4: Remove Drive Belt(s). Your vehicle must have one or more drive belts removed. It could be a matter of loosening a fastener on the alternator or other accessory, or if it's a late model car it will have a spring loaded tensioner that you need to loosen. They are often difficult to reach and having the proper belt tensioning tool will be critical.
When the belt is loose, it may still be necessary to crank the engine with a wrench while you "pull" the belt off the pulley.
Step 5: Remove the water pump. This is another step that may not be needed on your engine. On some inline engines, the water pump is located on the side of the timing cover and may remain in place. On most V-type engines, the water pump is attached directly to the timing cover, so it must be removed.
Step 6: Remove Drive Pulley. At the front of the engine is a large pulley or harmonic balancer that runs through the timing cover. Removing the bolt from this pulley can be a problem even for professionals because the engine is trying to crank while you are trying to loosen the bolt. You will need to use a crankshaft holding tool or impact wrench to remove this bolt.
Once the center bolt is out, you can remove the pulley from the crankshaft with just a few hammer blows on the sides. If he is stubborn, a gear puller or harmonic balancer puller will help. Keep a close eye on any loose key that might slip out with it.
Step 7: Remove the timing cover. Use your small pry bar or large screwdriver to get under the timing cover and remove it from the block. Some engines have bolts that run from the bottom through the oil pan to the timing cover. Be especially careful not to tear the oil pan gasket when removing it.
Part 2 of X: Replacing Timing Gears
Necessary materials
- combination keys
- Crankshaft holding tool
- Hammer with a dead blow
- Gear puller or harmonic balancer puller
- Sealant for RTV gaskets
- Screwdrivers (cross and straight)
- Socket wrench set
- Wrench
- Repair manual
Step 1Set Timestamps. Check the repair manual. There are as many different timing marks as there are engines. They are usually a series of dots that line up when the engine is at TDC.
Temporarily insert the bolt back into the crankshaft so that the engine can be cranked. Rotate the motor until the marks match as described in the manual.
Step 2: Remove the gears. Remove the nuts or bolts that secure the gears to the camshaft. The crankshaft gear bolt was the same as the front pulley and was removed earlier.
The gears may be slipping off their respective shafts, or a gear puller may be required. With gears, you can take them off one at a time, but if you can take them off at the same time, it will be a little easier. The camshaft may need to be rotated a bit when the gear breaks off due to the helical cut of the teeth.
Step 3: Install New Gears. At the same time, slide the new gears onto the respective shafts. You will need to align the timestamps and hold them in place as the gears slide onto their keys.
Once they are in place, a few hits with an ineffectual impact hammer will install them completely. Put the crankshaft bolt back in so you can turn the engine with the wrench. Rotate the engine two full turns to make sure the timing marks line up. Turn out a bolt of a cranked shaft back.
Step 4. Reinstall the timing cover.. Clean the timing cover and scrape off the old gasket. Install a new seal in the cap.
Apply some RTV sealant to the surface of the engine and to the timing case cover and glue the new gasket in place on the engine. Install the cover and finger-tighten the bolts, then tighten the bolts evenly in a criss-cross pattern to secure the cover.
If there were bolts on the cover that go through the oil pan, tighten them last.
Step 5: Install the front pulley in place.. Install the front pulley and center bolt. Use a crankshaft holding tool and a torque wrench to tighten it to factory specifications. This is big! It will probably need to be tightened to 180 ft lbs or more!
Part 3 of 3: Completing the Assembly
Necessary materials
- Belt Tension Tool
- Switch
- combination keys
- Hammer with a dead blow
- Storage tray and jugs
- Safety glasses
- Screwdrivers (cross and straight)
- Socket wrench set
- Repair manual
Step 1: Reinstall water pump and belts.. If the water pump is old, it is recommended to replace it now. It's relatively inexpensive and will eventually fail, so you can save yourself some trouble later.
Similarly, it is recommended to install new belts at this time, since they have already been removed. Apply some RTV sealant to the new water pump gasket as you put it on.
Step 2: Replace the Radiator and Fill the Cooling System. If there is a coolant outlet, open it. If not, remove the heater hose from the top of the engine. Then fill in the coolant through the expansion tank.
If the coolant you drained is more than two years old, replace it with fresh coolant. Continue pouring until coolant comes out of the bleed or hose you disconnected. Close the outlet valve and reconnect the hose.
Turn the heater on high and run the car until the temperature gauge comes on and you can feel heat coming out of the vents. Continue adding oil to the reservoir while the engine is warming up. When the vehicle is fully warmed up and the coolant is at the correct level, install a sealed cap on the reservoir.
Check the engine for oil or coolant leaks, then jack it up and ride it. Check for leaks again after a few minutes of driving.
This is a job that will take you at least a day for the most basic preparations. On more complex engines, there may be two or more. If your idea of a fun weekend doesn't include spending it hunched over the hood of your car, AvtoTachki can replace the timing cover at your home or office to get the job done at your convenience.