When and how it is necessary to adjust the valves on the VAZ 2105: process sequence with photos and videos
Content
Despite the simple design of the valves and valve stem seals of the engine, these elements perform an important job, without which the normal functioning of the power unit is impossible. The efficiency of the engine directly depends on the correct operation of the valves: power, toxicity, fuel consumption. Therefore, their integrity, like adjusting clearances, is very important.
The purpose of the valves in the VAZ 2105 engine
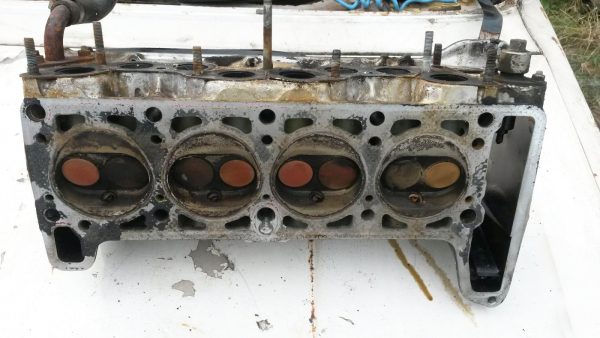
In the VAZ 2105 engine, as in any other internal combustion engine, valves are an important element of the gas distribution mechanism. On the "five" in the power unit, 8 valves are used: there are 2 valves for each cylinder, the main purpose of which is the correct distribution of gases. By means of clans, a mixture of fuel and air is supplied to the combustion chamber through the intake manifold and exhaust gases are discharged through the exhaust system. In the event of a breakdown with any valve, the operation of the gas distribution mechanism, as well as the entire engine as a whole, is disrupted.
Valve adjustment on the VAZ 2105
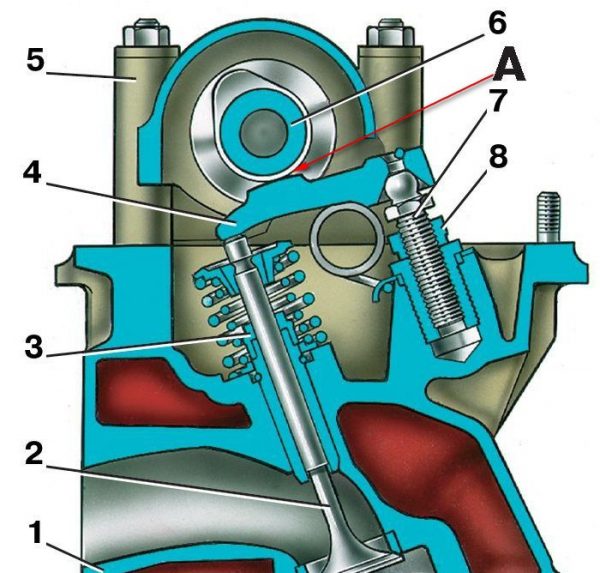
Cars of the VAZ family, such as the VAZ 2101/07, are equipped with engines with a similar design. The differences are, as a rule, in some technical characteristics. This allows you to carry out maintenance and repair work yourself. Stable operation of the VAZ 2105 engine is impossible without properly adjusted valves. The procedure is suitable for all power plants of classic Zhiguli models. The essence of the adjustment is to change the gap between the rocker and the camshaft cam. Please note that the adjustment must be carried out on a cold motor.
When and why is valve adjustment necessary?
The adjustment of the valves on the VAZ 2105 is started in case of violation of the gap. To understand what the signs are and what the wrong gap can lead to, it is worth understanding this moment in more detail. The main symptom of an incorrect timing mechanism clearance is the presence of a metallic knock in the cylinder head area. At first, this knock is noticeable only in one of the engine operating modes, for example, at idle, but as the car is used, it will be observed in all modes.
The gap can differ both up and down from the nominal value. In any case, an incorrect parameter will affect the reduction in engine power. In the case of a reduced clearance, the valve will be pressed by the rocker, which will lead to a violation of the tightness in the cylinder and a decrease in compression. As a result, burning of the working edge of the valve and its seat is possible.
With an increased gap, the flow of a mixture of fuel and air into the combustion chamber will decrease due to a shorter valve opening time. In addition, gases will be discharged in an incomplete volume. Just in order to avoid the listed nuances on the “five”, valve adjustment is required every 15–20 thousand km. run.
Adjustment tools
One of the conditions for proper valve adjustment is the availability of the necessary tools and knowledge of the sequence of actions. From the tools you will need to prepare the following list:
- a special key for rotating the crankshaft;
- open-end and socket wrenches (for 8, 10, 13, 17);
- flat screwdriver;
- probe with a thickness of 0,15 mm.
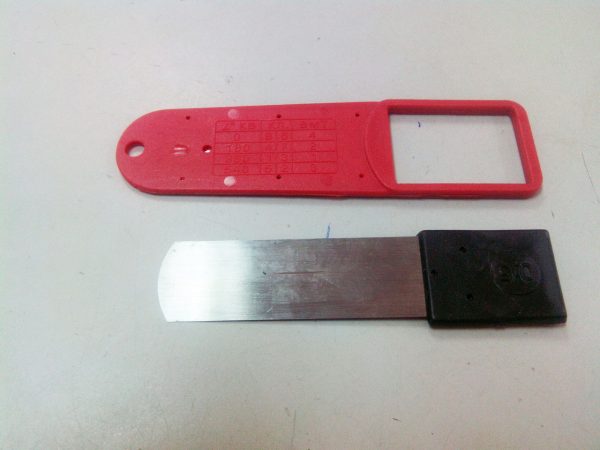
The adjustment process is carried out with a special wide probe, which is used for the process in question.
Adjustment procedure
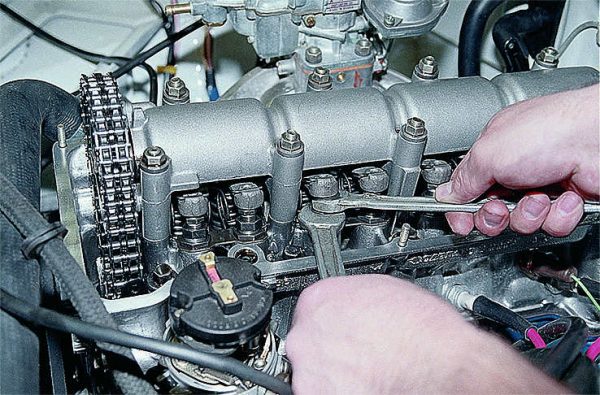
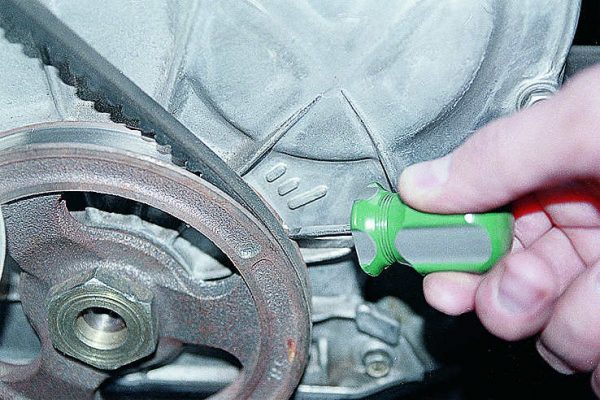
Before adjustment, it is necessary to dismantle some elements, namely the air filter and its housing, the suction cable from the carburetor, the throttle rod, and the valve cover. It would be useful to remove the cover from the ignition distributor so that there is no interference with the adjustment. Initially, it is necessary to set the engine mechanisms by marks: there are marks on the crankshaft pulley and on the front timing cover. We set the mark on the pulley opposite the length of the risks on the cover.
It should be noted that the valves are regulated in a certain sequence. This is the only way to properly adjust the timing mechanism.
The adjustment process consists of the following steps:
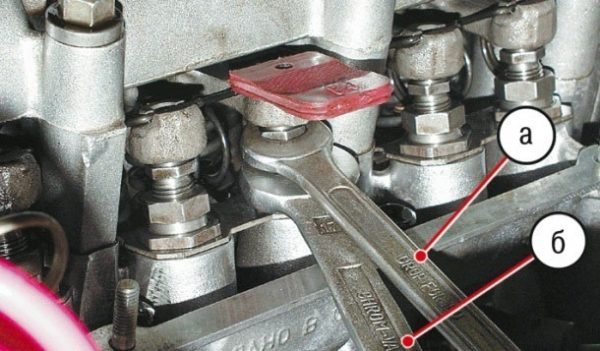
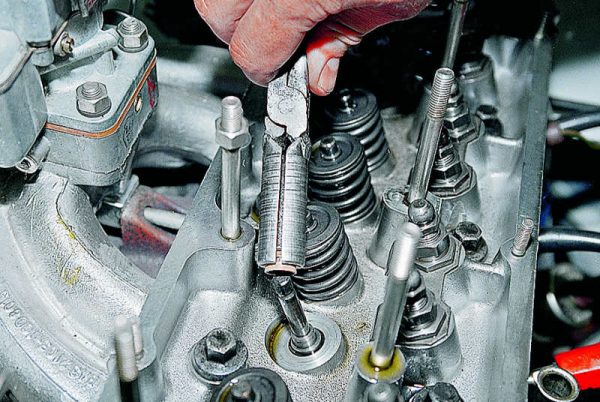
- After the position of the crankshaft is set according to the marks, we check the clearance with a feeler gauge on the 6th and 8th camshaft cams. To do this, insert the tool between the rocker and the camshaft cam. If the probe enters with little effort, no adjustment is needed.
 To assess the thermal clearance of the valves, insert the probe between the rocker and the camshaft cam
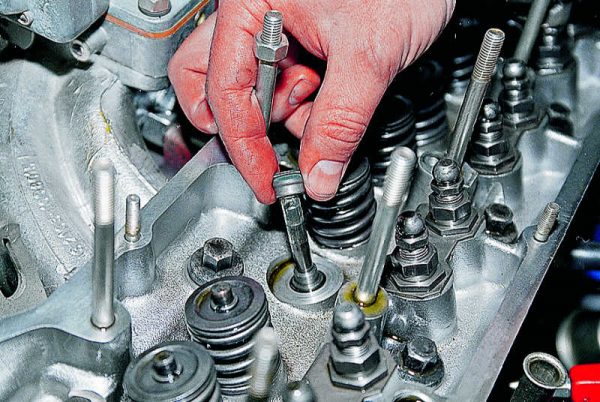
 - Adjustment is necessary if the probe is difficult to enter or too loose. We carry out the process with keys 13 and 17. First we hold the head of the bolt, with the second we slightly unscrew the lock nut. Then we insert the probe and, by rotating the bolt, select the desired position. After we wrap the nut and carry out a control measurement.To adjust the gap, we use the keys for 13 and 17. We hold the bolt first, and unscrew the lock nut with the second. By turning the bolt we achieve the desired clearance
- We measure and adjust the clearance on the remaining valves in the same sequence. To do this, rotate the crankshaft 180˚ and adjust valves 4 and 7.
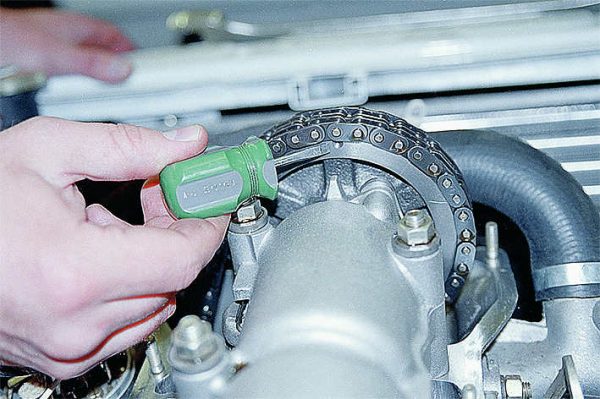
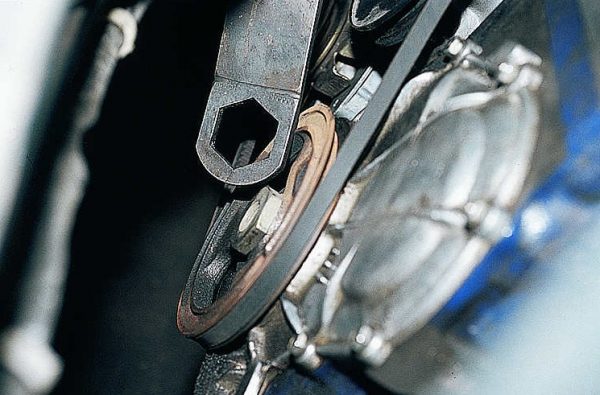
- We turn the crankshaft another half a turn to adjust 1 and 3 valves.With a special key, turn the crankshaft another half turn to adjust 1 and 3 valves
- At the end of the process, we adjust the clearance on 2 and 5 valves.
The adjustment process is not so much complicated as it requires attention, accuracy and precision. When rotating the crankshaft, it is important to clearly align the marks. For a better understanding of the process, a table is provided from which it becomes clear which valve and at what position of the crankshaft must be adjusted.
Table: adjusting the thermal clearance of valves VAZ 2105
| Angle of rotation crankshaft (gr) | Angle of rotation camshaft (gr) | Cylinder numbers | Adjustable Valve Numbers |
| 0 | 0 | 4 and 3 | 8 and 6 |
| 180 | 90 | 2 and 4 | 4 and 7 |
| 360 | 180 | 1 and 2 | 1 and 3 |
| 540 | 270 | 3 and 1 | 5 and 2 |
After the event, we assemble the dismantled elements in the reverse order.
Video: valve adjustment on the example of a VAZ 2105 with a belt drive

Clearance values
During the operation of the engine, heating and expansion of its parts occurs. To ensure a snug fit of the valve, a thermal gap is needed, which on VAZ 2101/07 vehicles should be 0,15 mm, which corresponds to the dimension of the probe used for adjustment.
Valve stem seals
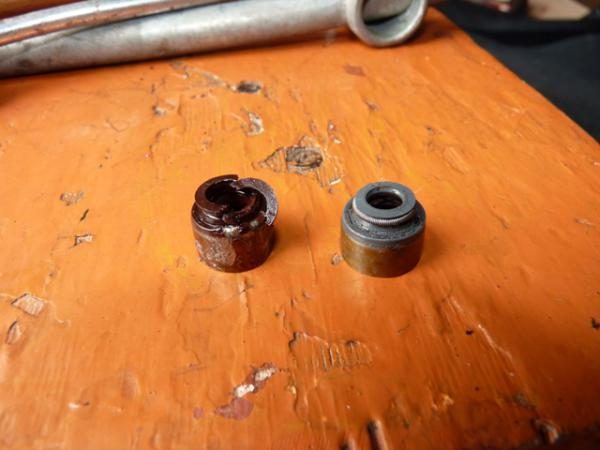
Valve stem seals, also called valve seals, primarily prevent oil from entering the engine combustion chamber. Like other parts of the power unit, the caps wear out over time, which affects the reduction in their efficiency. As a result of wear, the seals begin to leak oil. This leads to increased lubricant consumption and other typical problems.
What are valve seals for?
The timing mechanism uses two types of valves: intake and exhaust. The top of the valve stem is in constant contact with the camshaft, which causes the engine oil to mist. The reverse side of the intake valve is located in the area where there is a suspension of fuel droplets, and the exhaust element is located in the area of hot exhaust gases.
The camshaft cannot operate without a constant supply of lubricant. However, oil getting inside the cylinder is an undesirable process. Just in order to prevent the penetration of lubricant into the combustion chamber, valve stem seals were created. The design of the stuffing box is such that with its help, during the reciprocating movement of the valve, the oil is removed from the stem.
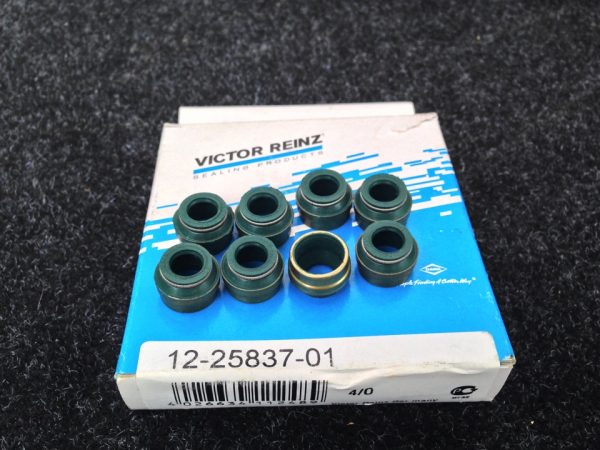
What to put valve stem seals on the VAZ 2105
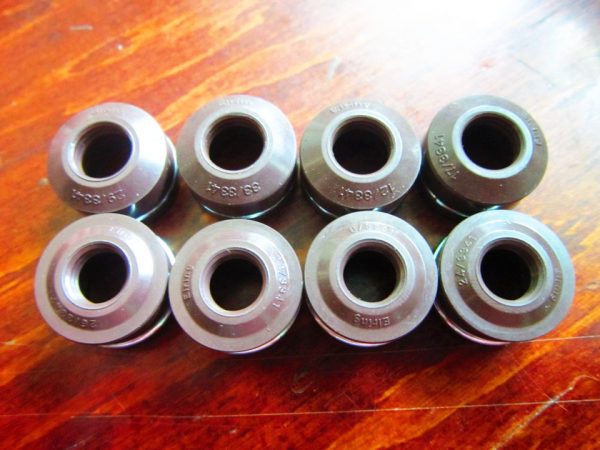
If it is necessary to replace the valve seals on the “five”, a related question arises - which caps to choose so that they last as long as possible? Based on the experience of many motorists, manufacturers such as Elring, Victor Reinz and Corteco should be preferred.
What causes oil seal wear
To understand the possible consequences of operating an engine with worn valve seals, it is worth considering the signs of their failure. It is necessary to think about the fact that the caps have become unusable and need to be replaced in the following cases:
- gray smoke when starting the engine, and as it warms up, it disappears;
- carbon deposits on spark plugs;
- increased oil consumption.
The first sign indicates that a worn cap lets oil through to a cold one, and after the engine warms up as a result of expansion, the part is able to perform its functions. The appearance of soot can be associated not only with valve seals, so you will need to perform engine diagnostics to accurately determine the problem. It should be borne in mind that the average service life of cuffs is about 70-80 thousand km. If after such a run there are signs of wear and tear, then the likelihood that the problem is in them increases.
Some car owners do not attach much importance to the signs of a malfunction of the sealing elements, and in fact in vain. Despite the fact that the car is still driving and there are no tangible problems, serious engine problems are possible in the future. Take at least oil consumption. With its increase, “oil starvation” of the motor appears, which leads to premature wear of parts, after which a major overhaul is required. In addition, motor lubricant is not so cheap. If you need to constantly add oil, then this will not be reflected in the budget in the best way.
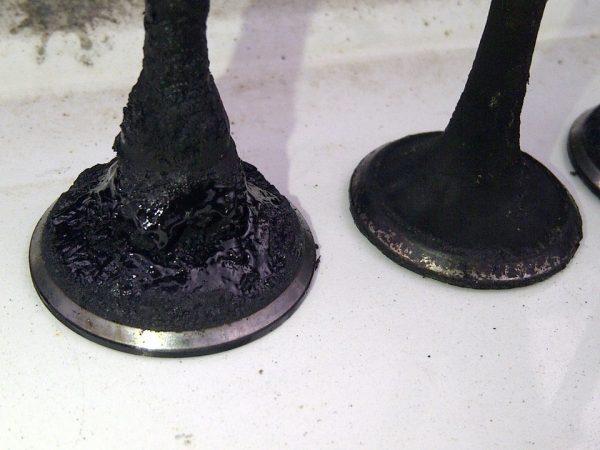
With the constant ingress of oil into the combustion chamber, the candles fail prematurely, which negatively affects the operation of the power unit. In addition, carbon deposits form not only on candles, but also on valves, pistons, and cylinder walls. What does it threaten? The most common problem is burnt valves. From this we can conclude that the wear of the cuffs can lead to serious consequences and considerable financial costs. Therefore, if signs of wear are found on the seals, do not delay replacing them.
How to change valve stem seals on a VAZ 2105
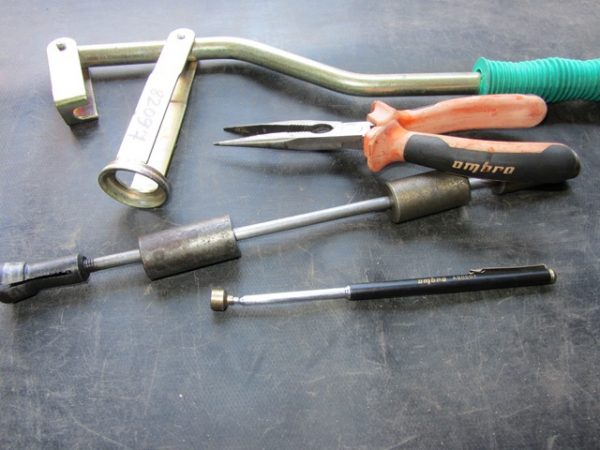
Replacing the caps is impossible without the appropriate tool, so you should take care of its preparation. To carry out this procedure, we need:
- valve desiccant;
- cap removal tool;
- tweezers, long nose pliers or magnetic handle;
- soft metal rod.
First you need to do the preparatory work, which boils down to dismantling everything that will interfere with the replacement of the caps. These elements include the air filter together with the housing, the valve cover, the suction cable and the thrust from the gas pedal to the carburetor. The rest of the replacement process consists of the following steps:
- We set the crankshaft to a position in which cylinders 1 and 4 will be at TDC.We set the crankshaft to a position in which cylinders 1 and 4 will be at TDC: the mark on the pulley should be opposite the length of the risk on the timing cover
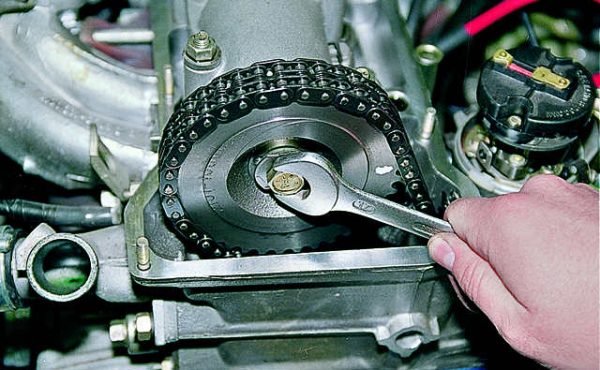
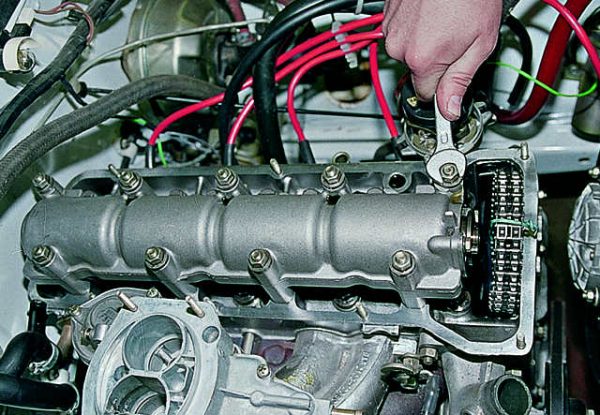
- Loosen the camshaft gear bolt.We bend the edge of the lock washer of the camshaft sprocket bolt, after which we loosen the fasteners
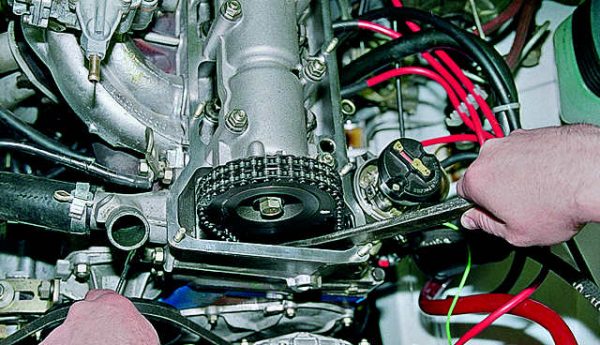
- We unscrew the fastening of the chain tensioner, loosen the chain and tighten the nut.Using a 13 wrench, loosen the chain tensioner cap nut. Resting the mounting blade against the tensioner shoe, we squeeze the tensioner rod and fix it by tightening the cap nut
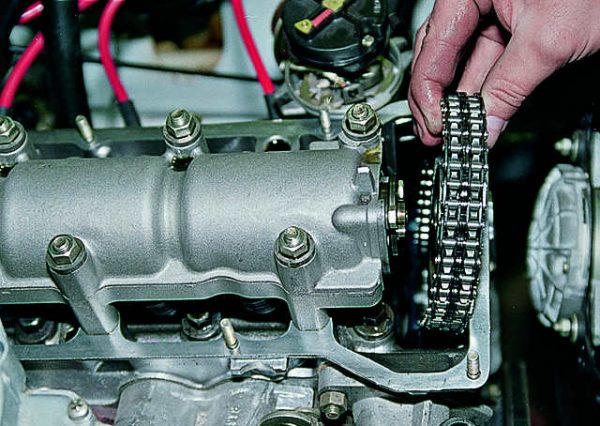
- We unscrew the bolt securing the camshaft gear and remove it. To prevent the chain from falling, a wire can be used to fix it.We remove the sprocket together with the camshaft chain and put it in the block head. To prevent the chain from jumping, we tie it to an asterisk
- We unscrew the fasteners of the bearing housing and dismantle the assembly from the block head.Using a 13 key, unscrew the nine nuts securing the camshaft bearing housing
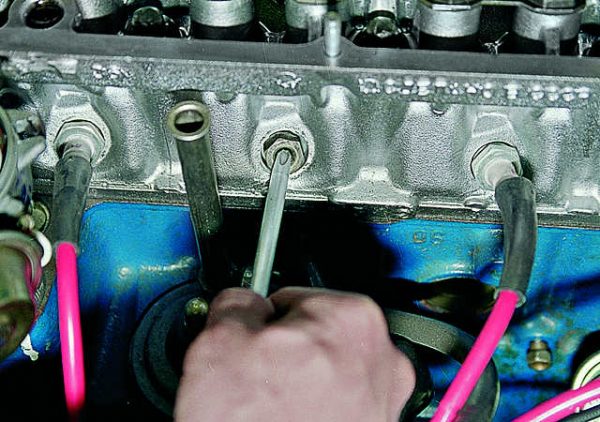
- We unscrew the candle of the first cylinder and insert a bar of soft material into the hole to hold the valve.Between the piston and the valve plate (on which we change the cap), we insert a soft metal bar with a diameter of about 8 mm. In extreme cases, you can use a screwdriver
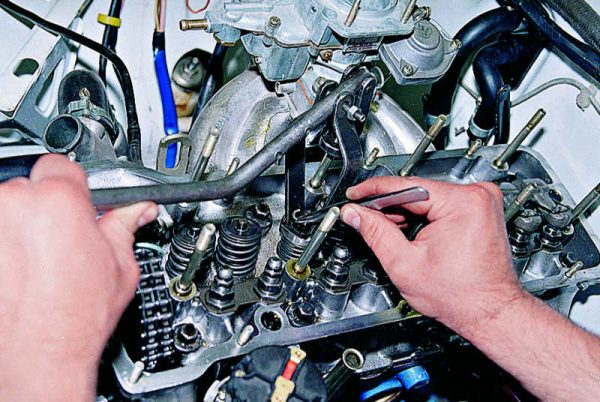
- To compress the spring, we use a cracker, and with the help of long-nose pliers or tweezers, we take out the valve crackers. For convenience, you can use a magnet.We compress the valve springs with a cracker and remove crackers with tweezers
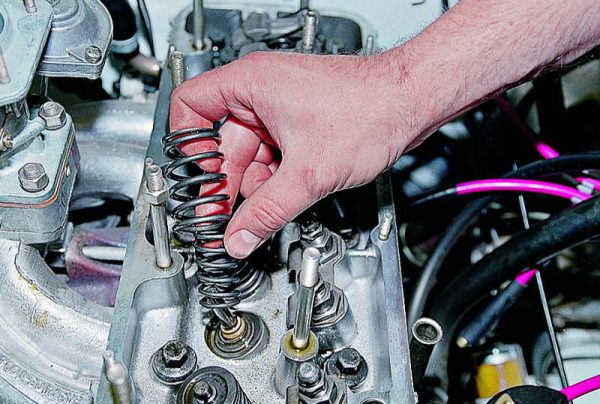
- Remove the top plate, springs and support washers.Remove the top plate, springs and support washers from the valve stem
- We place the cap remover on the valve and remove the gland.You can remove the cap with a screwdriver or a special tool.
- To install a new cuff, we pre-moisten it with engine grease and use a puller to mount it on the valve stem.Lubricate the working edge of the new cap with engine oil and put it on the valve stem
- We repeat the same procedure with the fourth valve.
- Having turned the crankshaft half a turn, we dry out valves 2 and 3. We replace the seals in the same way.
- Turning the crankshaft 180˚, and then another half a turn, we replace the caps on the corresponding valves.
After installing all the seals, we assemble the mechanism in the reverse order. Before putting the camshaft in place, by rotating the crankshaft, we set the distributor slider to the position in which it was dismantled. After assembly, it remains to adjust the thermal clearance of the valves.
Video: replacing oil caps on classic VAZ models

Valve lid
Owners of the VAZ 2105, like other classic models, often face the problem of an oily engine. An unpleasant situation can manifest itself both in the form of small and significant smudges, which indicates the failure of the valve cover gasket. Replacing the seal is not a difficult task and will require a minimum of effort and tools, such as:
- flat screwdriver;
- a wrench on 10;
- ratchet for 10.
Replacing the valve cover gasket on the VAZ 2105
The work on replacing the valve cover seal on the “five” is carried out in the following sequence:
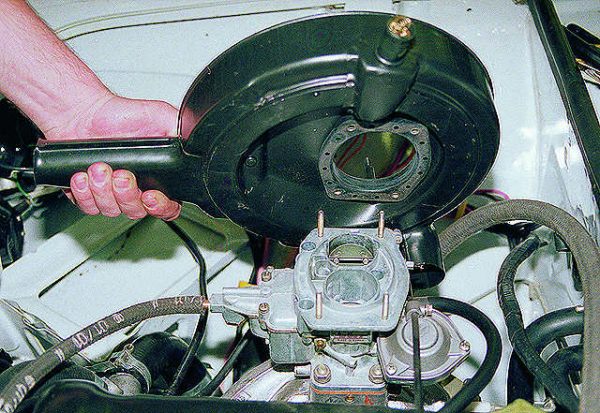
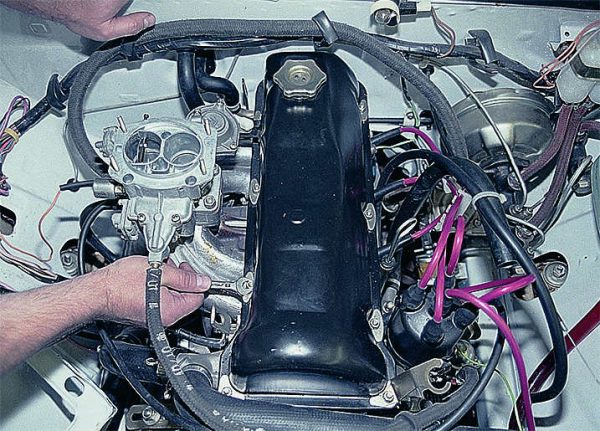
- To free access to the cover, we dismantle the air filter and the housing, which is attached to the carburetor.To gain access to the valve cover, you will need to remove the air filter and its housing
- Remove the crankcase exhaust hose by loosening the clamp.
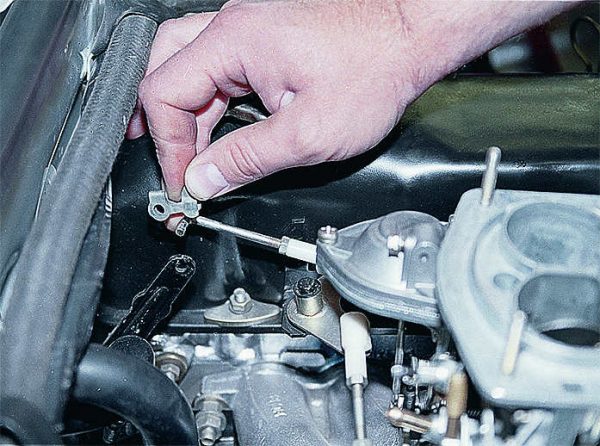
- Disconnect the carburetor throttle drive rod and the suction cable.With a thin screwdriver we pry and remove the spring clip, disconnect the rod from the throttle drive shaft
- We unscrew the nuts securing the valve cover with a 10 key. For convenience, you can use a ratchet with a head of the appropriate dimension.Using a 10 key, unscrew the eight nuts securing the cylinder head cover
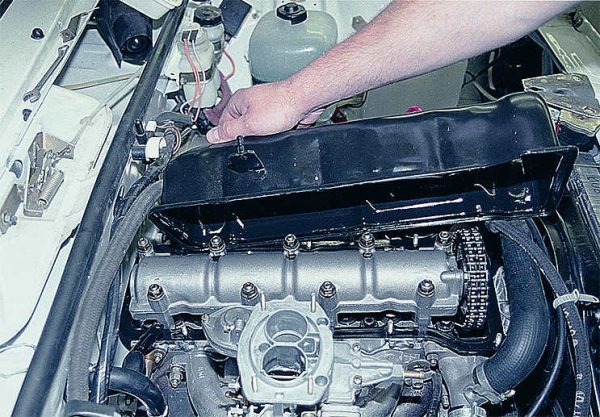
- After unscrewing the fasteners, remove the washers and dismantle the cover from the studs at a certain angle.The valve cover must be removed from the studs at a certain angle
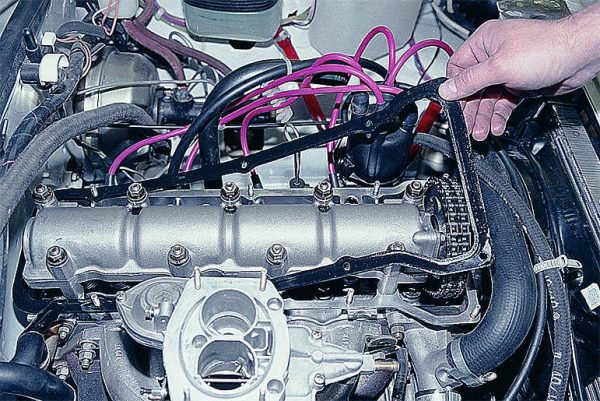
- When the cover is removed, remove the old gasket and wipe the seats on the cylinder head and the cover itself with a clean rag. Then we put a new seal on the studs.We remove the old gasket, wipe the seats on the head and cover, install a new seal
- We mount the cover and all the elements in the reverse order.
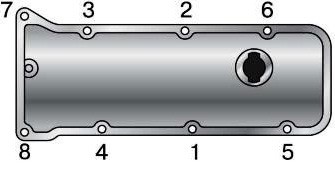
Valve cover tightening order
To avoid distortion when mounting the valve cover, the nuts must be tightened in a certain order, as can be seen from the figure below.
The appearance of any malfunctions or even their signs associated with the wear of the valve seals or the valves themselves should not be ignored. If you replace a failed part or make the necessary adjustments in a timely manner, you can avoid costly engine repairs. Therefore, it is important to monitor the technical condition of the power unit and perform the necessary maintenance according to the manufacturer's recommendations.

