
Multimeter test socket (2-method test)
Content
Do you have an analog or digital multimeter but don't know how to use it to test an electrical outlet? With our guide to testing outlets with a multimeter, you'll learn everything you need to know. If you're most concerned about wiring outlets, we've got you covered.
In short, you can exit with a multimeter by following these steps. First, set up your multimeter appropriately for measuring voltage. Then connect the black plug to the COM port and the red plug to the Omega port. Then insert the probe into the two vertical slots of the electrical outlet. Place the red one in the small slot and the black one in the big slot. Expect a reading of 110-120 volts for a properly working outlet. No reading means that the socket wiring is faulty or the circuit breaker has tripped.
Checkout Benefits
- This helps keep the chassis secure.
- This will help you determine if the wiring in the outlet is reversed.
famous things
Make sure you read the instruction manual that came with your digital or analog multimeter. Do not touch the metal pins to avoid electric shock. Checking the voltage at an electrical outlet is quite simple. Being on it, you can make sure that its body is safe.
Step-by-step guide to test outlets with a multimeter
We have adopted a two-method approach to test the output of a multimeter, namely;
- The first method – Checking the voltage in the socket
- The second method – Chassis grounding check
Let's go right now.
Method 1: Checking the voltage at the outlet
1. Familiarize yourself with the electrical outlet landscape. Modern sockets have three slots - hot, neutral and ground. The lower one is a rounded semicircle. Neutral is the longer slot to your left and hot is the shorter slot to your right. Handle each slot with care because the three wires can handle the current. (1)
2. Install an analog or digital multimeter. Set up your multimeter accordingly for voltage measurements. Do you see a wavy line? This is an alternating current (AC) function. Select it. Here is a more detailed guide on how to measure voltage with a multimeter.
3. Connect wires. The black wire banana plug (short thick plug) should fit into the jack labeled "COM". Some usually have a minus sign next to them. Then connect the red connector with the positive sign (+) or omega, the Greek letter. (2)
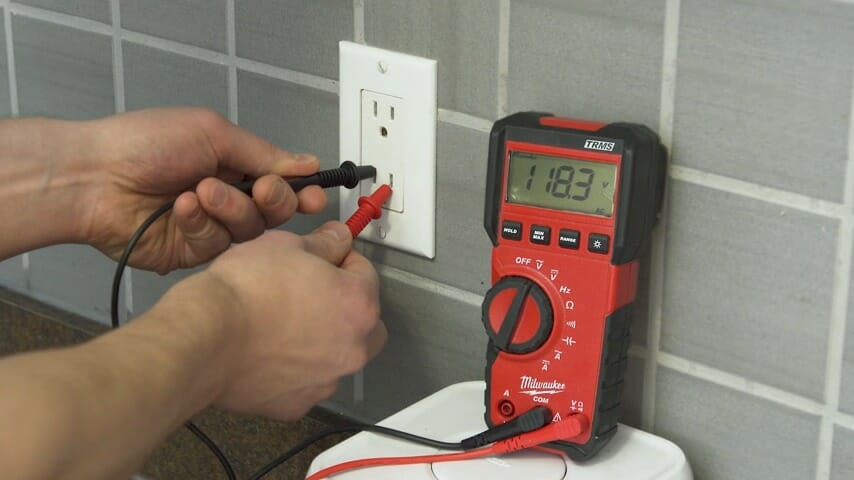
4. Measure the voltage at the outlet. With one hand, insert the probe into the two vertical slots of the electrical outlet. Place the red one in the small slot and the black one in the big slot. Expect a reading of 110-120 volts for a properly working outlet. No reading means that the socket wiring is faulty or the circuit breaker has tripped.
Method 2: Verify that the outlet is properly grounded
Let the red wire stay in the small socket and move the black wire to the ground socket. The volt reading should not change (between 110 and 120). If the readings fluctuate, this indicates an incorrect ground connection.
By checking that the outlet is properly grounded, you can ensure that the wiring is not reversed. Move the red probe to the large slot and the black probe to the small slot. The wiring is reversed if you get a reading on the DMM. While this problem may not interfere with simple electrical items such as lamps, it can be a disaster for more complex electronics.
Summing up
Checking the voltage at the outlet, whether it is properly grounded and if the wiring is reversed, is important for the safety of the home or office. Without involving an engineer or an electrician, being able to do this is a plus. Luckily, you can do this with an analog or digital multimeter.
Recommendations
(1) current - https://study.com/academy/lesson/what-is-electric-current-definition-unit-types.html
(2) Greek script - https://www.britannica.com/topic/Greek-alphabet
