DIY colorful Easter eggs - how to make them?
Content
DIY Easter decorations are a target. They look beautiful on the festive table, and are also a great opportunity to show your creative hobby. Here are three quick and cute Easter egg ideas you can make with just a few pieces.
How to make an egg shell?
The first step to creating Easter eggs is, of course, the preparation of the base, which consists in washing and releasing the shell very carefully. Choose eggs that are well shaped and have a smooth, even texture. Inspect them carefully to make sure there are no cracks on them - they can get deeper if blown out or painted.
Take the egg with a full hand and scratch small holes on both sides with a needle. Then carefully screw it inward, widening the hole. It should be about 5 mm. Place a bowl under the pierced shell. Start blowing gently. The first part of the egg white will drain slowly, but the yolk may pop out a little faster. Be careful not to splatter yourself.
You already know how to make an eggshell. Let's move on to the next stage of decorating our Easter eggs, i.e. dyeing them in a uniform color.
What color to paint eggs for Easter?
Coloring eggshells with onion shells or beetroot juice is a great way. However, if you want to make Easter eggs more springy, use paint. Watercolor will give a very light effect. You can try dipping the shell in water to add them, or build up the coverage with a brush by adding more layers. However, I decided to use Happy Color acrylic paints.
The set of twenty-four colors includes beautiful shades that immediately reminded me of spring. Pastel shades of blue, pink or green are the colors that seemed appropriate to me.
Each egg was dyed twice. One layer of paint did not cover the red stamp and the texture of the shell. Also, I wanted intense pigmentation to make the Easter eggs look joyful and colorful.
heavenly easter egg
The first pattern was inspired by what I saw outside the window while I was working - a clear, blue sky. To recreate them on the Easter egg, I needed three different shades of blue. One thing is juicy and rich. The other two had to be very bright, but also completely different. I got one by mixing the original pigment with white. The second one I found in the Happy Color set. It was number 31 of the Blue Doves.
I started drawing clouds. I wanted them to be fluffy, slender and evenly spaced. I applied paint liberally, in layers. The result is a three-dimensional effect.
I finished the clouds in blue. After all, the real ones also have more than one shade. Therefore, it was important for me that the Easter version had a natural feature. At this stage, I have finished the work, but if you feel that something is missing, you can draw birds or the sun. Or maybe you have decided that you prefer to draw a sunset or a thunderstorm on your egg?
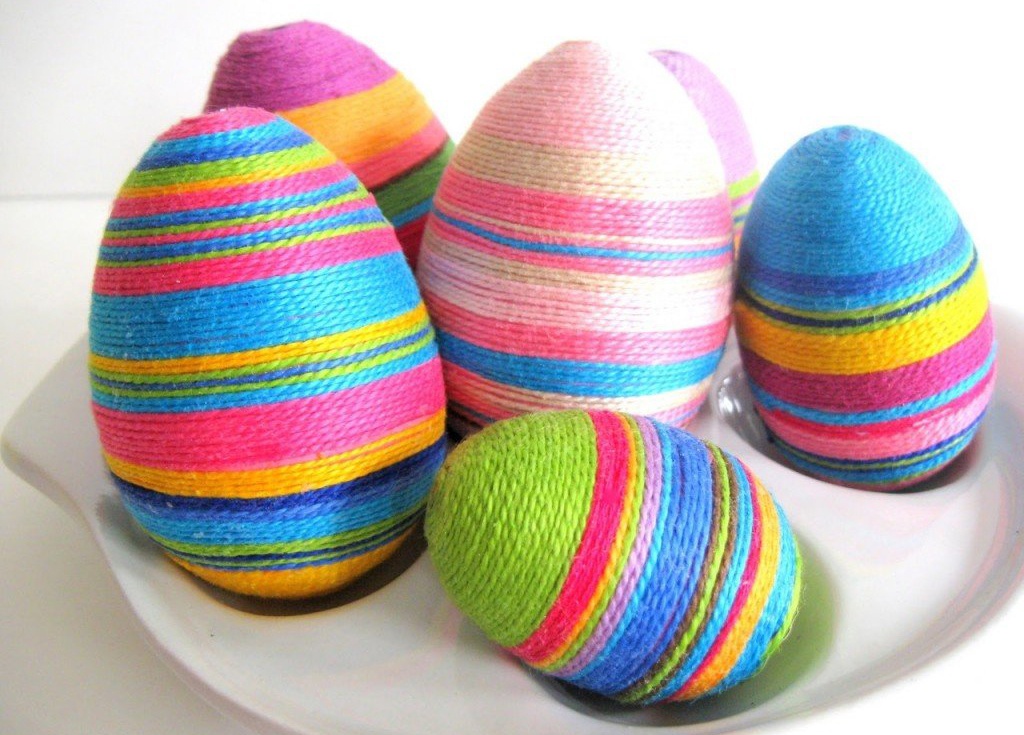
Twisted Easter egg
My second idea was to wrap the egg with floss. Simple, effective, but requires the use of good glue. So I reached for my glue gun. How to use such equipment? Unless otherwise stated in the manual, plug in the plug and wait a few minutes for the tool to warm up. After this time, insert the cartridge, pull the trigger. When the first drop of glue appears on the tip, this is a sign that you can get to work.
In a circular motion, I applied glue to the narrower tip of the egg, right next to the hole. I started winding floss threads. I decided to use very springy shades - the same colors that I used to paint the eggs.
Every few laps I added a bit of glue, being careful not to have too much. In addition, the substance dried out extremely quickly and tended to form thin threads connecting the impact site to the tip of the gun. You can try to help yourself with a toothpick, which is easy to gain excess sticky mass.
It is a little more difficult to apply the floss on the wider part of the egg. To make it easier, put them in a glass and gently wrap them with thread. It may turn out that at this moment he will be a little freer.
What came first: the egg or the rabbit?
The last Easter egg was made from scrapbook paper, but if you don't have any, you can cut them out of colored paper. I looked at a few of them to create the final concept. Always dry any parts before attaching them permanently. Sticky fragments are difficult to remove without compromising the design.
I decided to turn my colorful shell into a minimalist rabbit. I used ears and a charming bow. I placed the first shape on the narrower top of the egg and the second one about 1,5-2 cm below.
Let me know what ideas you have for this year's handmade Easter decorations. And for more creative inspiration, check out the DIY section.