Body VAZ 2101: description, repair and painting
Content
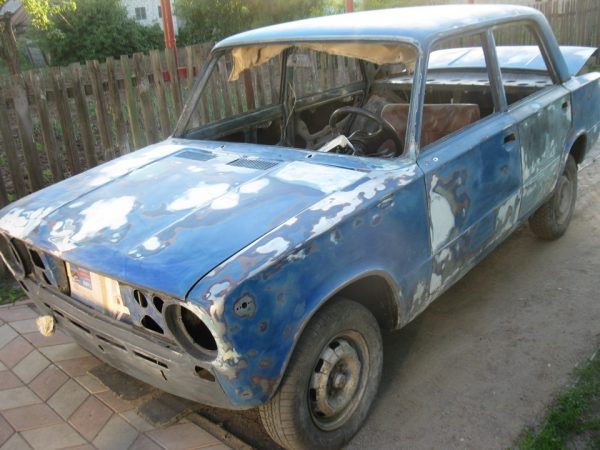
VAZ 2101 is a legendary model of the domestic automobile industry that once dominated the roads of the USSR. And today many people own this car. True, they have to carefully care for the body, over which time takes its toll. Considering how many years have passed since the release date of the last episode, this is not surprising.
Body description VAZ 2101
"Penny", like any other sedan, is equipped with a load-bearing chassis. In other words, the metal frame not only provides a convenient container for the driver, passengers and luggage, but at the same time is the carrier of a large number of elements, assemblies and assemblies. Therefore, a sedan, like no other body type, needs timely inspection and repair.
Body dimensions
Under the dimensions of the skeleton of the car, it is customary to understand the overall data. The body dimensions of the "penny" are as follows:
- width is 161 cm;
- length - 407 cm;
- height - 144 cm.
The weight
The mass of the bare body of the "penny" is exactly 280 kg. This was found out by simple mathematical calculations. It is necessary to subtract the weight of the engine, gearbox, cardan, rear axle and radiator from the sum of the total mass of the car.
As for the total weight of the "penny", it is 955 kg.
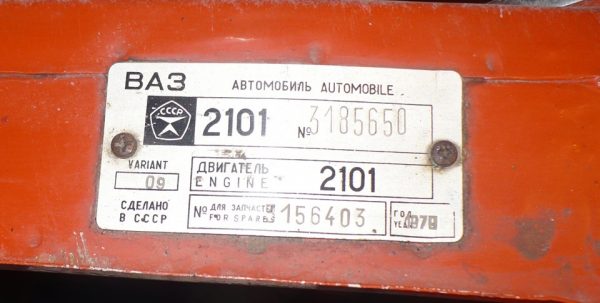
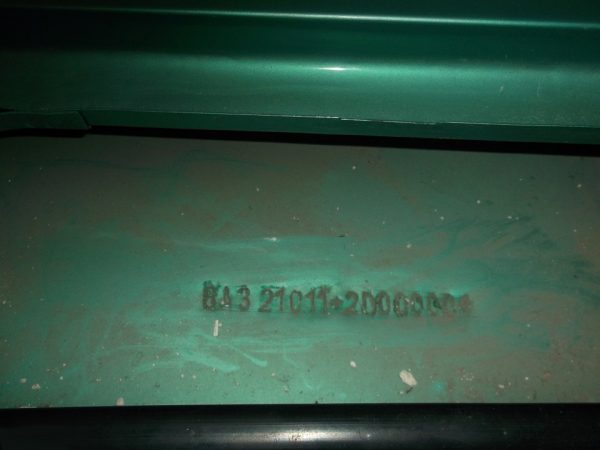
Body number
As a rule, it is placed on the identification plate, which must be looked for in several places:
- on the right cup of the telescopic rack support;
- on the top of the engine compartment.
 The body number of the VAZ 2101 can be read on the identification plate
In some cases, it can be knocked out separately.
Additional Items
Body parts are usually divided into basic and additional elements. The first include whole parts - wings, roof, floor, spars; to the second - mirrors, thresholds, a platform under the battery, etc.
Mirrors VAZ 2101 are designed to provide the driver with good visibility. The interior saloon mirror is equipped with a special anti-dazzle device. As for the side exterior mirrors, they were installed a lot, depending on the year of manufacture of the "penny". The old versions were equipped with round models, the new ones with rectangular ones.
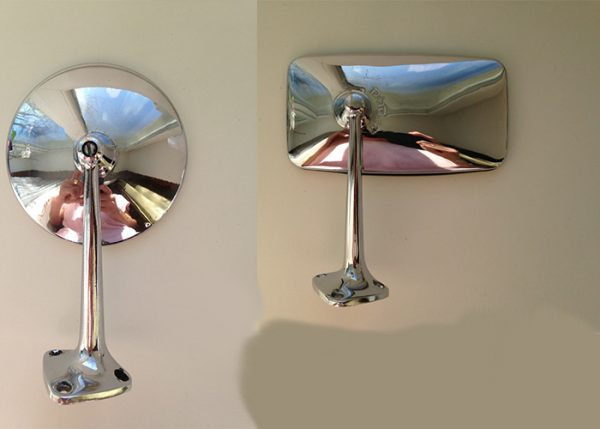
The mounting option was also gradually modernized - instead of three holes for screws, only two were left.
On the VAZ 2101, one of the weak points of the body is the thresholds. They quickly rust and rot, as they are subject to regular mechanical stress. In order to protect and extend the service life, they are covered with plastic overlays.
Today on the market you can find "regular" plastic lining for any modification of the VAZ, including for the "penny". You can also install linings from more modern models on the VAZ 2101 - VAZ 2107, Lada, etc.
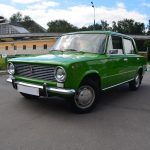
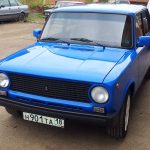
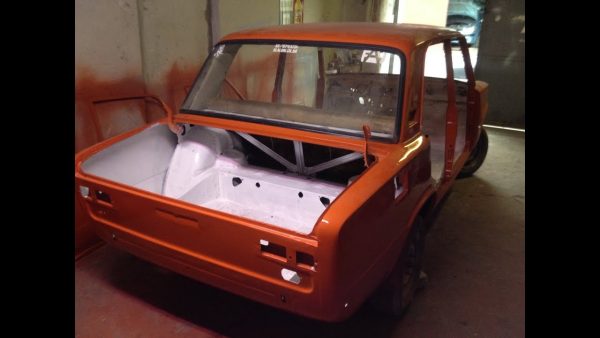
Photo VAZ 2101 in a new body
-
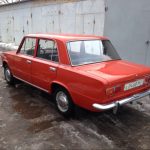
- VAZ 2101 red 1982 release

-
- VAZ 2101 in a new body looks like this from behind
-
- VAZ 2101 version 1,2 MT in a new body develops 64 hp
-
- VAZ 2101 blue tuned immediately attracts the attention of an amateur
Body repair
Over time, any car body suffers from corrosion that occurs for various reasons.
- Due to mechanical influences (collisions, accidents, impacts).
- Due to the formation of condensation caused by climate change.
- Due to the accumulation of dirt and moisture in various cavities of the structure.
Most often, corrosion appears in deep and hidden cavities of the body, where the accumulated moisture cannot evaporate. These areas include wheel arches, door sills, luggage cover and hood. The restoration of the body and its elements depends on the extent of the spread of corrosion centers (classified in 2 general categories).
- Surface damage - corrosion centers are evenly distributed over the metal surface. The restoration process does not require special skills - it is enough to clean the rust, apply primer and paint.
- Spot damage - corrosion has penetrated the structure of the metal. Such foci are difficult to recover and more serious body repairs are needed.
Work on straightening body parts, restoring paintwork and other operations require professional equipment and special tools.
- Clamps with hydraulic drive or clamp for fixing body parts during welding.Clamp-clamp allows you to securely fix the part before welding
- Pump.
- Hacksaw and scissors.
- Bulgarian.A grinder in body repair is needed for cutting and grinding parts
- Hammers and mallets.
- Stops.
- Body dent removal tool.A car body dent puller will be a valuable help during repairs.
- Welding machines: semi-automatic and inverter.


Installation of plastic wings
The standard wings on the VAZ 2101 are metal, but due to the reduction in the total body weight and in order to increase the aerodynamic properties, many owners carry out tuning. They install plastic wings, more fragile, but beautiful and very light.
In order to somehow strengthen the plastic wing, many manufacturers make its front part as rigid as possible. Swedish plastic fenders are considered the best in this regard, but they are hard to find in stores. For the most part, there are Chinese counterparts.
It is advisable to purchase tuned wings from a manufacturer specializing in the manufacture of body parts for the "classics". So you can avoid difficulties with fitting and get rid of flaws.
Plastic wings on the "penny" can be fixed in two ways: glued or secured with screws. Before starting the replacement, it is recommended to carry out a full sketch of the future part. The slightest inconsistencies between a plastic wing and a metal body, increased gaps and their unevenness will have an extremely negative impact on operation and safety. Therefore, everything must be carefully checked and docked.
Now you can start removing the wing (front).
- Remove the bumper, hood and front door.
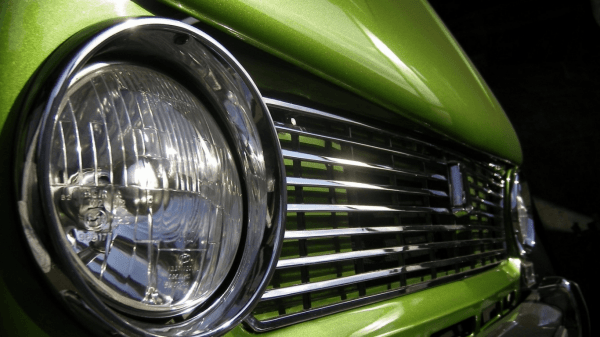
- Remove the optics from the wing: turn signal, lantern and sidelight.The headlight of the VAZ 2101 must be dismantled before replacing the wing
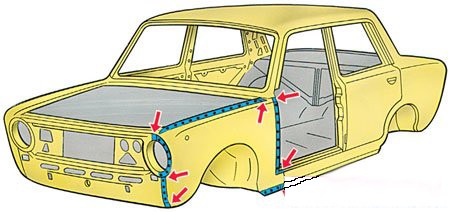
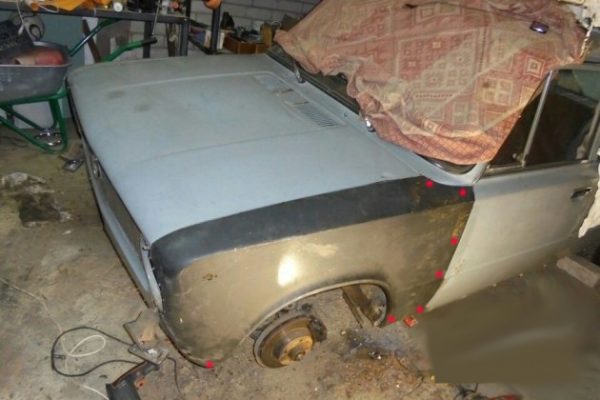
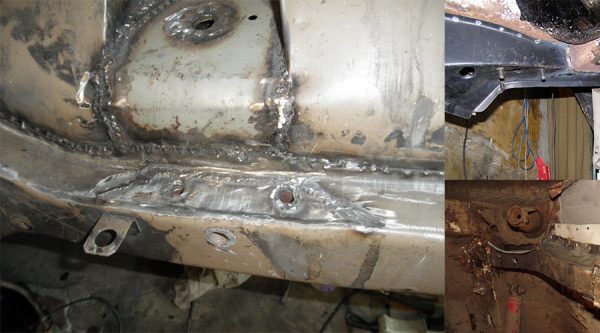
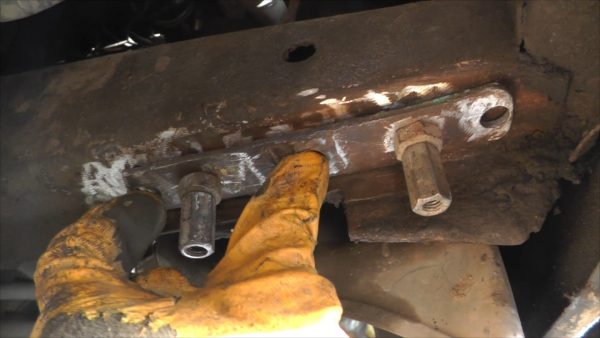
- Cut off the connections of the wing with the lower part of the body, the front pillar and the front panel with a grinder.
- Drill or cut with a sharp chisel the welding points marked in the photo with red arrows.Weld points or seams must be cut out
- Remove the wing.
Now installation.
- Attach the plastic fender to see how it snaps into place.
- Lubricate the part with glue or special putty from the inside (those places that will be in contact with the body).
- Temporarily fix the upper edge of the part with screws, carefully making holes in the wing with a drill.Holes on the edge of the wing must be drilled in these places
- Install the hood. Re-check how everything sits, if there are any large gaps - if necessary, adjust, align.
- Pull the wing down, fix the lower parts, as well as the docking points with the door with screws or self-tapping screws.The fixation of the plastic wing is carried out at the lower points and at the points of docking with the door
After the glue dries, the screws that are visible can be removed, then the empty holes can be puttied, primed and painted.
Welding work on the body
The body of the VAZ 2101 was originally produced for active operation for a certain period of time. Then the corrosive process begins, which can be stopped by restoring or replacing the part. Of course, in the course of high-quality and regular body care, the time for the onset of metal rusting can be significantly extended, but sooner or later restoration will be required, which also involves welding.
As you know, the bare car body is not cast at the factory, but stamped with a number of tin (metal) parts. They are interconnected by a welded seam, thereby providing a single and durable frame. Modern production, for example, is fully or partially put on the conveyor - welding is carried out by robots. In the automotive industry, spot welding technology is mostly used, which makes it possible to improve the quality of positioning of elements and eliminate the negative effect of climate change.
Today bodybuilders work with two welding machines.
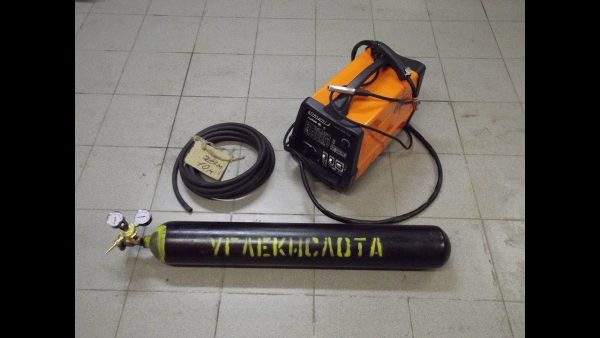
- Most often, in welding work on the body, a semi-automatic device is used that can simulate spot factory welding. Its popularity is also ensured by convenience - you can easily sew a seam almost anywhere, including a hard-to-reach area. The use of a semi-automatic device requires a cylinder of carbon dioxide and a pressure reducer.Semi-automatic carbon dioxide tank is most often used for body welding
- The inverter has become extremely popular because of the way the voltage is transformed. This unit is content with a conventional 220-volt outlet. It is compact, lightweight, not very sensitive to low voltage and easily ignites the arc. The inverter can also be used by beginners who are welding for the first time. On the other hand, such equipment is unable to give an even and thin welding seam due to the fact that the metal is heated more strongly, temperature deformations appear. However, the bottom and other inconspicuous parts of the body are quite suitable for the inverter.The inverter is convenient for working with the bottom and other inconspicuous parts of the body

Thresholds, as mentioned above, faster than other body parts, are affected by corrosion.
This is explained not only by the harmful environment and mechanical influences, but also by the lack of anti-corrosion treatment, the low quality of the metal, and the presence of a reagent on the roads in winter. Before starting work on the threshold, it is necessary to check and, if necessary, repair the door hinges. The gap between the threshold and the bottom of the door must be even. If the hinges are faulty, then the door sags, which can easily be misleading after installing a new threshold - it will not fall into place in any way.
Replacement and welding of thresholds VAZ 2101 is carried out as follows.
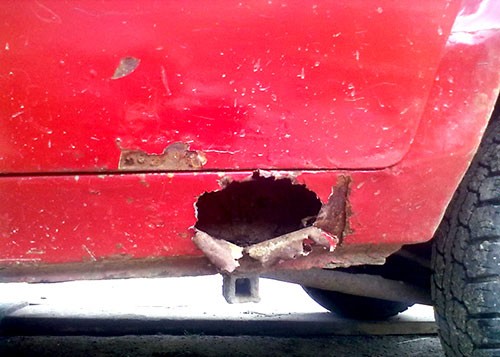
- Cut out the rot on the outside of the thresholds using a hacksaw (grinder).
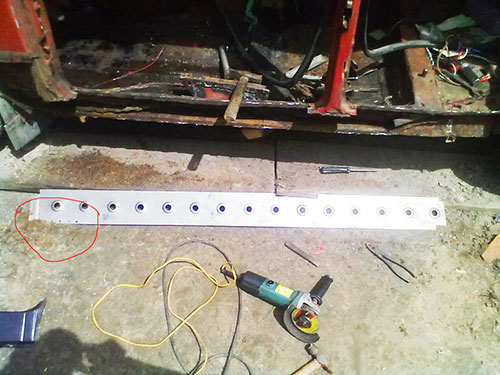
- Then remove the amplifier - an iron plate with holes around the entire perimeter. On some "penny" amplifier may not be.Threshold without an amplifier is a common occurrence that needs urgent improvement
- Thoroughly clean the workplace, removing the remains of rotten parts.
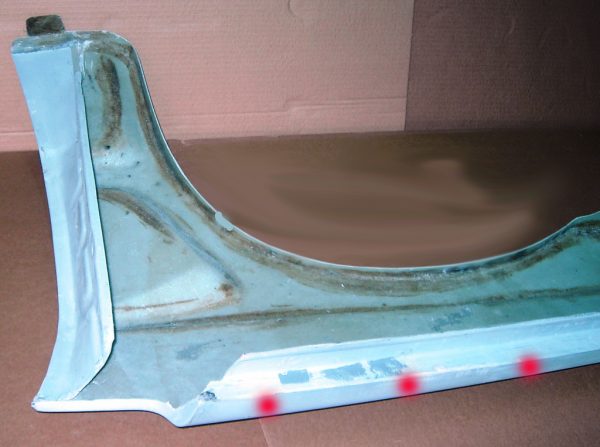
- Try on a new amplifier made from metal tape.An amplifier made of metal tape must be tried on on the threshold, and only then installed
- Clamp the part with clamps and weld. It is advisable to use the parallel welding method, fixing the bottom and top of the threshold at the same time.
- Try on a new threshold, cut out the excess and fix the outer part of the part with self-tapping screws.
- Recheck the gaps between the door and the threshold.
- Carry out welding starting from the middle pillar of the car.
- Clean the surface, prime and paint in body color.

The inner part of the threshold is part of the bottom of the car. And in this place, too, the body quickly rots, causing varying degrees of corrosion. Repair involves the general restoration of the floor or bottom, as they say. Instead of a threshold amplifier, in order to strengthen the bottom and update the threshold, metal strips are welded around the entire perimeter of the body.
To independently restore the bottom of your car, it is enough to have good lighting and a viewing hole or lift available. Damage to the eye is difficult to determine, so all suspicious areas of the floor must be tapped with a hammer. Overcooking the bottom is not a very difficult procedure. She can do it for everyone. Preparation takes a lot of time and effort: connection and adjustment of equipment.
The step-by-step algorithm for repairing the bottom looks like this.
- Using a grinder with a mounted abrasive wheel, grind all problem areas of the floor.
- Cut out too rusty sections of the floor with scissors or a grinder.Rusty sections of the bottom must be cut with scissors or a grinder
- Prepare from thin metal (1-2 mm) square or rectangular patches, the size of cut holes.
- Thoroughly clean the surfaces on which the patches will be cooked.
- Weld the patches, carefully clean all the seams and treat with anticorrosive.A large patch on the bottom must be welded around the perimeter

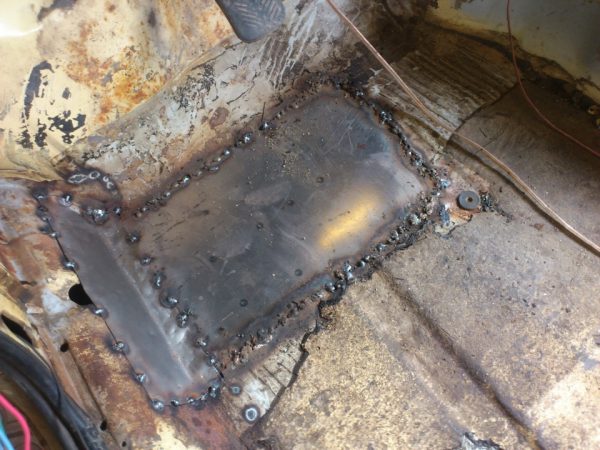
Welding is best done with a partner, as it will be difficult for one person to fix the patch before brewing.
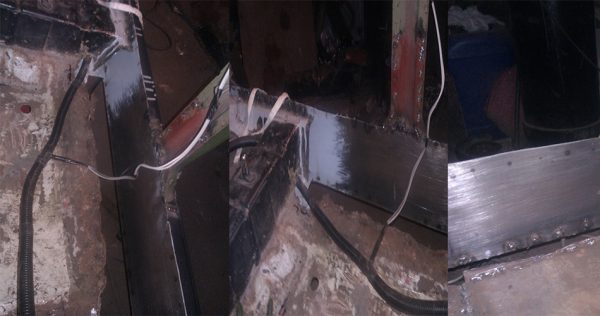
The list of welding work on the body necessarily includes work with spars and a beam.
To fully work with these bottom parts, it is advisable to remove the engine. You can purchase a manual winch if the garage does not provide equipment for quick removal of the motor installation.
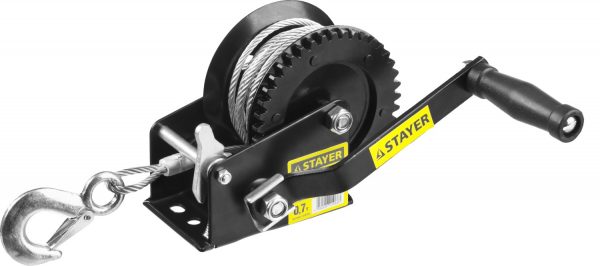
Such a winch must be attached to the ceiling of the garage, then tie the engine with tow cables and carefully pull it out. Of course, first it will be necessary to release the motor from the mounts with the body and other components of the car. The next stage of work is the dismantling of all attachments from the engine compartment. For convenience, it is also recommended to remove the front grill - TV.
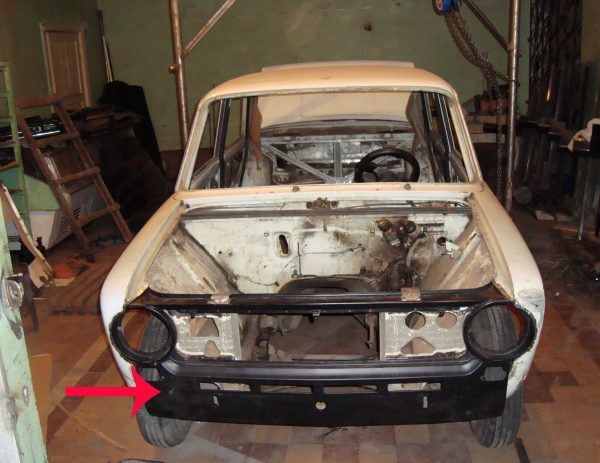
Then it remains only to throw off the beam and everything that hangs on the spars. Cut out the rotten parts, weld new ones. It is advisable to carry out this work in parts - first walk on the left side, then on the right. New spars are recommended to be further strengthened.
Video: bottom and sill welding

Hood
The hood is the part of the body that is often upgraded due to the location of the engine under it. As you know, the engines of the domestic auto industry were installed at the factory without providing good cooling, and they could not withstand a long ride at top speed, like foreign cars. To correct this oversight of manufacturers, owners are advised to carry out tuning.
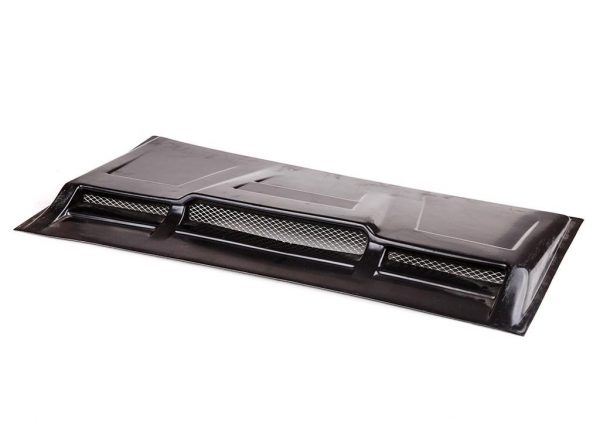
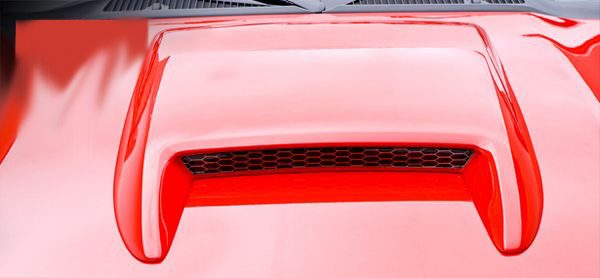
Air intake on the hood
This is exactly what you need to ensure good cooling. Today in stores you can buy a ready-made version of such a snorkel. It weighs only 460 g, can be custom-painted in the color of the car, mounted on self-tapping screws or masking tape. The element is made of 2 mm plastic.
Here is the installation step by step.
- Remove the hood.
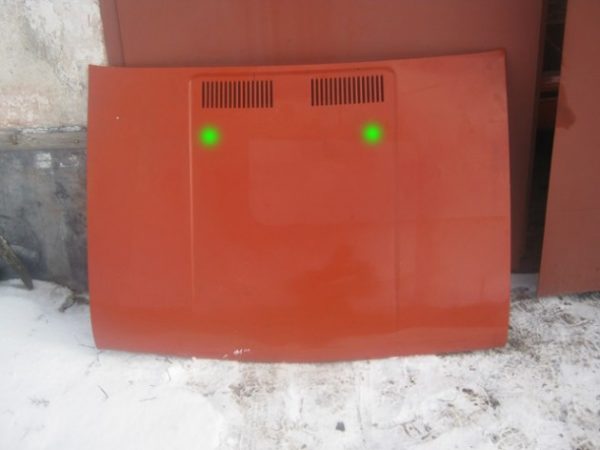
- Drill the cover in these places.The hood of the VAZ 2101 must be removed and drilled in 2 places
- Drill holes on the snorkel if they are not already there.
- Fix the air intake with bolts.
You can also install this option, since there are a lot of models for choosing for sale.
Hood lock
Repair of the VAZ 2101 hood lock is quite within the power of everyone. The mechanism rarely fails suddenly, deterioration in closing occurs gradually. The main lock option is to fix the hood. In working condition, it does this perfectly, but deteriorates over time: you have to slam the hood several times to close it. The lid can rattle and bounce on potholes, which is also unpleasant.
There are 3 options for fixing the problem.
- Adjustment. The lock occasionally sticks, the hood rattles barely noticeable.
- Repair and lubrication. Constant jamming, futile attempts at tuning.
- Replacement. Serious damage to the mechanism.
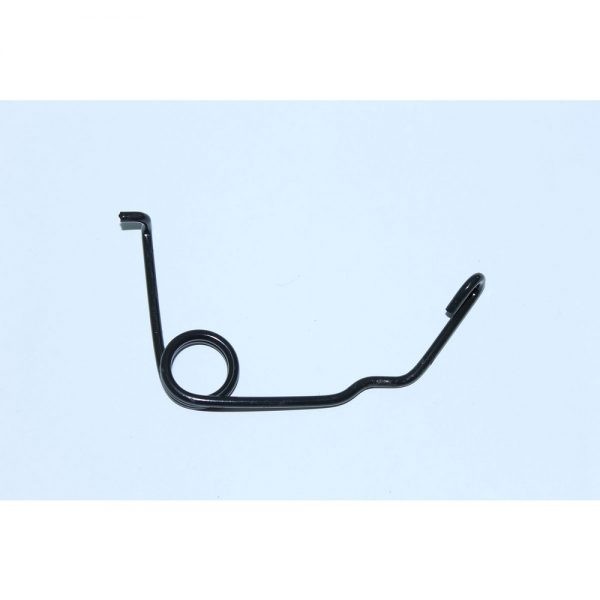
As a rule, repair of the lock involves replacing the spring. She is the main culprit of the spontaneous opening of the hood.
The hood latch cable is also often repaired, seizing or deteriorating over time. The old element is easily cut off from here.
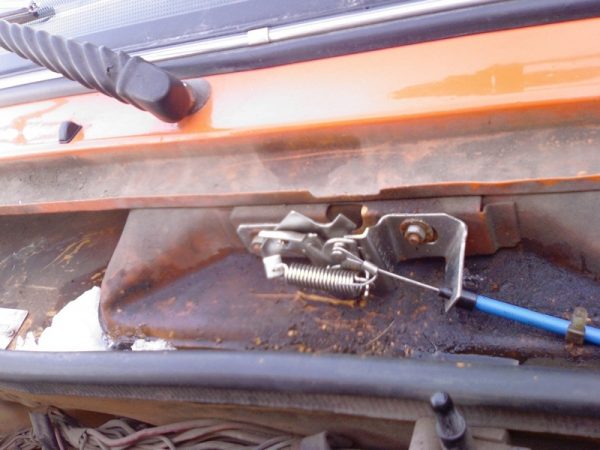
Then the cable must be removed from the shell in which it sits. Install a new one, thoroughly lubricating it with oil.
How to paint a VAZ 2101
Any owner of a "penny" wants his car to shine like new. However, the minimum age of the VAZ 2101 is thirty years, and the body has probably survived more than one welding. To bring it to perfection, you need to carry out high-quality painting. It is customary to distinguish between two types of such works: local and partial painting. In both cases, painstaking and lengthy preparatory work will be required before the main operation. It includes sanding and priming. During partial painting, they work exclusively with damaged body surfaces - hood, doors, trunk, etc.
Particular attention is paid to the choice of paint. To date, there are several options for the composition, differing in quality, manufacturer and price. Everything will depend on the financial capabilities of the owner - the most expensive is powder. The required set of new paintwork should include: primer, paint and varnish.
Painting work included.
- Full or partial dismantling of body elements.
- Washing and mechanical cleaning.
- Carrying out straightening and welding works.
- Surface degreasing.
- Putting.Puttying the body of the VAZ 2101 can be carried out partially
- Padding.
- Degreasing.
- Painting and drying in a special chamber.VAZ 2101 after painting must be left to dry in a special chamber or in a closed garage
- Assembly of nodes and elements.
- Final finishing and polishing.
Behind the car body you need an eye and an eye. This is especially true of the VAZ 2101 model, since the last release of which more than 25 years have passed.

