Side light bulbs for Renault Logan
Content
The lamps in the lighting fixtures of any car constantly burn out, and if you contact a car service every time you replace a light bulb, the cost of such a “repair” will block all others, including fuel costs. But why turn to specialists for every little thing, if everything can be done with your own hands? In this article, we will try to independently replace the parking light bulbs on Renault Logan.
Are the headlights different on different generations of Logan and the replacement of lamps in them
To date, Renault Logan has two generations. The first one began its life in 2005 at the Renault Russia (Moscow) plant and ended in 2015.
The second generation was born in Togliatti (AvtoVAZ) in 2014 and its production continues to this day.

As you can see from the photo above, the headlights of the generations are somewhat different, and these differences are not only external, but also constructive. However, the algorithm for replacing the parking light bulbs for Renault Logan I and Renault Logan II is almost the same. The only difference is in the protective casing (Logan II), which covers the marker lamp base.
As for the rear lights, their design has not changed at all, which means that the algorithm for replacing light bulbs in them has remained the same.
What tools and bulbs will be needed
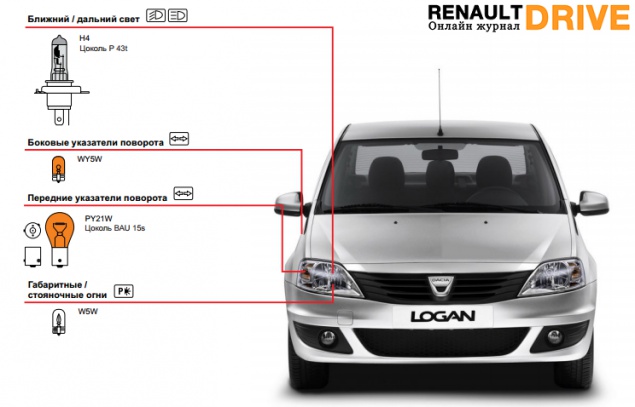
First, let's find out which lamps are used on Renault Logan as side lights. Both generations are the same. In the headlights, the manufacturer installed W5W incandescent bulbs with a power of 5 W in general:
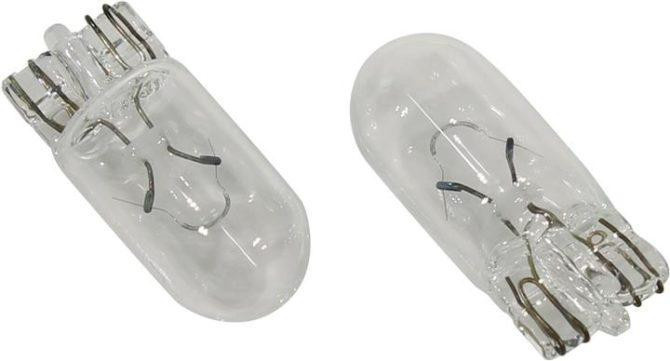
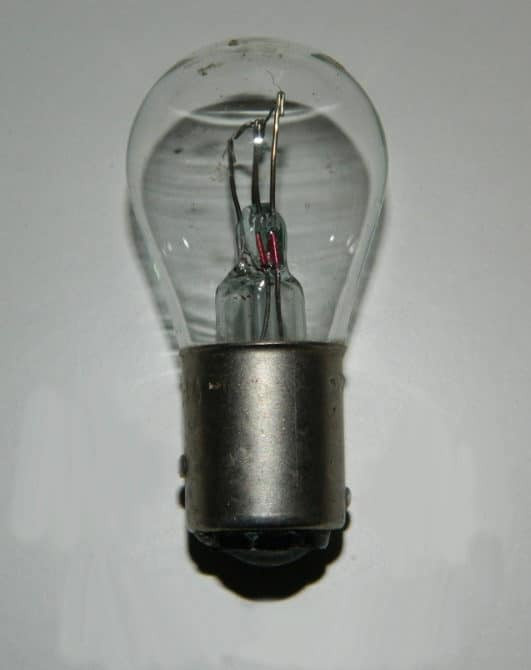
In the taillights, a device (also incandescent) with two spirals - P21 / 5W, is responsible for the side lights and the brake light.
If desired, LEDs of the same size can be installed instead of conventional incandescent lamps.
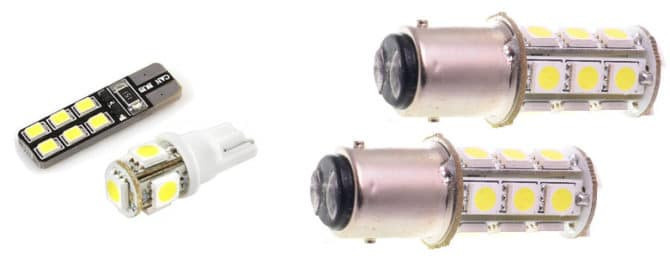
Analog diodes W5W and P21/5W
And now the tools and accessories. We don't need anything special:
- Phillips screwdriver (only for Renault Logan I);
- cotton gloves;
- spare bulbs.
Replacing the front gauge
When replacing the parking light bulbs in the headlights, it is not necessary to remove these headlights, as most resources on the net recommend. Even my hand (and even then not the most elegant one) is able to reach the overall cartridge located on the back of the headlight. If someone interferes with the battery, it can be removed. She doesn't bother me.
There is nothing difficult in the operation, and it does not require physical effort.
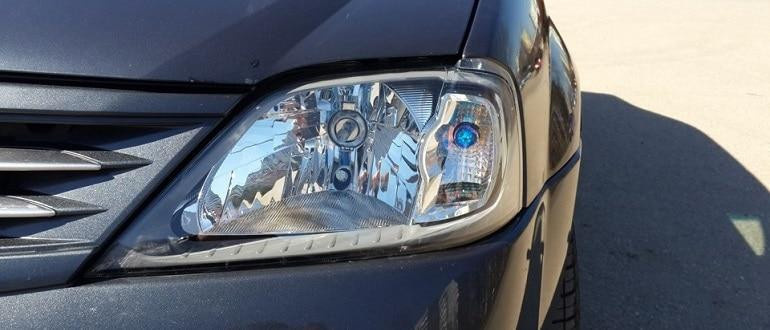
So, open the hood of the engine compartment and proceed to the replacement. Right headlight. We put our hand into the gap between the battery and the body and by touch we are looking for a cartridge of marker lights. Outwardly, it looks like this:
Cartridge marker lights on Renault Logan I in a regular place
Turn the cartridge 90 degrees counterclockwise and remove it along with the light bulb.
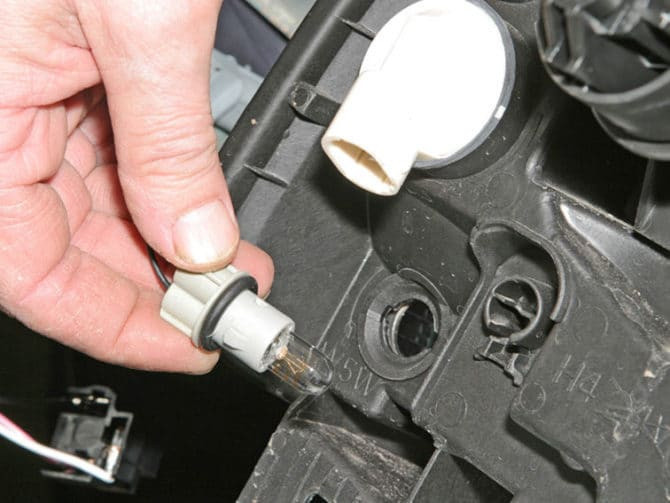
Cartridge of parking lights removed on Renault Logan I
Remove the light bulb by simply pulling on it and putting a new one in its place. After that, we perform all the steps in the reverse order: install the cartridge in place and fix it by turning it 90 degrees clockwise.
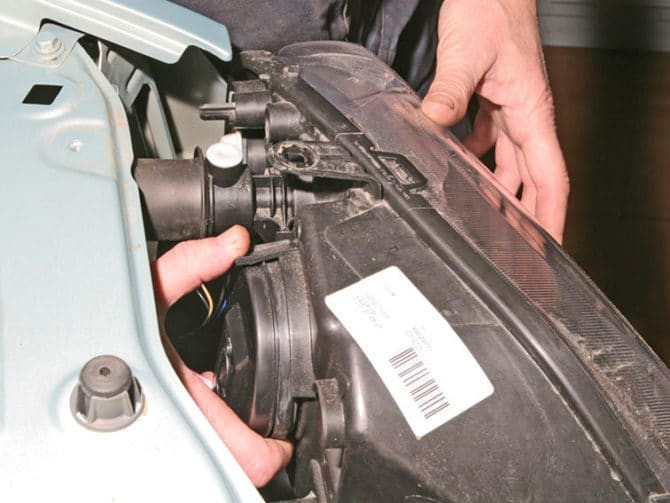
With the left headlight, everything is a little more complicated, since the hole is much narrower and you will have to approach the cartridge from the side of the main light block. My hand will go into this slot, if yours is not, then you will have to partially disassemble the headlight unit. Remove the protective plastic cover from the headlight hatch.
Removing the headlight hatch cover
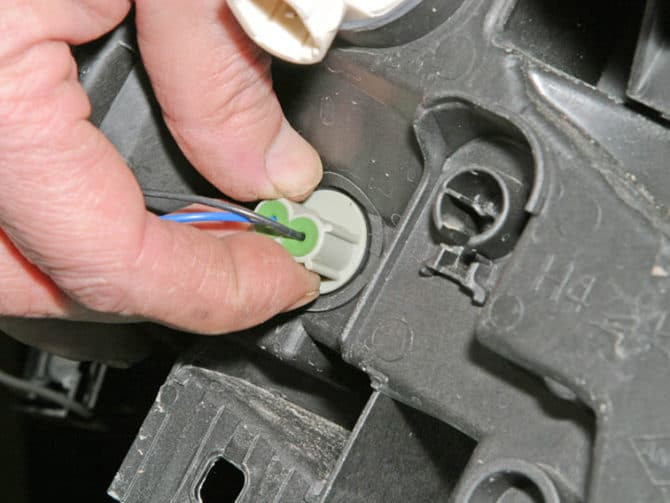
Turn off the power to the headlight by unplugging the connector. Remove rubber stamp.
Removing the power unit and rubber seal
As a result, the gap will expand and it will be easy to climb into it. In the same way, we remove the cartridge, change the light bulb, insert the cartridge, do not forget to put on the sealing sleeve and connect the power to the main light.
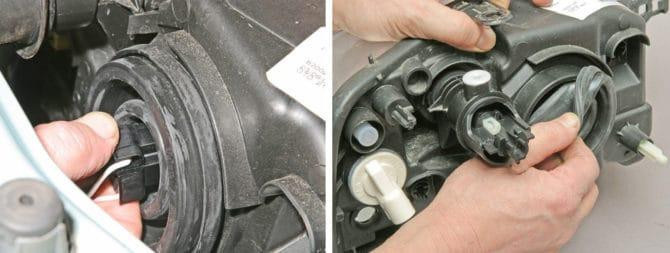
For owners of Renault Logan II, the process of replacing light bulbs in the headlights is not significantly different. The only difference is that the side light lamp socket is closed with a protective cap. Therefore, we take the following steps:
- We grope and remove the cover (small).
- We grope and remove the cartridge (turning).
- We change the lamp.
- Install the cartridge and put on the cap.
Replacing the lamps of the front position lights on the Renault Logan II
Rear clearance replacement
Rear lights Renault Logan I and Renault Logan II have almost the same design. The only difference is that in the first generation, the flashlight is fastened with screws for a Phillips screwdriver (second generation - plastic wing nuts) and 5 clamps of the main board, and not 2.
Let's start with the process of replacing the rear lights (they are also brake lights) on the Renault Logan II, since this modification is more common in Russia. First of all, unscrew the two plastic nuts that hold the flashlight. They are made in the form of lambs, and the key is not needed.
Location of rear light latches on Renault Logan II
Now remove the headlight - gently shake and pull back along the car.
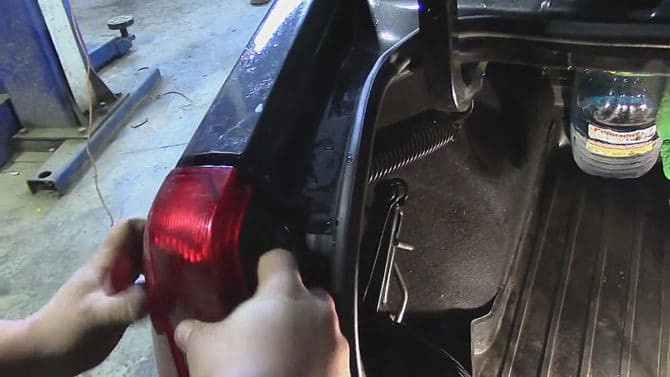
Remove rear light
Disconnect the power connector by pressing the latch.
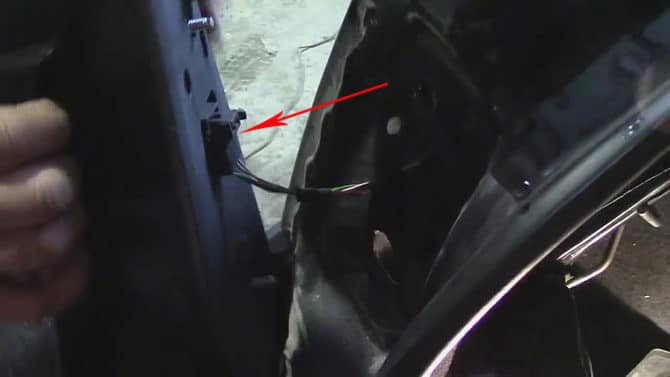
The feed terminal is fixed with a push latch
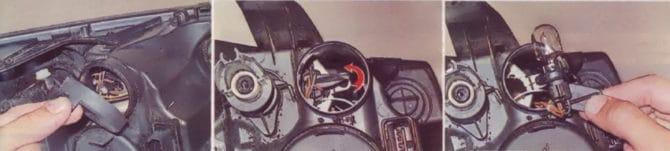
Place the unit upside down on a soft surface and remove the soft seal.
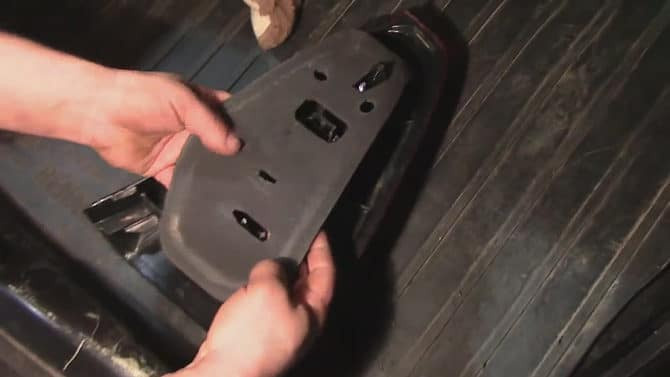
The board with light bulbs is held on by two latches. We compress them and charge.
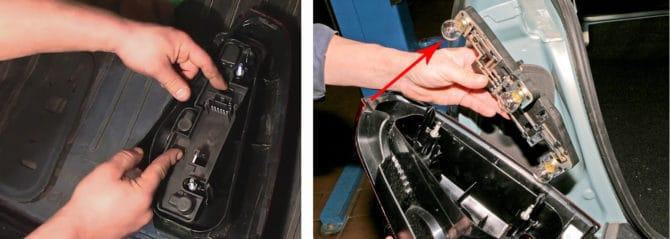
Removing the lamp plate
I marked the lamp responsible for the dimensions with an arrow. It is removed by lightly pressing and turning counterclockwise until it stops. We change the lamp to a working one, install the board in place, connect the power connector, repair the headlight.
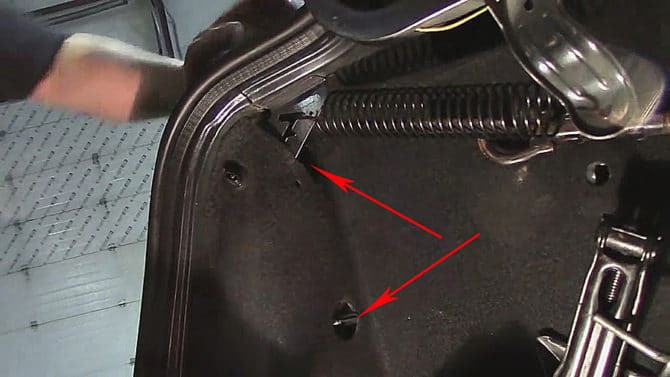
With Renault Logan I, the actions are somewhat different. First, remove the part of the trunk upholstery opposite the headlight. Under the upholstery, we will see two self-tapping screws located in the same place where the wing nuts are located on the Renault Logan II (see photo above). We unscrew them with a Phillips screwdriver and remove the lantern. The rest of the steps for replacing the marker lights are similar. The only thing is that the lamp board on Logan I can be fastened with two or five latches, it depends on the modification of the lamp.
Apparently, we are talking about replacing the side light bulbs on a Renault Logan car. If you carefully read the article, then you can easily cope with this task on your own, spending no more than 5 minutes on the replacement.