Do-it-yourself mechanical and pneumatic reverse hammer
Content
Due to the fact that the assembly technology is very simple, it is easy to make a reverse hammer with your own hands. The device does not contain any complex components and assemblies that require production machines and automated lines.
During work related to straightening the body, special tools are used to level the depressed surfaces. Professional equipment is usually quite expensive. But you can save money on the purchase of certain types of equipment, for example, by making a reverse hammer with your own hands.
Design features
To fix dents on the metal of the car body, it is required to make certain efforts concentrated on a limited area. Access to this sector can be very difficult. As a rule, specialized sets of tools for dismantling bearings are equipped with such a device. If you do not have such equipment, then you can make a reverse hammer with your own hands.
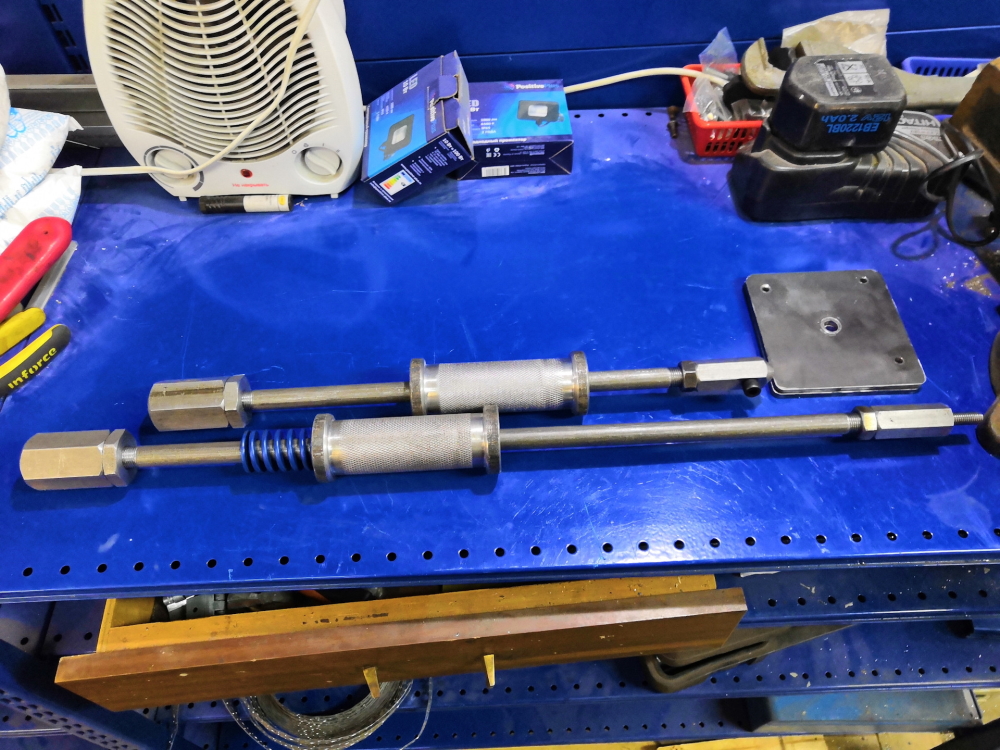
A simple version of a homemade reverse hammer
The simplest option is a steel rod 500 mm long, 15-20 mm in diameter. On the front side there is a handle made of rubber or wood, and on the back there is a metal washer. A weight walks along the rod, helping to increase the power of impact on the object. The working tip is welded to the surface requiring straightening. Fixing a homemade reverse hammer can be done by means of removable grips and hooks.
Tool types
There are several types of such equipment, differing in the method of attachment to metal objects. These include:
- Mechanical with auxiliary nozzles. A set of various adapters and washers is used. The tips are screwed to the surface, and the leveling hooks are fixed on them.
- Pneumatic with vacuum suction cups. Allows you to do without drilling holes. In this case, the paintwork practically does not deteriorate.
- Functioning in tandem with a spotter. This reverse hammer scheme is rarely used due to the complexity of the work. Requires the use of a contact welding unit. The installation site must be pre-cleaned from paintwork.
- With adhesive tips. Special rubber suction cups are attached with a powerful compound based on cyanoacrylate.
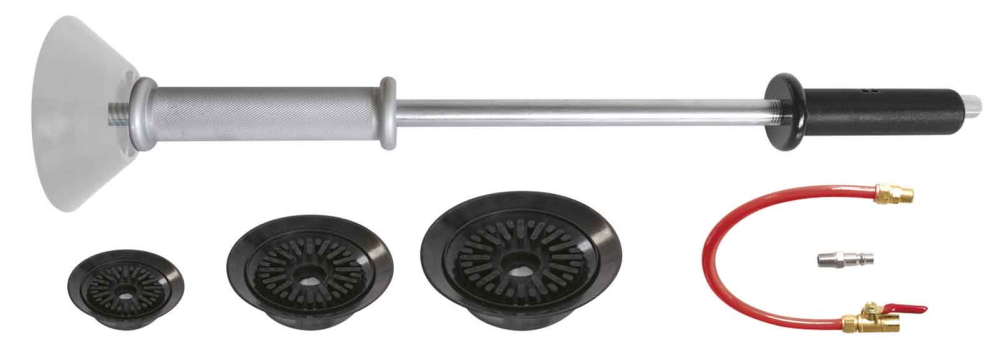
Pneumatic slide hammer with vacuum suction cups
The choice of the type of device is carried out based on the specific circumstances and the exact purpose of the work.
Assembly Parts
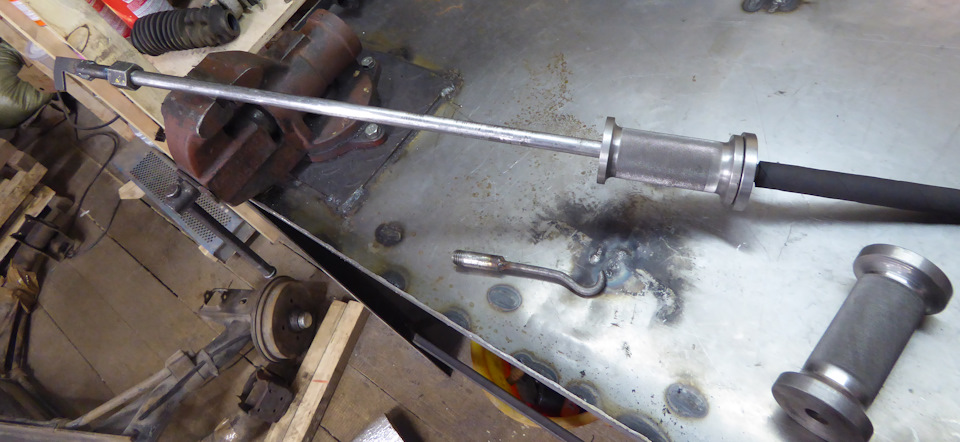
Before you make a reverse hammer with your own hands, you need to prepare materials and tools. The list is simple and includes items that are sure to be found in any garage. So, you will need:
- A metal rod about half a meter long. As a basis, you can use racks from old shock absorbers or hubs.
- Weight with a pre-drilled longitudinal channel.
- Lerka for the formation of threads.
- Welding machine.
- Angle grinder.
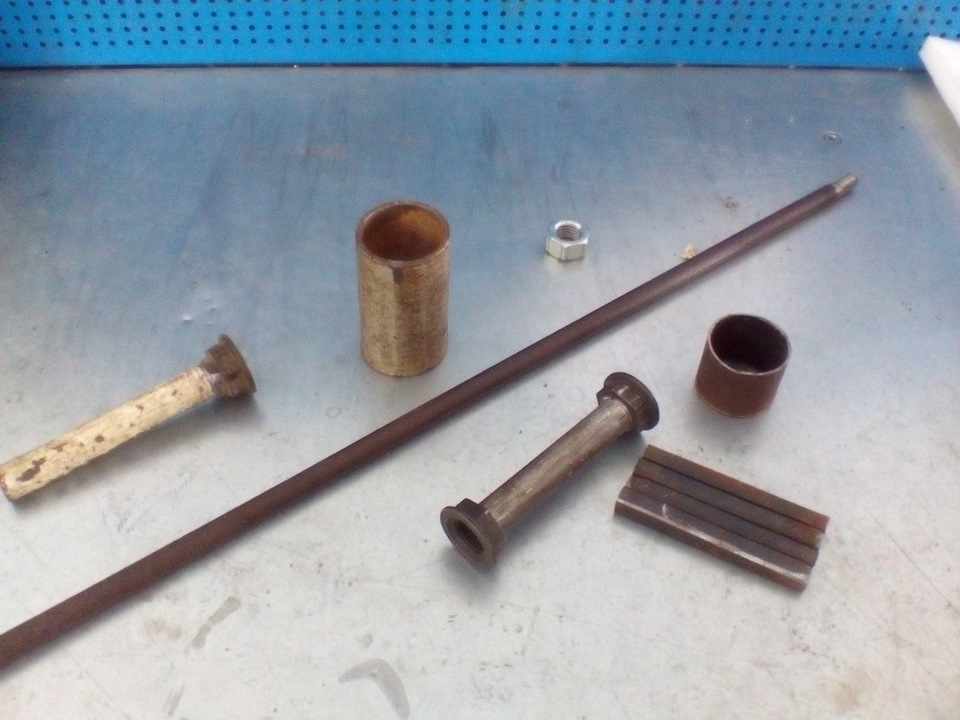
Assembly Parts
Production
In the specialized market, equipment for removing dents on cars is presented in a wide range. It is often included in professional kits, but is also sold separately. Due to the fact that the assembly technology is very simple, it is easy to make a reverse hammer with your own hands. The device does not contain any complex components and assemblies that require production machines and automated lines.
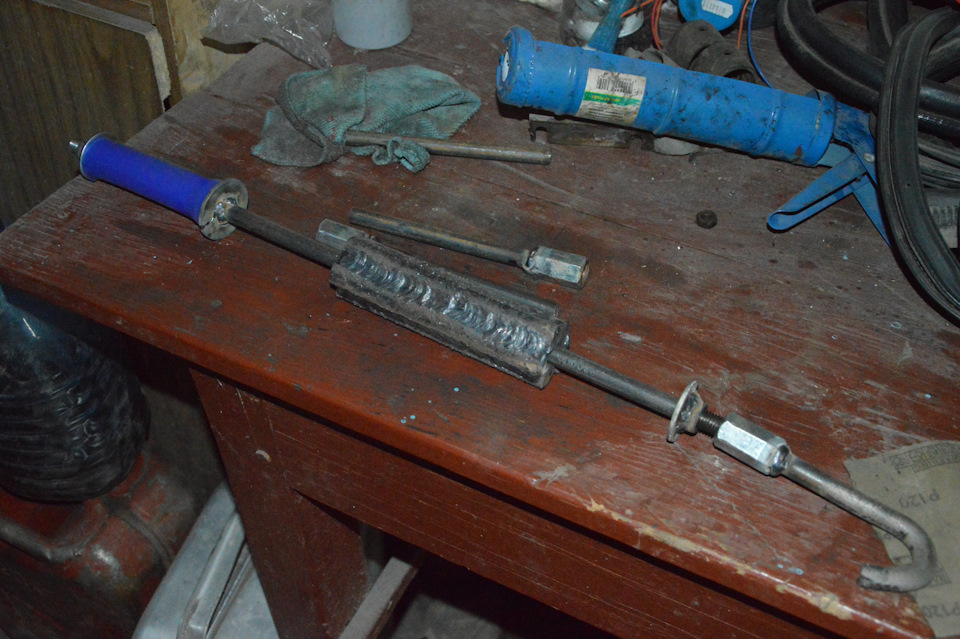
Mechanical reverse hammer
The prepared rod from the shock absorber strut or CV joint is cleaned of corrosive products. The polished space is degreased with alkaline solutions. Next, the procedure is as follows:
- The nozzle with a hook is cauterized to the part of the rod located at the opposite end from the handle. You can do without welding, using a die to create a threaded connection.
- A washer is attached to the curved edge, which plays the role of a stopper for the kettlebell. The load moves along the main pin freely due to the provided gap in the longitudinal channel.
- After installation, the plumb line is sewn up with steel sheets to increase reliability and ensure a snug fit.
- On top of the weighting agent, another ring part is put on, which prevents contact with the holder upon impact.
Homemade mechanical reverse hammer
Finally, the handle is welded to the base base.
Pneumatic slide hammer
A homemade tool is made on the basis of an electric chisel. Step-by-step instruction:
- Bushings, springs, stoppers and anthers are dismantled.
- The body is clamped in a large vise. The cylinder is unscrewed, and the piston and valve are removed from it to block the air flow.
- On the outer part of the round casing, a thread is cut for the future plug. Then the dust filter insert is removed.
- The gun is cut along the semi-axis. This allows you to access the interior space and make accurate measurements.
- According to the fixed digital values, a drawing is drawn up. It will become a kind of instruction for turning a new case in compliance with the given sequence.
- The shank is made so that it can be used to remove the nozzles.
- After that, the end part of the bit is cut off and placed inside the cylinder along with the piston.
- The new frame is assembled according to the previous scheme.
After the installation of the air hose is completed, the do-it-yourself reverse pneumatic hammer is ready to go.