Exhaust installation
Standard mufflers are getting bigger, heavier and heavier, and their sound is getting lighter and lighter. Mufflers and complete units from accessory suppliers are lighter, sound better and give the bike a personal touch.
Mounting the exhaust on a motorcycle
While stock mufflers are getting bigger and bigger and sound pretty deplorable, accessory vendors are offering mufflers and complete units with sporty or authentic and custom designs so you can find that sound as powerful as you want it to be. In addition, their performance is often higher than that of the original models, even for devices approved for road use. The torque curves are much more linear and their weight, often much lighter, helps improve the bike's driving dynamics. In most cases, replacement is easy.
Popular motorcycle customization
From an aesthetic point of view, owners of the current generation of roadsters and sports bikes (with electronic injection) have new possibilities (which could never have been approved in the past): the Hurric Supersport muffler, for example, gives such a short time. and a compelling design that many bikers will love. With a CE certificate, you don't need to go to a technical center or carry a certificate with you, because from a legal point of view, the exhaust label is the only proof of compliance.
In most cases, the adjustment range of the electronic injection system (which ensures the correct mix) involves simple muffler replacement or simple use of a K&N permanent air filter. However, if you are doing multiple tuning jobs (such as a sports air filter plus dB killer removal), then you should consider enriching the injector mixture (such as in Power-Commander form). This also applies if you are installing a non-road approved exhaust system. For cars with carburettors, the motorcycle model largely determines whether or not you need to adapt the mix. If you are using only a CE and dB-killer approved silencer, it is rarely necessary to install a more powerful blasting system.
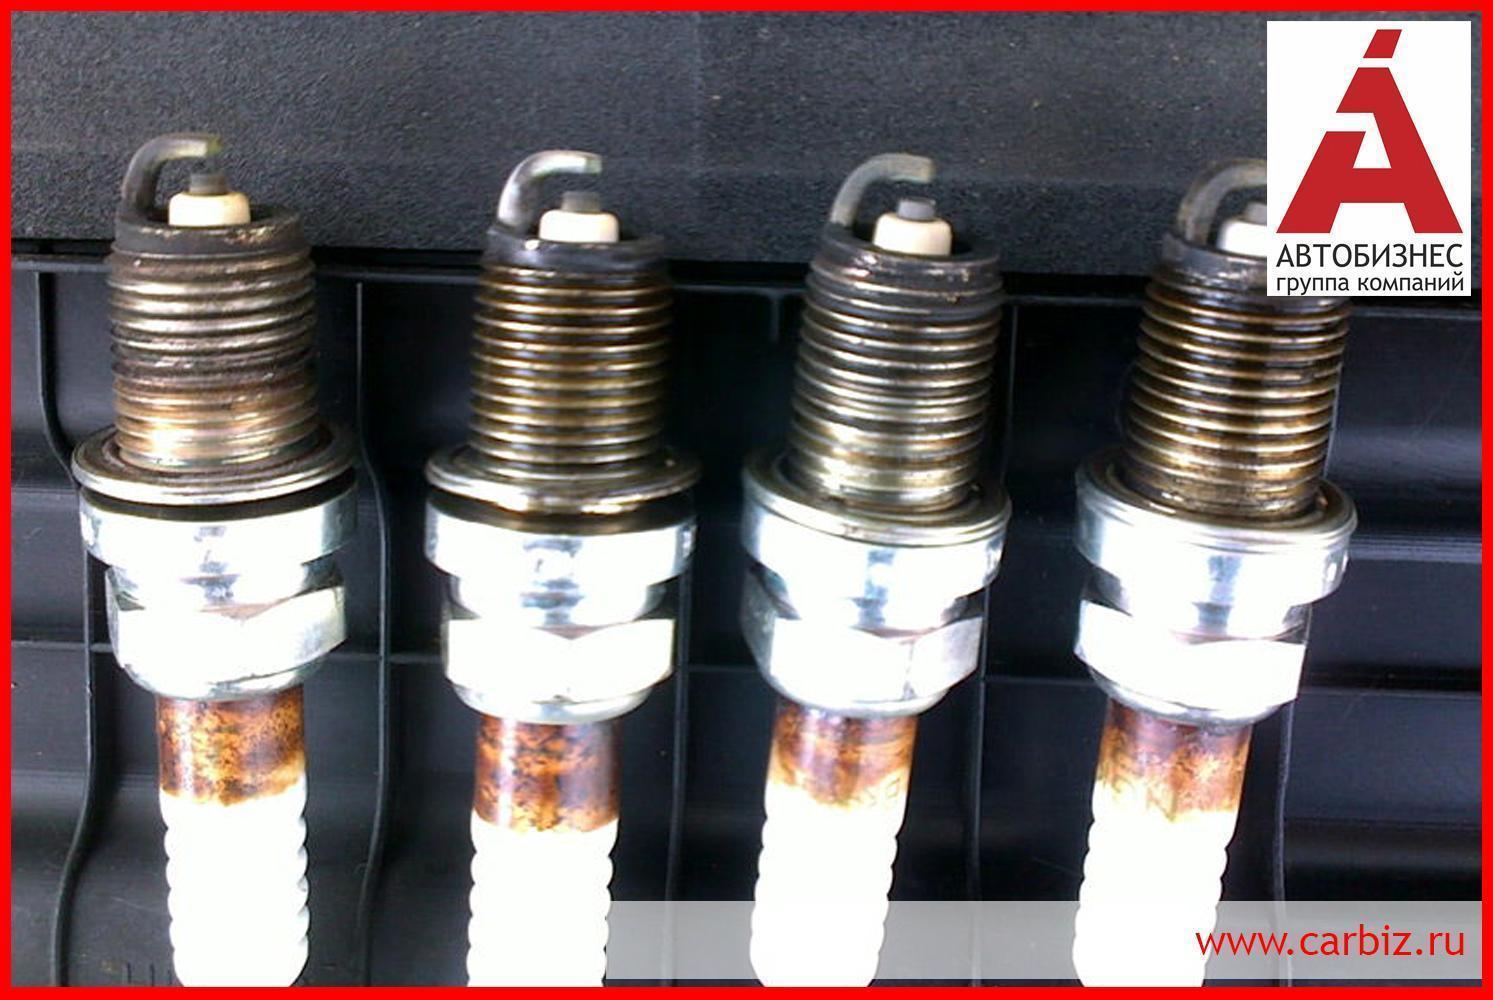
The note : However, if you are doing multiple tuning jobs (muffler plus higher flow air filter), this is often necessary. Therefore, after conversion, we recommend that you review the appearance of the engine spark plugs and look for other symptoms that may indicate a too lean mixture, such as muffler knocking during deceleration or engine temperature.
What about a catalytic converter? Since 2006, emissions checks have been carried out during periodic technical inspections of motorcycles. If the muffler on motorcycles built after 05/2006 has been replaced by an aftermarket device, it must be equipped with a catalytic converter to meet the exhaust emission limits. It is most practical, of course, if the original catalytic converter is housed in the exhaust manifold ... in this case there is no need to equip it with an aftermarket muffler. For vehicles entering the market since 2016, the even stricter Euro4 standard for exhaust and noise emissions applies. You must use a Euro4 exhaust system marked as suitable. The killer decibel is no longer removed on these cars. Cars built before 05/2006 do not need a catalytic converter to meet the emission limit values. This way you do not need to install a catalytic converter when installing a muffler in the aftermarket (please consult our mechanics. Periodic inspection and European legislation.
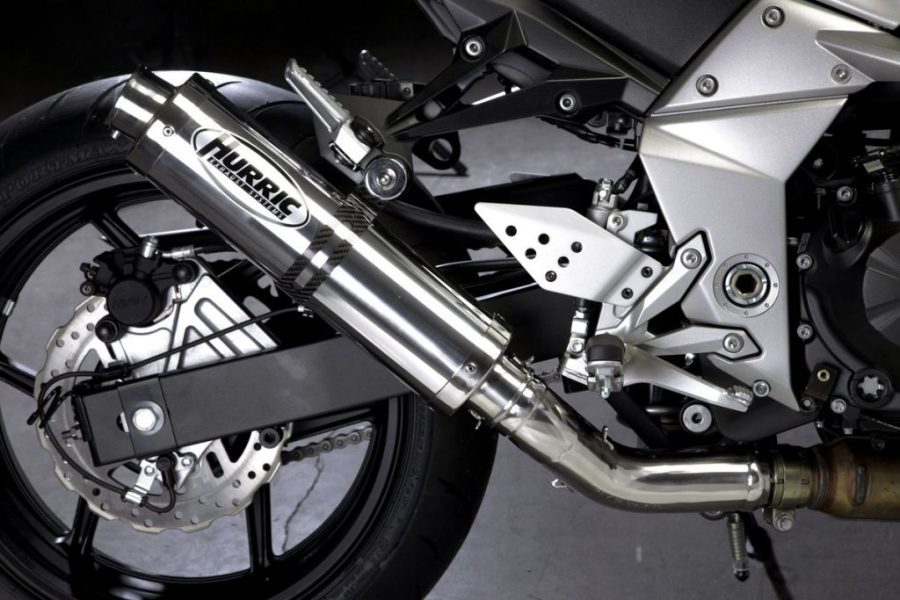
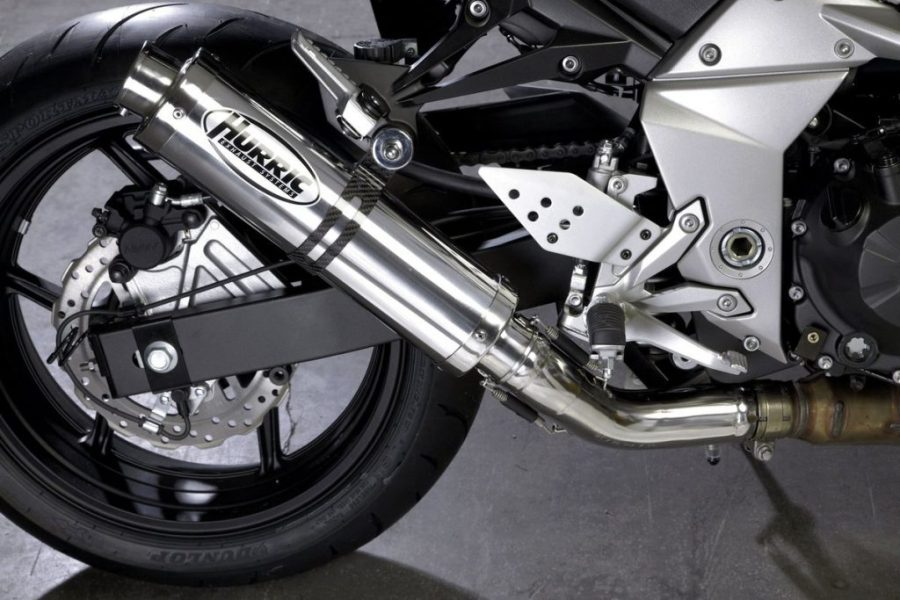
Muffler installation in the aftermarket: example of a Hurric Supersport with catalytic converter on a 750 Kawasaki Z 2007 motorcycle.
Raise the motorcycle safely and securely before starting work (see Our mechanic tips Basic knowledge of stands). Prepare a soft surface (such as a blanket) so that original parts and new installation parts can be safely placed on it without risk of scratching them.
Exhaust conversion - let's get started!
01 - Unscrew the exhaust manifold, muffler support and frame
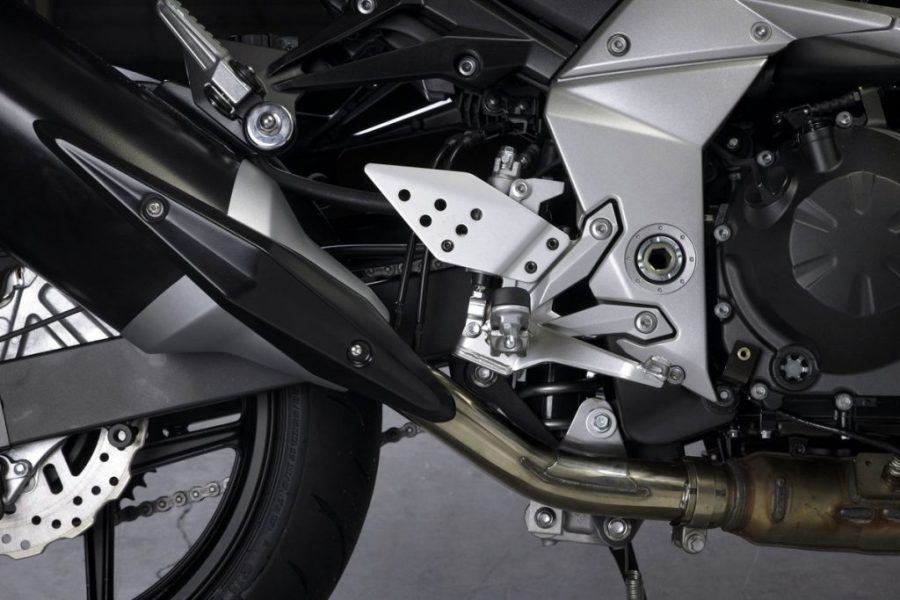
First, loosen the screws on the exhaust manifold clamp, center pipe bracket and muffler bracket on the motorcycle frame. When loosening the last screw, always hold the muffler firmly by the bracket so it does not fall to the ground.
02 - Remove the servomotor cover from the shaft
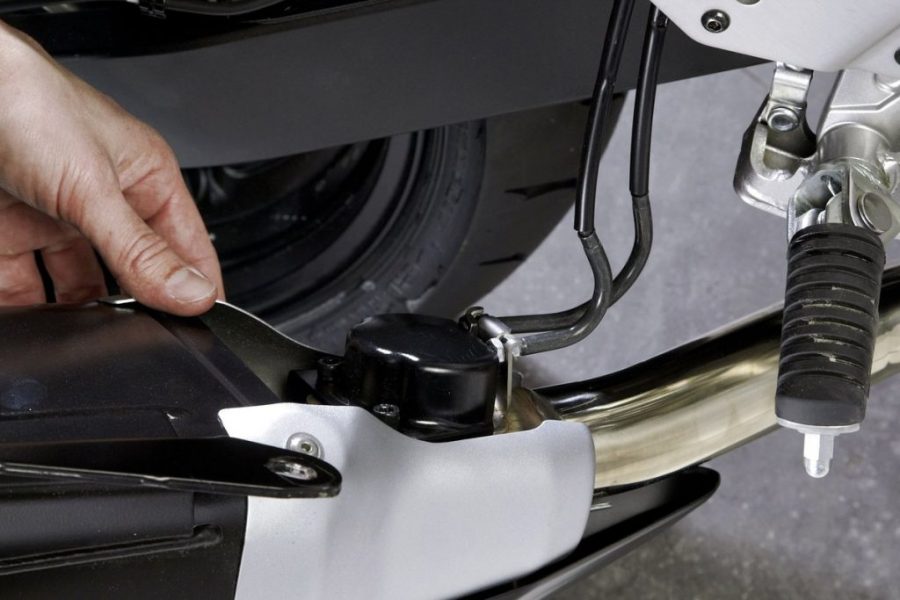
Then turn the muffler clockwise outward and remove the black servomotor cover from the drive shaft by unscrewing the two Allen screws.
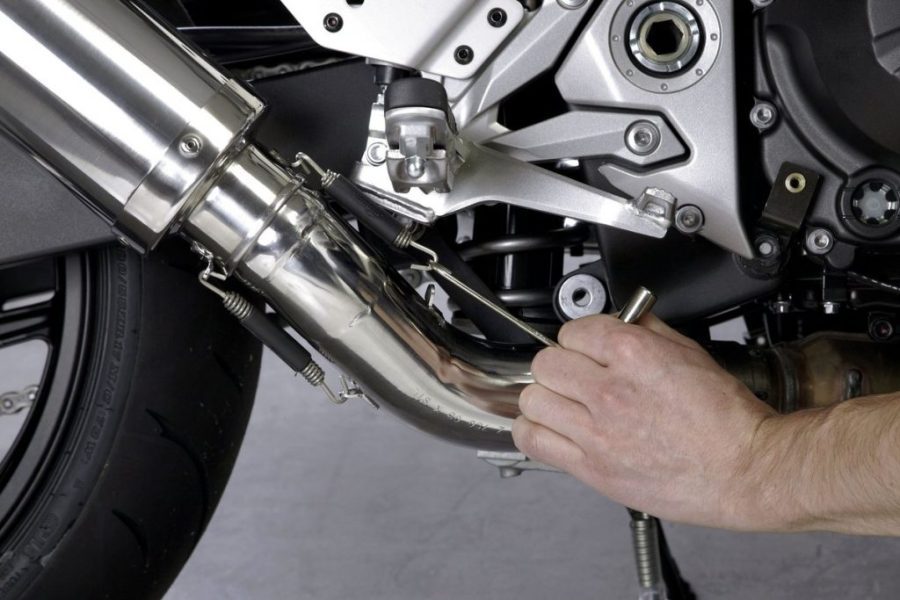
03 - Unhook the Bowden cables

Before disconnecting the Bowden cables from the drive shaft, first loosen the hex nuts that secure them. You can then detach the Bowden cables from the servomotor and secure them to the motorcycle using cable ties.
The note : loose cables must not come into contact with moving parts! Therefore, they must be secured at a safe distance from the chain, sprocket, rear wheel or swingarm! Complete dismantling of Bowden cables is also possible. However, this can lead to an error message in the cockpit, the consequence of which is that the motorcycle only runs in the emergency program, or at least an unwanted error message is constantly displayed. You must switch it off electronically, and this task can only be done by your specialized garage.
04 - Insert the intermediate tube and pre-assemble the manifold clamp
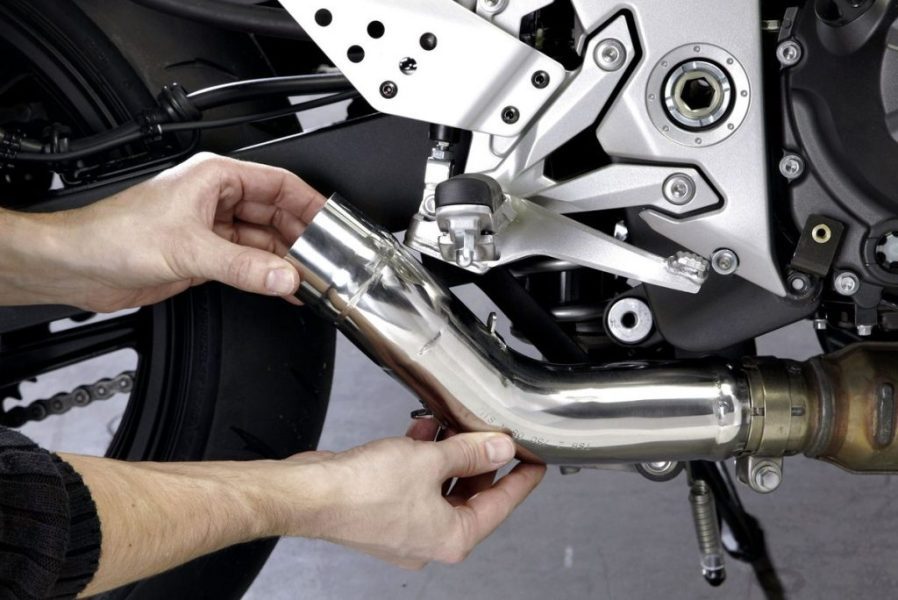
Apply a thin layer of copper paste to the contact surfaces of the pipes to facilitate assembly and eventually can be reassembled. Also apply copper paste to all muffler mounting screws and clamps to prevent rust. Then insert the intermediate Hurric tubing into the original exhaust manifold, then pre-secure its hose clamp without tightening it.
05 - Insert new muffler
Then slide the Hurric muffler fully onto the Hurric intermediate pipe. Position the muffler and intermediate pipe so that the exhaust system is parallel to the motorcycle. Screw the carbon clip onto the Hurric muffler, then attach it to the original motorcycle frame body with the original mounting hardware without tightening it.
06 - Hook the springs
Then hook the springs into the lugs provided for this. We recommend that you use a spring assembly tool.
07 - Orient the muffler
Orient the muffler on the vehicle and make sure it is installed avoiding any stress. This is important to avoid damage from vibration. If the muffler deviates slightly at the attachment point on the frame and you cannot correct this error by orienting the unit, it is better to install a thick flat spacer washer instead of tightening the entire unit to the frame with screws. Then tighten the M8 screws on the frame bracket and the intermediate pipe clamp to a torque of 21 N. After assembly is complete, cleaning and all parts are securely fastened, you can test this new sound. And it is at this moment that no rider can help but smile.