German African Corps Part 2
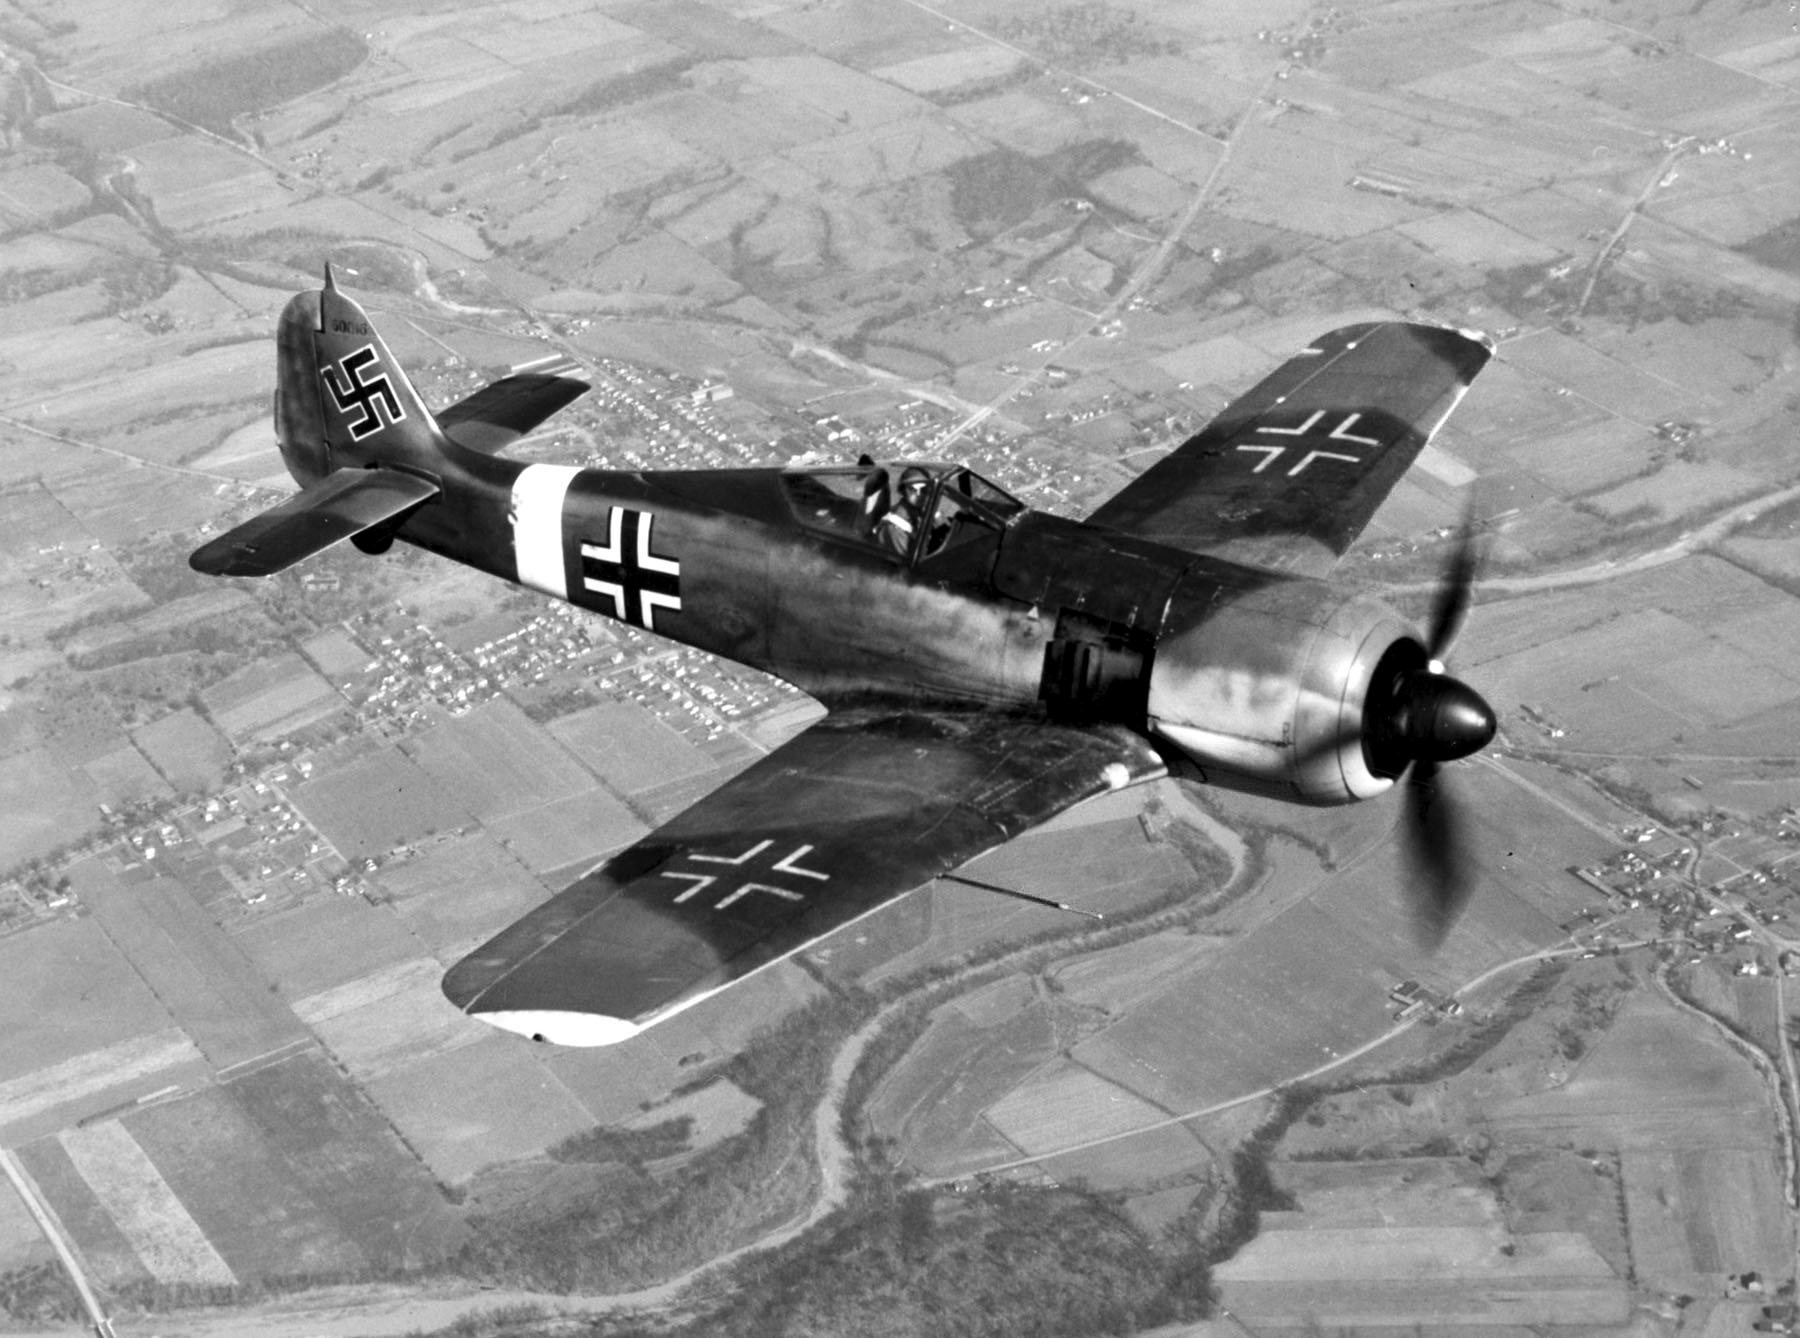
PzKpfw IV Ausf. G is the best tank the DAK has ever had. These vehicles were used from the autumn of 1942, although the first tanks of this modification reached North Africa in August 1942.
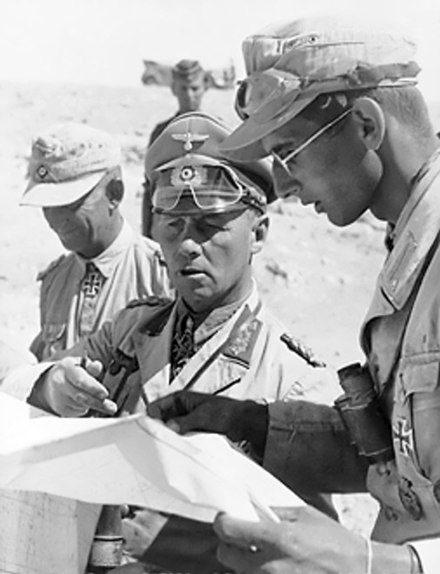
Now not only Deutsches Afrikakorps, but also Panzerarmee Afrika, which included the corps, began to suffer defeat after defeat. Tactically, it's not Erwin Rommel's fault, he did what he could, he became more and more dominant, struggling with unimaginable logistical difficulties, although he fought skillfully, bravely and one can say that he succeeded. However, let's not forget that the word "effective" refers only to the tactical level.
At the operational level, things were not going so well. It was not possible to organize a stable defense due to Rommel's unwillingness to positional actions and his desire for maneuverable battles. The German field marshal forgot that a well-organized defense can break even a much stronger enemy.
However, on a strategic level, it was a real disaster. What was Rommel up to? Where did he want to go? Where was he going with his four very incomplete divisions? Where was he going to go after conquering Egypt? Sudan, Somalia and Kenya? Or maybe Palestine, Syria and Lebanon, all the way to the Turkish border? And from there Transjordan, Iraq and Saudi Arabia? Or even further, Iran and British India? Was he going to end the Burmese campaign? Or was he just going to organize a defense in the Sinai? For the British will organize the necessary forces, as they did before, at El Alamein, and deal him a mortal blow.
Only the complete withdrawal of enemy troops from British possessions guaranteed a final solution to the problem. And the possessions or territories mentioned above, which were under British military control, extended to the Ganges and beyond ... Of course, four thin divisions, which were divisions only in name, and the forces of the Italo-African contingent, this was by no means impossible.
In fact, Erwin Rommel never specified "what to do next." He still spoke of the Suez Canal as the main target of the offensive. As if the world had ended on this important communication artery, but which was also not decisive for the defeat of the British in the Middle East, Middle East or Africa. Nobody raised this issue in Berlin either. There they had another problem - heavy fighting in the east, dramatic fights to break Stalin's back.
The Australian 9th DP played a significant role in all the battles in the El Alamein area, two of which were called the First and Second Battles of El Alamein and one called the Battle of Alam el Halfa Ridge. In the photo: Australian soldiers in the Bren Carrier armored personnel carrier.
Last offensive
When the battle of El-Gazal ended and on the Eastern Front the Germans launched an offensive against Stalingrad and the oil-rich regions of the Caucasus, on June 25, 1942, German troops in North Africa had 60 serviceable tanks with 3500 infantry riflemen. units (not including artillery, logistics, reconnaissance and communications), and the Italians had 44 serviceable tanks, having 6500 riflemen in infantry units (also excluding soldiers of other formations). Including all the German and Italian soldiers, there were about 100 of them in all formations, but some of them were sick and could not fight, 10 XNUMX. infantry, on the other hand, are those who can realistically fight in an infantry group with a rifle in hand.
On June 21, 1942, Field Marshal Albert Kesserling, commander of OB Süd, arrived in Africa to meet with Field Marshal Erwin Rommel (promoted to this rank on the same day) and General of the Army Ettore Bastico, who received the marshal's mace in August 1942. Of course, the topic of this meeting was the answer to the question: what's next? As you understand, Kesserling and Bastico wanted to strengthen their positions and prepare the defense of Libya as Italian property. Both understood that when decisive clashes took place on the Eastern Front, this was the most reasonable decision. Kesserling calculated that if a final settlement took place in the east by cutting off the Russians from the oil-bearing regions, forces would be freed up for operations in North Africa, then a possible attack on Egypt would be more realistic. In any case, it will be possible to prepare it methodically. However, Rommel argued that the British Eighth Army was in full retreat and that the pursuit should begin immediately. He believed that the resources obtained at Tobruk would allow the march to Egypt to continue, and that there was no concern about the logistical situation of Panzerarmee Afrika.
On the British side, on June 25, 1942, General Claude J. E. Auchinleck, commander of British forces in Egypt, the Levant, Saudi Arabia, Iraq and Iran (Middle East Command), dismissed the commander of the 8th Army, Lieutenant General Neil M. Ritchie. The latter returned to Great Britain, where he took command of the 52nd Infantry Division "Lowlands", i.e. was demoted two functional levels. However, in 1943 he became commander of the XII Corps, with whom he fought successfully in Western Europe in 1944-1945, and later took command of the Scottish Command and, finally, in 1947, headed the Far East Command of the Ground Forces until he retired in 1948, that is, he again assumed command of the army rank, in which he was awarded the rank of "full" general. At the end of June 1942, General Auchinleck personally took command of the 8th Army, performing both functions simultaneously.
Battle of Marsa Matruh
British troops took up defense at Marsa Matruh, a small port city in Egypt, 180 km west of El Alamein and 300 km west of Alexandria. A railroad ran to the city, and to the south of it went the continuation of the Via Balbia, that is, the road leading along the coast to Alexandria itself. The airport was located south of the city. The 10th Corps (Lt. Gen. William G. Holmes) was responsible for the defense of the Marsa Matruh area, whose command had just been transferred from Transjordan. The corps included the 21st Indian Infantry Brigade (24th, 25th and 50th Indian Infantry Brigades), which took up defense directly in the city and its environs, and east of Mars Matruh, the second division of the corps, the British 69th dp "Northumbrian" (150. BP, 151. BP and 20. BP). About 30-10 km south of the city was a flat valley 12-XNUMX km wide, along which another road ran from west to east. To the south of the valley, convenient for maneuvering, was a rocky ledge, followed by a higher, slightly rocky, open desert area.
About 30 km south of Marsa Matruh, on the edge of the escarpment, is the village of Minkar Sidi Hamza, where the 5th Indian DP is based, which at that time had only one, the 29th BP. Slightly to the east, the 2nd CP of New Zealand was in position (from the 4th and 5th CP, with the exception of the 6th CP, which was withdrawn at El Alamein). And finally, to the south, on a hill, was the 1st Panzer Division with its 22nd Armored Battalion, the 7th Armored Brigade and the 4th Motorized Rifle Brigade from the 7th Infantry Division. The 1st Dpanc had a total of 159 fast tanks, including 60 of the relatively new M3 Grant tanks with a 75 mm gun in the hull sponson and a 37 mm anti-tank gun in the turret. In addition, the British had 19 infantry tanks. The forces in the Minkar Sidi Hamza area (both the depleted infantry divisions and the 1st Armored Division) were part of the 7th Corps under the command of Lieutenant General William H.E. "Strafera" Gott (died in a plane crash 1942 August XNUMX).
The attack on the British positions began on the afternoon of 26 June. Against the positions of the 50th Northumbarian Regiment south of Marsa Matruh, the 90th Light Division moved, weakened enough to be soon delayed, with considerable assistance from the effective fire of the British 50th Infantry Division. South of it, the German 21st Panzer Division broke through a weakly defended sector north of both New Zealand brigades of the 2nd DP and in the Minkar Caim area east of the British lines the German division turned south, cutting off the New Zealanders' retreat. This was a rather unexpected move, as the 2nd New Zealand Infantry Division had well organized lines of defense and could defend itself effectively. However, being cut off from the east, the New Zealand commander, Lieutenant General Bernard Freyberg, became very nervous. Realizing that he was responsible for the New Zealand troops to the government of his country, he began to think about the possibility of transferring the division to the east. With the southernmost German 15th Armored Division being halted in the open desert by the 22nd British Armistice, any sudden action seemed premature.
The appearance of the 21st Armored Division behind British lines also frightened General Auchinleck. In this situation, at noon on June 27, he informed the commanders of the two corps that they should not risk the loss of subordinate forces in order to maintain their position at Marsa Matruh. This order was given despite the fact that the British 1st Armored Division continued to hold the 15th Panzer Division, now further reinforced by the Italian 133rd Armored Division "Littorio" of the Italian 27th Corps. On the evening of June 8, General Auchinleck ordered the withdrawal of all troops of the 50th Army to a new defensive position in the Fuca area, less than XNUMX km to the east. Therefore, the British troops retreated.
The hardest hit was the New Zealand 2nd Infantry Division, which was blockaded by the German 21st Infantry Division. However, on the night of 27/28 June, a surprise attack by the New Zealand 5th BP on the positions of the German motorized battalion was successful. The battles were extremely difficult, especially since they were fought at the shortest distances. Many German soldiers were bayoneted by the New Zealanders. Following the 5th BP, the 4th BP and other divisions also broke through. The 2nd New Zealand DP was saved. Lieutenant General Freiberg was wounded in action, but he also managed to get away. In total, the New Zealanders had 800 killed, wounded and captured. Worst of all, however, the 2nd New Zealand Infantry Division was not ordered to withdraw to the Fuca positions, and its elements reached El Alamein.
The order to withdraw also did not reach the commander of the 28th Corps, who on the morning of June 90 launched a counterattack to the south in an attempt to relieve the 21st Corps, which ... was no longer there. As soon as the British entered the battle, they were in for an unpleasant surprise, because instead of helping their neighbors, they suddenly encountered all the German forces in the area, that is, with the 21st Light Division and elements of the 90th Panzer Division. It soon became clear that the 28th Panzer Division had turned north and cut off its escape routes directly east of X Corps. In this situation, General Auchinlek ordered to divide the corps into columns and attack to the south, break through the weaker 29th dlek system towards the flat part between Marsa Matruh and Minkar Sidi Hamzakh, from where the X Corps columns turned east and on the night of 29 to June 7 eluded the Germans in the direction of Fuka. On the morning of June 16, Marsa Matruh was captured by the 6000th Bersaglieri Regiment of the XNUMXth "Pistoia" Infantry Regiment, the Italians captured about XNUMX Indians and the British.
The detention of German troops at Fuka also failed. The Indian 29th CP of the Indian 5th Infantry Regiment attempted to organize a defense here, but the German 21st PDN attacked it before any preparations were completed. Soon the Italian 133rd division "Littorio" entered the battle, and the Indian brigade was completely defeated. The brigade was not recreated, and when the Indian 5th Infantry Division was withdrawn to Iraq at the end of August 1942, and then transferred to India in the fall of 1942 to fight in Burma in 1943-1945, 123 stationed in India division was included. Composition. BP to replace the broken 29th BP. Commander of the 29th BP brig. Denis W. Reid was taken prisoner on June 28, 1942 and placed in an Italian POW camp. He fled in November 1943 and managed to get to the British troops in Italy, where in 1944-1945 he commanded the Indian 10th Infantry Division with the rank of major general.
Therefore, the British troops were forced to retreat to El Alamein, Fuka was executed. A series of clashes began, during which the Germans and Italians were finally arrested.
First Battle of El Alamein
The small coastal town of El Alamein, with its railway station and coastal road, is located a few kilometers west of the western edge of the verdant farmlands of the Nile Delta. The coastal road to Alexandria runs 113 km from El Alamein. It is about 250 km from Cairo, located on the Nile at the base of the delta. On the scale of desert activity, this is really not much. But here the desert ends - in the triangle of Cairo in the south, El Hamam in the west (about 10 km from El Alamein) and the Suez Canal in the east lies the green Nile Delta with its agricultural land and other areas covered with dense vegetation. The Nile Delta stretches to the sea for 175 km, and is about 220 km wide. It consists of two main branches of the Nile: Damietta and Rosetta with a large number of small natural and artificial channels, coastal lakes and lagoons. It's really not the best area to maneuver.
However, El Alamein itself is still a desert. This location was chosen primarily because it represents a natural narrowing of the area suitable for vehicular traffic - from the coast to the inaccessible swampy basin of Qattara. It stretched for about 200 km to the south, so it was almost impossible to get around it through the open desert from the south.
This area was preparing for defense already in 1941. It was not fortified in the truest sense of the word, but field fortifications were built here, which now only needed to be updated and, if possible, expanded. General Claude Auchinleck very skillfully threw the defense in depth, not placing entire troops in defensive positions, but creating maneuverable reserves and another line of defense located a few kilometers behind the main line near El Alamein. Minefields were also laid in less protected areas. The task of the first line of defense was to direct the movement of the enemy through those minefields, which were additionally protected by heavy artillery fire. Each of the infantry brigades that created defensive positions (“boxes traditional for Africa”) received two artillery batteries as support, and the remaining artillery was concentrated in groups with corps and army artillery squadrons. The task of these groups was to inflict strong fire attacks on enemy columns that would penetrate deep into the British defensive lines. It was also important that the 8th Army received new 57-mm 6-pounder anti-tank guns, which proved to be very effective and were successfully used until the end of the war.
By this time, the Eighth Army had three army corps. XXX Corps (Lt. Gen. C. Willoughby M. Norrie) took up defenses from El Alamein to the south and east. He had the 8th Australian Infantry Regiment in the front line, which placed two infantry brigades in the front line, the 9th CP off the coast and the 20th CP a little further south. The division's third brigade, the Australian 24th BP, was located about 26 km from El Alamein, on the east side, where luxury tourist resorts are located today. The 10th South African Infantry Regiment was positioned south of the 9th Australian Infantry Division with three brigades on the north-south front line: 1st CT, 3rd CT and 1st CT. And, finally, in the south, at the junction with the 2nd Corps, the Indian 9th BP of the Indian 5th Infantry Division took up the defense.
South of XXX Corps, XIII Corps (Lieutenant General William H. E. Gott) held the line. His 4th Indian Infantry Division was in position on the Ruweisat Ridge with its 5th and 7th CPs (Indian), while its 2nd New Zealand 5th CP was slightly to the south, with the New Zealand 6th and 4th -m BP in the ranks; her 4th BP was withdrawn back to Egypt. The Indian 11th Infantry Division had only two brigades, its 132nd CP had been defeated at Tobruk about a month earlier. The British 44th CU, 4th "Home Districts" Infantry, defending north of the 2nd Indian Infantry, was formally assigned to the New Zealand 4th Infantry, although it was on the other side of the XNUMXth Indian Infantry.
Behind the main defensive positions was X Corps (Lt. Gen. William G. Holmes). It included the 44th "Home County" Rifle Division with the remaining 133rd Rifle Division (the 44th Rifle Division then had only two brigades; later, in the summer of 1942, the 131st Rifle Division was added), which occupied positions along the ridge of Alam el Halfa, which divided the plains beyond El Alamein in half, this ridge stretched from west to east. This corps also had an armored reserve in the form of the 7th Panzer Division (4th BPC, 7th BZMOT) stretched to the left of the southern wing of the 10th Corps, as well as the 8th Infantry Division (having only the XNUMXth BPC) occupying positions on the ridge of Alam el-Khalfa.
The main German-Italian strike force at the beginning of July 1942 was, of course, the German African Corps, which, after the illness (and capture on May 29, 1942) of armored general Ludwig Kruwel, was commanded by armored general Walter Nering. During this period, the DAK consisted of three divisions.
The 15th Panzer Division, temporarily under the command of Colonel W. Eduard Krasemann, consisted of the 8th Tank Regiment (two battalions, three companies of PzKpfw III and PzKfpw II light tanks and a company of PzKpfw IV medium tanks), the 115th Motorized Rifle Regiment ( three battalions, four motorized companies each), 33rd Regiment (three squadrons, three howitzer batteries each), 33rd Reconnaissance Battalion (armored company, motorized reconnaissance company, heavy company), 78th Anti-Tank Squadron (anti-tank battery and self-propelled anti-tank battery), 33rd communications battalion, 33rd sapper and logistical service battalion. As you might guess, the division was incomplete, or rather, its combat strength was no more than that of a reinforced regiment.
The 21st Panzer Division, commanded by Lieutenant General Georg von Bismarck, had the same organization, and its regimental and battalion numbers were as follows: 5th Panzer Regiment, 104th Motor Rifle Regiment, 155th Artillery Regiment, 3rd reconnaissance battalion, 39th anti-tank squadron, 200th engineer battalion. and the 200th communications battalion. An interesting fact about the artillery regiment of the division was that in the third division in two batteries there were 150-mm self-propelled howitzers on the chassis of the French Lorraine transporters - 15cm sFH 13-1 (Sf) auf GW Lorraine Schlepper. (e). The 21st Panzer Division was still weakened in battles and consisted of 188 officers, 786 non-commissioned officers and 3842 soldiers, a total of 4816 against regular (atypical for it) 6740 people. It was worse with equipment, because the division had 4 PzKpfw II, 19 PzKpfw III (37 mm cannon), 7 PzKpfw III (50 mm cannon), one PzKpfw IV (short-barreled) and one PzKpfw IV (long-barreled), 32 tanks all in working order.
The 90th Light Division, under the command of Armored General Ulrich Kleemann, consisted of two partially motorized infantry regiments of two battalions each: the 155th Infantry Regiment and the 200th Infantry Regiment. Another one, 361st, was added only at the end of July 1942. The latter consisted of Germans who served in the French Foreign Legion until 1940. As you understand, it was not quite a certain human material. The division also had the 190th artillery regiment with two howitzers (the third division appeared in August 1942), and the third battery of the second division had four guns 10,5 cm Kanone 18 105 mm, 580 instead of howitzers. squadron regiment, 190th communications battalion and 190th engineer battalion.
In addition, the DAK included formations: the 605th anti-tank squadron, the 606th and 609th anti-aircraft squadrons.
A column of fast Crusader II tanks armed with a 40 mm cannon, which were equipped with armored brigades of British armored divisions.
The Italian forces of Panzerarmee Afrika consisted of three corps. The 17th corps (corps general Benvenuto Joda) consisted of the 27th dp "Pavia" and the 60th dp "Brescia", the 102nd corps (general of the corps Enea Navarrini) - from the 132nd dp "Sabrata" and 101- dpzmot "Trento" and as part of the XX motorized corps (corps general Ettore Baldassare) consisting of: 133rd DPanc "Ariete" and 25th DPZmot "Trieste". Directly under the command of the army were the XNUMXth Infantry Division "Littorio" and the XNUMXth Infantry Division "Bologna". The Italians, although in principle they followed the Germans, also suffered considerable losses and their formations were severely depleted. It is worth mentioning here that all Italian divisions were two regiments, and not three regiments or three rifles, as in most armies of the world.
Erwin Rommel planned to attack the positions at El Alamein on June 30, 1942, but the German troops, due to difficulties in delivering fuel, did not reach the British positions until a day later. The desire to attack as soon as possible meant that it was undertaken without proper reconnaissance. Thus, the 21st Panzer Division unexpectedly encountered the 18th Indian Infantry Brigade (Indian 10th Infantry Brigade), recently transferred from Palestine, which took up defensive positions in the Deir el-Abyad area at the base of the Ruweisat ridge, dividing the space between the coast and El Alamein, and the Qattara depression, almost equally divided in half. The brigade was reinforced with 23 25-pounder (87,6 mm) howitzers, 16 anti-tank 6-pounder (57 mm) guns and nine Matilda II tanks. The attack of the 21st DPunk was decisive, but the Indians put up stubborn resistance, despite their lack of combat experience. True, by the evening of July 1, the Indian 18th BP was completely defeated (and never recreated).
Better was the 15th Armored Division, which bypassed the Indian 18th BP from the south, but both divisions lost 18 of their 55 serviceable tanks, and on the morning of July 2 they could field 37 combat vehicles. Of course, intensive work was going on in the field workshops, and repaired machines were delivered to the line from time to time. The most important thing, however, was that the whole day was lost, while General Auchinleck was strengthening the defenses in the direction of the main German attack. Moreover, the 90th Light Division also attacked the defensive positions of the South African 1st Infantry Division, although the German intention was to outflank the British positions at El Alamein from the south and cut off the city by maneuvering seaward to the east of it. Only in the afternoon of the 90th, Dlek managed to break away from the enemy and made an attempt to reach the area east of El Alamein. Again, precious time and losses were lost. The 15th Panzer Division fought the British 22nd Armored Division, the 21st Panzer Division fought the 4th Panzer Division, the 1st 7th Armored Division and the XNUMXth Armored Division respectively.