Clean and operate the carburetor ramp
Content
Good control of the four-cylinder air-gasoline mixture
Kawasaki ZX6R 636 Model 2002 Sports Car Restoration Saga: Episode 9
The Kawasaki Zx6r does not have an electronic injection, but a carburetor. like many motorcycles of its time. 100% mechanical element directly connected to the gas handle and controlled by a cable. Its work is not obvious, even if its function is obvious: to provide and manage the air-gasoline mixture, as well as to feed the cylinder of this explosive mixture. Not being able to test the bike on the road before buying it, I have no idea about its condition.
Dismantling the carburetor
Given what has already been dismantled, and especially the widespread dirt on the bike and in its bottles, I am not talking about the fear of removing the carburetor ramp and making sure it was okay.
The tank was repatriated home, as was the air box. I have already cleaned the filter and checked if everything is in order elsewhere. These two elements are removed at high speed: this operation has become a pure routine (I re-fixed everything for transport).
The hardest part in this case is still access to the clutch screws that tighten the intake pipes to the carburetors.
The more you get into a 4-cylinder engine, the easier it is. We can rotate them to find the correct angle and we leave. The flexible extension I have in the tool case helps a lot. Digging a little in my head, I shoot by hitting the ramp, and later the "Shpok" all came from the block. I see butterflies, check their hole, look at their clothes ...
I take advantage of the presence of Alex, on vacation at home and a motorcyclist mechanic student, to be ashamed to exploit him. It's also a mechanic: helping each other and sharing know-how. And his hand is safer than mine. Surely she's innocent, isn't she? He tells me he knows carburetors by heart.
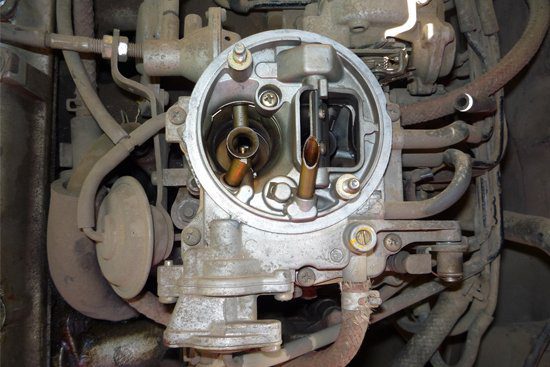
Checking the carburetor
So I let him check everything and focus on his game, watching from the corner of his eye what was happening there. And now, surprise: it's flawless! Not the slightest trace, no sediment, dirt or bucket of anything. I wonder if she is the age of the motorcycle arteries, this ramp is in a hurry! It must be rolling hard in front of me, right?
In the meantime, this will avoid costly repairs and the transition to an ultrasonic tank. Good savings that offset the unexpected costs! I check that everything is sliding correctly, and especially bushels, that nothing is missing, and I lubricate some of the moving parts, just to make sure. I even push vice to check sprinklers and back to RAS. The membranes are definitely deformed, but not excessively, and they are still waterproof. Just like carburetors. An invaluable respite. This is true. And right now, everything that's free is a godsend!
I put the ramp back on the shelf in the garage and make sure the intake pipes have not been damaged by the harassment of spending time outdoors. For granted, I spray them with Teflon spray. This gives them a shine and protects them for a while. Again, it's okay. I shouldn't have relaxed my attention, I can feel it.
The accelerator cable also benefits from being fully lubricated and inspected so that it will no longer wear out. This can break at the slightest opportunity or make the gas grip reluctant. Again, it's okay and it's a relief.
I can handle dismantling the cylinder head.
Required Tools
- Screwdriver
- Pipe wrench
- WD40
Remember
- A well-clogged carburetor is a motorcycle that spins!
- Time is taken not so much by disassembly as by reassembly
- The more cylinders you have on the engine, the more time it becomes ...
Not to do
- Disassemble the carburetor too much if you are unsure of yourself
- Disassemble a full ramp if you are not an expert