Basic body repair techniques
Content
Unfortunately, external damage to the car is a frequent occurrence, and the cost of even minor body repairs in a car service is quite high. But some damage to the case is quite feasible to fix on your own.
To the credit of Russian motorists, many of them, unlike foreign colleagues, have good skills in repairing car bodies with their own hands. True, this dignity is based on the negative aspects of our reality. The condition of the roads, to put it mildly, is far from ideal, and the level of wages has not yet reached the level at which one can afford to go to a car service with any dent.

No car is immune from "injury". Even with the impeccable observance of the rules by its owner, the likelihood of an accident remains; Unfortunately, not all drivers are supporters of the established order of traffic on the roads. Also, damage (scratches, dents, chips) can be obtained by simply leaving the car in the parking lot.
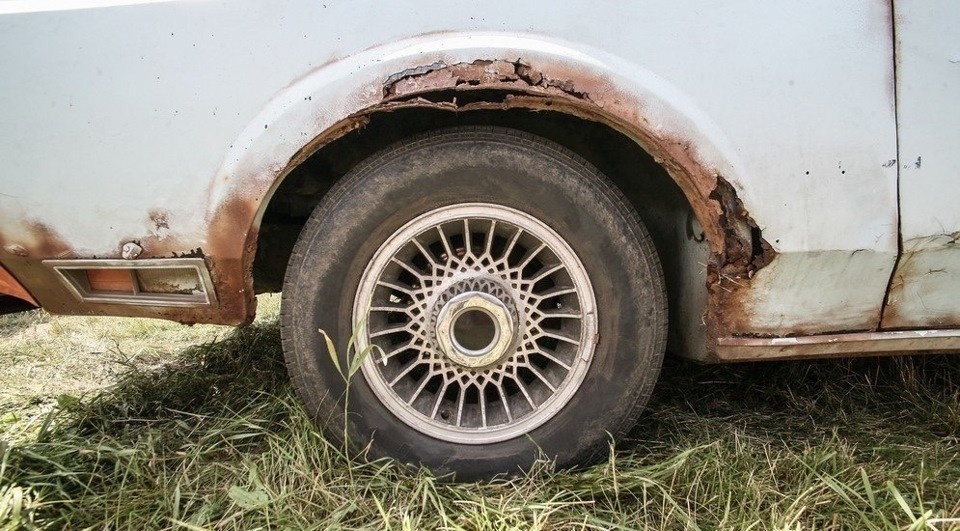
Cars have another formidable enemy: time, which does not forgive steel bodies. Given the attachment of most of our car owners to their cars, the elimination of the effects of corrosion is becoming one of the main tasks of body repair.
It is worth mentioning right away that body repair in the absence of professional skills and specialized equipment is possible only with minor damage that does not affect the load-bearing structural elements of the car.
Rust removal
The fight against corrosion is one of the most time-consuming processes, but if it is neglected, in a fairly short period of time, a car that has not even been in an accident will lose its visual appeal. Well, if time has already been lost, and rust makes itself felt with red spots, it is urgent to take measures to localize and eliminate foci of corrosion.
Cleaning the body from rust involves two stages of its implementation: mechanical cleaning and treatment with special chemicals. For the first stage of work, you will need
- metal brushes (manual or in the form of devices for a drill or grinder "),
- a good amount of sandpaper with a grit of 60-80,
- soft tissue
To carry out chemical rust removal, you must purchase the appropriate reagent. The range of oxide converters is quite wide, they are mainly made on the basis of phosphoric acid. Available in liquid, gel and aerosol form. Of course, all modifiers have their own specific composition, therefore, they require mandatory thorough familiarization with the rules for their use and compliance with the recommended safety measures.
- First of all, you need to thoroughly wash the car and identify pockets of corrosion on its surface.
- Mechanically (with a brush or sandpaper), rust spots are cleaned to a “healthy” metal. Do not immediately apply an anti-corrosion agent; it is difficult to predict the depth of the lesion.
- No matter how hard you try, small pockets of rust will remain in pores or cavities where mechanical penetration is no longer possible. It is at this stage that a rust converter is produced (according to the instructions for its use), which should not only completely dissolve it, but also cover the affected area with a kind of primer suitable for further puttying. General advice cannot be given here: some formulations require mandatory rinsing after a certain reaction time, others, on the contrary, remain at the site of application until completely dry.
- It often happens that corrosion eats metal into a thin "mesh" or even through. Through holes can of course be sealed with fiberglass using epoxy compounds, but still the best solution would be to tin the area and solder a metal patch. The tinned area will not corrode further and the included patch can be easily pierced to apply the required thin layer of putty on top.
- We must not forget that the cleaned places must be immediately treated with an anti-corrosion compound. At intermediate stages of work, it is necessary to exclude even the slightest chance of hitting the surface of the water.
Fight against scratches
Scratches on the car body are a common headache. There are many reasons for its appearance, even if you do not count the accident: stones and foreign objects flying out from under the wheels, uncut branches of bushes and trees, playful children's hands or someone's malicious intent. How to repair the body with your own hands with such damage?
If there is no deformation of the carcass, first of all it is necessary to accurately determine the depth of the scratched layer; this may be a slight damage to the top lacquer coating, a violation of the integrity of the paint layer or a deep pothole in the metal, with chipped paint. As a rule, in good light, this can be seen with the naked eye, if desired, you can use a magnifying glass.
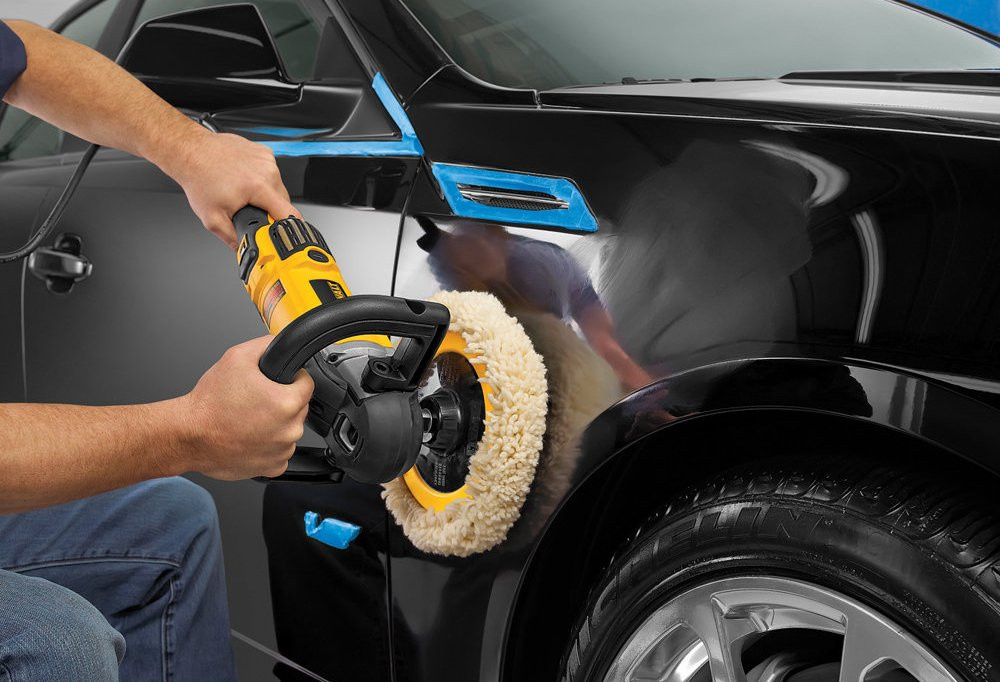
For superficial damage, when only a layer of protective varnish is scratched, special polishes (liquid or paste) or polishing sticks, for example, recommended by many car owners Fix it Pro or Scratch Free, can be used to remove light scratches. The principle of its application is simple:
- The surface is thoroughly washed from dirt and dust with detergent and dried.
- Polish is applied to the damaged area and rubbed into the surface with a clean, dry cotton cloth in a circular motion.
- After the composition has completely dried (according to the instructions attached to the product), final polishing is carried out.
If the scratch is deeper, there will be much more problems. You will need a restoration pencil (e.g. NEW TON) or a small amount of paint; the difficult moment in both cases is the correct selection of the desired shade.
- The surface is thoroughly washed with car shampoo, dried and degreased. To prevent paint from getting onto an undamaged area, it is best to cover the area around the scratch with masking tape.
- With the help of a pencil, a coloring composition is applied. If there are none, then the scratch is carefully filled with paint with an ordinary toothpick, but not to the surface, but so that there is room for applying the polishing composition.
- After the paint has completely dried, polishing is performed as described above.
The 3M Scratch and Swirl Remover method of removing scratches received very good reviews, which does not require the necessary selection of paint. Essentially, this compound slightly dissolves the paint around the scratch and fills it in. After polishing, the damage becomes almost invisible.
If scratching the surface to the metal has led to the destruction (chipping, cracking) of the paint, then simple restoration methods cannot be dispensed with. You will need to cut out the scratch, apply an anti-corrosion compound, putty the damaged area, level it and prepare it for painting. Often this requires painting the entire body element.
Dent repair, straightening
This process is one of the most difficult, and you should carefully evaluate your capabilities before taking on this job.
First of all, you need a specialized tool that not everyone has. Secondly, the work requires high qualifications - the master must "feel" the metal. Third, don't rely too much on do-it-yourself car body repair videos posted online; what looks simple and clear on the screen may not be so in practice. However, if the desire to test your strength prevails, you can try in several ways.
If the dent has not formed a metal fold (“bump”), you can try to gently squeeze it out from the inside. To do this, use levers or hooks if there is a stop point inside the body to apply force. Sometimes a little effort or a few light taps with a mallet (rubber mallet) is enough to straighten the dent.)
Some craftsmen use car chambers (ball chambers) to extrude the "kicker". The method is old, but often very effective. The camera is placed under a dent, covered with cardboard or plywood pads so that it does not break, or placed on a canvas cover. When pumped with air, it can, by increasing in volume, straighten the metal in place.
It is recommended to try to heat the dent around the circumference with a hairdryer, and then cool it sharply with liquefied carbon dioxide (in extreme cases, only with a damp cloth). Sometimes this gives a very good effect.
If you have a vacuum suction cup or spotter at your disposal, then the problem is even easier to solve. The application of force from the outside of the dent allows you to straighten the geometry of the body as much as possible, without even damaging the paint layer. However, this method is only applicable to cars that have not previously been caulked and repainted. An example of using the observer is shown in the proposed video.
If the dent is large, deep, and associated with an obvious wrinkle in the metal, you need to straighten it out.
- It also starts with the maximum draw of the part to be repaired. If any of the stiffeners (struts or ribs) are damaged, you need to start with them.
- Smoothing the wrinkled area starts from the edges, gradually moving towards the center. After squeezing out large dents, you can proceed to a rough restoration of the geometry of the part using hammers and anvils for straightening. You may need to heat the area around the area being straightened; this can be done with a building hair dryer.
- The quality of anti-aliasing is constantly checked during operation. Deep bumps and pits are not allowed, which will not allow high-quality puttying in a damaged area. After completion of work, the straightened area must be thoroughly cleaned from paint to metal.
How to clean a car? Basic rules and possible difficulties.
Puttying and preparing for painting
The final appearance of the damaged part of the body is putty. Before starting work, the surface is thoroughly washed, dried and cleaned of dust. Particular attention should be paid to transitions to an undamaged area: putty will not fall on a glossy coating, it should be cleaned with fine sandpaper to a matte finish. Immediately before applying the putty layer, the surface is degreased with a solvent.
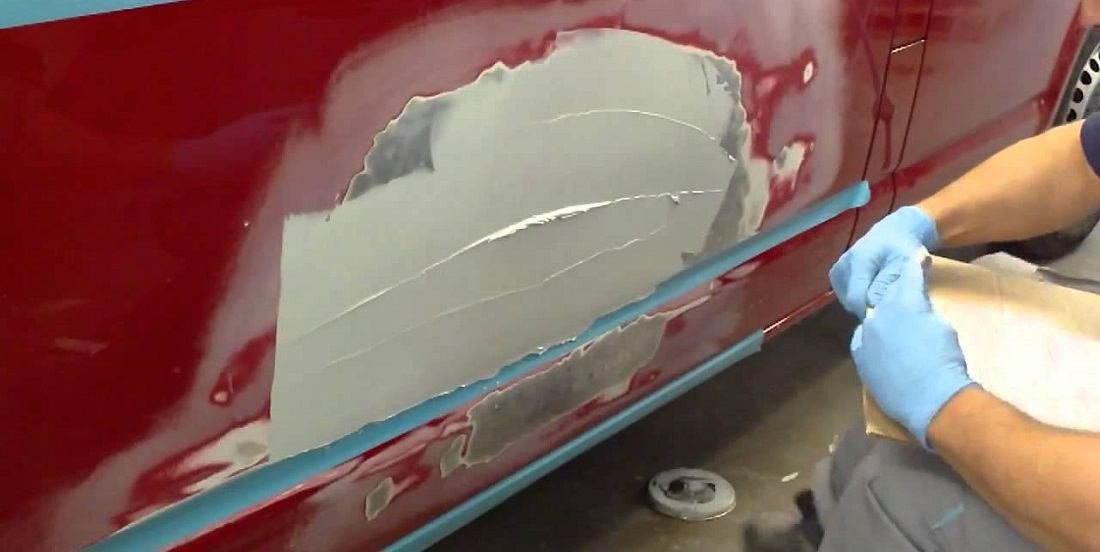
For the first layer, a coarse-grained putty with a hardener is used. Apply evenly with a rubber spatula. Don't try to display part geometry right away; a thick layer may crack during shrinkage. It is necessary to allow the applied layer to dry and then apply the next one. The maximum thickness of the applied putty, as a rule, should not exceed 1-2 mm.
After the applied coarse-grained putty has dried, the surface of the part is carefully sanded and sanded until the damaged area acquires the desired shape. Only after grinding the surface and thoroughly cleaning it from the resulting dust can a thin layer of finishing putty be applied, which should cover all minor risks and scratches. After this layer has completely dried, the surface is carefully sanded with sandpaper with a grit of no more than 240. If the resulting appearance of the part suits the master, you can proceed to priming and painting.
Therefore, minor body repairs are quite feasible for a diligent motorist. However, for starters, it may be worth practicing on some old and unnecessary parts of the body in order to at least “fill your hand” a little. If the result is not as expected, it would be wiser to entrust the repair to specialists.