Repair and clean the exhaust line
From pickling to cleaning and polishing manifolds, mufflers to keep everything shining
Saga of restoration of the sports car Kawasaki ZX6R 636 model 2002: 8nd series
I use dismantling of a motorcycle and engine parts. to rebuild or rather clean and polish the exhaust pipe.
From the beginning I saw that the exhaust line was highly oxidized and that the Scorpion's adaptable stainless steel exhaust, chic and approved, needed a good cleanliness.
Cleaning the muffler
As far as the muffler goes, no big deal: good fabric, some Belgom Alu and voila, the exhaust regains its luster after a little elbow oil. The inner stone wool is in good condition after being examined with a flashlight. Whatever happens, I have the original item that came with the motorcycle. In case you never know. It's more likely more effective, but remains to be seen. Before you can take the tests, you will have to be able to drive. And it's not won yet.
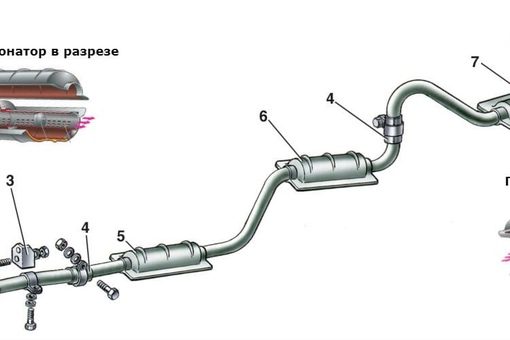
Removing the exhaust line
For the exhaust line, that's a different story. To do this, we will have to fight the Gugeons who hold him in place. They are 8 and not the most cooperative. Quite simply, they are mutilated with rust, to the point where I already know what is likely to happen: breakdown! Rust significantly weakens this highly stressed part.
A double thread is screwed into the cylinder head on one side, and the other side of the thread is used to secure the line in place. As a result, exhaust connections will also be needed, the original ones of which give me no illusions about the possibility of their restoration. This will avoid leaks, a small additional cost to be expected when re-assembling the cylinder head: € 10 for 4.
First try: Manual rubbing with WD-40
But let's get back to my collectors. No matter how much I spray WD40 liberally and go smoothly, I try to clean the nuts and thread with the brush I found, but it does nothing: the metal is too attacked. Effects? A key that starts skating right away is a sign of a struggling gougeon that soon breaks in the next half second, with no way to warn him. And M ... e!
However, there is more, and I know that it is possible to extract whoever stays on the cylinder head. Well then, everything is going well and you guessed it, nothing is going as planned throughout this whole motorcycle restart. We will see this during the rebuild attempt, once the cylinder head is back in shape. Finally, if he ever manages to renew his original constitution.
The good thing about the exhaust is that it won't go away on its own: the springs take care of the grain as well. If, according to Deproges, the hanger is the enemy of man, in my opinion, the same as spring. It's vicious, spring. And it's not easy to remove when you only have a nose and good motivation. There are special tools for extracting them. These are hooks. And honestly, if the usefulness isn't always obvious when removing them when it comes to handing them over, we'll praise the genius of whoever first invented the tool. A bit like the way I regularly praise the inventor of hot water. Yes, I did not invent hot water literally and figuratively - and I regularly regret it.
Spring puller price: from 6 euros
On the other hand, even without introducing the laws of thermodynamics, the line falls quite easily. Ugh. I hold it in place with wedges and hand strength. It is also fixed under the motorcycle and on the pot. The operation is tedious, but everything is going well. Often I regret having to work at ground level and I understand the value of a motorcycle bridge (next article). It's so nice to have everything close at hand, in front of you, without having to play co-author. Sometimes I miss not only intellectual flexibility: my old bones and wooden tendons remind me of this ... This man is small in front of the car.
Second test: Sanding with a silicon carbide drill and strip brushes
Truce of retreat. Once on land, I begin to undress him.
Again, I would kiss the inventor of the large cordless drill. The joint garage allowed me to discover the silicon carbide SiC brushes. It's just great.
So with a little time and a few passes, the planks start to wear out smoothly, but the result is flawless! Oh joy, the line regains its original color without the need for hours of rubbing, like a sick person.
That's all, I'm in love with this thing! If I thought about it, I could put a high temperature varnish on the line to protect it from further aggression, as described in the silent maintenance tutorial (see article). I could also go for the last oxidation patches. But on the one hand, I like the not-too-new side, and on the other hand, I don't have the place or time for the outdoor surgery. I'm going to have to fiddle with a line-sized paint booth and I'm not sure if Kirill, the boss, will let me do this.
Well, okay, I could also make out the exhaust fumes on the line, and once it was in two, take care of yourself regardless of both. But on the one hand, if it's simple, it's not funny, on the other hand, I usually have a month to do it all over again, and at such a rate I am not there. First of all, I learn as I go. As the saying goes, you learn from your mistakes, I feel like I have a chance to finish amazingly after this restoration!
The next step is to disassemble the carburetor ramp to allow access to the sore cylinder head. Read!
Remember
- The mechanical solution (drill + grid brush) is the most efficient and fastest
- Brush can't go everywhere, hand finishing is a must for most perfectionists
- There is high temperature varnish to make the line shine
Not to do
- Break one or more studs by disassembling the line
- Take a linear spring by removing it
Tools and accessories:
- Disassembly of the line: pipe wrench or blade wrench, WD40, spring puller, line holding wedge
- Line cleaning: drill, brush on chuck and / or cloth, renovator and elbow oil
- Supplies: no, everyone was present in the garage to participate
