Steam roller part 2
Last month we made a working steam engine, and I think you already liked it. I propose to go further and make a road roller or a locomotive with an engine.
The model must independently run around the room. Although the downside is the water dripping from the car and the rather unpleasant smell of burning tour fuel lollipops, I think that I did not discourage anyone and suggest that you go to work briskly.
Tools: Drill on a pole or tripod, wheel with sandpaper attached to the drill, hacksaw, large sheet metal shears, small soldering torch, tin, solder paste, stylus, punch, M2 and M3 die for cutting threads on the spokes, rivet for rivets with ear with a small margin. rivets.
Materials: Steam boiler jar, length 110 x 70 mm diameter, sheet half a millimeter thick, e.g. for building sills, corrugated board from a jar for a car shed, four large jar lids and one smaller one, knitting needles from an old bicycle wheel, crochet wire diameter 3 mm, copper sheet, thin brass tube with a diameter of 3 mm, cardboard, fine-mesh steering chain, travel fuel cubes, small screws M2 and M3, eye rivets, silicone high-temperature titanium and finally chrome spray varnishes and matte black.
Boiler. We will make a metal jar 110 by 70 millimeters in diameter, but one that can be opened and closed with a lid. Solder a tube with a diameter of 3 mm to the lid. This will be the pipe through which the steam will come out, setting the machine in motion.
Hearth. The small one is a chute with a handle. The firebox should contain two small white pellets of camping fuel. We cut out the focus and bend it from a 0,5 mm sheet. The grid of this focus is shown in the picture. I suggest that you first cut out the template from cardboard and only then mark and cut out the sheet. Any irregularities should be smoothed out with sandpaper or a metal file.
Boiler body. Let's make it from sheet metal, circling its grid according to cardboard templates. The dimensions must be adapted to your box. As for the holes, we drill 5,5 millimeters under the loops, and 2,5 millimeters where the wires from the knitting needles will pass. The axis of the circles will be made of 3 mm crochet wire. And holes of this diameter should be drilled in the provided place.
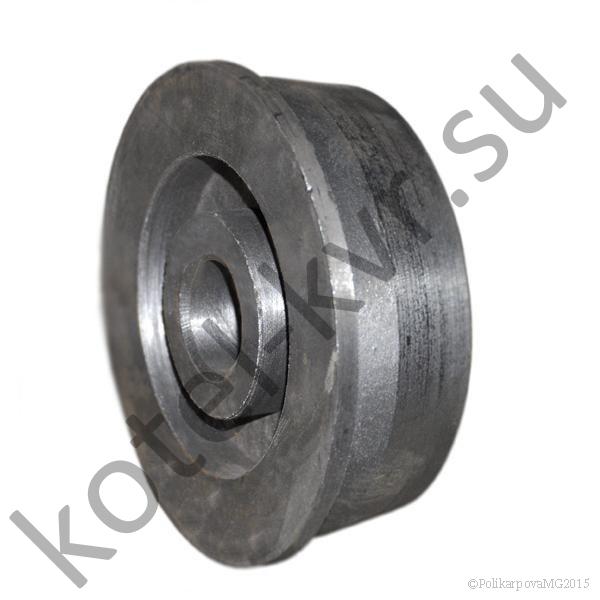
road wheels. We will make them from four jar lids. Their diameter is 80 millimeters. Inside, the pieces of wood are glued together with glue from a glue gun. Since the inside of the lid is covered with plastic that does not stick to the glue, I hasten to advise using a dremel equipped with a fine abrasive stone to get rid of this plastic. Only now it is possible to glue the wood and drill a central hole through both covers for the axles of the track rollers. The axis of the circles will be a knitting wire with a diameter of 3 mm, threaded at both ends. Spacers made of two pieces of brass tube are placed between the wheels and the firebox on the spoke. The ends of the spokes are secured with nuts and locknuts to prevent unscrewing while driving. I propose to seal the running edges of the wheels with a self-adhesive aluminum tape on a rubber basis. This will ensure a smooth and silent ride of the car.
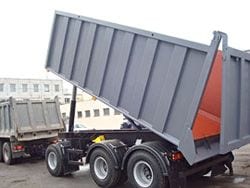
Roller. For example, I suggest using a small jar of tomato puree. It is easy to get it, unlike, for example, peas, through small holes drilled on both sides of the can. Also, the tomato soup is delicious. My jar is a bit small and I suggest you find a bigger one.
roller support. We will make it from a sheet of metal by tracing its grid over cardboard templates. The dimensions must be adapted to your box. We connect the upper part with soldering. We drill a hole for the axle after soldering the parts together. Fasten the support to the boiler with a clamp and an M3 screw. From below, the support closes the boiler box and is fastened with an M3 screw. The connector is shifted to the right to accommodate the worm handle. This can be seen in the photo.
Coil Holder. The cylinder holds the handle in the shape of an inverted U. Cut out the appropriate shape and bend it from the sheet, adjusting the dimensions to the size of the jar. The handle runs on an axle made from a spoke and cut on both sides. The spoke is covered with a spacer tube so that the working roller has some play in relation to the handle. In practice, the front of the rink proved to be too light and had to be weighted down with a piece of metal.
Roller fixation. The roller is surrounded by a horizontal rim. We will bend this form from sheet metal. The roller rotates on an axle with a spoke and threads on both sides passing through the handle and rim. Between the holder and the cylinder are gaskets made of two pieces of brass tube, forcing the cylinder to be centered relative to the holder. The threaded ends of the spokes are fixed with nuts and locknuts. This fastening ensures that it does not unscrew by itself.
Torsion mechanism. It consists of a screw fixed in a holder riveted to the furnace sheets. On the one hand there is a rack that interacts with the gear drive of the steering column. To make a snail, we wind a thick copper wire on a brass tube, which is molded on both sides. The wire is soldered to the tube. We will mount the tube in the holder on the wire axis from the knitting needle. The steering wheel can be made, for example, from a large embossed washer with four holes drilled in it. We attach it to the spoke, i.e. steering column. The roller control mechanism actually worked in such a way that when the driver turned the powerful steering wheel, the gear mode rotated, moving the auger on which the chain scrolled. The chain, attached to the rim of the roller, rotated it around a vertical axis, and the machine turned. We will recreate it in our model.
Roller cab. Cut it out of a piece of sheet metal 0,5 mm in shape, as shown in the drawing. We fasten it with two eyelets to the boiler casing.
roof shading. Let's look for a jar whose sheet is corrugated. From such a sheet we cut out the shape of the roof. After sanding and rounding the corners in a vise, bend the eaves of the canopy. Attach the canopy with nuts to the four spokes above the roller operator's cab. We can choose between soldering or silicone. Silicone is flexible, durable and comfortable to use.
chimney. In our case, the chimney plays a decorative role, but if you don't have enough, you can drain the used steam from the car into the chimney, this will make a big impression. We will roll from a sheet of metal onto a wooden hoof. The hoof is made from a traditionally shortened handle from a shovel to snow. The height of the chimney is 90 millimeters, the width is 30 millimeters at the top and 15 millimeters at the bottom. The chimney is soldered to the hole of the roller bearing.
Model assembly. We connect the stator of the machine with the boiler casing with two lugs placed in pre-designated places. Fix the boiler with four bolts and connect it to the steam engine support. We put on the roller support and fasten it with a clamping bolt. We fix the roller on its vertical axis. We fix the track rollers and connect them with a drive belt to the flywheel. Boiler equipment can be additionally equipped with a water gauge glass and a safety valve. Glass can be fixed at the bottom of the box in a soldered holder.
Everything is sealed with high temperature silicone. The safety valve can be made of a threaded spring tube and a bearing ball. Finally, screw on the chimney and roof. Fill the cauldron with water to about 2/3 of the can's capacity. A plastic pipe connects the boiler nozzle to the steam engine nozzle. Place two round pellets of camping fuel on the burner and light them. Do not forget to lubricate the mechanism of the machine. After a while, the water will boil and the machine should start without problems. From time to time we lubricate the piston, surface and crank mechanism. If you turn the roller a little, the machine will cheerfully drive around the room, patting on the carpet and delighting our eyes.