Paint the fairing and tank
Content
Supplies, method and advice
Kawasaki ZX6R 636 Model 2002 Sports Car Restoration Saga: Episode 21
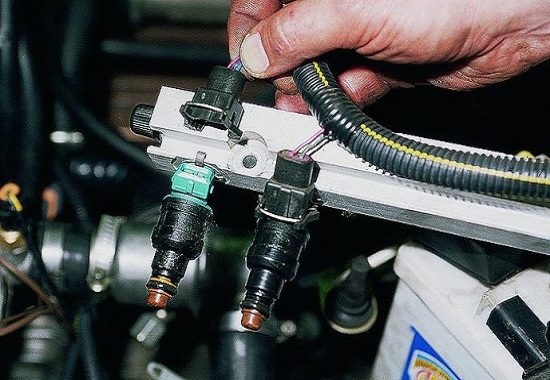
The fairing had to be replaced. Once all the fairing elements are in place and in good cosmetic condition after preparation, everything is ready for custom paint. Finally, something personal in the sense that I did: I stay on solid color. I chose home painting, but with professional equipment.
For best results, I even fell in love and rented a paint booth because I didn't have a place to make one at home. New nonsense for 150 euros. But I need it for a good result and especially for objective testing of professional painting rendering.
Types of paint
Basic for original black elements
I tested two paints on our ZX6-R 636. One of the main ones offered by the French manufacturer Berner: Lacquered Black. It will be used for the passage of the wheels, as well as on the original black elements: the air intake and the "leg" mudguard. I really like Berner. The bomb attachment is of quality and there is never overload or splashing, while the paint itself is excellent in terms of both coverage and retention. Tested and approved on a wide range of products including primers.
I paint the small parts, wheel arch, wheel liqueur and mud flaps in a craft garage "cabin" featuring Berner paint. The result is good.
Berner's bomb is placed on a gray primer, also Berner (to maximize compatibility). The primer is of excellent quality and adheres well. Unless the power of the finish is astounding and deserves a black rather than gray primer, the smoothing is good and the paint holds. Drying times are also very limited. The value for money is not bad at all!
Price Berner Bomb Paint Glossy Black Lacquer: about 12 euros per bomb.
More complex body paint
Another motorcycle paint, much more complex, comes from the BST Colors line. It is pearl white Kawasaki or pearl alpine white. The shadow is impossible to get if you want to do it yourself from classic bombs and is very difficult to obtain, even for professional bodybuilders. This paint manufacturer knows how to do it all in four steps: a primer, a white base coat, a slightly milky and high gloss varnish and varnish.
In theory, Pearl White comes with multiple layers and different treatments. Two bombs are enough here. Attention, a primer is preferable if you paint on a non-uniform shade. This is the case with our yellow and black tank! Remember to take your cooking bomb, always under the same brand, to stay in the same chemically compatible range.
If paint makers can produce mixes in their lab, the brand can provide their ready-to-use paints and dispense them under packaging that allows them to be transferred to an airbrush / Paint Gun. It is up to you when choosing what you are going to do.
Deliveries:
- Bomb priming: 2 bombs (18 € on sale)
- BST Colors Kawasaki Pearl White bombs: 4 400 ml bombs (240 euros)
- BST Colors 400 ml Single spray varnish for unexposed parts: € 10
- Lacquer bomb 2K 2 sprays, 500 ml each (70 €)
Total cost of the painting made: almost 500 euros, cabin rental and various consumables included (glass paper, etc.)
Fairing picture
It's time to attack the fairing. After sanding, not quite empty, I regret not having an industrial stripper on hand to further dilute the tank.
My eccentric sander won't let me do everything and I don't have enough sandpaper. So I compromise. I sand all the varnish, attack the paint around the edges and make sure that all paint adheres well when degreasing.
The base coat of BST Colors is just waiting to land on the fairings.
A colorful camera is a plus
I found a paint booth for rent right next to my house. Find. I am not saying that the professional I have chosen is the nicest or nicest, but he leaves his cabin for me for an hour against cash payment and in advance.
In general, you can ask bodybuilding professionals if they rent their equipment. But it's better to estimate the time it will take us. The paint booth is a privileged place that combines every possible advantage to put every chance of success on your side.
The benefits are numerous:
- room! Great, I can store all the pieces, rotate them, hang them and thus evenly distribute the layers to cover all corners.
- air suction and excellent ventilation. The problem with painting is smell. In the cabin, I breathe, even without a mask (but a mask is recommended). And it's greener. I'm trying to rationalize what is not: blow up my budget to bomb in a professional place. Luxury.
- no foreign body. Most noticeably, there is no risk of insect getting stuck in this booth, and I limit dust and other impurities as much as possible. This is all the more important since I start off with a pearl white color, which causes problems in much the same way as I do!
In theory, paint can give a less clean result than a paint gun, due to different evaporation, less powerful and less hazy, therefore less enveloping. However, in this environment, there is success without any effort. I couldn't avoid a few splashes of paint drops and a small block. Finally, when I say "I", it was more of a "professional" bodybuilder who found me too slow and wanted to hit me tomorrow. He was in great pain.
Accustomed to professional equipment, the only thing he managed to do was spray. Result? He gets angry, throws the paint bomb he used in the cockpit and slams the door. Fine. It's up to me to clean up the little pates I avoided by doing the right gestures and never leaving any excess paint in the nozzle (just flip it over and expel some gas). As well as the fact that not all goodwill is good to accept. Again, this was just the beginning of the sketch. I caught up with bugs with very fine grain grinding (again from 1000).
Painting and drying time
Bomb paint takes much longer than professional paint, which also dries faster, at least in theory. Therefore, the lease period had to be doubled compared to the planned one. Especially when, like me, we have a base and a varnish that contain glitter. Still wait a total of 5-7 hours, including paint dry time (it's fast!), Depending on your dexterity and the number of adjustments you need to make.
Varnish, on the other hand, will happily demand a night of tranquility. Suffice it to say that the cabin rental company has melted somewhat over time.
Opening
It is important to note that the opening operation guarantees a good result. Watch out for droplets, blisters and chemical reactions ... BST Colors 2K bombs provide adjustable flow directly at the nozzle. It is enough to control the flow, its power and possible overflows. In case of failure, don't panic, you can (re) do well! Therefore, painting is also a matter of time, and speed should not be confused with precipitation.
Lacquer is, exactly, again where the artist gets excited. I want to get rid of me as soon as possible. "I'm going to do it, I have everything I need, it will go faster and it will be better to do it." I don’t know why, I didn’t feel it before he intervened. Seeing him go too fast with his own equipment and load as much varnish as possible, I felt like he was going straight into the wall.
The gesture is good, the material is excellent, but the man is carried away and loads the lacquered details too much. Result? Drip spots in places.
Result? Drops are pronounced in places. Therefore, at the end of nerves and on the brink of a crisis, he sends a discovery. To my remark about the drops, he'll only attach himself to this "anyway, you wouldn't do better, and you won't see him once he comes up." Good spirit. For the first statement, I'm sure not.
For the second statement, he's not entirely wrong, but still. Anyway, the discussion ended, and if he gave me time to dry out my rooms, he called me the next morning to pick them up at his workshop, put them in the trash cans. Artists are sensitive people. Let's face it, his company sank the next month ... it must have been a little stressful.
As for me, I finally like the result, and this is the main thing. The remaining little polish will become a memory. The total cost of the body remains: 730 euros including 230 euros in consumables and 230 euros in the fairing, payable at 3x free.
In fact, I let go of the picture. I still have base and varnish for any hardware, just like I still have varnish, the bodybuilder used his own. I leave the lacquer bomb for him to compensate him, including the overtime in the salon (about 3 hours in total ...).
Considerable savings on the aesthetic aspect of the motorcycle. I'm surprised by myself, me, who started with a minimum. Yes, but I'm a little crazy here, let's face it and this bike is an opportunity for me to test so many things that I allowed myself to go completely (unconsciously). As a result, it is very good in terms of a fairing. I just hope it feels solid now ...
Another more economical solution
If I really wanted to prepare for the simplest and most economical, I could recolor the entire fairing with a less complex solid color (and especially not too light), max € 9,90 per 400 ml, always in BST Colors. That's 40 euros of paint versus 240 euros with the one I chose ... Then I would accept some imperfections and paint and varnish outdoors, once without wind or too much heat, which would be free. Finally, I could opt for a lower quality 2K varnish and a primer for about 6 euros for 400 ml. But the result, as well as the pleasure from it, would be different. As well as what would remain in my virtual wallet: the savings achieved would be significant, and the painting would only cost me about 70 euros. The amount to be added to the refurbishment at a price of 230, or 300 euros for the all-inclusive system. Here is the fairing price accurately painted in China. I "just" multiplied the flow rate by 2,5. Ouch.
Okay, so now I keep the airframes at home until I finish repairing the motorcycle. Then I'll take them there, ride them and go behind the wheel! I hope ... We're not there yet.
Remember
- Choose an environment with as little dust and animals as possible
- Ventilation! Depending on the degree of your requirement, the number of coats of paint and varnish may vary.
- Know that a beautiful varnish is a guarantee of a durable paint.
- Professionals can apply 4 to 9 coats of varnish and work on each coat for a perfect rendering (sanding, etc.). When you are told that it all depends on time!
Not to do
- I want to go too fast and load the room too much with both paint and varnish