Bleeding motorcycle brakes
Content
Brake fluid, like engine oil, is a consumable item that must be changed on a motorcycle at least every two years. However, it is possible to bleed the brakes of a motorcycle regularly, especially if you are an avid racer. When to clean ? How to bleed motorcycle brakes ? How to drain the brake system on a two-wheeled vehicle ? Should I buy a device for pumping brake fluid or a syringe ?
This operation is usually easy to perform even for a beginner in mechanics. It is enough to follow a few instructions precisely so that there are no air bubbles in the circuit. Bleeding the brakes can be difficult, however, if you have a front and rear brake system. This is the case, for example, with motorcycles like the Honda CBS Dual. In this situation, the best solution would be to call a mechanic. Find out how to professionally remove air from motorcycle brakes with this tutorial on how to bleed and empty a motorcycle brake circuit.
Why bleed motorcycle brakes?
Brake fluid is an incompressible fluid that has the necessary viscosity to transfer pedal force to the brake pads. Its downside is that it is hydrophilic, which means it easily absorbs moisture. However, water degrades the quality of braking. To prevent reduced braking performance or brake failure, Bleeding brake fluid is the only solution.
When to bleed the brakes on a motorcycle?
On a motorcycle, the brakes must be bled if there is air in the circuit or if the circuit has been emptied. In all cases, bleeding the brakes is a vehicle maintenance operation. Therefore, it is desirablepump the brakes every 10.000 km.
Bleeding the brakes is most often done during a motorcycle overhaul in a car dealership. If you do motorcycle sport on the track, it may be helpful to replace the original brake fluid with a more efficient brake fluid. In this case, purging is required.
How to bleed motorcycle brakes?
To ensure effective braking and bite on the master cylinder, it is necessary to bleed the front and rear brakes of the motorcycle. The operation is available to all mechanics, amateurs and beginners, but requires real meticulousness. In the event of double braking at the front and rear, it is best to return the motorcycle to a dealer.
Use suitable purging materials.
You can develop your own purge system or purchase it directly from your specialist retailer. Indeed, there is an effective purge system consisting of a check valve. For those who have a large fleet of motorcycles in their garage, this is convenient. it is recommended to equip yourself with a pneumatic device for bleeding the brake circuit... This material is used by motorcycle professionals and makes bleeding the front and rear brakes of vehicles much easier.
If you choose to do this yourself, the first step is to gather the tools you need for your intervention. These are common biker materials, including:
- Screwdriver
- Regular flat keys
- Transparent pipe
- A syringe that will be used to pump out the used brake fluid.
- Container, preferably plastic, for receiving the blown liquid.
- Brake cleaner
- Some rags
Preparing the container
La The second step is to prepare a container for the washed liquid.using a plastic container and hose. Start by drilling a hole in the canister lid so the hose can pass without moving. Pour some brake fluid into the bottom of the container, then close it. Finally, push the hose into it until the end is completely submerged in the water.
How to protect your motorcycle from brake fluid splashes?
As you know, brake fluid is very corrosive. Then, maximum precautions must be taken during the various purging operations. First, protect all surfaces that might be affected by motorcycle projections.
La tank painting is one of these sensitive areas closest to this element. To prevent spillage, surround the brake fluid reservoir with a rag or plastic. Thus, you will spend less time cleaning up after it is completed.
How to replace used brake fluid?
That open the brake fluid reservoir, take a screwdriver with the correct notch. This is important not to break the screws that hold it. This step is required if your can is built into the master cylinder.
Then you have to remove the used brake fluid with a syringe. Alternatively, an absorbent cloth can be used to drain the liquid. After all the liquid has been removed, make sure there are no deposits left in the jar.
The next step that fill the jar with new liquid, very important. This new fluid will replace the old one during purging. If you forget this step, you risk spending a lot of time and fluid removing air bubbles present in the brake system.
Actual bleeding of motorcycle brakes
Once all the preparation is complete, you will move on to the cleaning phase. This operation is difficult because you must ensure that no air bubbles enter the brake system. Risk of losing the brakes while driving!
Quickly, here step to be followed to bleed and empty the brake circuit :
- Open the reservoir and fill it with brake fluid.
- Loosen the bleed screw to draw in air.
- Press the brake lever to release air.
- Tighten the bleed screw.
- Release the brake lever to allow fluid to enter the brake hoses. The can is then emptied.
- When the level of the brake fluid in the reservoir is almost empty, start over from step 1. It is very important to always have the brake fluid in the reservoir to prevent the hoses from filling up with air.
- Test the braking before riding your motorcycle.
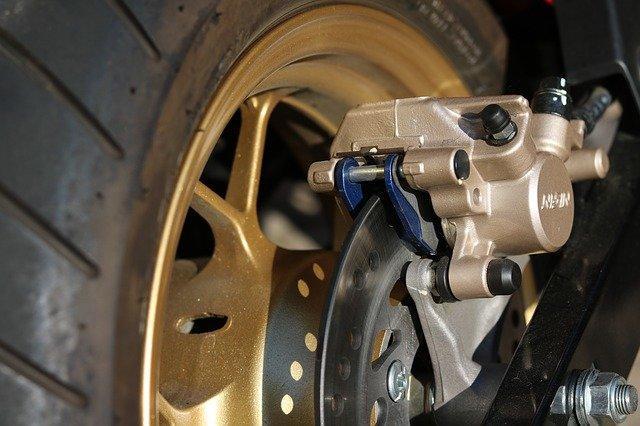
To give you more details, here are the explanations for each step. Install the hose / canister kit you prepared in advance. Place it on the side of the brake caliper. First remove the rubber plug that protects the bleed screw. Then place the open end wrench to the side of the eye. Finally, connect your kit to the screw.
Press the brake lever or pedal as if you were braking. Then loosen the bleed screw with an open-end wrench. You will notice that the pressure on the pedal will decrease. The old liquid will go into the container, and the new liquid already in the can will automatically replace it. Repeat this operation until you have obtained an amount of fluid equivalent to the capacity of one or two brake fluid reservoirs per caliper. The liquid in the pipe must be clear and free of bubbles.
During the process, do not forget to constantly monitor liquid level in the jar... It should gradually decrease. Plus, you should add more as you go.
After completing bleeding, close the brake fluid reservoir, not forgetting the small fuse. Then check your brake lever: it should be straight and firm. Then do a low speed road test. If you do not feel anything abnormal, then you have successfully completed the procedure.
Here video tutorial which shows you how to properly bleed your motorcycle's brakes:
Cleaning up traces of liquid
When the actual purging is complete, remove the hose and return the rubber cap to its original position. Make sure that it is properly closed to avoid leakage of the minimum amount of drops of brake fluid.
Finally, clean your motorcycle and its accessories. Using a clean cloth, wipe off all splashes of fluid on wheels, caliper, can, and all affected areas. To keep your caliper looking like new, choose a quality brake cleaner.
How to choose motorcycle brake fluid?
Please note that brake fluid is standardized by the US Department of Transportation or DOT, which is equivalent to the Department of Transportation. For two-wheeled vehicles, there are other criteria that define several levels of brake fluid quality. To find out which one is perfect for your machine, you just need to check the lid of your liquid can.