DIY headlight adjustment
Content
In order to avoid such problems as a reduced visibility zone at night and not endanger drivers driving in the oncoming lane, you need to correctly adjust the car's headlights.
If you want to save money, but correctly carry out this procedure, then an independent headlights are adjusted in four steps:
- make markings on the wall;
- carry out the marking of the lamps;
- adjust the low beam;
- adjust high beam.
Headlight adjustment can be done manually, with the help of car service specialists or using the necessary equipment.
When to Adjust Your Headlights
Every driver needs to know when to adjust their headlights. Therefore, if you are not one of them, then we will briefly recall this. This procedure is performed in one of the following cases:
An example of cases where headlight adjustment is necessary
- When replacing headlight bulbs. This applies to devices with both single and separate optics.
- When replacing one or both headlights. This may be caused by its failure, an accident, the desire of the owner to install a more powerful or technologically advanced lighting device.
- In case you feel that you have become uncomfortable to ride with the existing light and need to make an adjustment.
- In the case when, when driving at night, the drivers of oncoming cars flash their high beams at you, thereby signaling that you are blinding them.
- When installing fog lights. usually, only the PTF is adjusted.
- After performing work related to changing the stiffness of the suspension.
- When replacing discs or rubber with similar products with different diameters.
- In preparation for the passage of routine maintenance.
- before traveling long distances.
Monitor the light emitted by your car's headlights and adjust as needed. Remember that an incorrectly set light brings discomfort and a threat not only to you, but also to the drivers of oncoming cars.
Two universal ways to adjust headlights
Before proceeding with headlight adjustment, it is worth check and adjust the following parameters auto:
Universal headlight adjustment instructions
- Tire size difference.
- The condition of the springs in the suspension.
- Full distribution of all kinds of loads, fill a full tank of fuel, put a person in the driver's seat.
- Tire pressure level.
If there are breakdowns here, then the illumination angle will be incorrect, and in turn, it will certainly affect the quality of the adjustment itself. Naturally, in order to adjust the light correctly, you will need to meet some important conditions. The first of these is the presence of a vertical flat wall in front of which the car will stand.
The length of the distance from the wall to the front of the car is from 5 to 10 meters. Distance must be chosen from the consideration that the higher the dynamic characteristics of the car, the longer the braking distance during emergency braking, and accordingly the headlights must be correctly adjusted for the braking distance!
You can use either chalk or sticky tape for name markings. in order to get a more accurate horizontal line, you can use a laser level. Since each car has its own dimensions, the markup for it is purely individual. However, there are several standard values that can be used for almost all cars.
The first way to adjust the headlights

How to adjust headlights without instruments
Better suited for setting low beam headlights. We find a flat area, the side of which should rest against the wall. The wall, in turn, should be without protrusions, corners, various irregularities and strictly vertical. We drive close to the wall and mark the center of the car, as well as the central axis of the lamps.
in order to correctly mark the wall, you need:
- Mark the distance from the floor to the center of the lamp and draw a horizontal line on the wall that will connect the center points on both lamps.
- Then draw on the wall also one horizontal line, located 7,5 cm below the first.This distance is a non-constant value, indicated as a percentage by the car manufacturer in the form of a refractive index of light or a headlight angle. A sticker or nameplate with the exact value can be found on the headlight housing. in order to accurately know the gap between the lines, you need the length from the wall to the headlights, this is 7,5 meters multiplied by the refractive index for example 1%, it turns out 7,5 cm.
Tilt angle on Lada Priora
Adjustment angle VAZ 2105
Kia Cerato headlight angle
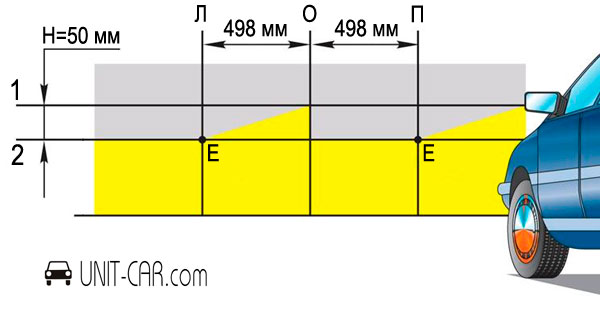
- We put the car away from the wall 7,5 meters.
- Then we draw vertical lines through the central points of the headlights. also one vertical line should be drawn in the middle, at an equal distance from the points of the headlights.
Headlight adjustment scheme at a distance of 5 meters
Adjusting screws for adjusting the headlight beam
After marking, turn on the dipped headlights and make direct settings:
- The horizon of light should be at the level of the lower horizontal line.
- The base of the angle of inclination of the lamps completely coincides with the horizontal line, and the top must necessarily coincide with the intersecting drawn lines.
As a result, in order to get the desired beam of light, it follows tighten the adjusting screws, which are located under the hood of the car on the back of the headlight.
The ideal option is when the light is 7,5 cm below the center of the headlights.
If your car has a separate high and low beam system, then any beam of light will have to be adjusted in turn. And the marking of the wall will also be slightly different - the dipped beam is adjusted according to the method described above. And the high beam must be placed in such a way that it accurately hits the central marking of the headlights. In this case, it is better to use special equipment, without which ideal adjustment will not work in this version.
The second way to adjust the headlights
Suitable for setting up all the light in the complex. You will need the same even wall as in the first case, but we do the markings a little differently.
To apply the dots, the machine must be up against a wall. We turn on the low and high beams in turn and draw a beam of light on the wall. Then we determine the centers of each headlight and draw vertical lines through them. We drive off to a distance of 7,5 meters (this method provides for a clear use of average values.)
- On the wall we mark the places that correspond to the center of the high beam lamps, and connect these two points horizontally. We also draw one horizontal line below, at a distance of 3 inches or 7,62 cm. This will be the line of the upper dipped beam threshold.
- We draw a vertical line that divides exactly in half the distance from the centers of the dipped and main beam headlights. To adjust the headlights left-right, measure how the beam of light has changed at the moment when the car drove off, and correct the equal distance from the center.
C - the central axis of the car; H is the height from the ground to the center of the headlight; D - line of high beam headlights; B - line of low beam headlights; P - line of fog lights; RCD - the distance from the center of the car to the center of the high beam; RZB - the distance from the center of the car to the center of the dipped beam; P1 - 7,62 cm; P2 - 10 cm; P3 is the distance from the ground to the center of the PTF;
PTF adjustment
Adjusting the fog lights, albeit a little, but still differs from the above method. Before adjusting the PTF, you need load the car at 70 kilograms - anything will fit and fit in your car.
we also refuel a full tank and set the car so that it is located on the most even horizontal surface, 10 meters from the light of the resulting screen. However, many experienced drivers claim that 5 meters is enough.
Fog lamp adjustment diagram
On the wall we draw lines denoting important points with their edges. The bottom line is the size from the ground to the center of the fog lights, the top line is the same distance from the center up.
we also mark with a vertical line the distance to the center between the headlights, from the centers of both fog lamps. The result should be a lined screen canvas with two points of the centers of the lamps, there will also be restrictions on the lower and upper borders of the light.
After drawing the lines, using a screwdriver and adjusting screws on the headlights, we achieve the focus of the beam of light from the lamps at those points where the centers of the headlights intersect.
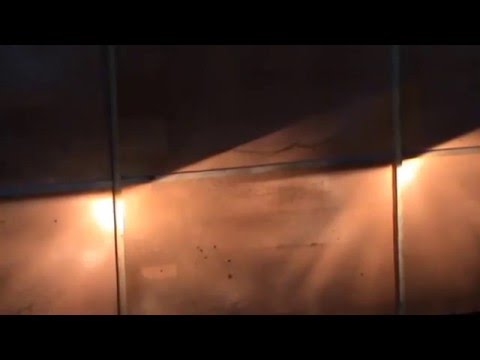
Adjustment of lensed headlights
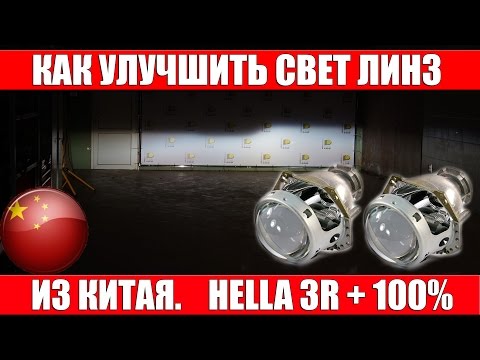
How to improve headlights if there is a lens: video
Before adjusting lensed headlights, you need to know that there are two types of them - adjustable and non-adjustable. The latter are quite cheap, and we do not recommend using such lighting fixtures. One example of such a headlamp is marketed under the brand name Depo. also, some headlights are equipped with an automatic regulator, which often fails quickly, so this is also not the best option.
To adjust the lensed headlights, there are special regulators, as well as on conventional lighting fixtures. In this case, it is impossible to give unambiguous recommendations, since in different cars and even in different headlights the adjustment takes place using different means. usually, adjusting bolts, or handles, are used for this. But after reading the general instructions for adjusting the headlights, you can cope with the task.
Headlight adjustment
At service stations, headlights are usually adjusted using special devices. Their purchase for an ordinary car owner is impractical, since such a device costs a lot, and you do not have to use it so often. Therefore, knowledge on how to adjust the headlights with the device will be useful to you only in order to check whether the service station worker is acting correctly.
The verification algorithm will be as follows:

Headlight adjustment by instrument
- Align the longitudinal axis of the device with the vehicle. After all, it is not a fact that the car drove strictly perpendicular to the box. This is the basic condition. To perform it on the device in its upper part there is a mirror with a horizontal line drawn on it. On it, you can easily set the device so that it stands strictly perpendicular to the body and headlights.
- Align the device strictly horizontally. Usually, in the design of its body, a level with an air bubble is provided for these purposes. This is a simple but reliable tool that allows you to achieve the desired results.
- Adjustment angle setting. On various devices, it can be set in various ways (one of these options is a swivel roller). An angle value of "0" means that the headlights will shine directly in the direction of the vehicle. The angle can vary by tenths of a degree. The value of the angle at which you need to set the headlight, you can find in the reference literature for your car.
- The axis of the adjusting device and the axis of the headlight must match.
Remember that you can not strongly "lift up" the beams of the headlights. Indeed, in this case, the value of the luminous flux can decrease by 20 ... 30%, which is a serious indicator. In addition, this way you will blind the drivers driving towards you.