Valve adjustment engine 11186
Content
Valve adjustment is one of the most important preventive measures for an engine. Moreover, it is also a real need.
Why do you need to adjust the valves?
Setting "in full swing"
This procedure is necessary when you want your vehicle to be more stable, both at high and low speeds. If the valves are not adjusted correctly, the gaps between the camshaft cam and the valve will be violated. And this, in turn, will lead to excessive opening of the valves during engine operation, as a result of which depressurization will occur in the cylinder.
This whole chain of events will greatly reduce the life of the engine.
An important note can also be considered that if the gap between the valve seat and the side particles of the cylinder is too large, a situation with valve wear may occur. If, in addition, the piston stroke is too large, then a "meeting" of the valves and the piston may occur. I think that it’s not even worth talking about what this threatens, since repairs will be very expensive. Therefore, it is necessary to periodically and very carefully adjust the valves.
The need for tuning exists only on 8-valve engines, such a power unit is installed on all Grants in the "Norma" configuration. 16-valve engines do not need adjustment, due to the presence of hydraulic compensators. Therefore, valve adjustment is not included in the list of necessary maintenance work.
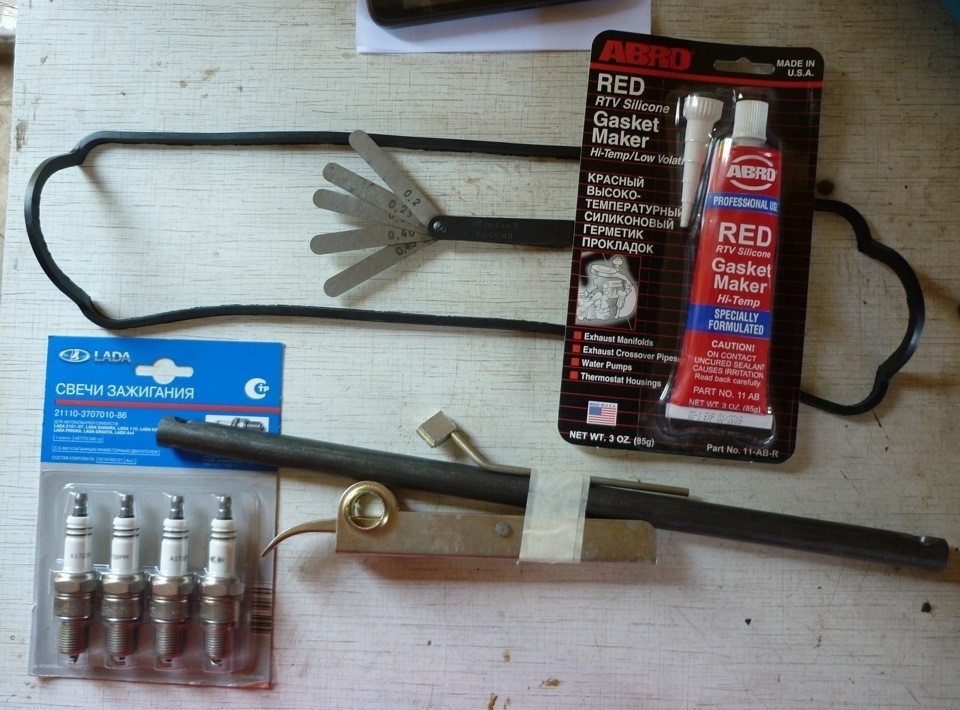
Required Tools
In the case of an 8-valve power unit, adjustment work may be required every twenty-five thousand kilometers. But for this you need to have a certain set of tools.
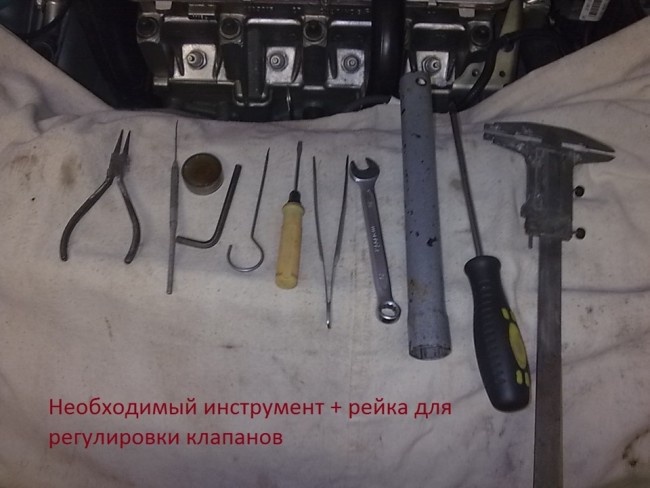
- First of all, we are talking about a set of leggings. As a rule, such washers are supplied in thicknesses from 3 to 4,5 mm in increments of 0,05 mm.
- In addition, you should have a probe with a similar interval on hand.
- And, of course, do not forget about adjustment devices. Its main feature can be considered that such a device will greatly facilitate the implementation of most work on replacing washers in the cylinder head.
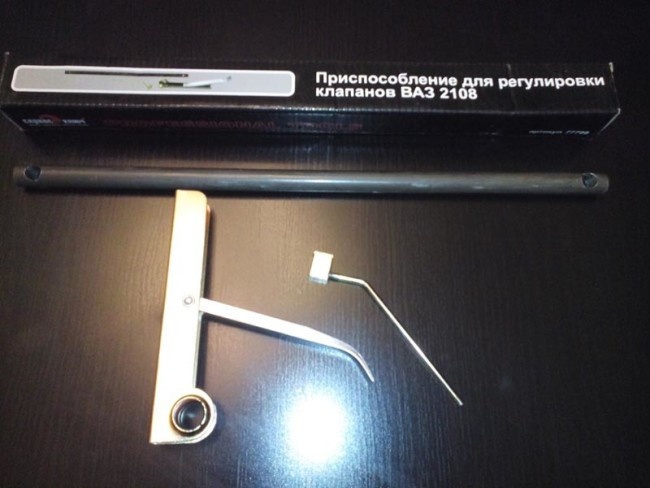
It is possible without a special device, but it is much easier with it.
Sequence of work on an 8-valve engine
Before starting work, you need to completely “cool down” the engine.
Some specialists do not start tuning until the car engine has been idle for a day without work.

Need to unlock
- It is desirable that its temperature be in the range of 20-30 degrees Celsius. For this purpose, you can use a conventional fan, for which it will be enough to disconnect the temperature sensor connector, which is located near the thermostat, and turn on the ignition.
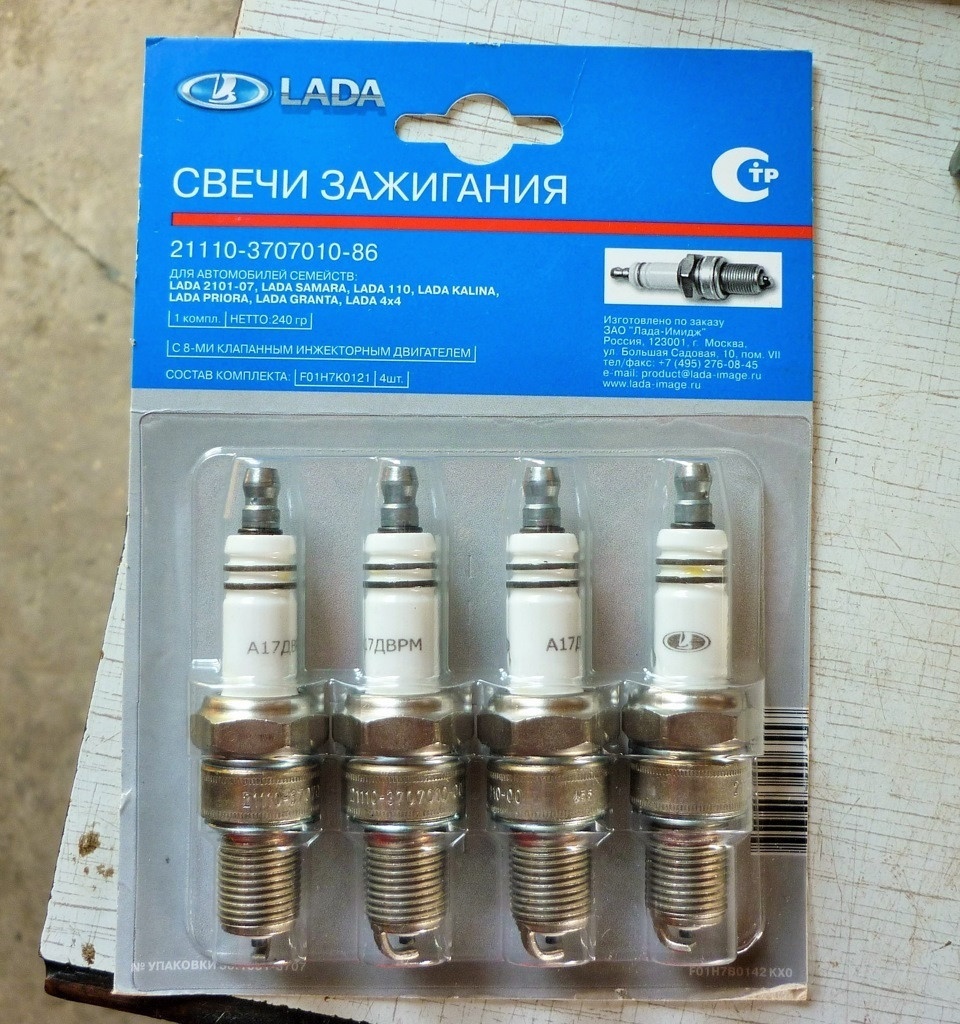
- Then remove the spark plugs. This must be done in order not to damage the timing during the movement of the camshaft.
- You will also need to unscrew the timing belt cover to remove it completely. Carefully disconnect all pipes from the valve cover by removing them from the vehicle.
- If there is oil around the valves (and it most likely is), then it must be removed with an ordinary syringe or a rubber bulb. For the most part, the oil is very close to the valve lifters.
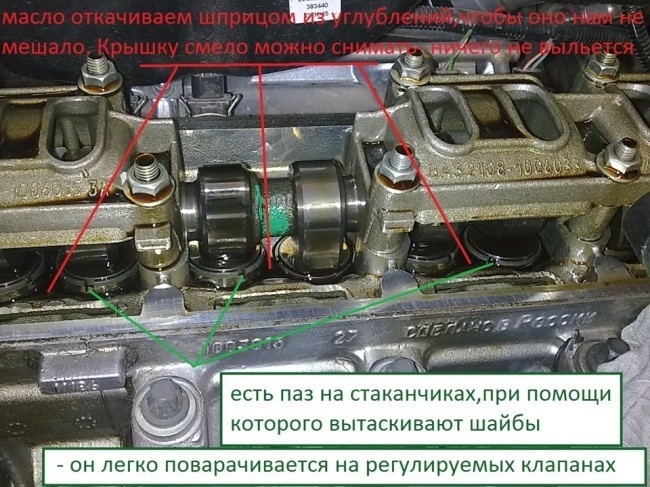
Pumping oil around the valves
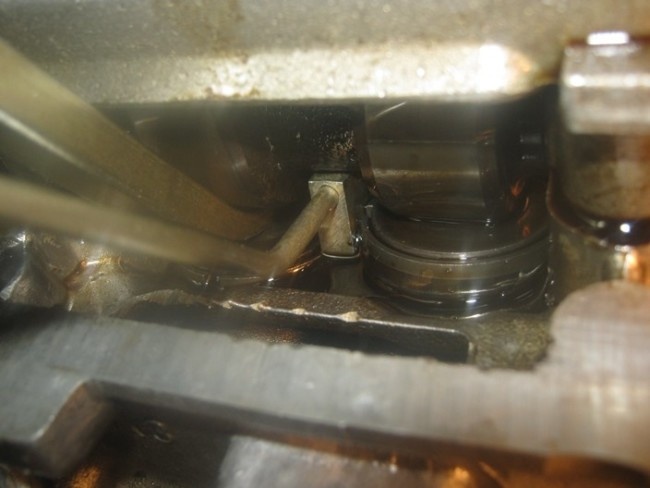
We remove the puck in this way with the help of special tools

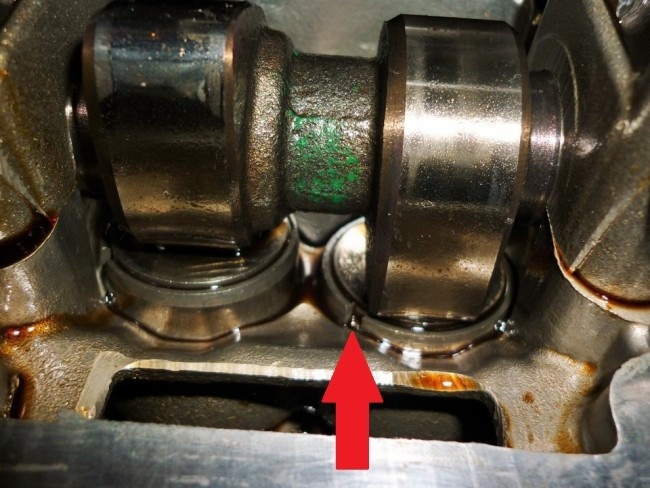
Checking the coincidence of the mark with the position of the timing (case removed)
The arrow marks the slot for the tweezers

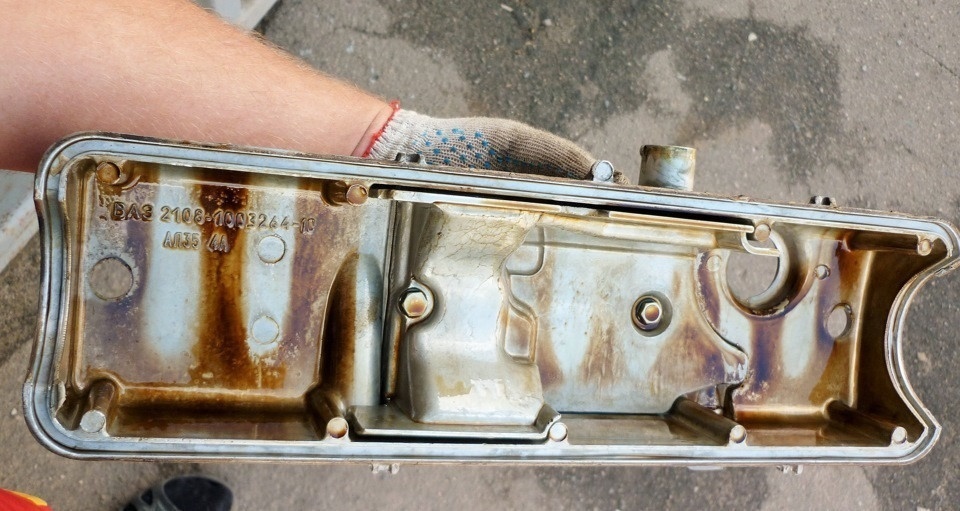
New gasket and valve cover
My measurements
My measurements after adjusting the valves are as follows:
- 0,25 - release
- 0.20 — input
- 0.30 — input
- 0.30 - start
- 0.30 - start
- 0,27 — input
- 0,24 — input
- 0,35 - release
Signs that valve adjustment is needed (video from "Theory of ICE")
In the operation of the car, there are certain signs that will tell you that the valves need to be adjusted.
The most obvious of these will be the car's engine idling and starting to shake and twitch. Very often the reason for this behavior lies precisely in poor valve adjustment.
And, of course, you have to control extraneous sounds, which are easy to determine by ear. It is enough to put two machines side by side, one with adjusted valves, and the other with dough. Start two cars at once and compare the "noise" of the engines.
I was always afraid to repair something on the car myself, but after reading this article, I decided to adjust the valves myself. Having bought everything he needed, he set to work. I did everything exactly according to the instructions on the site. He did the job very quickly. Thank you very much for such valuable and useful information.
The meeting of valves with pistons occurs due to a broken timing belt. Something is written here about valve guides and CYLINDER PARTICLES.
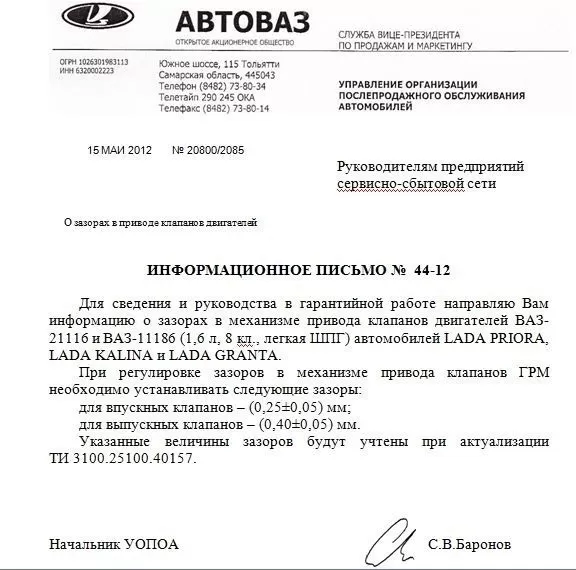
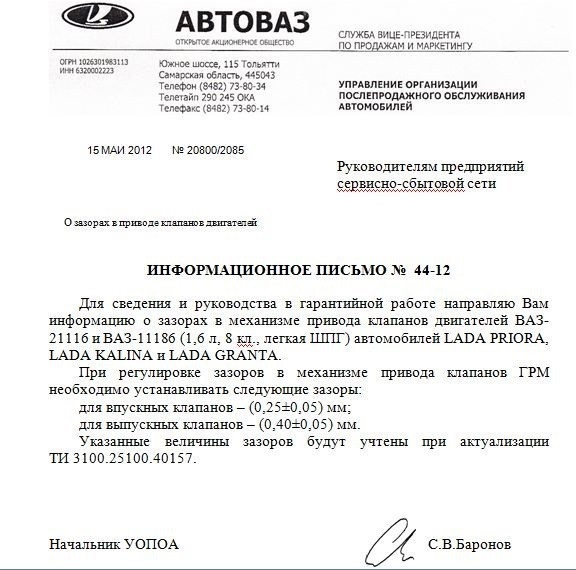
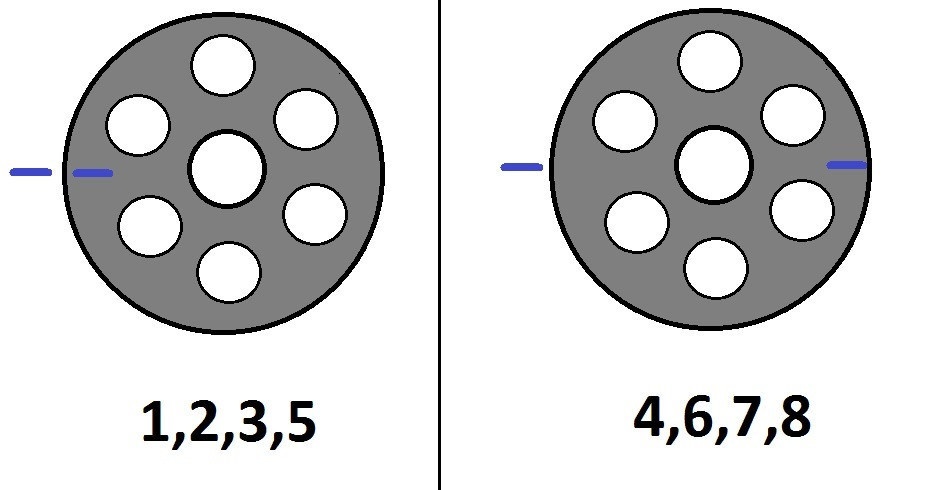
On the 11186 116 engine, the recommended clearances are as follows:
- Inlet (2, 3, 6, 7 valves) 0,25 mm + -0,05 mm
- Output (valves 1, 4, 5, 0,40 mm + -0,05 mm
1) Remove the valve cover;
2) Remove the timing cover;

3) Unscrew the candles;
4) Raise the right front wheel so that it is suspended (it is more convenient to turn the crankshaft);
5) Includes 5th gear;
6) Use a syringe to collect excess oil around the valve lifters;
7) Install the device for closing the valves;
Check gaps:
To check the gaps, it is necessary that the camshaft cams on the valve being measured be at the top (left, right - it doesn’t matter! The main thing is up). For convenience, you can use this one (I drew it myself, look somewhere on the Internet):
Now we take the probe with the gap we need and stick it into the desired valve (between the camshaft cam and the washer) to measure the gap. The indicator should pass without much effort. We use the principle of a reference point, and not a reference point, i.e. if, for example, a probe of 0,20 passes and 0,25 does not, then, accordingly, the gap will be 0,20 mm with an error of about 0,02 mm.
Example. At the input, we need 0,25 sui probe: it doesn’t go up, but 0,20 goes, then we need to get the disk and make it thinner (with a lower number). We take out the disk, it has the number 385, then you need to buy a disk with the number 380 and so on.
9) Take out the wedge:
To get the adjusting washer, use the tool to lower the pusher and insert the retainer between the camshaft and the glass.

Then, using tweezers, we take out the adjusting washer (there are special rectangular holes in the pushers for this, thanks to which you can lift the washer)
10) Having found the required washer (see point, place it on the pusher.
11) Using a tool, press the pusher and remove the retainer.
12) Again, check the measurement of the gap with probes. If the gap remains within the normal range, move on to the next valve.
13) After adjusting all the valves, we put a new gasket, apply sealant to the corners of the cylinder head, there may be oil smudges.

In this setup, you're all set.
Adjustment of thermal clearances in the valve drive of the gas distribution mechanism
The adjustment of thermal gaps in the operation of the valves of the gas distribution mechanism of the engine is carried out according to the maintenance schedule every 30 thousand kilometers. Operations are carried out on a cold engine.
Using a Phillips screwdriver, loosen the clamp securing the crankcase gas supply hose to the cylinder head cover ...
. and remove the hose from the deck pipe.
Using a Phillips screwdriver, loosen the hose clamp (the main circuit of the crankcase ventilation system) ...
. and remove the pipe sleeve from the cylinder head cover.
Similarly, we loosen the hose clamp (idling circuit of the crankcase ventilation system) ...
. and remove the pipe sleeve from the cylinder head cover
With a “10” head, unscrew the three nuts that hold the receiver support
. and remove the support.
Two studs for attaching the bracket to the receiver are screwed into captive nuts installed in grooves on the receiver.
With the cylinder head “by 10”, we unscrew the two blind nuts that hold the cylinder head cover.
Remove the metal washer from the stud...
...and a rubber bushing.
In the same way, remove the fasteners from the cover of the other stud.
Remove the cylinder head cover.
Remove the front upper timing belt cover (see "Checking the condition and replacing the timing belt").
The procedure for checking and adjusting clearances in the valve actuator is as follows.
Turn the crankshaft by the screw holding the alternator drive pulley clockwise until the alignment marks of the camshaft pulley and the rear timing belt cover are aligned (see "Checking the condition and replacing the timing belt").
Then we turn the crankshaft clockwise another 40–50 ° (2,5–3 teeth on the camshaft pulley).
With this position of the shafts, we check the gaps with a set of probes (between the adjusting washers of the pushers and the cams) in the first ...
. and cams of the third camshaft.
The clearance between the camshaft lobes and washers should be 0,20mm for intake valves and 0,35mm for exhaust valves. The clearance tolerance for all jaws is ± 0,05 mm. The gap is equal to the thickness of the feeler gauge, which enters between the cams and the washer with a slight pinch.
If the clearance is out of range...
..then install the valve adjuster on the camshaft bearing housing studs.
We turn the pusher so that the groove in its upper part faces forward (in the direction of the car).
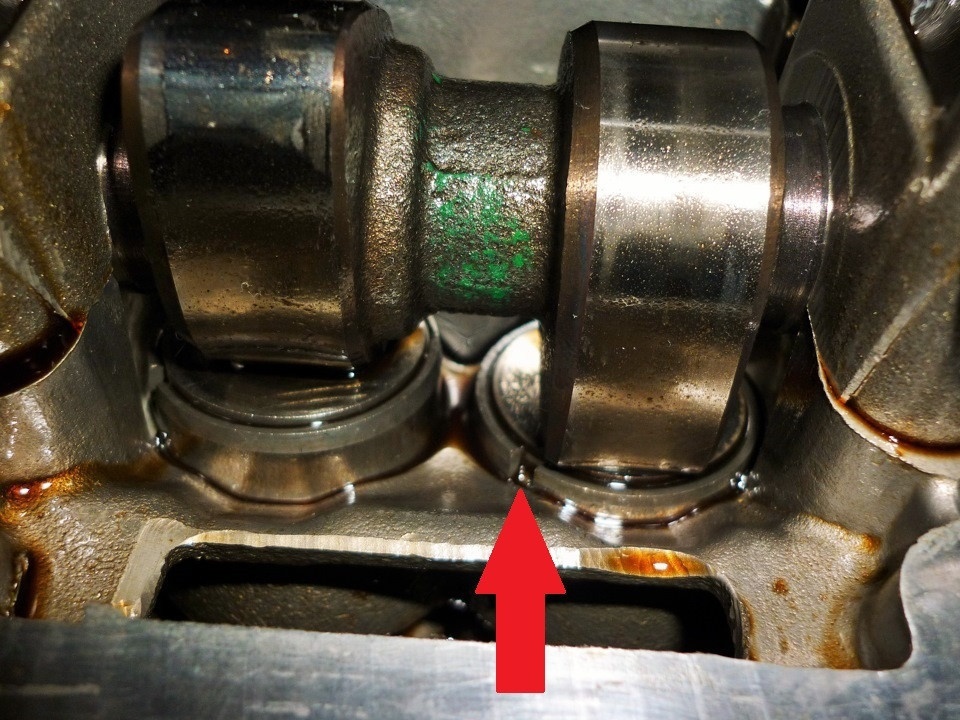
We introduce the “fang” of the device between the cam and the washer (see the figure below).
Recessed valve lifter when replacing the shim:
1 - accessory;
2 - pusher
By pressing the lever of the device, we sink the pusher with the "fang ...
... and install a retainer between the edge of the pusher and the camshaft, which holds the pushrod in the down position.
Fixing the valve lifter when replacing the shim:
1 - retainer;
2 - adjusting washer
We move the lever of the device to the upper position.
Using pliers, pry up the slot and remove the shim.
If a valve adjustment tool is not available, two screwdrivers can be used.
With a powerful screwdriver, leaning on the cam, push the pusher down. Inserting the edge of another screwdriver (with a blade width of at least 10 mm) between the edge of the pushrod and the camshaft, fix the pushrod and remove the shim with pliers.
The gap is adjusted by selecting an adjusting washer of the required thickness.
To do this, measure the thickness of the removed washer with a micrometer.
The thickness of the new wedge is determined by the formula:
H = B+ (A–C), mm, where
A is the measured clearance;
B is the thickness of the extracted washer;
C - nominal clearance;
H is the thickness of the new washer.
The thickness of the new washer is marked on its surface with an electrograph.
We install a new washer on the pusher with the mark down and remove the retainer.
Check the gap again. When properly adjusted, the 0,20 or 0,35 mm feeler gauge should enter the gap with a slight pinch.
Sequentially turning the crankshaft half a turn, we check and, if necessary, adjust the clearances of other valves in the sequence indicated in the table:

We assemble the motor in the reverse order. Before installing the cylinder head cover...
. we will replace your gasket with a new one.