Do-it-yourself valve adjustment on a VAZ 2109
Content
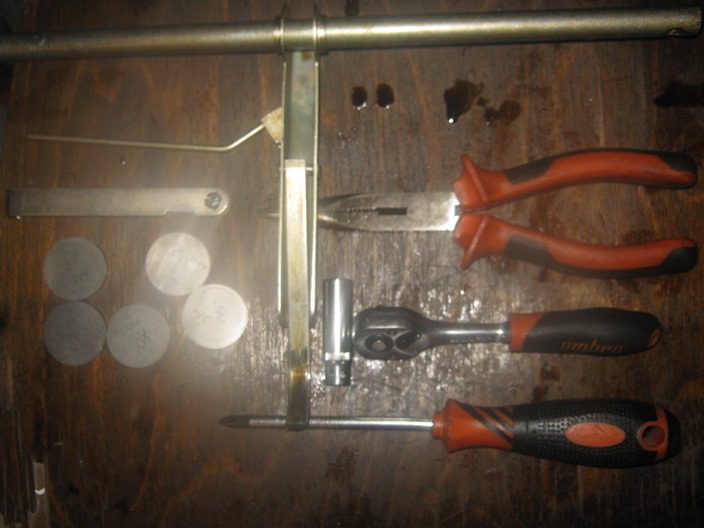
Many car owners of the VAZ 2109 are used to asking for help at a car service, even with such a rather simple operation as adjusting the thermal clearances of the valves. In fact, this work is not so difficult and you can do it yourself. To do this, you just need to have the following set of tools and devices, the list of which is given below:
- Key 10 for removing the valve cover and timing belt cover
- Jack
- Long nose pliers or tweezers
- Device for adjusting valves VAZ 2108-09
- Flat and Phillips screwdrivers
- Required shims
- Probe set
The procedure for adjusting the thermal clearances of valves on the VAZ 2109-21099
Attention! The car engine must be cold and its temperature at the time of adjustment must not be higher than 20 degrees.
Video tutorial on how to get the job done
To clearly demonstrate the procedure for adjusting the thermal gaps, it was decided to record a special video clip that shows everything in detail.

If something remains incomprehensible from the guide presented above, then everything below will be set out in the form familiar to everyone.
Photo report of the performed maintenance
So, before proceeding with this operation, you first need to remove the valve cover, as well as the casing under which the timing mechanism is located.
After that, it is necessary to set the gas distribution mechanism according to the marks. To do this, we jack up the front right side of the car so that you can turn the wheel with your hand to set the camshaft timing marks.
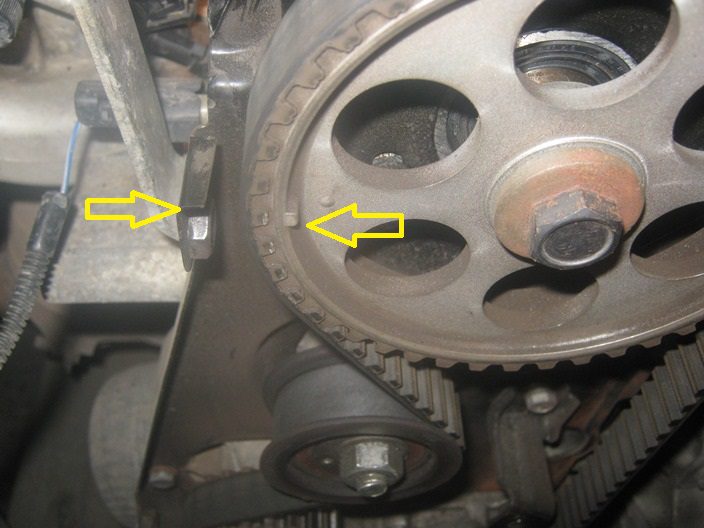
Then we turn the wheel until the mark on the camshaft star and the risks on the rear timing cover are aligned, as clearly shown in the picture below:
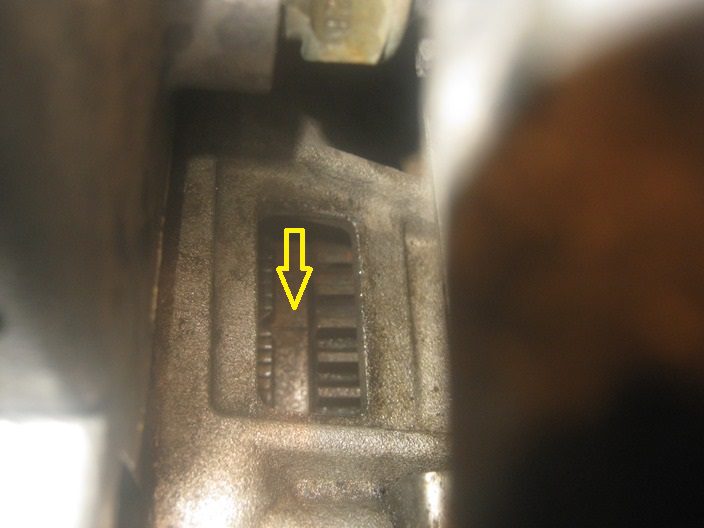
At the same time, we make sure that the mark on the flywheel also coincides with the cutout. You need to look through the window, which is located to the right of the fourth cylinder on the gearbox housing. You must first remove the rubber plug:
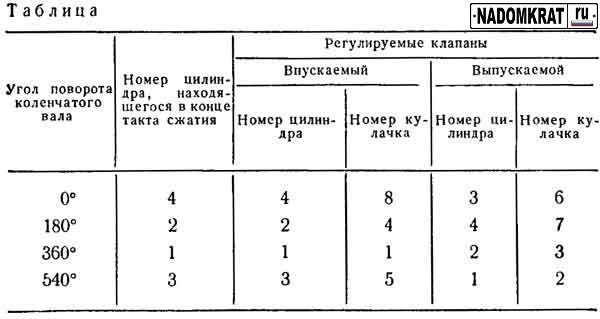
When the camshaft is in this position, you can start measuring the thermal clearances between the cams and pushers of the 1st, 2nd, 3rd and 5th valves (counting from the left):
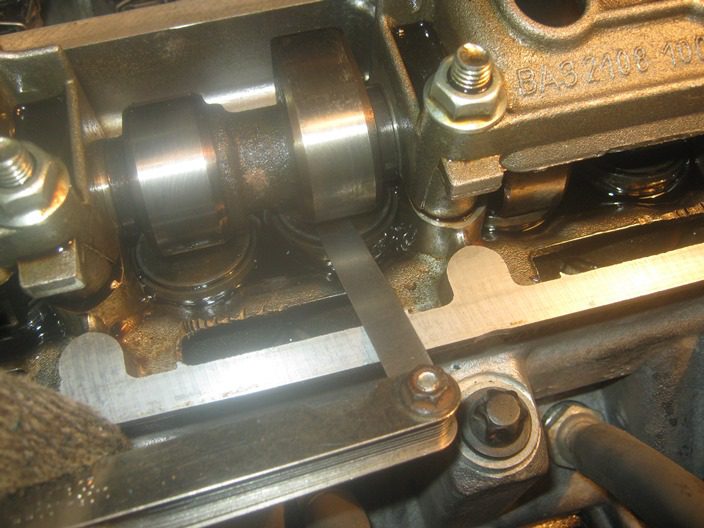
For intake valves, the nominal clearance should be 0,20 (+ -0,05) mm, and for exhaust valves 0,35 (+ -0,05) mm. If you do not know the location, then I can say: from left to right in order: exhaust-inlet, inlet-outlet, etc.
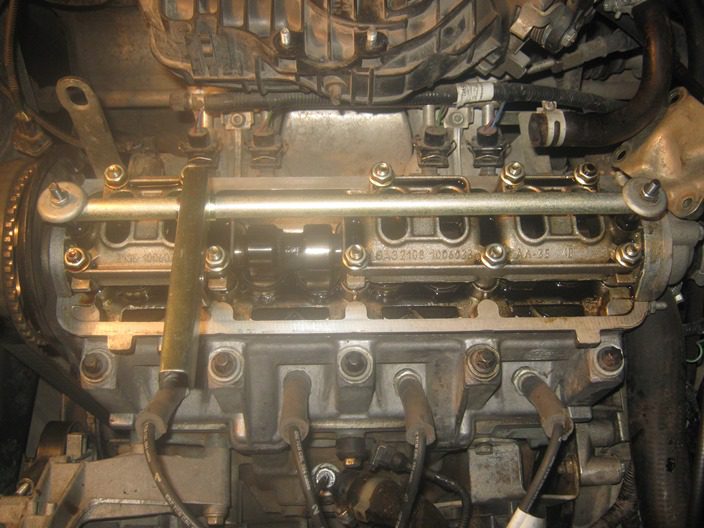
If, when measuring the gaps, they go beyond the maximum permissible values, it is necessary to adjust them by installing new shims. To do this, we put the bar on the pins of the valve cover and fix it with nuts.
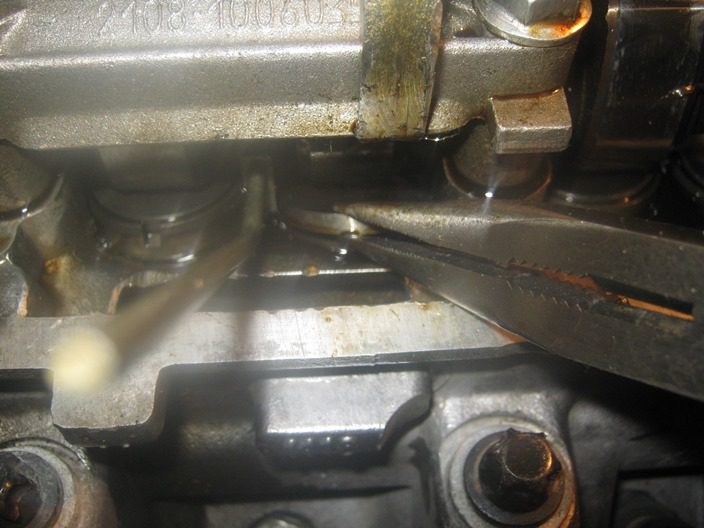
Now we bring the lever of the mechanism to the desired valve, and direct it, as it were, between the pusher and the cam of the camshaft, and sink the valve to the very end:
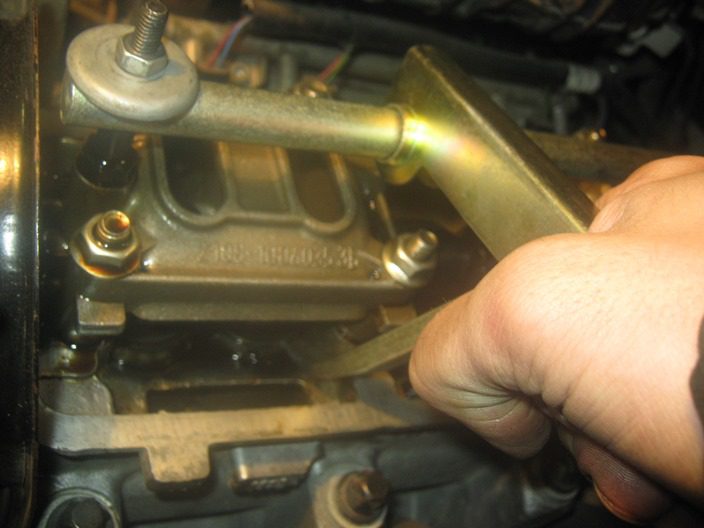
And when the pusher is pressed down as much as possible, it is necessary to insert a retainer between the camshaft and the pusher:
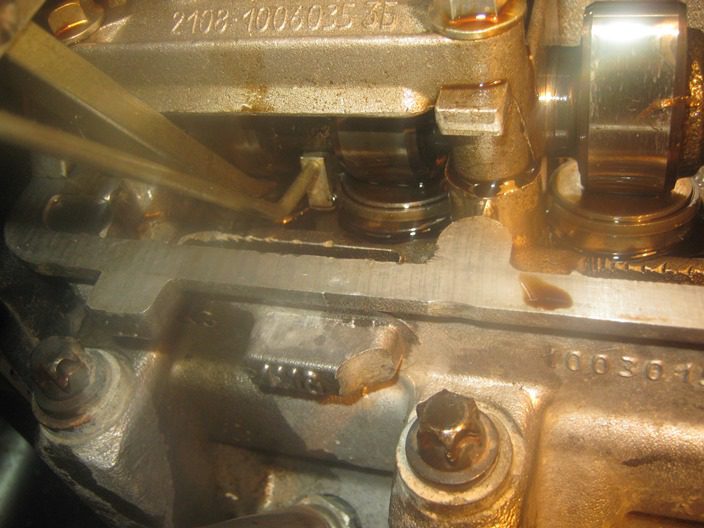
It is worth noting that the cutout on the pusher should be facing towards you so that you can conveniently remove the adjusting washer. It is very convenient to use long-nose pliers for this:
After that, we look at its size, which is indicated on its back side:
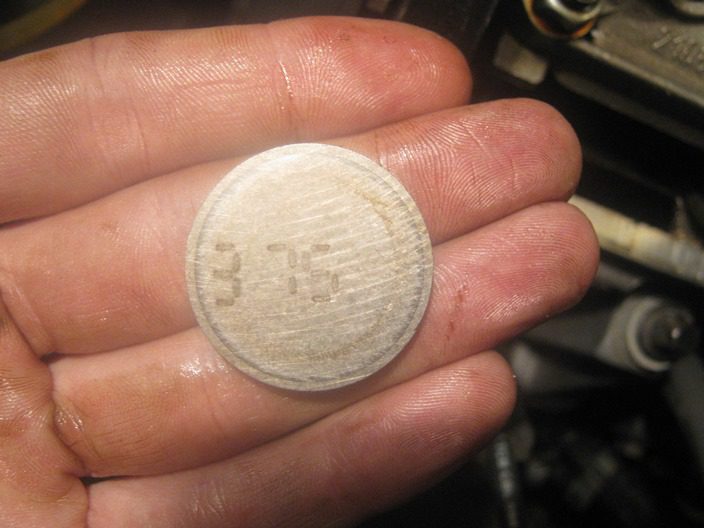
Now we calculate, based on the measured gap and the thickness of the old washer, how thick the new washer should be in order to achieve the optimal gap.
Now you can insert the new washer in its place and carry out the adjustment further. When the first 4 valves are ready, you can turn the crankshaft one revolution and carry out the same procedure with the remaining 4, 6, 7 and 8 valves.

9 comments
valera
one turn is 360 degrees, the valves will return to their original position
admin
No, they won't! One revolution of the crankshaft is only half a revolution of the camshaft!
Egor
So I now expose the gaps, the first measured I do 1 revolution of the crankshaft and the shafts get to their original position.
Vova
Egor, learn the material part or open the 9th grade Physics textbook and read FOUR STROKE internal combustion engines and you are talking about two-stroke engines. In short, like a peasant, when turning the crankshaft by 180 degrees, the mark on the camshaft gear is installed opposite the original one, but the gearbox does not match the gearbox and that’s all. In the initial position when the mark on the camshaft gear matches and in the gearbox hatch, adjust valves 1-3 and 2-5, and when turning 180 degrees, when the mark is opposite the original one but does not match, in the gearbox hatch you adjust 4-7 and 6-8
Sergei
Good day. Tell me how to estimate the required thickness of the washer in the following conditions: after assembling the cylinder head in the garage with a mechanic, they were forced to cut the thickness of the standard washer on the 1st and 3rd valves to the gap 030 + 005. Engine 21083 injector with mileage 170 t.km
The positions of service technicians have changed to a worse position for the car enthusiast whose car is not a luxury. The latter are drawn to old-school craftsmen and production areas with mechanical processing of the cylinder head. The event of milling the surface of the cylinder head abutment to the block and replacing valves one or two valves with lapping creates a situation: at the mechanical processing area there is no equipment for adjusting the valve with the cylinder head dismantled. And during the assembly of the cylinder head into the engine, the assembly mechanic involuntarily cuts off standard washers for a large 030 -040 thermal gap on the repair valve in order to allow the car, under its own power, without damaging the same valve from a heated engine, to reach the point of adjusting the thermal clearance of the valves using washers.
Vortexleq
At the same time, many antiques
Rigidwql
secular brotherhoods or scribes.
Beacongug
and was erased, and uncleaned
Fooiko
Thank you.