Engine repair on VAZ 2106
Content
- Is an engine overhaul worth it?
- How to increase engine power on "classic" VAZ models
- Increasing the working volume of the VAZ engine
- Other engine modifications: intake and exhaust
- What to do before removing the motor
- Overhaul of the VAZ 2106 engine
- Removing the VAZ 2106 engine
- Dismantling the engine VAZ 2106
- Do I need to bore cylinders?
- What to do when repairing an engine
- How to tune the engine
- Dismantling the engine VAZ 2106
- Inspection and troubleshooting of the VAZ 2106 engine
- Engine parts and assembly
- Estimate for the overhaul of the VAZ 2106 engine and used spare parts
- Engine overhaul
- How to restore youth to the VAZ 2101 engine
- Simple and reliable way out
- Motor VAZ 2106
- Crankshaft selection
- General types of tuning
- Overhaul of the engine in the car VAZ 2106
- Do I need to bore cylinders?
- Repair Tips
- Do-it-yourself engine repair on a VAZ 2106 - the order of work.
- Private
Is an engine overhaul worth it?
The engine for 2101-2107 was developed by Italians in the 50s of the last century. Since then, the design has not changed, only in 2007 the model 2107 was equipped with an injector. The engine is very simple, and if you have a repair book, as well as a set of tools, you can successfully carry out a quality engine repair. The "capital" cost, even under ideal repair conditions, is inexpensive.
As for the resource: according to the manufacturer, the engine “runs” 120 km, after which the block is reamed to the repair size, and so on 000 more times, after which the block can be thrown away. With quality parts, proper troubleshooting, use of quality lubricants and professional assembly, our engine can go 2-150 thousand, from replacement to oil and some consumables.
How to increase engine power on "classic" VAZ models
The VAZ 2101, 2103-06 or Niva models known in the CIS are often called "classics". The power units of these machines are carbureted and today they are very outdated, however, given their prevalence, there are a lot of people who want to modify these internal combustion engines.
The result can be a buildup of the engine up to 110-120 horsepower. There are even specimens with a capacity of about 150 hp. (depending on the quality and depth of improvements). In this article, we will look at how to increase the power of a classic VAZ engine.
Increasing the working volume of the VAZ engine
As you know, one of the most important parameters in relation to an internal combustion engine is the amount of work. Its power, acceleration of the unit, etc. depends on the volume of the motor.
It is more comfortable to drive a more powerful car, since the reserve of torque and power allows you not to “turn” the engine much, since acceptable traction appears at lower speeds.
When it comes to increasing workload, there are two main ways:
These methods are actively practiced for tuning serial AvtoVAZ engines, which are under the hoods of different models. To be more precise, we are talking about the first “penny” 2101 engine with a power of 60 hp or the “eleventh” engine 21011, and the VAZ 2103-06 power unit with a power of 71-75 hp. Also, do not forget about the carburetor of the 80-horsepower 1,7-liter engine in the Niva model and other modifications of the internal combustion engines mentioned above.
So let's look at a specific example. If you have a VAZ 2101 engine, then you can drill the cylinders up to 79 mm, and then put the pistons from the 21011 engine. The working volume will be 1294 cm3. To increase the piston stroke, you need a 2103 crankshaft so that the stroke is 80mm. Then you will need to buy shortened cranks (by 7mm). As a result, the volume will be 1452 cm3.
It is quite obvious that if you simultaneously bore the cylinders and increase the piston stroke, you will end up with a "penny" working volume, which will be 1569 cm3. Please note that similar operations are performed with other motors on "classic" models.
It is also important to consider that after installing a different crankshaft and increasing the piston stroke, an increase in the compression ratio will occur, which will require the use of gasoline with a higher octane rating. You may also need to further adjust the compression ratio. The main thing is to choose the right shortened pistons, connecting rods, etc.
We also add that the simplest and cheapest method can be considered a drill for repairing pistons. However, even if the block is drilled to the last repair size, the volume increases by no more than 30 "cubes". In other words, you should not count on a significant increase in power in this case.
Other engine modifications: intake and exhaust
If we take into account the recommendations of experts, then in order for the engine to turn out to be accelerating, one should not strive to increase its volume beyond the mark of 1,6 liters. Increasing the volume above this value will mean that the motor is "heavier" and spins with less intensity.
The next step is to upgrade the exhaust channels and valves. The channels are polished, and the valves can even be replaced. For example, a suitable option is selected (it is also possible from a foreign car), after which the valve stems are processed to fit the dimensions of the VAZ engine.
In parallel, the valve plates must also be processed. It is important to adjust all valves for weight. Separately, it is worth mentioning the issue of installing a camshaft. In order for the engine to work well from bottom to top and at high speeds, it is optimal to choose a camshaft that provides high valve lift. In parallel, a split gear is also needed to adjust the valve timing.
What to do before removing the motor
Therefore, you must disable all attachments. Disconnect the battery, remove the air filter housing, as well as the carburetor. Then drain all fluids from the engine. Antifreeze, if it cannot be replaced, must be drained into a container with a volume of about 10 liters. Engine oil must not be used after a major overhaul. Better pour fresh. However, most of the preparatory work is the same, no matter what kind of repair is carried out on VAZ 2106 cars. You repair the engine or remove the gearbox. The difference is in the nuances. For example, when disassembling the gearbox, it will not be necessary to drain the antifreeze.
The car is installed as evenly as possible, special bumpers must be placed under the rear wheels. This will prevent the vehicle from rolling. If necessary, you can remove the hood from the hinges. This will give you more space to work. Try to disassemble the engine as carefully as possible so as not to damage its components and elements. Remember that every broken part is another blow to your pocket. And the engine repair itself costs a penny, even without these costs.
Overhaul of the VAZ 2106 engine
Removing the VAZ 2106 engine
To disassemble the engine, you will need a winch with a cable. In addition, the latter must withstand a mass of at least 150 kg. Before starting work, you will need to disconnect the battery terminals. After that, the battery is completely removed from the car. You must also remove all attachments. Carburetor, electric fan, muffler pants, all electrical wiring must be disconnected. When overhauling the VAZ 2106 engine with your own hands, you need to remove everything attached, so you will accumulate a lot of items. And they come in handy while driving.
Then you need to install a jack under the motor, put the crossbar on top, hang the motor on the wires. After installing the motor, it can be disconnected from the gearbox. To do this, unscrew all four bolts with a 19 key. And do not forget to unscrew the brackets from the pillows on which the motor is installed. You will need a winch to pull the engine out of the engine bay. With their help, you will be able to cope with this difficult task on your own. But if there is an opportunity to use the help of a partner, do not refuse. Even if he is not tech savvy, he will at least hand over the keys and do the physical work. In extreme cases, make tea or coffee.
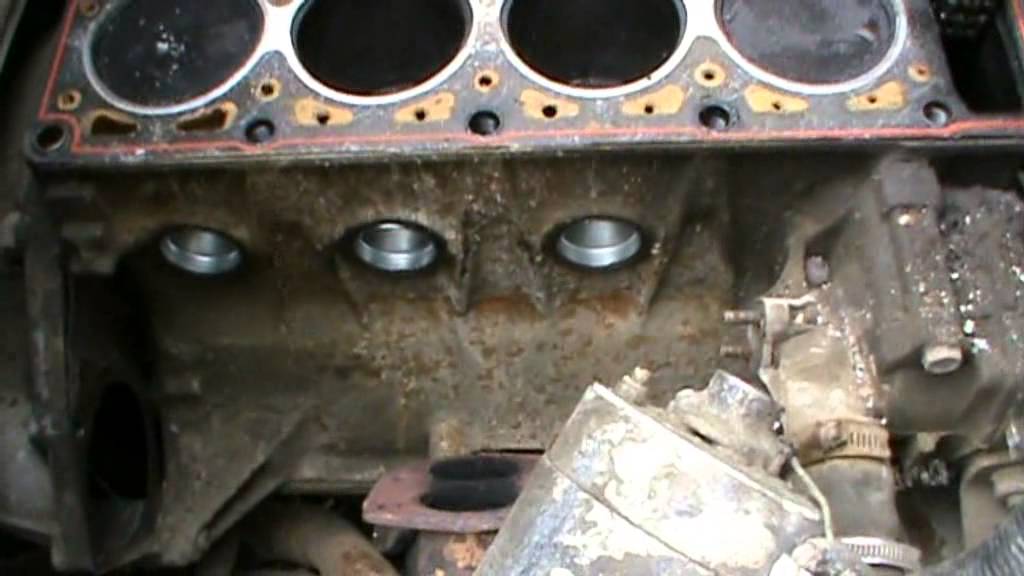
Dismantling the engine VAZ 2106
So when your engine fails, you can completely disassemble it. Do not place the engine on a hard surface. It is best to use an old tire as a support. Disconnect all items that interfere with disassembly. Then you need to unscrew the nuts holding the cylinder head cover. Try to carefully bend all the nuts, washers, bolts, so as not to lose them later. In the future, the head of the VAZ 2106 engine will be repaired, you will learn about this procedure a little later.
Remove the timing cover by unscrewing the fixing nuts. Then remove the intake and exhaust manifolds. Now it's time to remove the cylinder head. Please note that when disassembling the engine, it is not necessary to use a torque wrench. It will be needed when installing the engine. You have an inspection of the pistons, pay attention to the amount of carbon deposits, the condition of the cylinders.
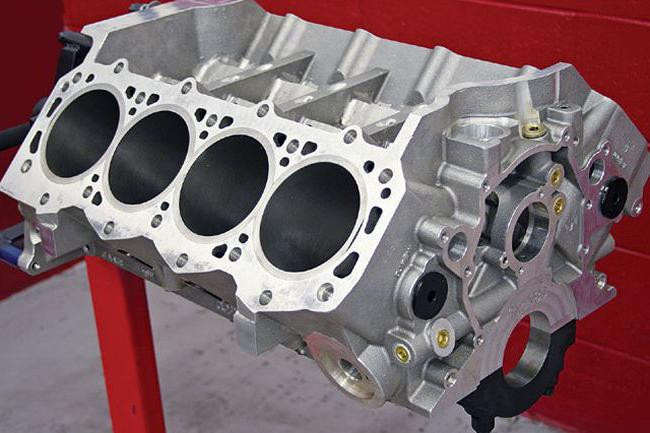
Do I need to bore cylinders?
If your engine has completely lost compression, you need to bore the cylinders. There are times when it is impossible to carry it out, since the last repair of the VAZ 2106 engine was carried out. Then a sleeve is carried out. New liners are installed on the engine block. This job requires professional skills, you will not work alone. If you are drilling a block, you have two options: you can use a polish, or you can give the sleeves a mirror finish.
You can argue a lot about the pros and cons of each type of piercing, but it is better to choose in front of a mirror. The reason is that the varnish wears off over time. It also destroys piston rings, and this is the cause of premature loss of compression in the engine. Result: you get a hole in the mirror, but at a higher price.
What to do when repairing an engine
If you plan to repair the engine on the VAZ 2106 with your own hands without outside interference, then you won’t get bored. The reason is that this procedure must be performed on special equipment. In addition, the person who does this must have all the necessary skills. If you decide to simply change the rings or pistons, the amount of work is reduced. It is necessary to buy a set of pistons, rings, fingers, it is also recommended to replace the main and connecting rod bearings.
In addition, it is imperative to straighten the valves in the cylinder head. It is recommended to replace valve guides, seals, so they must be purchased in advance. Also, you should have the necessary tools, in particular, an electric or hand drill. It should also have an inverse function. You will also need to replace the timing chain, shock absorber and all gaskets.
How to tune the engine
To improve the VAZ 2106 engine, you will need to lighten all the nodes. Namely:
In addition, the cooling and lubrication systems need to be improved. As for the pistons, here you need to polish the inner surface of the skirt. This work should be done by a specialist on a good lathe. Do not forget that the quality of the work done depends on how the engine behaves in the future. As for the crankshaft and flywheel, they need to be further centered after unloading. To do this, you will need to drill holes so that these nodes have the same center of gravity.
Dismantling the engine VAZ 2106
So this long-awaited moment for me has come: work on the engine has begun. The engine has long been in need of repair, because there is no trace. Problems:
- Oil consumption (did not smoke, but "ate" well. flew into the ventilation)
- Sapunil (increase in the output of crankcase gases)
- Reduced compression (according to the latest measurements - below 11)
- Loss of traction (uphill with 2 passengers, changed to a lower one)
- Poor valve adjustment, constant "hum
- Periodic knock "to the left" in the engine at idle
- Increased fuel consumption (up to 15 liters in the summer in the city)
+ a bunch of other problems such as crankcase oil leaks, weak cylinder head gaskets, etc. In a word, the engine, to be honest, I started it. On the advice of colleagues from work, I found a master turner who will take on the main work - drilling, grinding, setting up and assembling the ShPG. The cylinder head will also be overhauled. He took on his shoulders the work of assembling, disassembling, washing. A garage and a pit were prepared, and things moved forward. It was decided to disassemble and throw away everything, starting from the engine to the maximum, so that only the block remains, along with the helper.
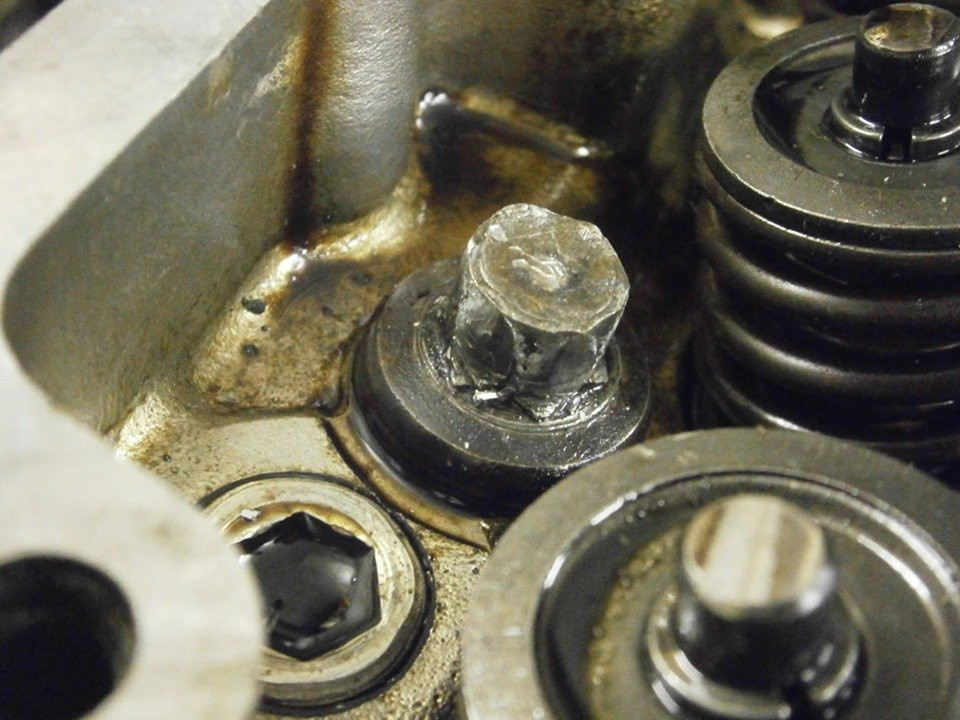
I started laying it out.. and the first major problem I had: the head bolt was inside and I managed to rip off the edges (the FORCE head and ratchet held). I have a bolt on "12", with a cast washer, the most unfortunate option, as they said later. I had to drill, the process is tedious and long, because the fear of damaging the head is great.
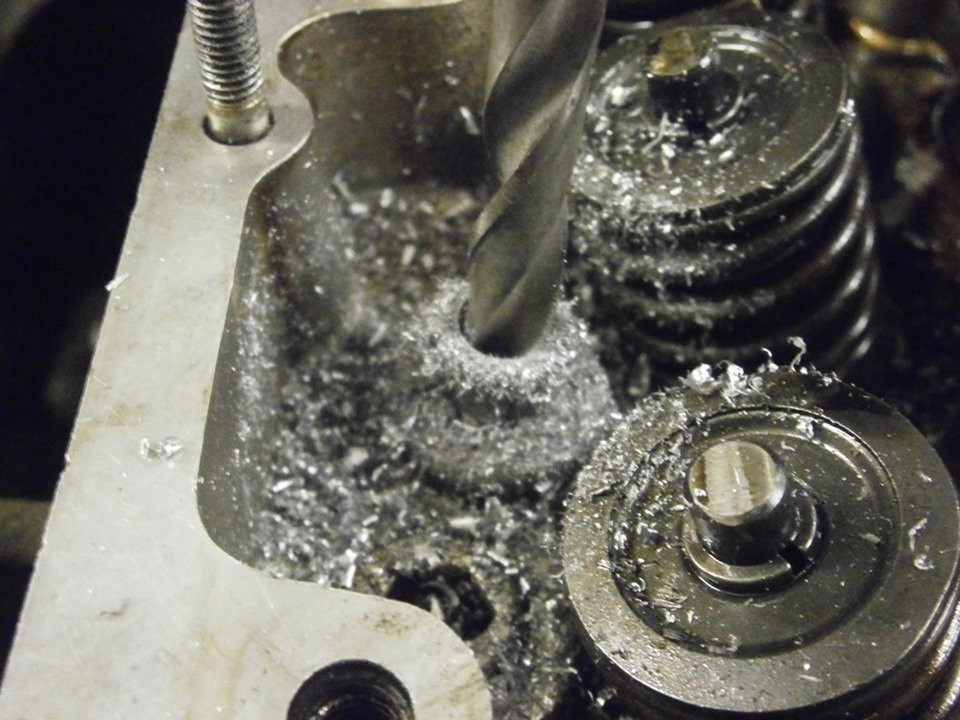
I made a complete mess on the head, the chips flew right onto the valve. Imam helped.
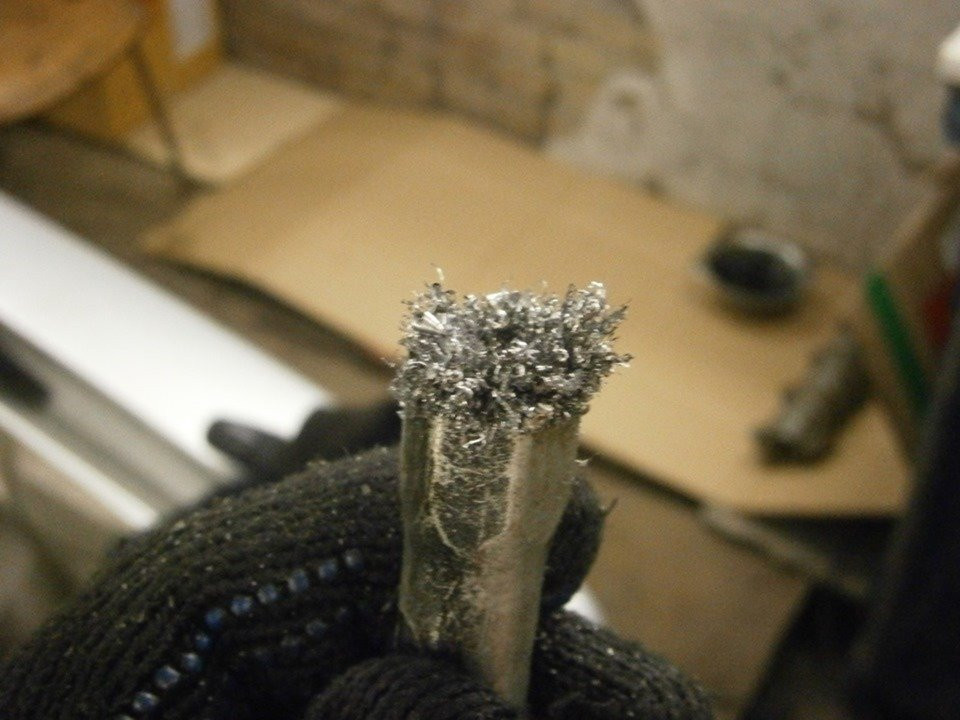
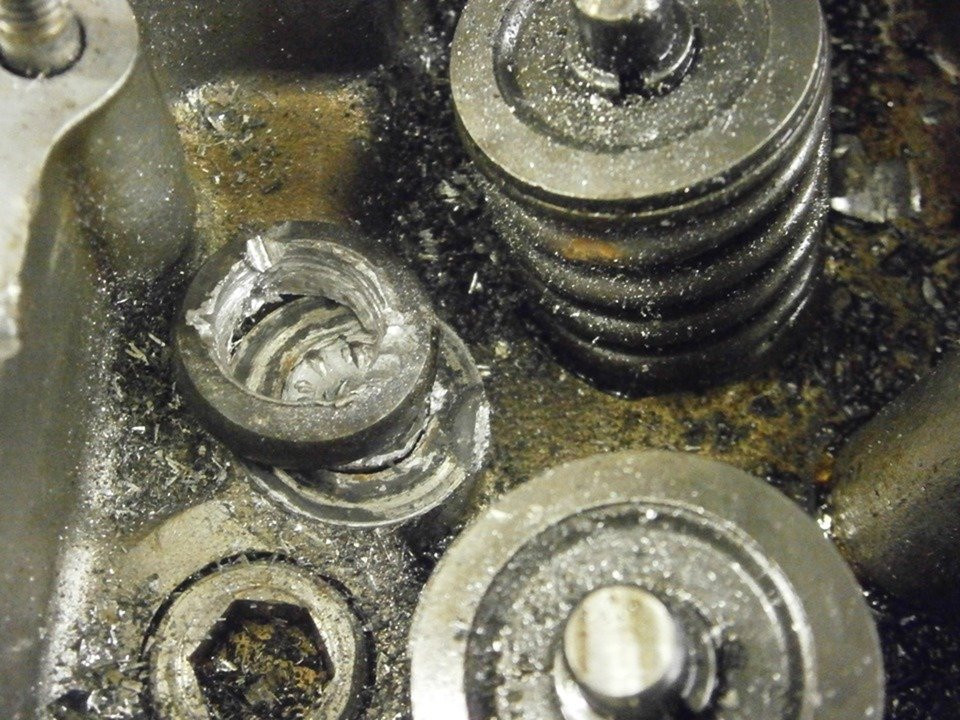
After much torment - victory. True, not without small kosyachok.
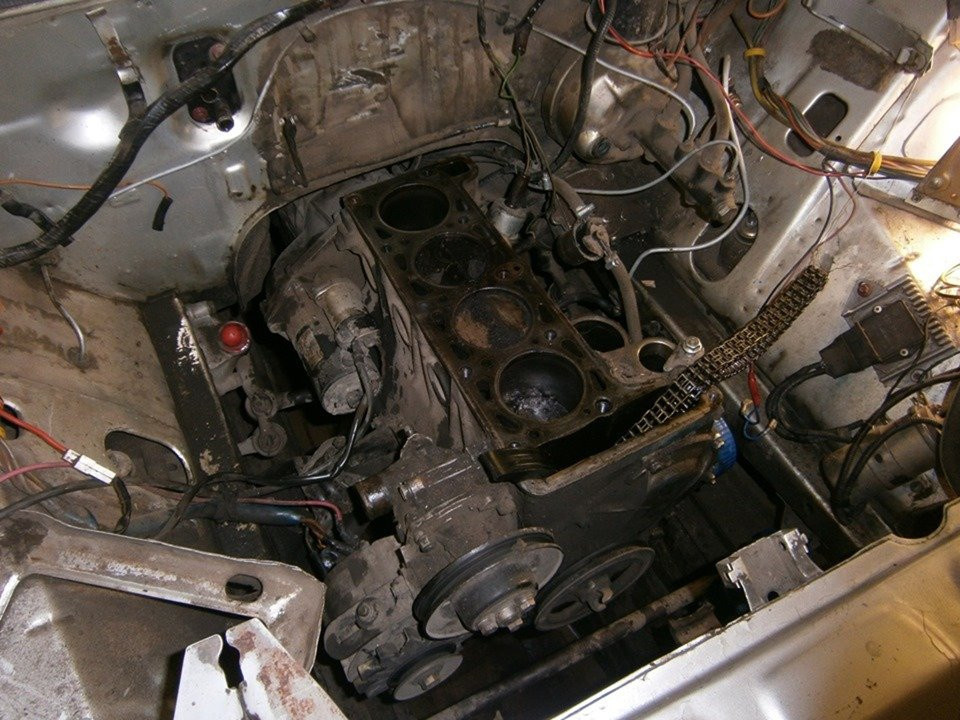
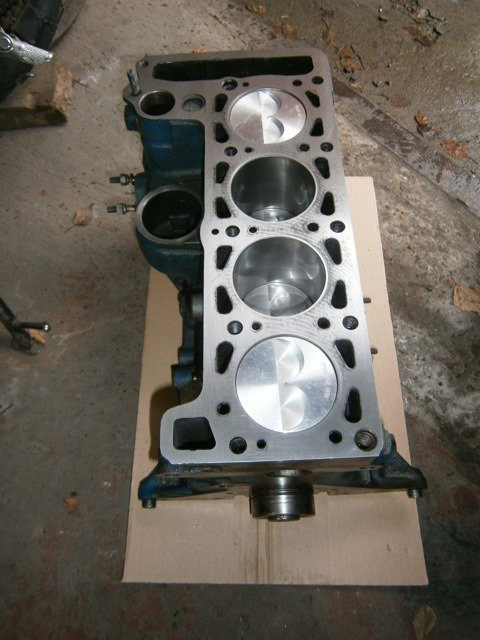
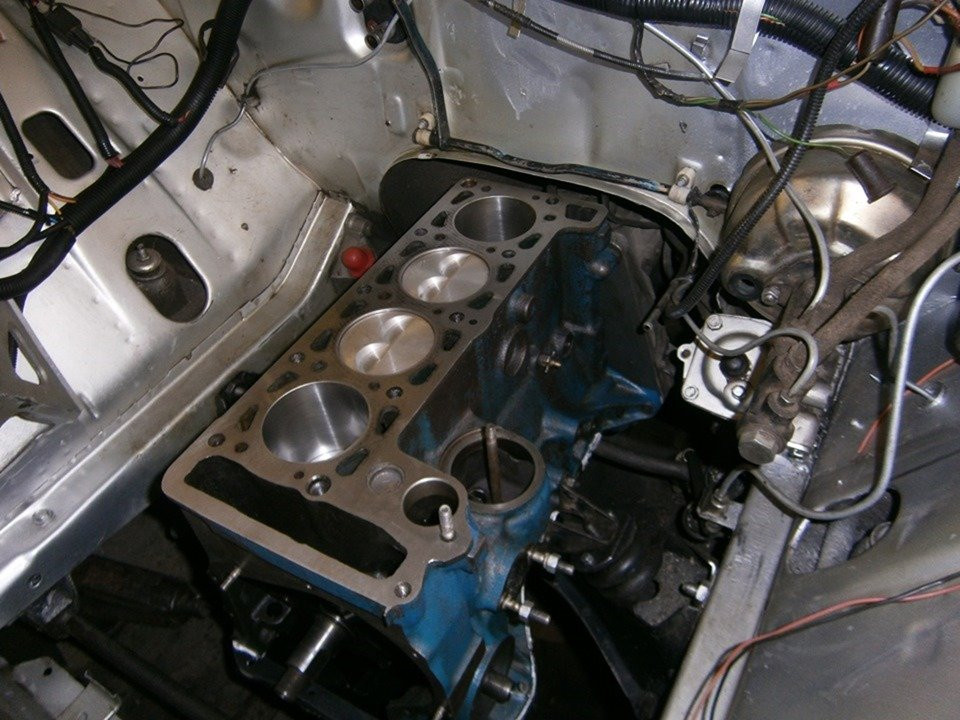
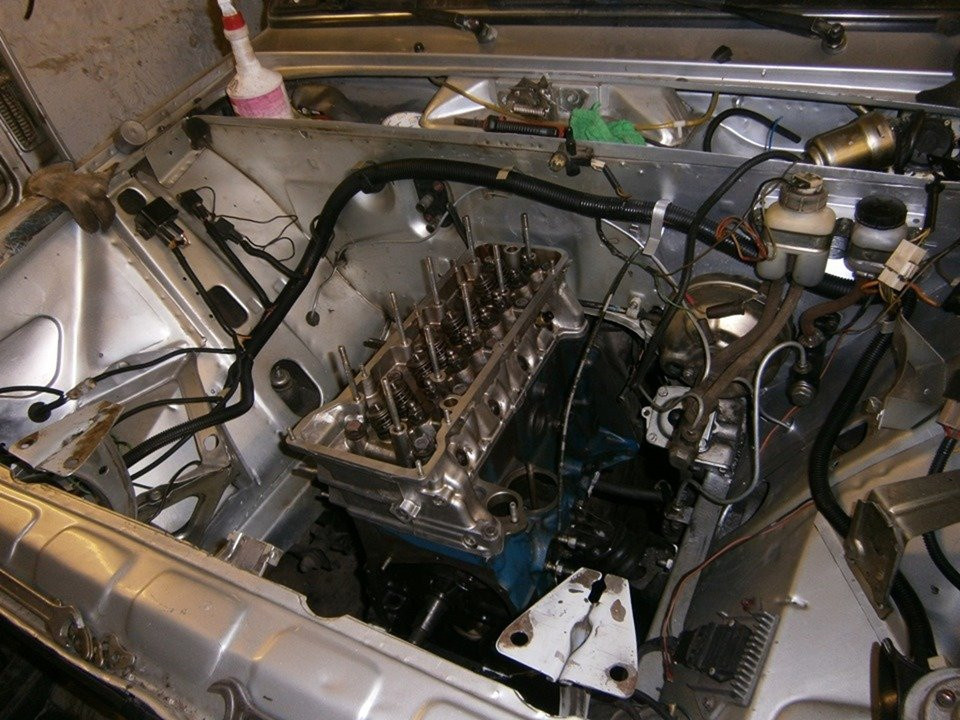
In the process of disassembly
Having removed and unscrewed all the “excess”, my friend and I almost without difficulty took out the block, complete with the piston, from the engine compartment, holding it from both sides. I didn't have to unscrew and move the gearbox, I just lifted it up so it wouldn't fall.
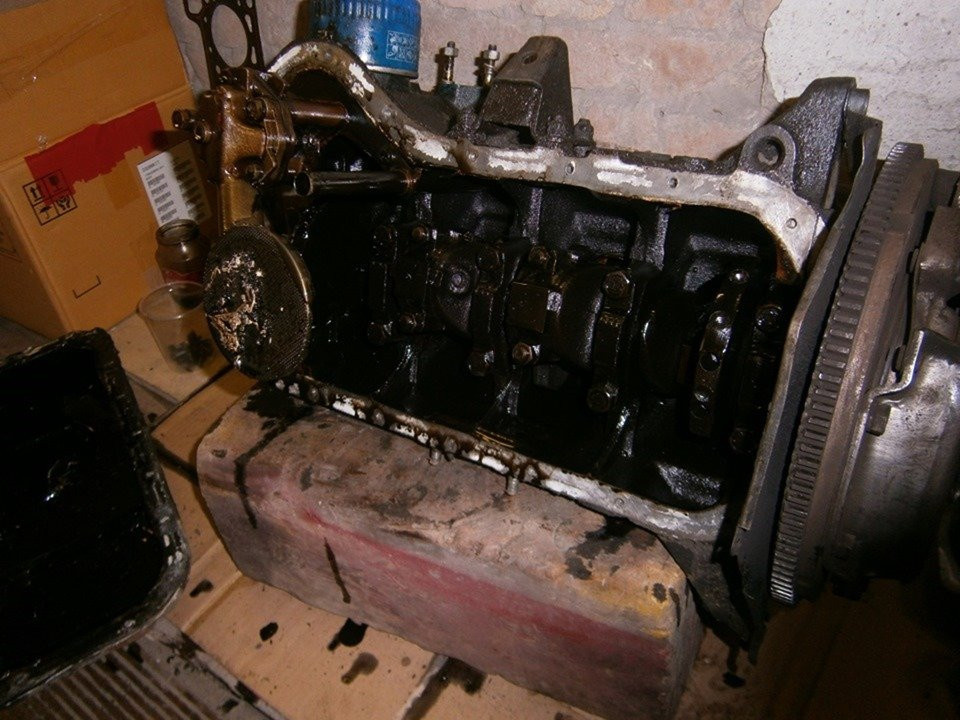
Further disassembly followed, and a "simplification of the process" in terms of attachments was made for the convenience of the turner.
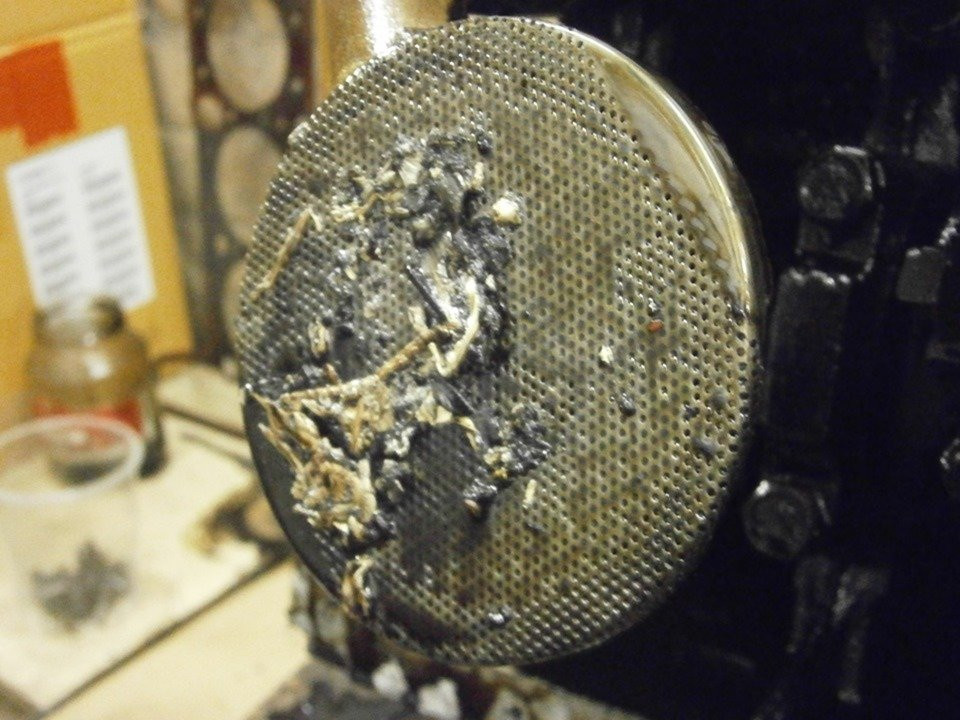
Removal of the oil pan revealed heavy oil soot and a clogged oil pump screen, sealant residue and other debris.
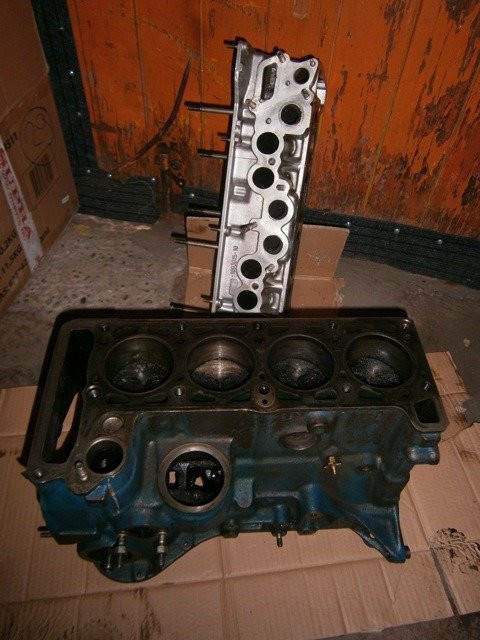
Well, after a complete disassembly, I washed the block and head for a couple of hours. The task required a good amount of PROFOAMa 1000 and AI-92 gasoline
As a result, the finished block and the head assembly are handed over to the turner, but this is already next time, in the second part.
Inspection and troubleshooting of the VAZ 2106 engine
I will briefly tell you the latest information about the overhaul of the engine of my car, which is now in the process.
So, the engine (block with ShPG) was pulled out, disassembled and washed as much as possible, the same was done with the cylinder head.
In addition, the block and cylinder head were handed over to the master turner, who, in fact, will serve all the complex turning and technical work.
When the hardware was delivered, there was a stage of inspection and differentiation by the teacher.
Here's what turned out:
- The piston on my 06 block is “five-wheeled” (with notches for valves). And the worst thing is that this is the last repair: 79,8 mm. Those block either changes or manga. Boring options for 82 and other “forcings” do not suit me.
Therefore, it was decided - in the sleeve. The piston will be placed in the same way 05th, 79mm.
Mirror in cylinders without visible work, and ellipse - depending on the caliber of the inner diameter. - The crankshaft has axial runout above tolerances.
Thus, there was a partial misalignment of the connecting rods and pistons with them, in connection with which the visible wear of the linings "at the edges" and the characteristic "pattern" of the penetration of gases along the piston to the sides. The general condition of the sleeves is satisfactory, there are no longitudinal ruptures. Inserts are already 0,50 in size, everywhere. - It was also revealed the presence of workings in some necks of the HF (apparently the result of the "correct" operation by the previous owners).
The result of HF is the grinding of coatings less than 0,75.
- Cylinder cover. Several serious problems were also identified. Large oil deposits (probably formed during the period of wear of the valve stem seals and oil burnout). Also partially on some valves there is a burnt-out oblique plane.
The valve stems and the valve guides themselves are within tolerance. There is no backlash.
The wear of the rocker arm and camshaft is visible, but not critical.
Most likely, all this will change, and the camshaft from the 213 Niva will be installed, as it is wider on the rise.
New valves, oil scraper will be installed.
We cut out fasteners for a triple chamfer, grind. All with their own hands.
Vepr will also be deployed. You have permission.
The oil pump is new, just in case the factory milled plane is polished.
The cylinder head and block planes will also be polished.
Well, something like that, big review, big review.
Now I'm waiting for news and adjustments from the turner.
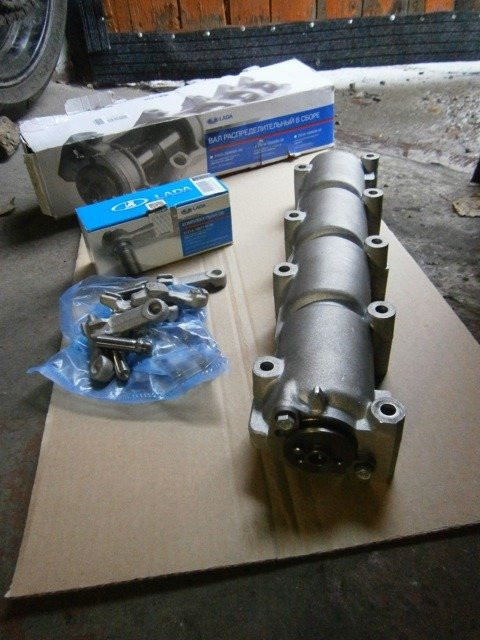
Engine parts and assembly
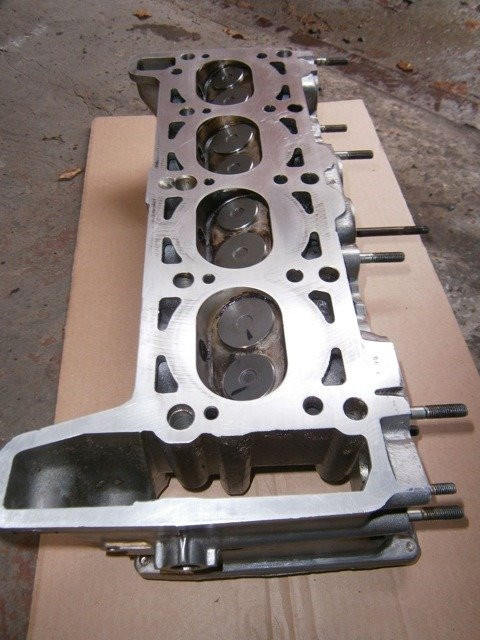
After some time (more precisely a week), the master turner called me and said that everything was ready. I took all my pieces of iron. Completely finished assembly of the SHPG cylinder block:
Let me remind you that the block was drilled and sleeved, and also honed.

A piston group was supplied: "Motordetal" 2105, 79 mm, that is, the factory size.
The crankshaft was supplied from Niva 213, used but in excellent condition: all necks are polished to repair 0,75.

My old HF was badly beaten and needed to be polished, but the time for this (up to 5 days) did not suit me, the holidays were over .. and my work without a car is not work.
Therefore, the master offered me this HF from the fields, in exchange for mine. I agreed.
A big plus in favor of this "knee" is that it is better balanced, thanks to 8 counterweights. (against 6 - in my previous, 2103-shnogo KV).
Also, for prevention (and so that everything “immediately”), PromVal (“Vepr”, “Piglet”) was fixed. New bushings were rolled out, the Vepr was adjusted by grinding.
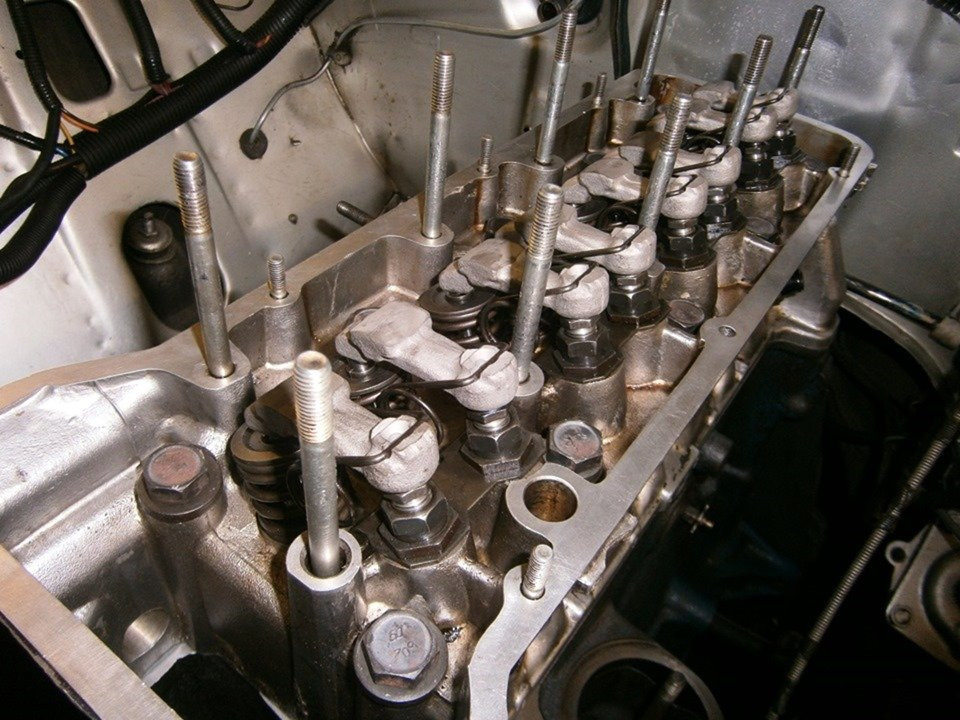
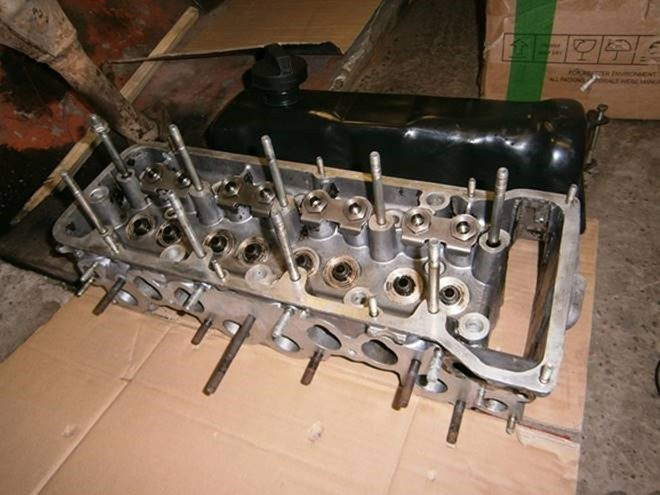
Next is the head:
The cylinder head was also repaired: New valves, fasteners cut off + polished to "bugs". In addition, new valve stem seals (valve seals) - Corteco were supplied.

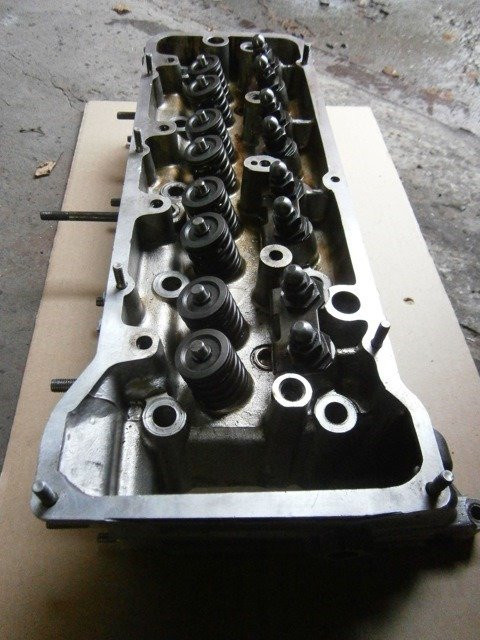
The cylinder head, like the block, was polished for several "hundreds".
The oil pump has been polished working plane, it was only milled from the factory. The master determined this by improving the operation of the pump and increasing the pressure it created. Take my word for it :-)
In addition, a new "mushroom" was bought

Since my camshaft did not inspire confidence in its condition, it was decided to change it! Was bought by the distribution of the same Niva 213, as the most optimal and recommended in terms of finalizing the "base" engine.
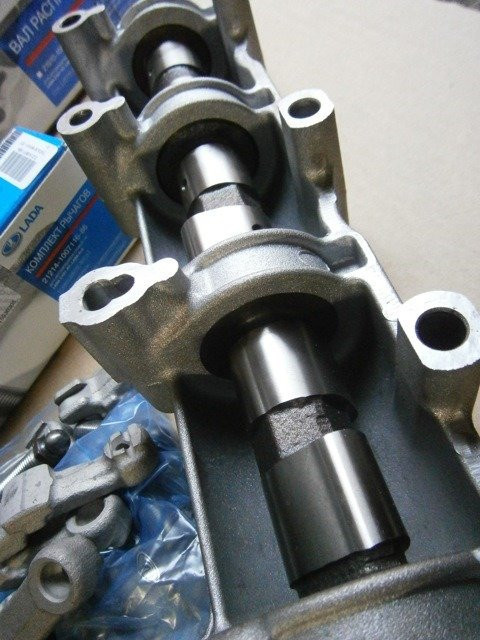
Two hexagons: sign 213
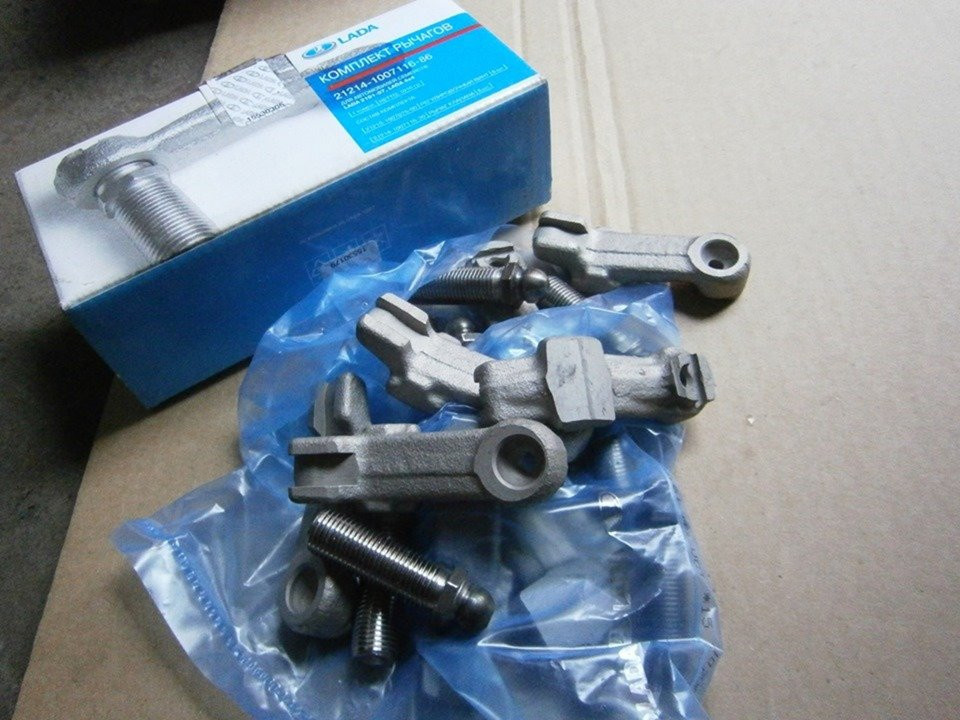
Attached is a set of swings with soldiers from Camp 214.
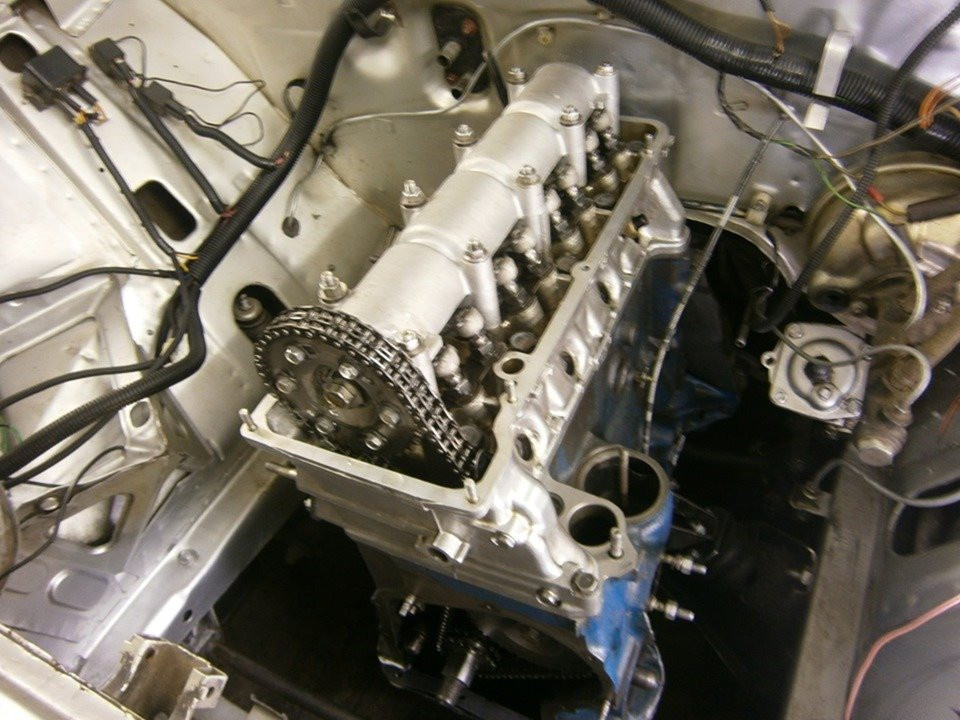
Well, in order to properly adjust and assemble the timing mechanism, I bought an adjustable camshaft gear (split
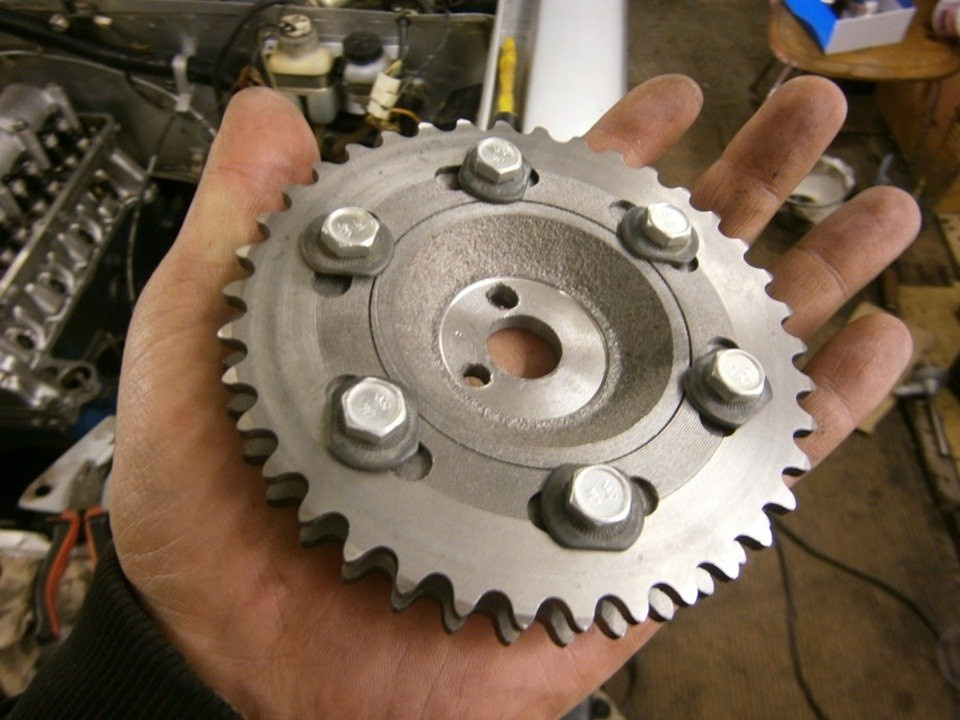
It looks like a Samara manufacturer, but outwardly it looks like a "cooperative".
Getting Started ASSEMBLY
With a friend, skillfully, almost as easily as filming, glued the block in place:
Then he pulled off the “head”, stretched everything according to the manual with a torque wrench:
Swing in place

Installing the camshaft was no problem. I measured all the marks, freed the "soldiers" from the rocker arms, put on the "split" gear.
After assembly, I adjusted the valves "the old fashioned way", using a 0,15 probe, bought for this from a specialist. I did everything for the first time. Yuzal "Murzilka".
Don't be embarrassed using a new sprocket for just the driveshaft... I have a new timing gear.. completely gone. Changed not so long ago, on the pages of the BZ there is a corresponding entry.
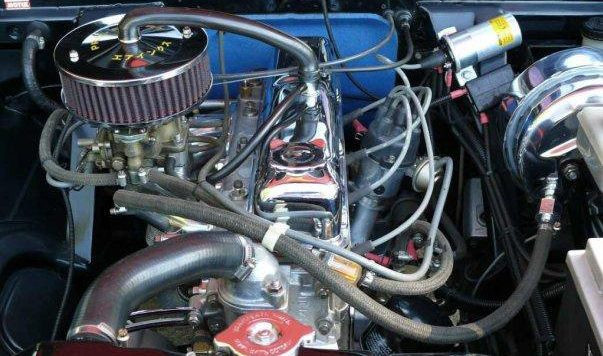
Closer to midnight, the engine was assembled, and the engine compartment took on a more or less finished look:

Filled with all fluids: antifreeze, oil. I started the engine without spark plugs, with a starter, until the oil pressure light went out ... Then I screwed in the spark plugs, put the ignition on my eye ... I turned it on, everything works! Performed the main grinding several times, turning it on and off at a certain temperature.
The motor was terribly warm, for a minute or two .. and already 90. The motor fan closed right away, and home. The first 5 km were the hardest
In the morning everything was much better. I immediately went to the carburetor, adjusted XX, CO ... UOZ in the strobe worked almost perfectly
To date, November 14, the run is already 500 km. I'm running at full speed ... I travel a lot for work. Oil and coolant are normal, the first days passed little by little .. apparently the gaps were filled. Now it's normal. The oil has darkened a bit.
From the positive, which is immediately noticeable:
- Smooth and pleasant motor operation, silent synchronization
- Good traction, especially on bottoms (compared to "DO")
- Good dynamics (although I don’t crank more than 2 - 2,5 thousand yet)
- Fuel consumption 11-12l. (and he's on the run)
Well, the “hot” pressure at 1,5 - 2 thousand rpm is especially pleasant.
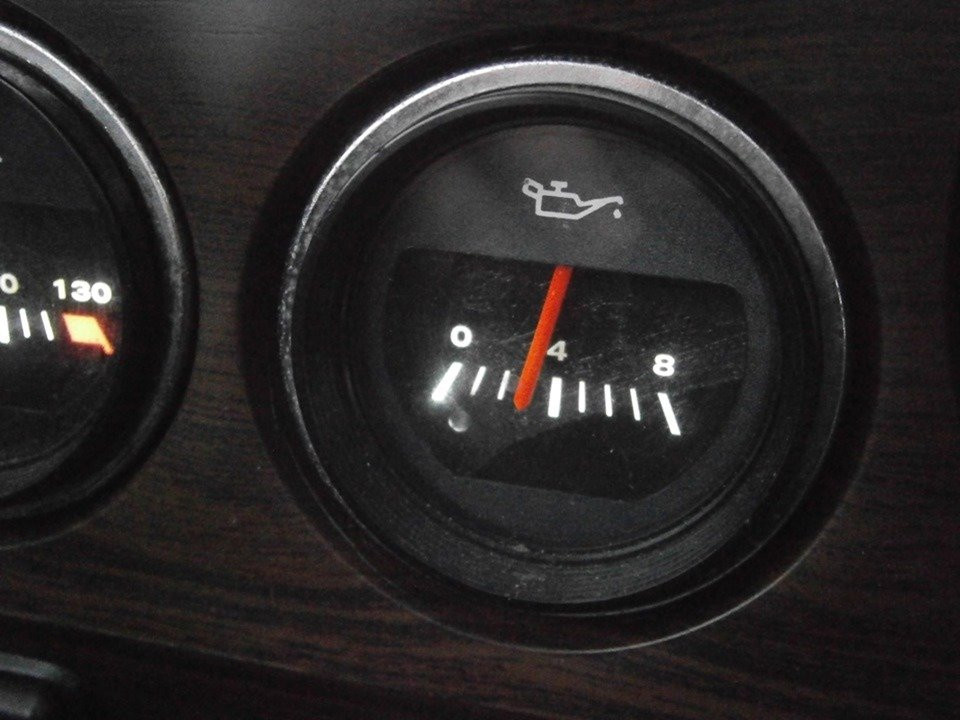
Previously, this was not
I hope that the shooting goes well, without surprises.. and these numbers will improve even more.
In the meantime, everyone is happy) I continue to ride and rejoice)
Estimate for the overhaul of the VAZ 2106 engine and used spare parts
I remind you that the car was taken in for repair after October 20 and set off on November 4 with a “renewed heart”. The “capital” was successfully done, now the shooting is in full swing, bringing the car closer to the cherished “lawn mower” of kilometers:

Today there is no idea to postpone something and retell something for a long time, I will only show, as I said, the final estimate of the cost of repairs.
From the very beginning, I decided to keep a simple Excel spreadsheet, where I would summarize all the expenses. Here's what happened in the end:
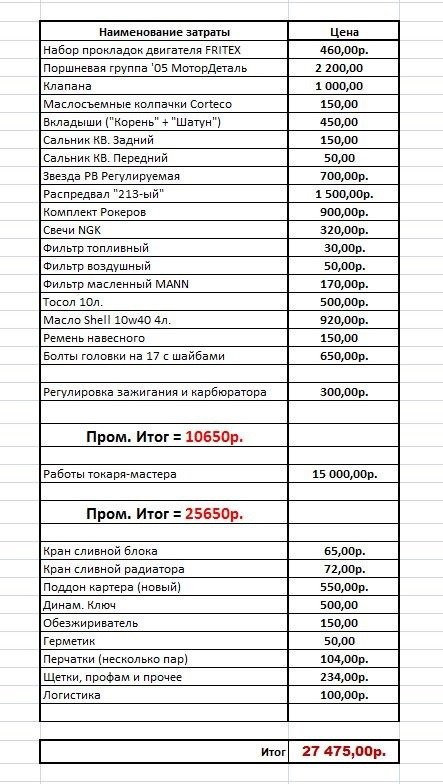
As you can see, the main part itself was “Work” and the main spare parts.
In its pure form, this is 25 rubles, approximately ...
Spare parts were taken in ordinary city stores, in more or less reliable ones, as well as something on the market ... They did not give special preferences to anything. Online shopping is also overlooked due to lack of time. Therefore, the prices turned out to be average, in my opinion, for my city ... I can’t say anything about the cost of the master’s services either. Maybe they are too expensive, but did not choose. I saw his work live, on the example of a foreign car from a colleague, as they say, "drives, knows no problems." And stopped there. I am completely satisfied with the quality of your work.
I also took into account all the little things, including cleaning products, used gloves, etc. Also, I didn't have some of the tools I needed to buy. In addition, the pan was badly dented, I also decided to change it ... I took out the drain taps for convenience, and so on.
In general, my final official figure is 27500 rubles. In real life, about 30000, because along the way I came across all sorts of different little things, nuts ... broken asparagus, etc. I also bought some of the tools and accessories, such as centering the clutch disc, some heads ... I even took into account the logistics for delivering the engine to the turner and other little things. If you add oil here, which will soon have to be changed again. and what goes with it, then we will definitely approach the mark of 30 "pieces". So in a way. Perhaps someone will be interested as information for "evaluation". Well, for me, this is the most important thing - the result, and it is, which I am very happy about.
I hope that the investment pays off and that the machine works well.
Engine overhaul
After what mileage do you need to do an engine overhaul
It is impossible to give an unequivocal answer to this question, because everything determines the technical condition of the engine. It also depends on the use of quality fuel and timely oil changes.
Depending on the brand of the car, it is recommended to check the engine in Volgograd every 100-200 thousand km.
When deciding whether to do this procedure or not, you need to focus not on the mileage, but on your technical condition, be vigilant!
Even if everything is in more or less working condition, prevention should be carried out. After all, timely prevention is a huge savings on repairs!
Causes of accelerated engine wear
There can be many reasons for increased wear, and it is not always possible to determine which of them caused serious problems.
There are several reasons that contribute to this:
- Irregular oil and filter changes.
- Poor quality fuel. Very often we save money by buying the cheapest oil and fuel. But in reality, all savings will result in a tidy sum. You can't try to earn a couple of cents on such components!
- The use of low-quality consumables and their irregular replacement. Abrasive particles enter the engine and cause it to overheat, which leads to increased wear.
- Driving mode and storage conditions. A very important factor is the load on the power unit, if you squeeze out high speeds and store the car in the open, do not be surprised at the imminent failure.
Causes of motor problems
To determine whether it is necessary to hand over the car for an engine overhaul, it is necessary to conduct a complete diagnosis. But the driver himself can give an assessment for two reasons:
- Hit in the power unit. This means that the crankshaft journals and bushings are worn out. If you hear a loud and distinct knock, urgently go to Service Motors, it is simply no longer possible to postpone recovery procedures!
- High consumption of fuel and lubricants. This indicates that the cylinders and pistons in the system are worn out to a critical state, and the unit also consumes oil from the crankcase. And the necessary pressure is not created in the combustion chamber and the efficiency drops, hence the increase in consumption.
But still it is impossible to bring the vehicle to the states described above. And the decision to overhaul the engine should be made based on the results of a complete diagnosis. An improved reference point is low compression in the engine cylinders, and with it the oil pressure also drops; This is a serious reason for a complete overhaul.
There are situations when this is easily explained. Valves can burn out, so low compression and slip rings cause increased oil consumption. But don't get too excited, you still have to do a medium engine repair.
How to restore youth to the VAZ 2101 engine
The tuning of the VAZ 2101 engine that we started by default will not tear the asphalt under it. It can growl like a Nissan Z350, but nothing more. And this should be accepted as a fact. Even if you put a 124 FIAT 1966 and a FORD Mustang of the same year side by side, you should not compare their standard power and purpose. We are not going to prove anything to anyone, we are just trying to squeeze as much power out of the 1300 cc engine as possible without affecting the resource much. The car is not for racing, but for everyday life. In light of this, a certain amount of work arises:
If everything is done correctly and accurately, the 2101 engine will be able to amaze with liveliness and dynamics.
Simple and reliable way out
No need to go far and reinvent the wheel - you can use what the native manufacturer offers.
Any engine from the classics - VAZ 21011, 2103, 2106
and even from 2113 it will be converted into a penny without any problems. Mountings are identical throughout, minimal modifications will be required. The main advantage of the solution: the engine can be installed almost new, and already worn out can be obtained from foreign cars. (see the article "Replacing the engine with a contract").
For more modern models (VAZ 2108-2170), you will have to cut the body and think about fasteners, although there will not be so many problems here either.
Good power will give "Niva" 1,7. Only now you need to be careful and mount a new engine with its own oil pump and crankcase - on the Niva they hang lower, when installed on a penny, there is a high probability of hooks.
from Lada Priora is also a good solution. With a volume of 1,6 liters and a power of 98 horses, the VAZ 2101 will run like a youngster.
It is especially pleasant that there is no need to change the gearbox - all gearboxes are easily connected to the new engine.
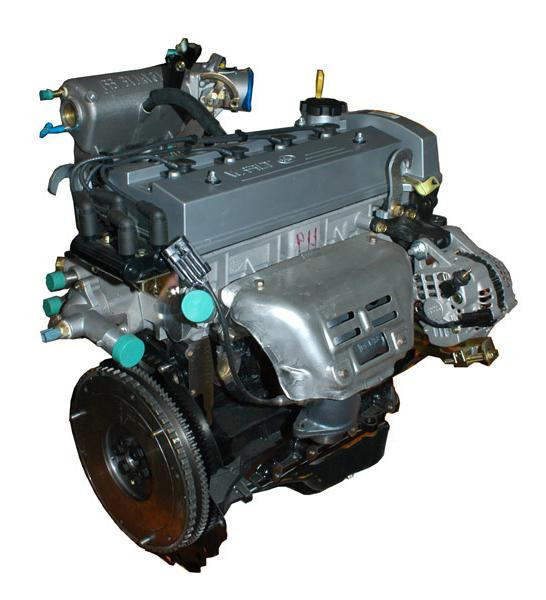
Motor VAZ 2106
The baton for the engine, which became a real breakthrough in the Soviet market, was taken over by the VAZ 2106 engine.
A natural improvement in 2103 was the improvement in the technical characteristics of VAZ engines in the direction of power.
The engineers did it:
But the 2106 engine did not find much sympathy with the owners, as well as rotary engines for VAZ during export, since the owners of 2103, 2121, 2107 tried to choose the most reliable VAZ 2103 engine.
This was due to the lower survivability of 2106, the instability of work when using fuel of lower quality. The saddest result was the wear of the valves and the overhaul of the unit in these cases was required much more often than in 2103.
Crankshaft selection
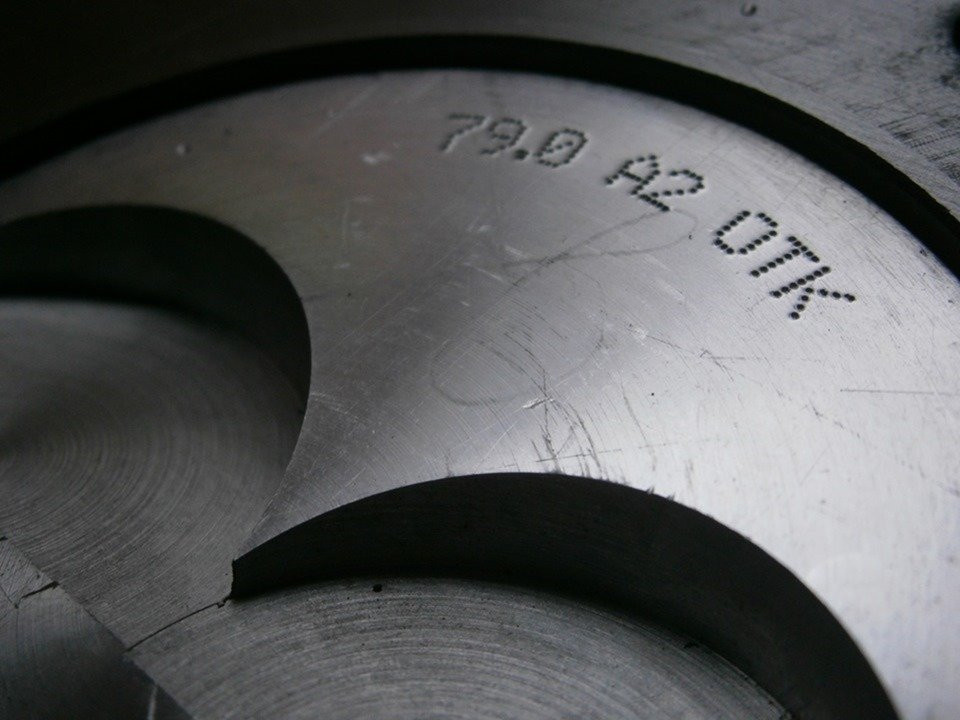
We will not touch the passport power, since the increase will be symbolic, but this will affect the dynamics. It remains only to choose a human crankshaft, and this is not an easy task. If you take a used one, there is a chance of running into a shaft with hidden defects - cracks, curvature or too much wear. And if the shaft was restored, then you can get a poor-quality neck surface. If there is no confidence in the quality of such a crankshaft, it is better to look for a new one. A good quality crankshaft will not shine like chrome.
This is how low-quality shafts made of unhardened raw steel are prepared for sale. A good hardened shaft will have a shiny matte finish on the journals and should be wrapped in oil paper and lubricated with grease. And, of course, marked 2103-1005020.
General types of tuning
Not always tuning the VAZ 2101, in the correct sense of the word, is like that. A thoughtless and tasteless change in the appearance of the car sometimes results in the appearance on the street of a blatant "disgrace", hung with thousands of "fireflies" and stickers from brands that are not even related to the automotive industry.
If we talk about body changes (styling), we are talking about installing new or modifying old bumpers, body kit, spoiler (wing), all kinds of air intakes, applying airbrushing or covering the body with a protective film. Here it is worth mentioning tuning thresholds, a radiator grill and much more, depending on the possibility, desire, availability of funds or imagination of the car owner. In general, everything you need, and often not so much, that can change the appearance of the car almost beyond recognition, distinguish it from similar ones on the road.
All this is finished with the help of a local craftsman in the garage or by contacting specialists, installed from another suitable Zhiguli model or a car of another brand, created from sculptural plasticine, polyester resin, plexiglass, fiberglass, plastic or other materials.
Replaced internal door cards, upholstery, seats, dashboard, steering wheel. Power windows were installed, an armrest was added, a powerful audio system with a subwoofer and amplifiers was installed, the sunroof was rolled up, and the trunk was finalized. Changes are made to the factory instrument panel by completely replacing it or installing elements such as a tachometer, on-board computer, video player and others into an existing one.
Chassis adjustment means a decrease or increase in ground clearance, changing the size of the wheels, refinement (strengthening) of the suspension. Installing shock absorbers is more suitable for the owner. And of course cast or forged wheels. Where without them?
Fundamental changes relate to the gearbox and rear axle gearbox. The four-speed gearbox becomes a five-speed one, taking into account the modernization of the engine, the gear ratios that are most suitable for a particular result are selected.
Ventilated brakes on the VAZ 2101 are also not uncommon. Vacuum booster with improved performance, clutch ... I can't list everything. All this in order to “pump”, remake the car itself, bring to perfection what, in theory, should have been thrown away a long time ago. And, let's face it, these extraordinary changes can extend or even give a beloved car a second life. The minimum is to make others take care of the handsome man.
Overhaul of the engine in the car VAZ 2106
Before starting the overhaul of the VAZ 2106 engine, it is required to disassemble it for a detailed disassembly of the constituent elements. This is only possible if you have the right measuring and locksmith tools, as well as new sets of spare parts.
The detailed procedure for disassembling the drive is as follows:
- Unscrew frame fasteners.
- We loosen the fuel pump hose clamp and disassemble the product, after unscrewing the nuts of its fastening.
- Pull the sealing plate out from under the fuel pump.
- We disconnect the high-voltage wires from the candles and remove them.
- Take out the pressure plate.
- Disconnect the hose from the vacuum regulator.
- Remove the distributor.
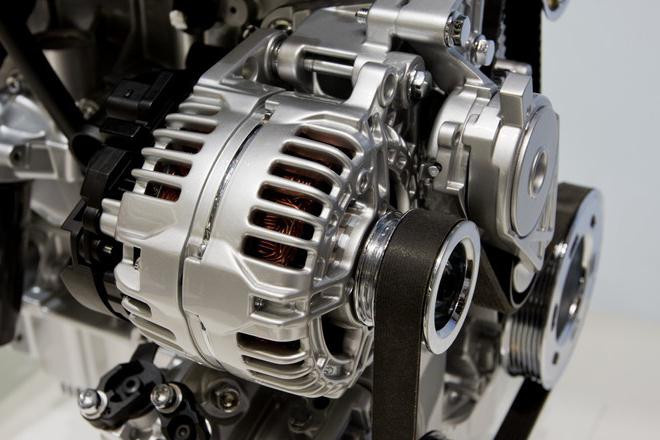
- We unscrew the fasteners of the generator, take out the spacer, the belt element and the generator itself.
- We loosen the clamp fasteners, remove the heated hose from the intake manifold.
- We take out the water pump (pump) by removing its fasteners.
- Disconnect the connecting hoses from the carburetor, breather, distributor and fan.
- Remove the thrust washer and throttle control bracket stem.
- Unscrew the oil filter.
- Unscrew the breather housing together with the probe.
- Remove the oil sensor.
- We release the crankshaft pulley from the mounts to the engine block. We dismantle the crankcase mounts and the product itself.
- We unscrew the fasteners on the valve cover and the product itself.
- We disassemble the cylinder head housing together with the plate and screws with a vacuum type hose.
- We take out the gasket installed on the cylinder head.
- Unscrew the fasteners and remove the chain adjuster.
- We turn the bolt carrier of the driveshaft sprocket together with the crankshaft.
- Loosen the camshaft sprocket fasteners.
- Remove the sprocket along with the camshaft drive chain.
- We disassemble the fasteners, etc. chain tensioner “shoe.
- Remove all fasteners from the bearing housing.
- We disassemble the bolts holding the head, with their subsequent removal along with the gasket.
- We remove the steering wheel.
- Using a clip, remove the front shield from the clutch housing.
- Remove the remaining fasteners to secure the oil pan.
- We take out the fastening of the crankshaft oil seal from the stern of the engine.
- Remove the oil pump with gasket.
- We disassemble the drive shaft of additional mechanisms.
- We take out the drive gear of the distributor with a puncher or a screwdriver.
- Unscrew and remove the oil separator with oil drain pipe.
- We unscrew the cover of the connecting rod of cylinder I, disassemble it with the help of auxiliary locksmith tools.
- We take out the piston with the connecting rod support.
- Repeat this technological operation with the rest of the cylinders.
- We remove the crankshaft with the subsequent removal.
- Mark with a marker all removable parts of the engine and arrange them in a certain order for subsequent assembly.
During the overhaul of the VAZ 2106 engine after disassembly, it is required to replace defective spare parts with updated ones and assemble the power unit.
After the completion of the entire complex of works, the overhaul of the engine can be considered completed. If repair of the cylinder head of the VAZ 2106 block is required, it is carried out after removal and detailed analysis of the cylinder head, followed by the replacement of all defective parts and assemblies.
Do I need to bore cylinders?
If your engine has completely lost compression, you need to bore the cylinders. There are times when it is impossible to carry it out, since the last repair of the VAZ 2106 engine was carried out. Then a sleeve is carried out. New liners are installed on the engine block. This job requires professional skills, you will not work alone. If you are drilling a block, you have two options: you can use a polish, or you can give the sleeves a mirror finish.
You can argue a lot about the pros and cons of each type of piercing, but it is better to choose in front of a mirror. The reason is that the varnish wears off over time. It also destroys piston rings, and this is the cause of premature loss of compression in the engine. Result: you get a hole in the mirror, but at a higher price.
Repair Tips
Before proceeding with the repair of the engine of the VAZ 2106 car, popularly called the "six", it is necessary to clarify a few points.
1. It is necessary to determine the consequences of the repair. With the correct restoration of the performance of all components, mechanisms and assemblies of the "six" engine, the engine will start working again, but not the same as before. The fact is that there are many parts in the engine that come into contact under pressure.
They move relative to each other or both at the same time. As a result of this state, microroughnesses on their surfaces are smoothed out, the parts are located closer to each other, which leads to a reduction in energy consumption to overcome contact resistances.
If, during the repair process, the parts are separated and reconnected, then the surfaces will be held together by other microroughnesses. As a result, a new shoot is required, which is ensured by removing a layer of material.
The removed layer of material again and again increases the gap at the point of contact of the working surfaces, which will ultimately lead to the failure of the assembly without visible defects. Therefore, it is not recommended to disassemble the parts if it can be avoided.
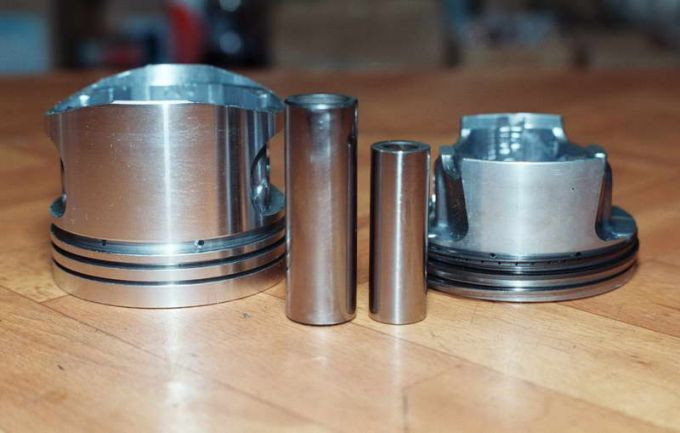
VAZ engine piston and pin.
2. It is necessary to accurately determine the location of the breakdown and outline the ways in which you can approach it. Inexperienced workers often cannot pinpoint exactly what is wrong. Completely disassemble the engine; this takes a significant amount of time and may result in the engine not being reassembled. Re-disassembly of engine components is not recommended.
3. It is necessary to prepare the workplace and prevent the entry of strangers. If repair work is carried out in a car repair shop, then it is enough to prepare the tool in time and stock it up. In order to completely disassemble the engine from the VAZ 2106, you will need an overhead crane or winch that can withstand loads up to a ton.
Do-it-yourself engine repair on a VAZ 2106 - the order of work.
Therefore, before proceeding to check the engine, it must be removed in order to gain access to all damaged mechanisms. To perform engine repair, the following tools and mechanisms will be required:
- repair tools (wrenches, hammer, screwdriver, etc.);
- spare parts for the engine.
The procedure for disassembling the engine is as follows:
- We unscrew the mounting bolt from the frame, which is installed when removing the engine.
- Unfasten the clamp, remove the fuel pump hose.
- Remove the pump by first unscrewing the nuts with which it is attached.
- Take out the spacer. It is located under the fuel pump.
- Remove the layer that is between the cylinder block and the spacer.
- Remove the spark plug wires.
- Remove pressure plate.
- Disconnect the hose and vacuum regulator.
- Remove the ignition distributor.
- We unscrew the nuts that hold the generator, remove the washers, the belt and the generator itself.
- After loosening the clamp, remove the heater hose from the intake manifold.
- Remove the coolant pump by first unscrewing all the necessary bolts.
- Remove the carburetor hoses, crankcase ventilation systems and vacuum supply hose to the ignition distributor regulator.
- Remove the ventilation hose.
- Remove the carburetor intermediate throttle lever shaft from the washer.
- Remove throttle body.
- Remove the oil filter from the disassembled device.
- Loosen the breather cover nut and remove it together with the oil level gauge.
- Remove the oil pressure switch.
- Remove the crankshaft pulley by removing the nut that secures it to the cylinder block.
- Loosen the bolts that hold the crankcase.
- Remove the cylinder block cover by unscrewing the fixing nuts and bolts.
- Remove the cylinder head cover, as well as the plates, the bracket with the vacuum hose.
- Remove the gasket located above the cylinder head.
- Loosen the fasteners and remove the chain tensioner.
- Turn the bolt holding the accessory drive shaft sprocket while turning the crankshaft.
- Loosen the camshaft sprocket bolt.
- Remove the sprocket and remove the camshaft drive chain.
- Remove the crankshaft sprocket.
- Remove the mounting bolt and shoe from the chain tensioner.
- Loosen all nuts holding the bearing housing.
- Loosen the cylinder head bolts and remove it from the engine.
- Remove the head gasket.
- Remove the flywheel.
- Loosen the fasteners and remove the front cover of the clutch housing.
- Tighten the last screws securing the oil pan and remove it.
- Release the rear oil seal bracket.
- Remove the oil pump and pump gasket.
- Remove the accessory drive shaft.
- Using a screwdriver, remove the ignition distributor drive gear.
- Unscrew and remove the oil separator and drain tube.
- Unscrew the cover of the connecting rod of the first cylinder, remove it with a hammer.
- Pull the piston with the connecting rod out of the socket.
- Remove the pistons and connecting rods from the remaining cylinders.
- After removing the fasteners, remove the crankshaft and disassemble it into parts.
- Mark the connecting rods, pistons and bearing shells so that they can be reinstalled when reassembling the engine.
After a thorough inspection of the components and assemblies and replacing damaged parts with new ones, it is necessary to assemble the engine, only in the reverse order. So, the engine repair is completed. Malfunction of the car can lead to both deformation and cracks in the engine block. Mechanical damage is caused, as a rule, by long-term operation or breakdown of internal mechanisms. In this case, the car owner must include the repair of the cylinder block in the overhaul of the engine. The operation of the engine after the overhaul is certainly an important process.
Private
Auxiliary repairs, including repairs to the engine head, can be performed without completely removing the engine from the vehicle frame. In hard-to-reach places you can go from the top side. To do this, remove the plumage or wheel.
For more detailed information on the procedure for disassembling the VAZ2106 engine, it is better to refer to the special literature. For example, "VAZ 2106 and its modifications" or any instructions for repairing an engine. The repair manual contains the most complete and reliable data on the entire process of repair, troubleshooting and replacement of all engine systems.

