Valve adjustment manual for VAZ 2110-2115
Content
If you are the owners of a VAZ 2110-2115 with a conventional 8-valve engine, then you probably know about such a procedure as adjusting the thermal clearances of the valves. Of course, if you have a 16-valve engine, then this is not necessary, since you have hydraulic lifters installed and no adjustments are made.
So, for conventional internal combustion engines, which differ little from the VAZ 2108, this procedure is not carried out so often. After buying a new car, you can drive about 100 km without it, but this is not always possible and not every owner is so lucky. This type of maintenance of the VAZ 000 can be performed both at the service station, having paid a certain price for the work, and independently, having understood this work. If this is your first time doing this, the guide below will help you with it.
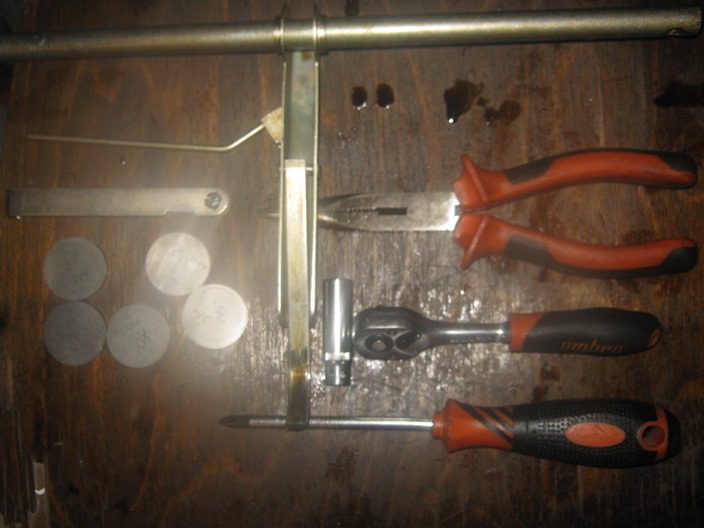
Necessary tools and devices for adjusting valve clearances on the VAZ 2110-2115
- Key 10 for removing the valve cover and disconnecting the gas pedal cable
- Phillips and flat head screwdriver
- Styli set from 0,01 to 1 mm
- A special device (rail) for drowning and fixing the valve tappets
- Tweezers or long nose pliers
- A set of shims or a certain amount required (it will become clear after measuring the clearances)
Video instruction and step-by-step guide
For those who are used to watching everything in video reports, I made a special video. It was inserted from my YouTube channel, so if you have any questions, please contact the comments below the video.

Well, below, if the review is unavailable, a photo report and a textual presentation of all the necessary information will be presented.
Work order and manual with photographs
So, before proceeding, we need to install the crankshaft and camshaft of the engine according to the timing marks. More details about this procedure are written here.
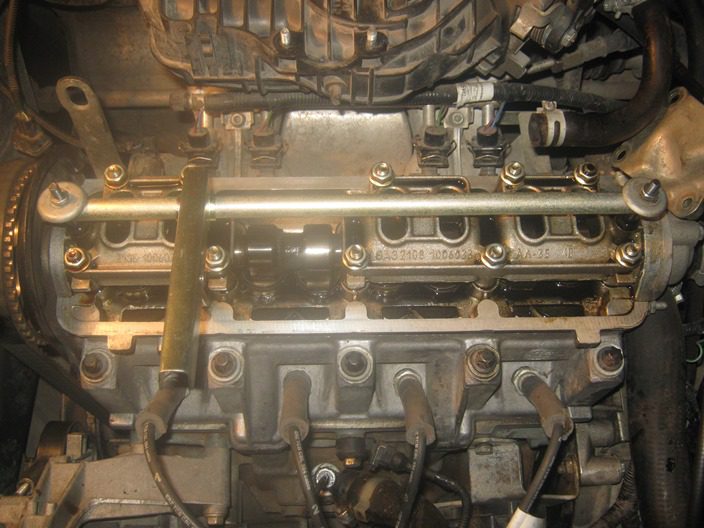
Then we remove the completely valve cover from the engine, after which you can install the rail and fix it on the studs of the cover itself, as clearly shown in the photo below:

You should not rush to remove the washers, since you must first check the thermal clearances between the camshaft cams and the adjusting washers. And this is done in the following sequence:
- When we find the crankshaft and camshaft, we check the gaps in those valves, the cams of which are directed upwards, according to the marks. These will be valves 1, 2, 3 and 5.
- The remaining 4,6,7 and 8 valves are adjusted after cranking the crankshaft one revolution
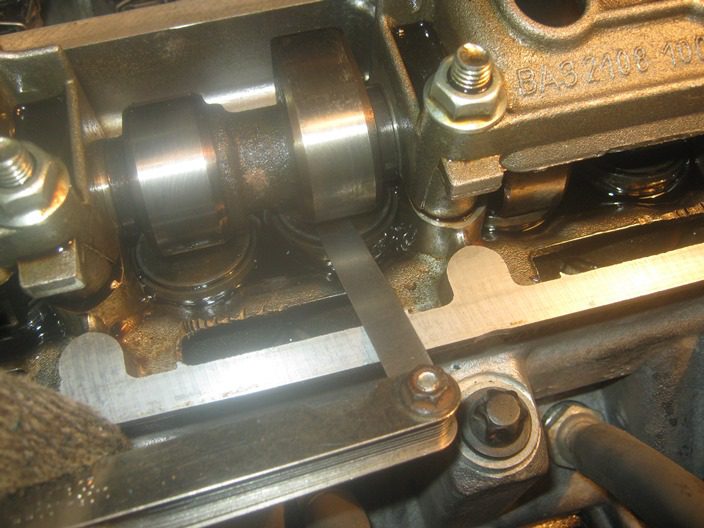
The nominal clearance for the intake valve will be 0,2 mm, and for the exhaust valve 0,35. The permissible error is 0,05 mm. We insert a dipstick of the desired thickness between the washer and the cam, as shown in the picture:
If it differs from the above data, then it is necessary to adjust it by purchasing a washer of a suitable size. That is, if instead of 0,20 it is 0,30, then you need to put a washer with a thickness of 0,10 thicker than the one that is installed (the size is applied on it). Well, I think the meaning is clear.
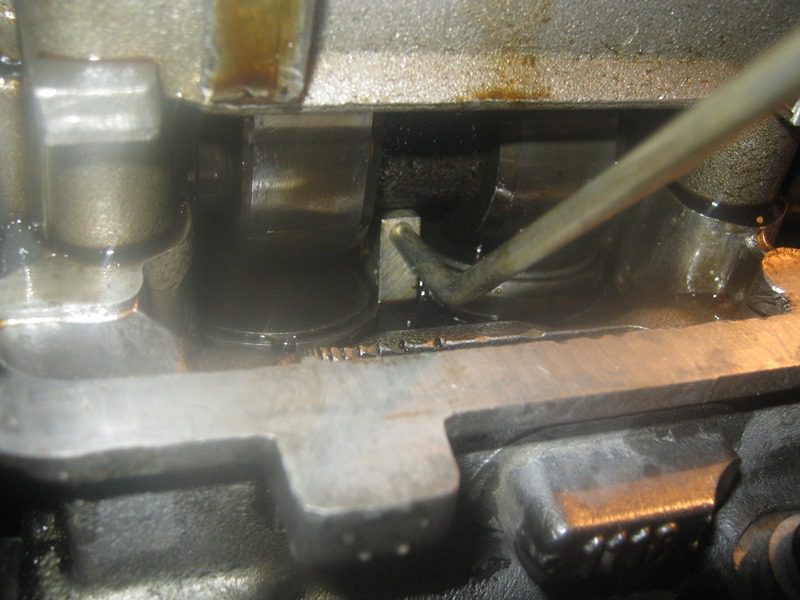
Removing the washer is quite simple, if you use the device shown in the picture, use the lever to push the desired valve all the way down:
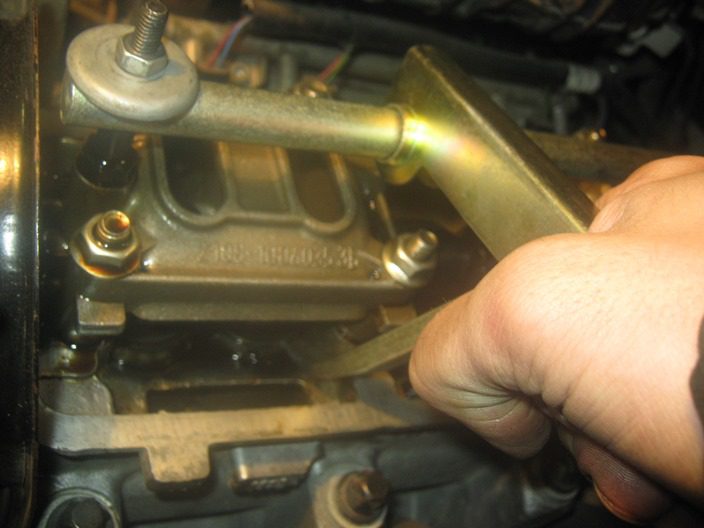
And at this time we insert the retainer (stop) between the pusher wall and the camshaft:
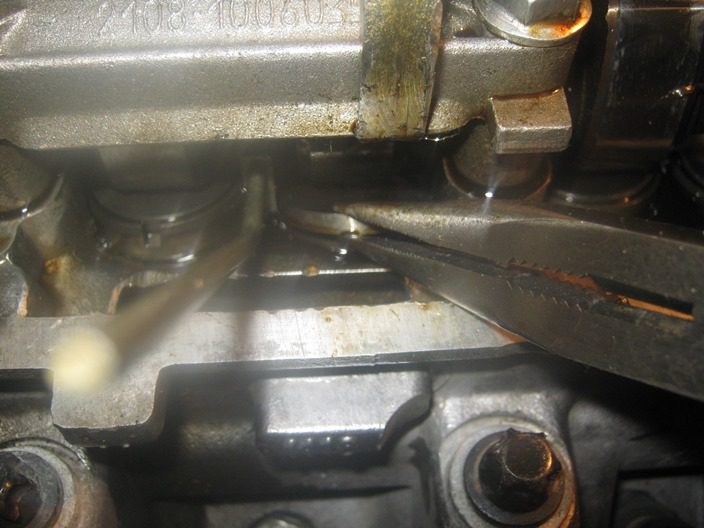
After that, using tweezers or long-nose pliers, you can remove the washer without any problems:
Then everything is done as described above. The rest of the gaps are measured and the valve shims necessary for the thickness are selected. Strictly - adjust the thermal gaps only on a cold engine, no more than 20 degrees, otherwise all the work may be in vain!