We independently change the brake caliper on the VAZ 2107
Content
If the car's brakes fail while driving, it will not lead to anything good. The rule is valid for all cars, and the VAZ 2107 is no exception. This car, for all its popularity in the vastness of our vast country, never could boast of reliable brakes. Most often, on the "sevens" the brake caliper fails, which has to be urgently changed. Is it possible to make such a replacement yourself? Yes. Let's try to figure out how this is done.
The device and purpose of the brake caliper on the VAZ 2107
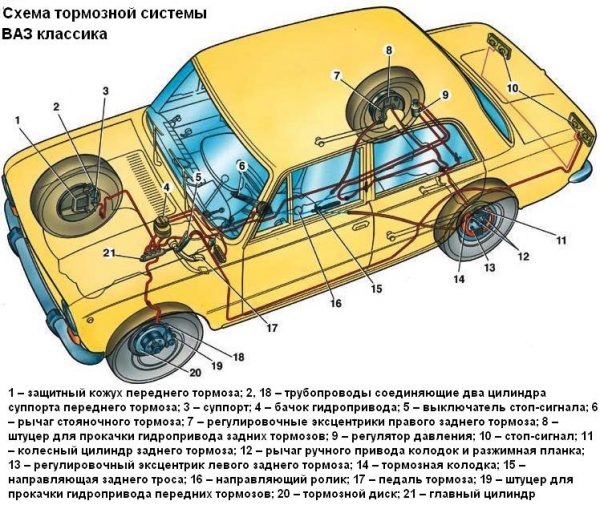
To understand why the “seven” needs a brake caliper, you should clearly understand how the brake system of this car works. First of all, it should be said that the VAZ 2107 has two brake systems: parking and working. The parking system allows you to block the rear wheels after stopping the car. The working system allows you to smoothly block the rotation of the front wheels while the machine is moving, changing its speed up to a complete stop. To achieve smooth blocking of the front wheels allows the hydraulic braking system, consisting of four cylinders, two brake discs, four pads and two brake calipers.
The brake caliper is a case with a pair of holes made of light alloy. Hydraulic cylinders with pistons are installed in the holes. When the driver presses the pedal, brake fluid is supplied to the cylinders. The pistons move out of the cylinders and press on the brake pads, which, in turn, compress the brake disc, preventing it from rotating. This changes the speed of the car. Thus, the caliper body is the basis of the VAZ 2107 working brake system, without which the installation of brake cylinders and a disc would be impossible. It should also be noted here that the brake calipers are installed only on the front axle of the VAZ 2107.
As for the VAZ 2107 parking system, it is arranged differently. It is based on large brake drums with inner pads mounted on the rear axle of the machine. When the driver pulls the handbrake lever after stopping the car, the brake pads move apart and abut against the inner walls of the drum, completely blocking the rotation of the rear wheels.
Signs of a malfunctioning brake caliper
There are not so many signs of malfunction in the VAZ 2107 brake caliper. Here they are:
- the vehicle is not braking fast enough. This is usually due to a brake fluid leak. It can leave both through worn out hoses and through hydraulic cylinders, which have lost their tightness due to wear. The first version of the problem is solved by replacing the brake hoses, the second - by replacing the damaged cylinder;
- constant braking. It looks like this: the driver, pressing the brakes, stopped the car, and releasing the brake pedal, found that the front wheels remained locked. This is due to the fact that the pistons of the cylinders are stuck in the open position and the brake pads are still pressing on the brake disc, holding it in place. In such a situation, they usually change the entire caliper, since it becomes more and more difficult every year to find new hydraulic cylinders for the “seven” on sale;
- squeak when braking. The driver, pressing the brake pedal, hears a quiet squeak, which can increase with increasing pressure. If you have to brake sharply and at high speed, then the creak turns into a piercing howl. All this suggests that the brake pads are completely worn out in the caliper, or rather, the coating of these pads. The material that covers the front of the pads has increased wear resistance, however, it also eventually deteriorates, being erased to the ground. As a result, the brake disc is compressed by two steel plates without a protective coating, which leads not only to a loud squeak, but also to an increased heating of the caliper.
Replacing the brake caliper on a VAZ 2107
To replace the brake caliper on a VAZ 2107, we need a number of tools. Let's list them:
- open-end wrenches, set;
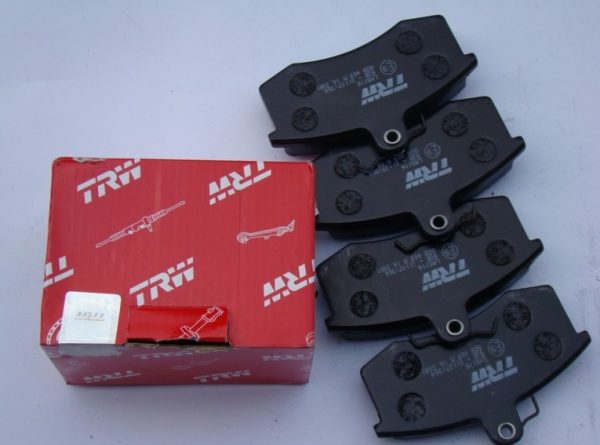
- new brake caliper for VAZ 2107;
- flat screwdriver;
- a cut of a rubber hose with a diameter of 8 mm and a length of 5 cm;
- jack;
- beard.
Sequencing
Before removing the caliper, the wheel behind which it is located will have to be jacked up and removed. Without this preparatory operation, further work will be impossible. After removing the wheel, access to the caliper opens, and you can proceed to the main work.
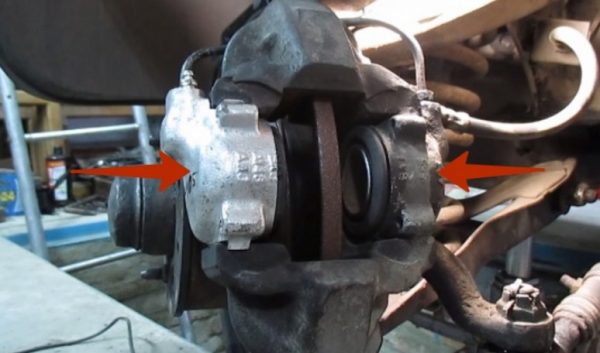
- The brake hose is connected to the caliper. It is mounted on a bracket that is bolted to the caliper. The bolt is unscrewed with an open-end wrench by 10, the bracket is slightly raised and removed.
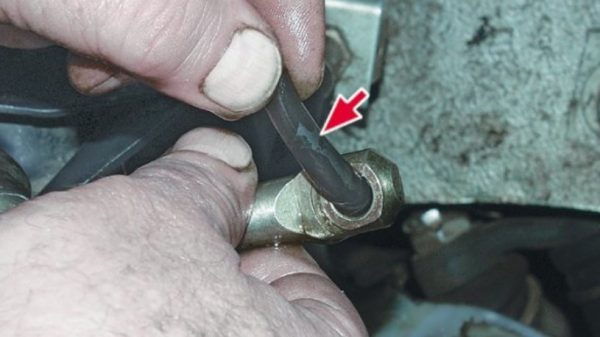
 The brake bracket nut is unscrewed with an open-end wrench by 10
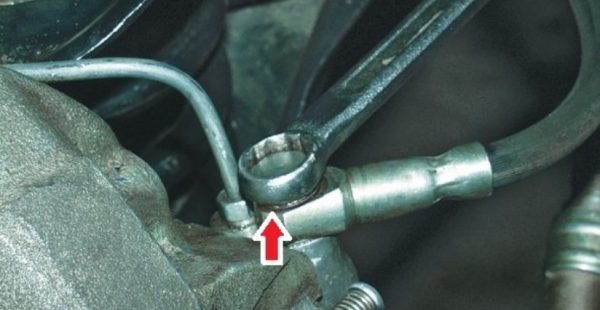
 - After removing the bracket, access to the bolt located under it will open. It is this bolt that holds the brake hose to the caliper. The bolt is turned out together with the sealing washer installed under it (in the photo this washer is shown with a red arrow).Under the brake hose there is a thin washer, shown in the photo by an arrow.
- After removing the brake hose, brake fluid will begin to flow out of it. To eliminate the leak, insert a piece of rubber hose with a diameter of 8 mm into the hole.To prevent brake fluid from escaping, the hole is plugged with a piece of thin rubber hose.
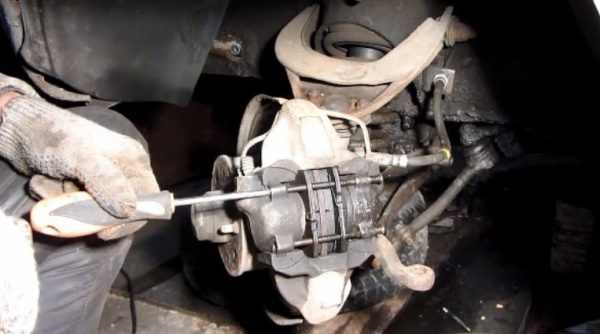
- Now you need to remove the brake pads, as they interfere with the removal of the caliper. The pads are held on fastening pins fixed with cotter pins. These cotter pins are removed with pliers.Cotter pins on brake pads cannot be removed without pliers
- After removing the cotter pins, the fastening fingers are carefully knocked out with a hammer and a thin beard (and if there was no beard at hand, an ordinary Phillips screwdriver will do, but you need to hit it very carefully so as not to split the handle).The fingers on the brake pads can be knocked out with a regular Phillips screwdriver
- Once the pins are knocked out, the pads are manually removed from the caliper.
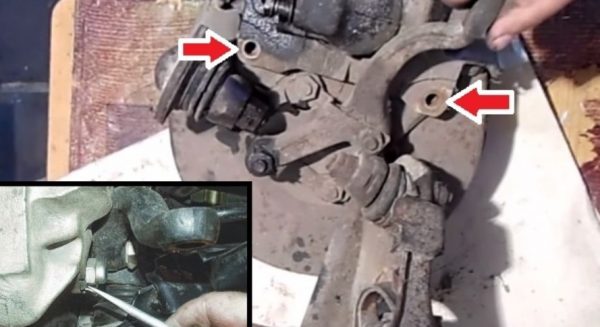
- Now it remains to unscrew a couple of bolts holding the caliper to the steering knuckle. But before unscrewing them, you should press the locking plates on the bolts with a flat screwdriver. Without this, the mounting bolts cannot be removed.It is better to bend the locking plates with a thin flat screwdriver
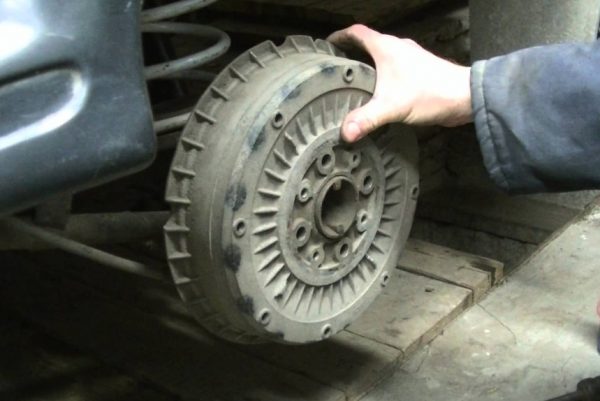
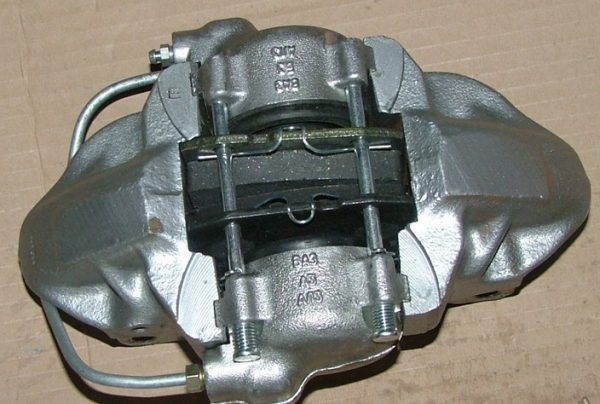
- After unscrewing the bolts, the caliper is removed from the steering knuckle and replaced with a new one. Then the VAZ 2107 brake system is reassembled.The brake caliper of the "seven" is removed, it remains to install a new one in its place


Video: change the caliper to the VAZ 2107

important points
When repairing the VAZ 2107 brake system, you should remember several very important nuances. Without mentioning them, this article would be incomplete. So:
- on the later VAZ 2107 models, spring washers began to be installed under the mounting bolts of the brake brackets. They are thin and very easy to lose when removing the bracket. To prevent this from happening, it is advisable to spread some newspaper or rag under the support. If the puck does pop out, it will be much easier to find it;
- if the driver does not plan to change the brake pads when replacing the caliper, then they should be marked with a marker or chalk before removing them so that they can be installed in the same place during assembly. If you change the original arrangement of the pads, then they will become unusable much faster;
- if the driver decides to leave the caliper in place and plans to change only the brake pads in it, then he will have to buy not one, but two sets of pads, since these parts always change on two wheels, and not on one. If you leave old pads on one of the wheels, this will inevitably lead to rapid wear and new violations in the operation of the brake system;When replacing pads on a VAZ 2107, you will have to buy two sets at once
- after removing the pads, never press the brake pedal. The pistons on the hydraulic cylinders installed in the caliper will move outward and prevent the installation of a new pair of pads. And pushing the pistons back will be very difficult: in some cases, for this you have to completely drain the brake fluid from the system;
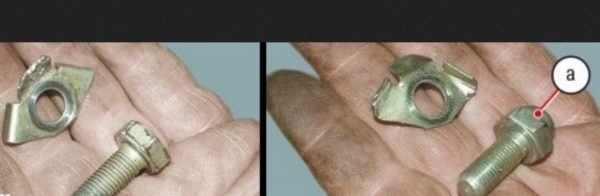
- when unscrewing the mounting bolts on the caliper, you should remember: they differ in the shape of the head. The head of the upper bolt is smaller, the head of the lower bolt is larger (in the photo it is marked with the letter "a"). If you swap the bolts, it will be impossible to install the brake pads;The letter "a" indicates the lower mounting bolt of the caliper with a thick head
- when buying a new caliper in a store, be sure to inform the seller on which side it will be installed, since there are differences in the design of the left and right calipers on the VAZ 2107. For example, the holes for the fastening bolts are located differently, so that the left caliper will not fit the right wheel and vice versa;
- Finally, after installing the caliper, be sure to press the brake pedal several times to check whether the new caliper works or not. In addition, after pressing the pedal, be sure to inspect the caliper and the asphalt under the machine for brake fluid leaks.
So, replacing a brake caliper is not at all as difficult a task as it might seem at first glance. The main thing that the driver should remember when changing this detail is its extreme importance. If a mistake is made during the installation of the caliper or pads, then this does not bode well for either the driver or the car. It is for this reason that the article described in as much detail as possible about all the nuances of mounting a brake caliper. And it is highly recommended to pay close attention to these nuances.

