We independently check the voltage regulator relay on the VAZ 2106
Content
If the battery on the VAZ 2106 suddenly stops charging, and the generator is working properly, the reason is probably a breakdown of the relay regulator. This little device seems like something insignificant. But it can be a source of serious headache for a novice driver. Meanwhile, troubles with the regulator can be avoided if this device is checked in time. Is it possible to do it yourself? Of course! Let's figure out how it's done.
The purpose of the voltage regulator relay on the VAZ 2106
As you know, the VAZ 2106 power supply system consists of two most important elements: a battery and an alternator. A diode bridge is mounted in the generator, which motorists call the rectifier unit in the old fashioned way. Its task is to convert alternating current into direct current. And in order for the voltage of this current to be stable, not dependent on the speed of rotation of the generator and not “float” much, a device called a generator voltage regulator relay is used.
This device provides a constant voltage throughout the entire VAZ 2106 on-board network. If there is no relay-regulator, the voltage will deviate abruptly from the average value of 12 volts, and it can “float” in a very wide range - from 9 to 32 volts. And since all energy consumers on board the VAZ 2106 are designed to operate under a voltage of 12 volts, they will simply burn out without proper regulation of the supply voltage.
The design of the relay-regulator
On the very first VAZ 2106, contact regulators were installed. It is almost impossible to see such a device today, since it is hopelessly outdated, and it was replaced by an electronic regulator. But to get acquainted with this device, we will have to consider exactly the contact external regulator, since on its example the design is revealed most fully.
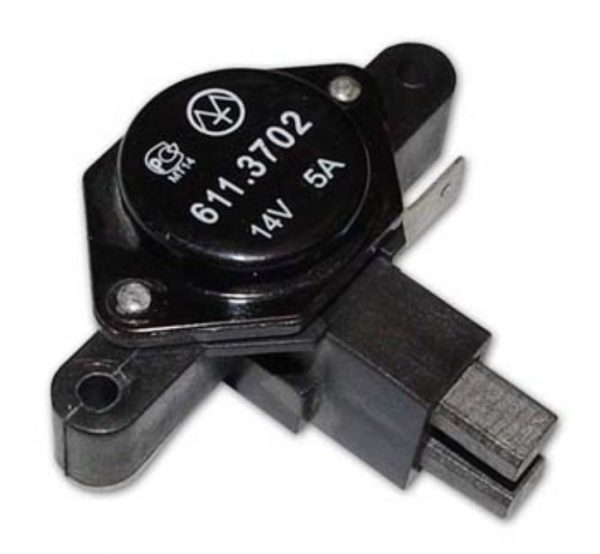
So, the main element of such a regulator is a brass wire winding (about 1200 turns) with a copper core inside. The resistance of this winding is constant, and is 16 ohms. In addition, the design of the regulator has a system of tungsten contacts, an adjusting plate and a magnetic shunt. And then there is a system of resistors, the connection method of which can vary depending on the required voltage. The highest resistance these resistors can deliver is 75 ohms. This whole system is located in a rectangular case made of textolite with contact pads brought out for connecting wiring.
The principle of operation of the relay regulator
When the driver starts the VAZ 2106 engine, not only the crankshaft in the engine starts to rotate, but also the rotor in the generator. If the speed of rotation of the rotor and crankshaft does not exceed 2 thousand revolutions per minute, then the voltage at the generator outputs does not exceed 13 volts. The regulator does not turn on at this voltage, and the current goes directly to the excitation winding. But if the speed of rotation of the crankshaft and the rotor increases, the regulator automatically turns on.
The winding, which is connected to the generator brushes, instantly reacts to an increase in crankshaft speed and is magnetized. The core in it is drawn inward, after which the contacts open on some internal resistors, and the contacts close on others. For example, when the engine is running at low speed, only one resistor is involved in the regulator. When the engine reaches maximum speed, three resistors are already turned on, and the voltage on the excitation winding drops sharply.
Signs of a broken voltage regulator
When the voltage regulator fails, it stops keeping the voltage supplied to the battery within the required limits. As a result, the following problems occur:
- the battery is not fully charged. Moreover, the picture is observed even when the battery is completely new. This indicates a break in the relay-regulator;
- the battery boils. This is another problem that indicates a breakdown of the relay-regulator. When a breakdown occurs, the current supplied to the battery can be several times higher than the normal value. This leads to overcharging the battery and causing it to boil.
Both in the first and in the second case, the car owner must check the regulator, and in case of a breakdown, replace it.
Checking and replacing the voltage regulator VAZ 2107
You can also check the relay-regulator in a garage, but this will require several tools. Here they are:
- household multimeter (the accuracy level of the device must be at least 1, and the scale must be up to 35 volts);
- open-end wrench for 10;
- flat screwdriver.
A simple way to check the regulator
First of all, the relay-regulator must be removed from the car. It is not difficult to do this, it is attached with just two bolts. In addition, the test will have to actively use the battery, so it must be fully charged.
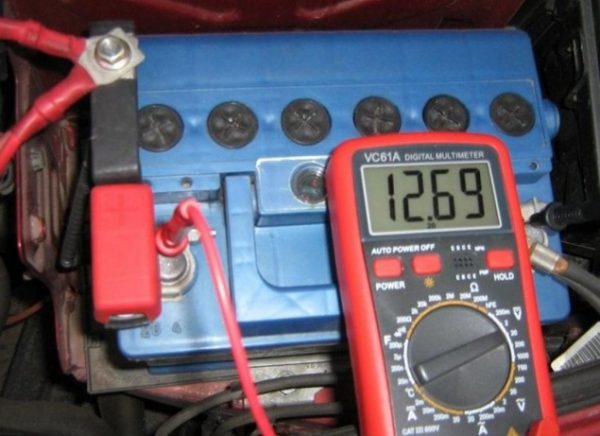
- The car engine starts, the headlights turn on, after which the engine idles for 15 minutes (the crankshaft rotation speed should not exceed 2 thousand revolutions per minute);
- The hood of the car opens, using a multimeter, the voltage between the battery terminals is measured. It should not exceed 14 volts, and should not be lower than 12 volts.
 The voltage between the terminals is within normal limits
 - If the voltage does not fit into the above range, this clearly indicates a breakdown of the relay-regulator. This device cannot be repaired, so the driver will have to change it.
Difficulty checking the regulator
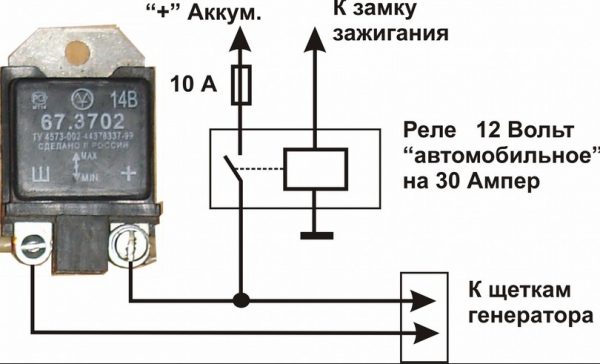
This option is used in cases where it is not possible to establish a breakdown of the regulator when checking in a simple way (for example, in situations where the voltage between the battery terminals is not 12 volts and above, but 11.7 - 11.9 volts). In this case, the regulator will have to be removed and “ringed” it with a multimeter and a regular 12 volt light bulb.
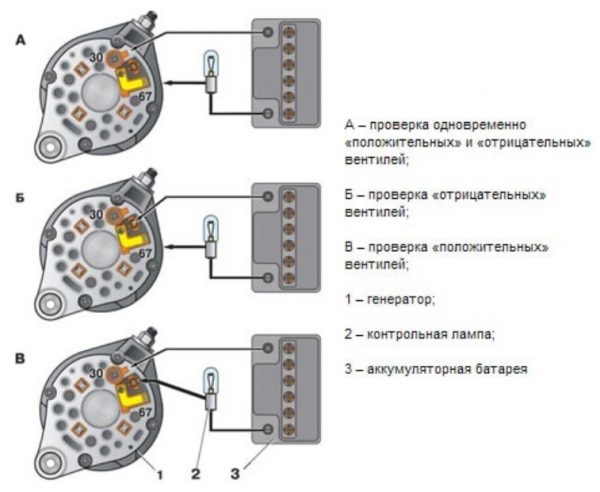
- The VAZ 2106 regulator has two outputs, which are designated as "B" and "C". These pins are powered by the battery. There are two more contacts that go to the generator brushes. The lamp is connected to these contacts as shown in the figure below.If the lamp does not light in any of the three options, it's time to change the regulator
- If the outputs connected to the power supply do not exceed 14 volts, the light between the brush contacts should be brightly lit.
- If the voltage at the power outputs with the help of a multimeter rises to 15 volts and above, the lamp in a working regulator should go out. If it does not go out, the regulator is faulty.
- If the light does not light up either in the first or in the second case, the regulator is also considered faulty and needs to be replaced.
Video: checking the relay-regulator on the classic

The sequence of replacing a failed relay-regulator
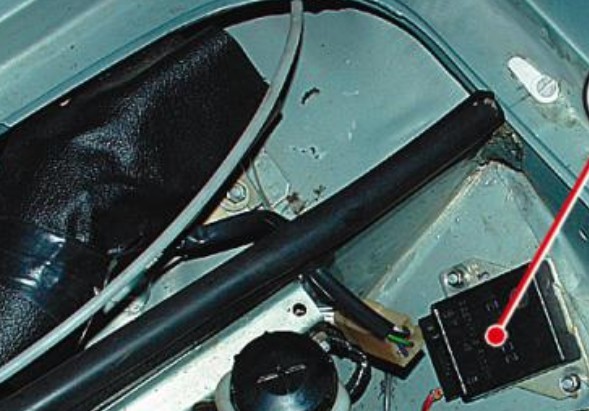
Before starting work, it is necessary to decide what type of regulator is installed on the VAZ 2106: the old external one, or the new internal one. If we are talking about an outdated external regulator, then it will not be difficult to remove it, since it is fixed on the arch of the left front wheel.
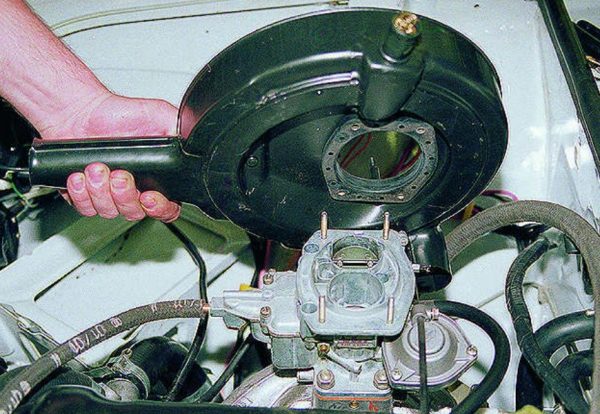
If an internal regulator is installed on the VAZ 2106 (which is most likely), then before removing it, you will have to remove the air filter from the car, since it prevents you from getting to the generator.
- On the external relay, two bolts are unscrewed with an open-end wrench, holding the device on the left wheel arch.
- After that, all wires are disconnected manually, the regulator is removed from the engine compartment and replaced with a new one.The external regulator VAZ 2106 rests on only two bolts of 10
- If the car is equipped with an internal regulator, then the air filter housing is removed first. It rests on three nuts by 12. It is most convenient to unscrew them with a socket head with a ratchet. Once the air filter is removed, the alternator is accessible.
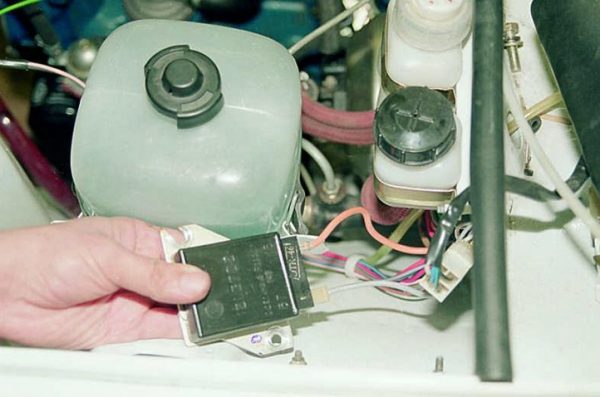
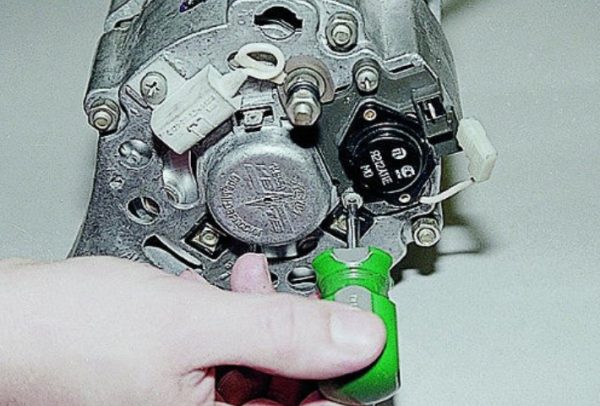
- The internal regulator is built into the front cover of the generator, and is held on by two bolts. To unscrew them, you need a Phillips screwdriver (and it should be short, because there is not enough space in front of the generator and it simply won’t work with a long screwdriver).The screwdriver used to unscrew the internal regulator must be short
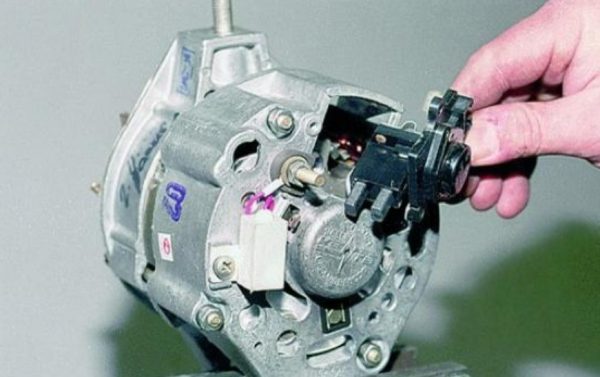
- After unscrewing the mounting bolts, the regulator gently slides out of the generator cover by about 3 cm. There are wires and a terminal block behind it. It should be carefully pry with a flat screwdriver, and then manually pulled off the contact pins.You should be very careful with the contact wires of the internal regulator VAZ 2106
- The faulty regulator is removed, replaced with a new one, after which the elements of the VAZ 2106 on-board electrical network are reassembled.
So, in order to check and change a burned-out voltage regulator, the car owner does not need special skills. All he needs is the ability to use a wrench and a screwdriver. And elementary ideas about the operation of the multimeter. If all this is there, then even a novice motorist will not have problems with replacing the regulator. The main thing is to strictly follow the above recommendations.

