Self-repair and replacement of the fuse box on the VAZ 2107 carburetor and injector
Content
The electrical equipment of any car is not complete without fuses (fuses) and the VAZ 2107 is no exception. Thanks to these elements, the wiring is protected from damage in the event of malfunction or failure of a particular consumer.
Purpose of fuses VAZ 2107
The essence of the fuses is that when the current passing through them is exceeded, the insert located inside burns out, thereby preventing heating, melting and ignition of the wiring. If the element has become unusable, it must be found and replaced with a new one. How to do this and in what sequence you need to understand in more detail.
Fuse box VAZ 2107 injector and carburetor
While operating the VAZ "seven", the owners sometimes encounter a situation when one or another fuse blows out. In this case, every motorist must know and navigate where the fuse box (PSU) is installed and which electrical circuit this or that element protects.
Where is the
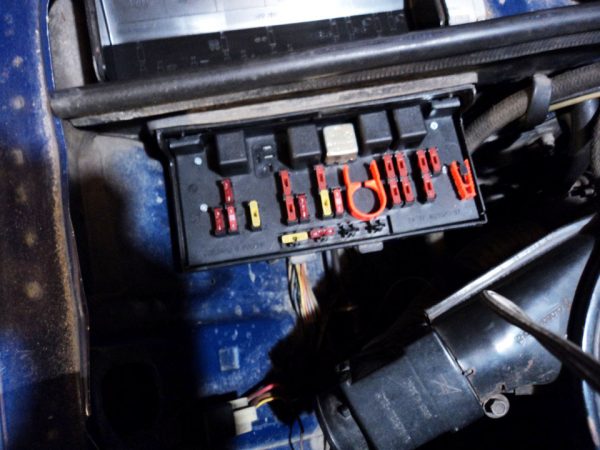
The fuse box on the VAZ 2107, regardless of the engine power system, is located under the hood on the right side opposite the passenger seat. The node has two versions - old and new, so to clarify the situation, it is worth dwelling on each of them in more detail.
The choice of a PSU sample does not depend on the vehicle's power supply system.
Old block variant
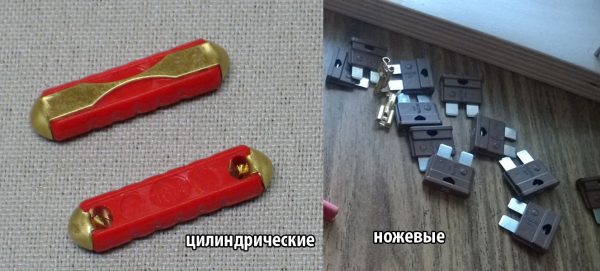
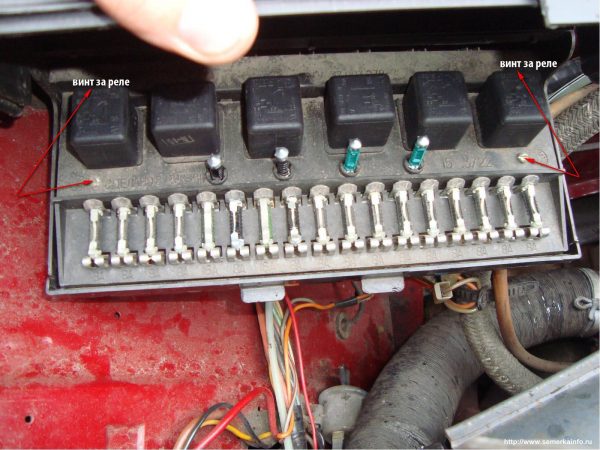
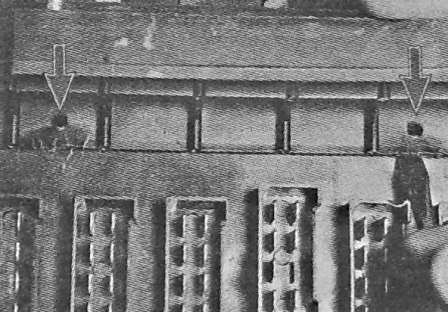
The old mounting block consists of 17 protective elements and 6 electromagnetic type relays. The number of switching elements may vary depending on the configuration of the car. Fusible inserts are arranged in one row, made in the form of a cylinder, held by means of spring-loaded contacts. With this method of connection, the reliability of the contacts is rather low, since at the time of the passage of large currents through the fuse element, not only it heats up, but also the spring contacts themselves. The latter deform over time, which leads to the need to remove the fuses and clean the oxidized contacts.
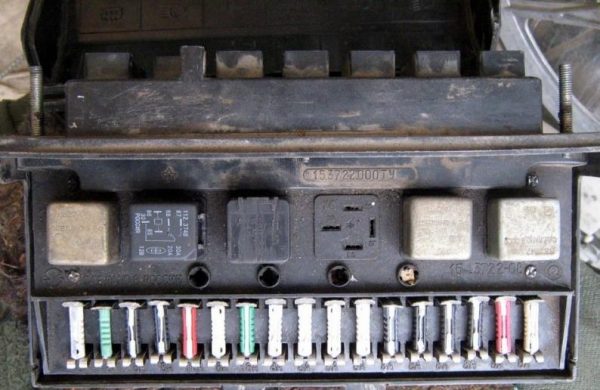
The mounting block is made in the form of two printed circuit boards, which are installed one above the other and connected by means of jumpers. The design is far from perfect, since its repair is rather difficult. This is due to the fact that not everyone can disconnect the boards, and this may be required in case of burnout of the tracks. As a rule, the track on the board burns out due to the installation of a fuse of a higher rating than necessary.
The fuse box is connected to the vehicle's electrical network through the connectors. In order to avoid mistakes when connecting, the pads are made in different colors.
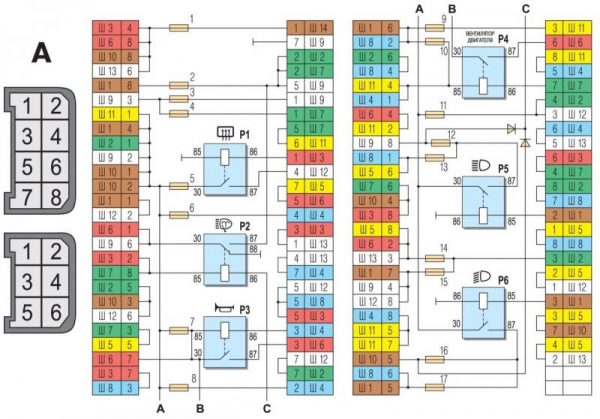
The rear of the mounting block protrudes into the glove compartment where the rear wiring harness and instrument panel connector fits. The bottom of the power supply unit is located under the hood and also has connectors of different colors. The block body is made of plastic. The cover of the unit is transparent with marked markings of the locations of the switching devices and fuse-links.
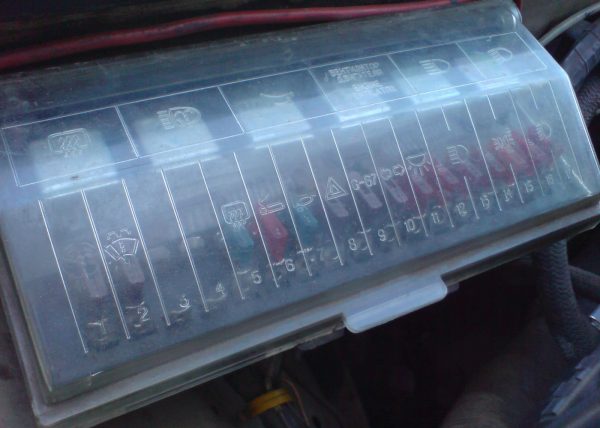
Table: which fuse is responsible for what
| Fuse number (rated current) * | Purpose of fuses VAZ 2107 |
| F1 (8A / 10A) | Rear lights (reverse light). Reverse fuse. Heater motor. Furnace fuse. Signaling lamp and rear window heating relay (winding). The electric motor of the cleaner and washer of the rear window (VAZ-21047). |
| F2 (8 / 10A) | Electric motors for wipers, windshield washers and headlights. Relay cleaners, windshield washers and headlights (contacts). Wiper fuse VAZ 2107. |
| F3 / 4 (8A / 10A) | Reserve. |
| F5 (16A / 20A) | Rear window heating element and its relay (contacts). |
| F6 (8A / 10A) | Cigarette lighter fuse VAZ 2107. Socket for portable lamp. |
| F7 (16A / 20A) | Sound signal. Radiator cooling fan motor. Fan fuse VAZ 2107. |
| F8 (8A / 10A) | Direction indicators in alarm mode. Switch and relay-interrupter for direction indicators and alarms (in alarm mode). |
| F9 (8A / 10A) | Fog lights. Generator voltage regulator G-222 (for parts of cars). |
| F10 (8A / 10A) | Instrument combination. Instrument panel fuse. Indicator lamp and battery charge relay. Direction indicators and corresponding indicator lamps. Signaling lamps for fuel reserve, oil pressure, parking brake and brake fluid level. Voltmeter. Devices of the carburetor electropneumatic valve control system. Relay-interrupter lamp signaling parking brake. |
| F11 (8A / 10A) | Brake lamps. Plafonds of internal illumination of a body. Stoplight fuse. |
| F12 (8A / 10A) | High beam (right headlight). Coil for turning on the headlight cleaner relay. |
| F13 (8A / 10A) | High beam (left headlight) and high beam indicator lamp. |
| F14 (8A / 10A) | Clearance light (left headlight and right taillight). Indicator lamp for turning on the side light. License plate lights. Hood lamp. |
| F15 (8A / 10A) | Clearance light (right headlight and left taillight). Instrument lighting lamp. Cigarette lighter lamp. Glove box light. |
| F16 (8A / 10A) | Dipped beam (right headlight). Winding for switching on the headlight cleaner relay. |
| F17 (8A / 10A) | Dipped beam (left headlight). |
| * In the denominator for blade type fuses | |
New sample block
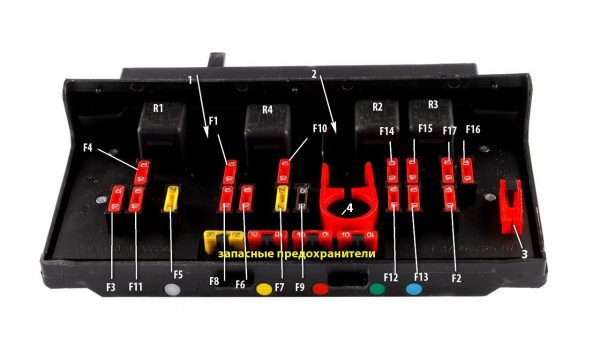
The advantage of the power supply unit of the new model is that the node is free from the problem of contact loss, that is, the reliability of such a device is much higher. Plus, not cylindrical fuses, but knife fuses are used. The elements are installed in two rows, and to replace them, special tweezers are used, which are constantly in the power supply unit. In the absence of tweezers, the failed fuse can be removed using small pliers.
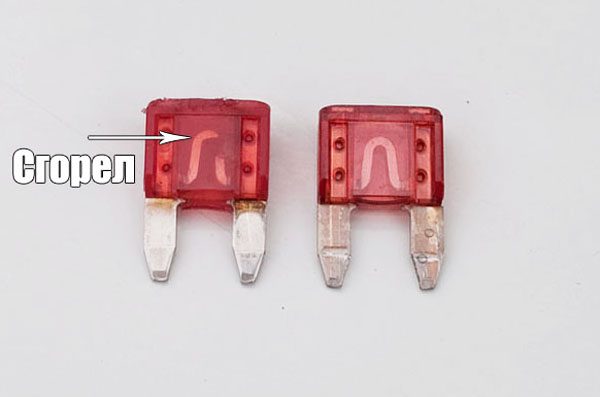
You can assess the condition of the fuses by their appearance, since the part is made of transparent plastic. If the fuse is blown out, it is easy to identify.
Only one board is installed inside the new block, which makes it much easier to repair the unit. The number of safety elements in the new device is the same as in the old one. The relay can be installed 4 or 6 pieces, which depends on the equipment of the car.
There are 4 spare fuses at the bottom of the unit.
How to remove the mounting block
Sometimes it may be necessary to dismantle the fuse box to repair or replace it. In this case, you need to prepare the following list of tools:
- key on 10;
- socket head 10;
- crank.
The procedure for removing the mounting block is as follows:
- We pull off the negative terminal from the battery.
- For convenience, we remove the air filter housing.
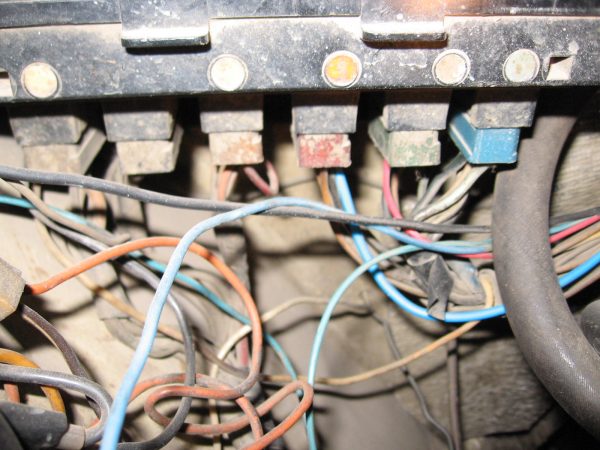
- We remove the connectors with wires suitable for the mounting block from below.
 In the engine compartment, connectors with wires to the mounting block fit from below
 - We move to the salon and remove the storage shelf under the glove compartment, or dismantle the storage compartment itself.
- We remove the connectors that connect to the PSU from the passenger compartment.We remove the pads with wires that are connected to the block from the passenger compartment
- With a head of 10, unscrew the block fastening nuts and remove the device together with the seal.The block is held by four nuts - unscrew them
- We assemble in the reverse order.
Video: how to remove the fuse box on the VAZ 2107

Repair of the mounting block
After dismantling the PSU, to detect problem areas and repair or replace the printed circuit board, you will need to completely disassemble the assembly. We carry out the procedure as follows:
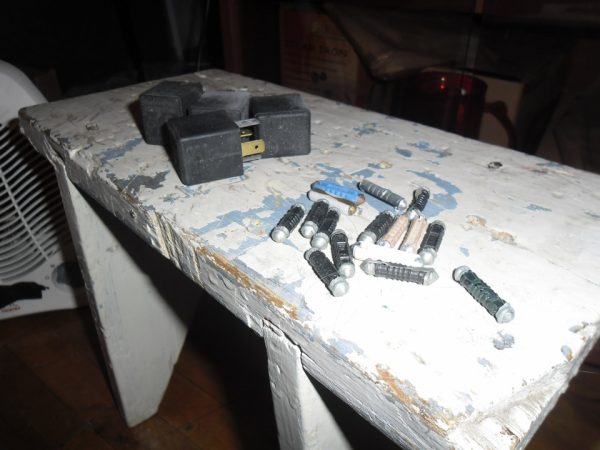
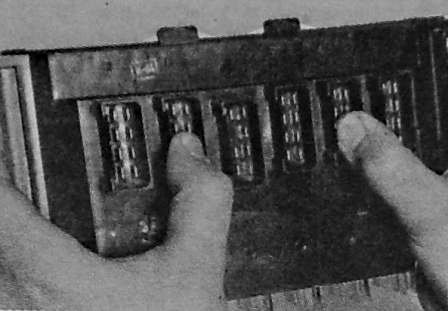
- We take out relays and fuses from the mounting block.To disassemble the mounting block, you first need to remove all relays and fuses
- Loosen the top cover.The top cover is secured with four screws.
- We pry off 2 clamps with a screwdriver.On the side of the connectors, the case is held by latches
- Move the fuse block housing.After disconnecting the clamps, we shift the block body
- Click on the connectors.To remove the board, you must press the connectors
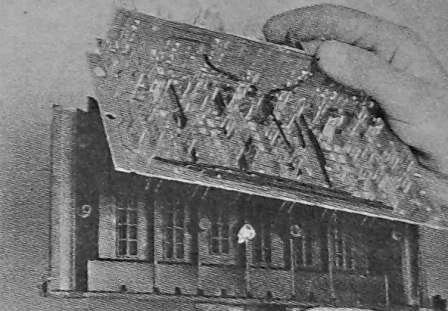
- We take out the block board.We dismantle the board by removing it from the case
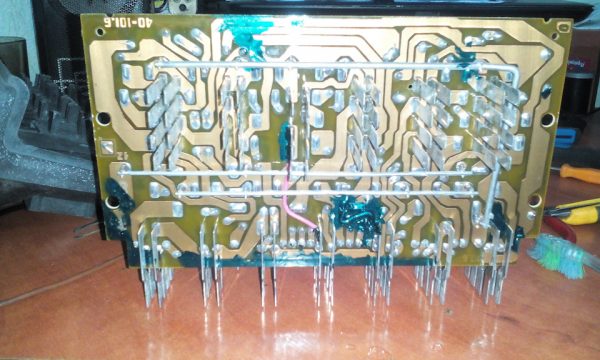
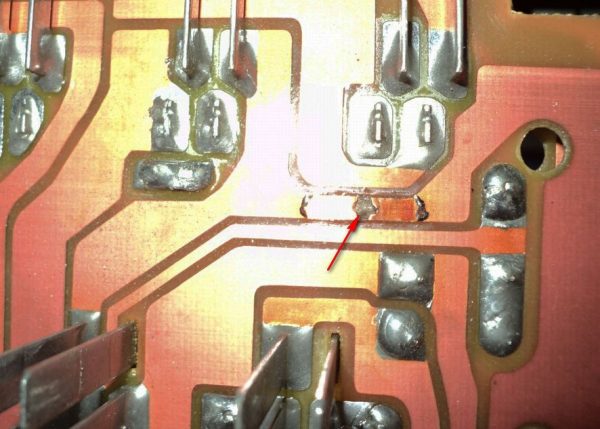
- We check the integrity of the board, the condition of the tracks and the quality of the soldering around the contacts.We examine the board for damage to the tracks
- We eliminate defects, if possible. Otherwise, we change the board to a new one.

Track break recovery
If a burned-out conductive track is found on the printed circuit board, it is not necessary to change the last one - you can try to restore it. To work, you will need a minimum set of tools and materials:
- soldering iron 40–60 W;
- solder;
- a piece of wire;
- knife.
Depending on the nature of the damage, the restoration is carried out in the following order:
- We clean the varnish in the place of the break with a knife.The damaged section of the track must be cleaned with a knife
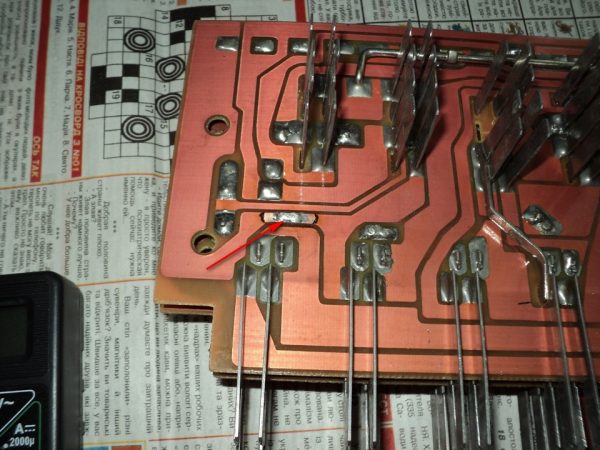
- We tin the track and apply a drop of solder, connecting the place of the break.Having tinned the track, we restore it with a drop of solder
- If the track is badly damaged, then we restore it using a piece of wire, with which we connect the necessary contacts, i.e. we duplicate the track.In case of significant damage to the track, it is restored with a piece of wire
- After the repair, we assemble the board and the block in the reverse order.
Video: repair of the VAZ 2107 fuse box

Relay test
To check the relays, they are removed from the seats and the condition of the contacts is assessed by their appearance. If oxidation is found, clean it with a knife or fine sandpaper. The operability of the switching element is checked in two ways:
- replacement with a new part;
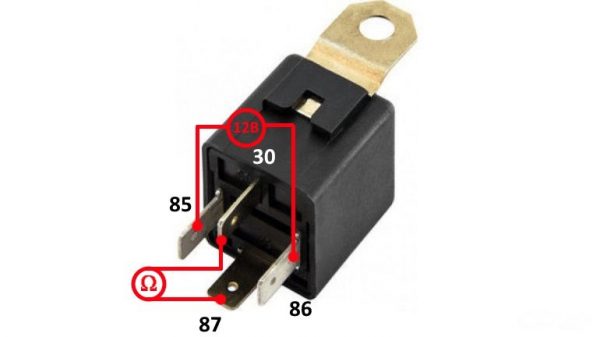
- by applying voltage to the winding.
In the first case, everything is simple: in place of the tested relay, a new or known good one is installed. If, after such actions, the workability of the part has been restored, then the old relay has become unusable and needs to be replaced. The second option involves supplying power to the relay coil from the battery and dialing with a multimeter, whether the contact group closes or not. In the absence of commutation, the part must be replaced.
You can try to repair the relay, but the actions will be unjustified due to the low cost of the device (about 100 rubles).
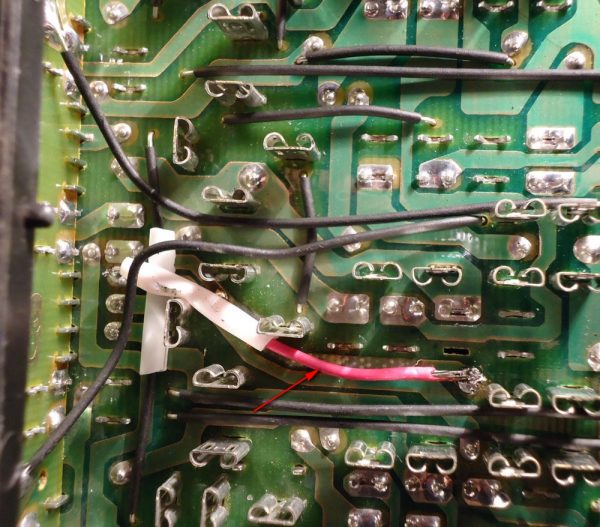
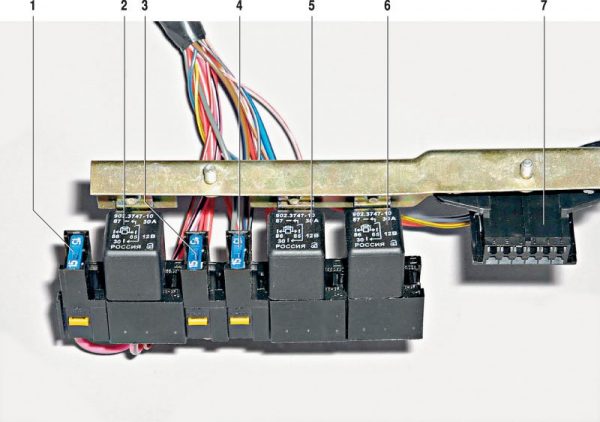
Passenger compartment fuse box
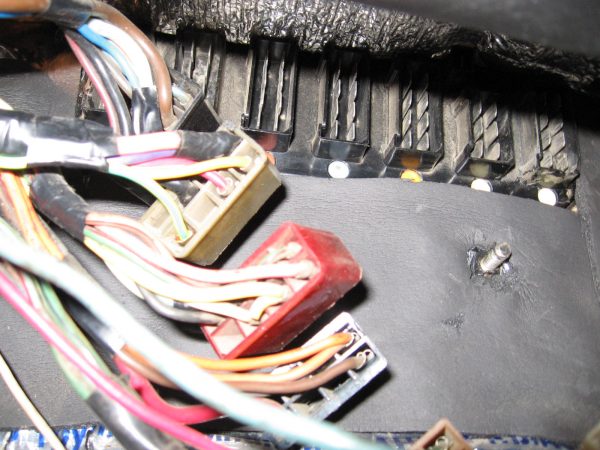
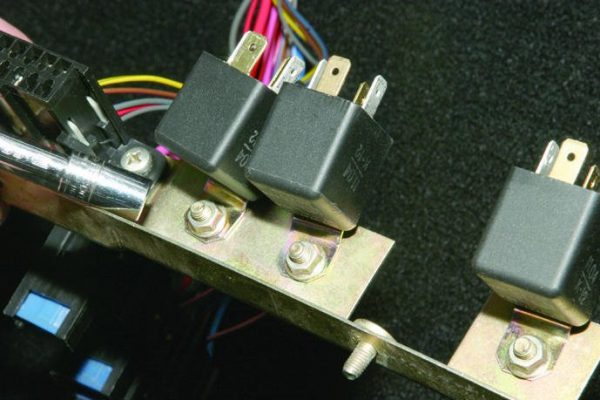
Despite the absence of differences between the mounting blocks of "sevens" with a carburetor and injection engine, the latter are equipped with an additional unit, which is installed in the cabin under the glove compartment. The block consists of sockets with relays and fuses:
- main relay;
- fuel pump relay;
- fan relay.
Fuses are designed to protect:
- main relay;
- electric fuel pump;
- electronic engine control unit.
How to remove a PSU
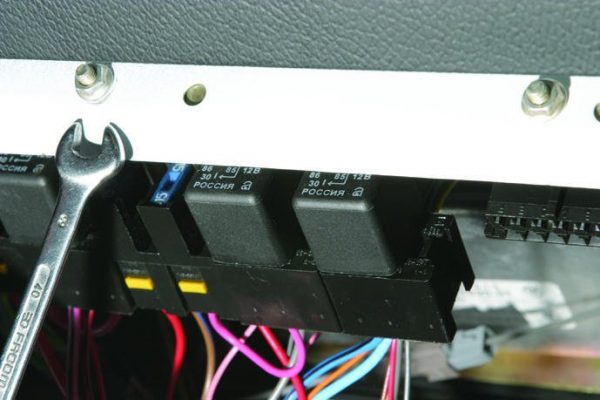
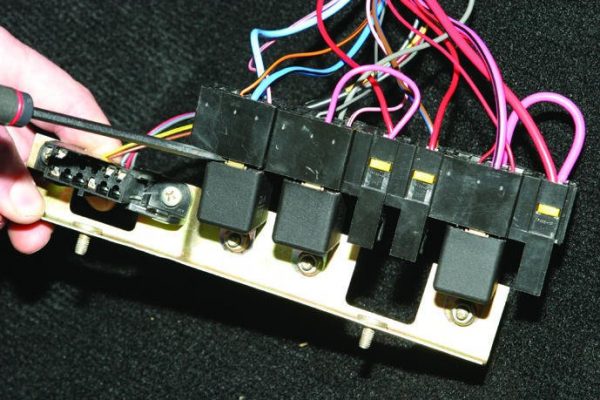
To replace the switching devices and fuses of the powertrain control system, it is necessary to remove the bracket on which they are attached. To do this, we perform the following actions:
- We remove the negative terminal from the battery.
- With an 8 wrench, unscrew the two nuts with which the bracket is attached to the body.The bracket is fastened with two wrench nuts for 8
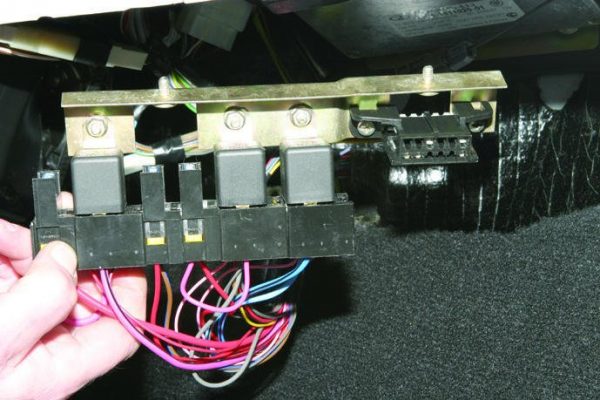
- We dismantle the bracket along with the relay, fuses and diagnostic connector.Having unscrewed the nuts, remove the bracket along with the relay, fuses and diagnostic connector
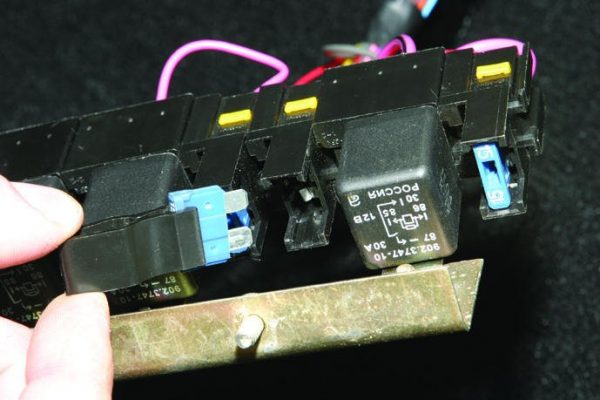
- Using tongs from the fuse box, we remove the faulty protective element and put in its place a new one of the same rating.You will need special tweezers to remove the fuse.
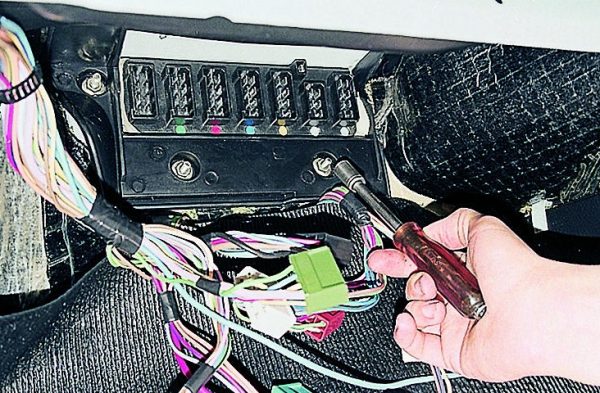
- To replace the relay, using a flat screwdriver, pry the connector with wires and disconnect it from the relay unit.To remove the connectors from the relay unit, we pry them with a flat screwdriver
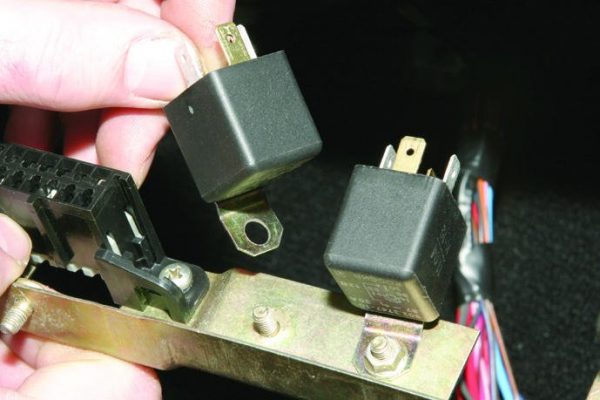
- With a key or head for 8, we unscrew the fasteners of the switching element to the bracket and dismantle the relay.The relay is attached to the bracket with a wrench nut for 8
- Instead of the failed part, we install a new one and assemble the assembly in the reverse order.After removing the failed relay, install a new one in its place.
Since there is no printed circuit board in the additional unit, there is nothing to restore in it, except for replacing the elements installed in it.
Having familiarized yourself with the purpose of the fuse box on the VAZ 2107 and step-by-step instructions for dismantling and repairing it, finding and fixing the malfunction will not pose any particular problems even for novice car owners. It is important to monitor the condition of the fuses and promptly replace the failed elements with parts of the same rating, which will eliminate the need for more serious repairs.

