Service – Clutch Kit and Flywheel Replacement
Content
 In the next article, we will go through the actual replacement of a dual mass flywheel step by step. Let's briefly describe how the disassembly of the gearbox looks like, which is necessary in order to get to the clutch, clutch bearing and flywheel. Then we will look at the coupling in more detail.
The disassembly time of the transmission depends on the type of vehicle and its logic of storing the components in the engine compartment. Since each car manufacturer has a different powertrain layout, the time required is different.
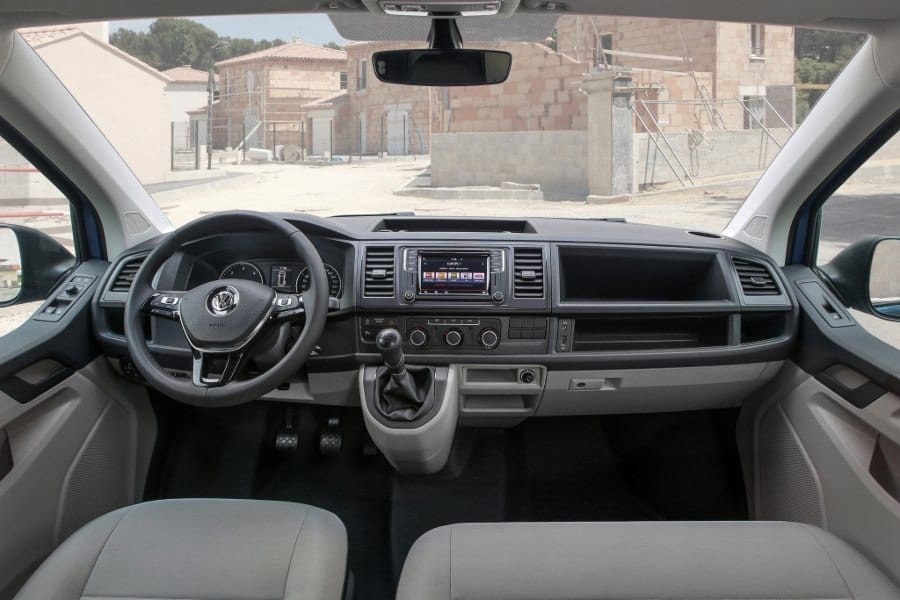
To remove the transmission from the engine, there must be sufficient space for servicing. Only with good enough preparation in the area of “freeing up space” does exchange become much easier. To disassemble the gearbox, we need to disconnect the axle shaft (in some cases it can be removed with the entire loop), disassemble the starter, as well as the battery and its lining, usually disconnect the water cooling pipe and much more. brackets. However, we will not discuss the disassembly of the gearbox itself, but will jump straight to the point where the gearbox is already separated from the engine.
When disassembling-removing the gearbox from the engine
- Check the engine crankshaft seal to make sure oil is not contaminating the flywheel. If the old flywheel is visibly contaminated with oil, the crankshaft oil seal must be replaced.
- Check the grooves on the transmission input shaft. They must not be worn and must not show signs of damage.
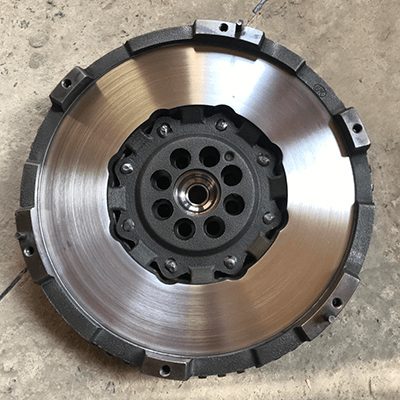
- Secure the flywheel with a suitable anti-twist device and remove the main fixing screws.
- Check the transmission shaft seal, making sure no oil is leaking from the transmission. If it leaks, the seal must be replaced.
- We will check the clutch release system for accidental damage to the guide bush or other signs of wear. It is also necessary to check the clutch fork, especially in the places where it is most loaded.
- When pressed, the pusher on the clutch roller should move within tolerance and there should be no oil leakage from the gearbox.
If we have completed all of these necessary checks, we can proceed with the preparation and assembly of the dual mass flywheel and clutch.

Install the new flywheel and clutch in place.
Carefully place the new flywheel in place in the center of the crankshaft and gradually tighten all six bolts with increasing torque, gradually criss-cross. The tightening torque of each bolt should be between 55-60 Nm. Tighten each screw an additional 50 °. The tightening torque should never be exaggerated.

Before installing the coupling
Apply a small amount of original clutch grease to the grooves of the clutch hub and apply the same small amount to the release bearing. In particular, on the bearing bore and at the point where the fork meets the bearing. Do not forget to lubricate the bearing rotation.
- Install the clutch disc into the flywheel using the centering tool.
- Using the centering pins and three screws, which we tighten crosswise at a 120 ° angle, make sure the clutch disc remains stable and centered correctly with the centering tool.
- If everything is in order, screw the other three screws into the lamella and gradually tighten them all crosswise in the same way as we pulled them on the flywheel. The Belleville washer pins should move evenly around the entire circumference when tightened. Repeat this entire pulling motion three times to securely tighten the socket head cap screws. Use a torque wrench to retighten the plate to 25 Nm.
- Install the clutch release bearing and check for correct offset.
Transmission assembly
- Check guide pins on engine and transmission. If they are in the right place and not damaged, we will fix the gearbox at the correct height in alignment with the engine crankshaft and make sure it is well stabilized. A possible fall of the gearbox or slippage to the wrong side can damage the gearbox housing itself (in the case of a light alloy housing) or other brackets, whether plastic, on the engine.
- Slowly insert the transmission shaft into the grooved hub of the clutch disc. If we cannot, we do not use force under any circumstances. Sometimes it is enough to turn the crankshaft through the flywheel. During the installation of the reducer, we must avoid unnecessary pressure on the pressure plate so as not to damage it.
- With small movements from side to side, we move the gearbox as close to the engine as possible so that the "gap" between the gearbox and the engine is the same everywhere. Gradually tighten each bolt between the engine and transmission until the gap is completely closed. Connect the control rods and the clutch release cable.
- Finally, tighten each bolt to the torque specified in the Transmission Service Procedure. We will reattach the starter motor, coolant piping, wiring that prevented us from replacing, and other plastic handles and covers in place. We install the axle shaft in the hubs and completely check the wheel suspension. If everything is in place and we have not forgotten anything, remove the wheels and properly tighten the central nut in the hub (also according to the service instructions for this part of the car).

Post-build testing
Correct clutch operation is determined as follows:
- Disengage and engage the clutch, shifting all gears. Switching should be smooth and hassle-free. We mustn't forget to come back.
- We will check. or that there is no unwanted noise or other inappropriate sound when disengaging and engaging the clutch.
- We will switch the speed to neutral and increase the engine speed to about 4000 rpm and find out if there are unwanted vibrations or other inappropriate sound effects.
- Let's take the car for a test drive. Excessive slippage should not occur when driving, gear shifting should be smooth.
After following these maintenance instructions, the clutch should function without problems. A layman who does not have the necessary education or experience in this problem will definitely not be able to cope with this task on his own, and therefore leave the installation to specialists or a service you have verified, as this is one of the most difficult service tasks. ...
Clutch and flywheel replacement times are typically around 5 hours. If everything goes smoothly and without difficulty, the exchange can be done in 4 hours. If other problems arise during disassembly, this time can be quickly increased depending on the expected, latent or other unexpected defect.