Do-it-yourself car noise isolation
Content
Since the noise insulation of the car is a long and laborious process, to complete the procedure you need to find a warm garage (if not your own). It must necessarily have a viewing hole - it will be more convenient to process the bottom. Before starting work, the interior is cleaned, the car is washed.
For work you will need the following tools:
- Building hair dryer.
- Stitch roller. This is an inexpensive tool that will help tightly "roll" Shumkov to the body.
- Scissors.
- Degreaser. Do not neglect them, because surface pretreatment is the key to a good result.
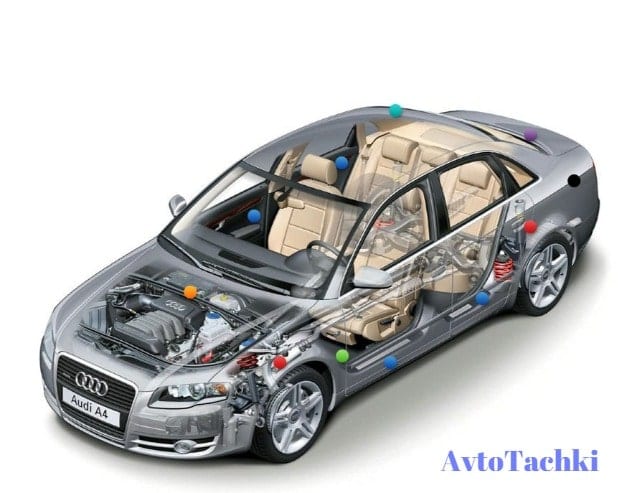
Sources of noise in the car

Before starting work, you need to find out where the background noise in the cabin comes from. Such sources are conventionally divided into two categories:
- Internal Plastic and non-fixed metal elements of the interior emit a characteristic knock or creak, which cannot be eliminated by performing sound insulation of the body. Such noise sources also include ashtray covers and a glove compartment. For some car models such “sounds” are natural (more often these are many budget cars).
- External This category includes the remaining noise generated outside the cabin. It could be the sound of a motor, howling cardan transmission, the roar of a burned-out muffler, the noise of tires, parts of power windows, etc.
After the motorist has determined the nature of the external noise, it is necessary to eliminate the cause of their occurrence (if possible), only then you should proceed with the sound insulation.
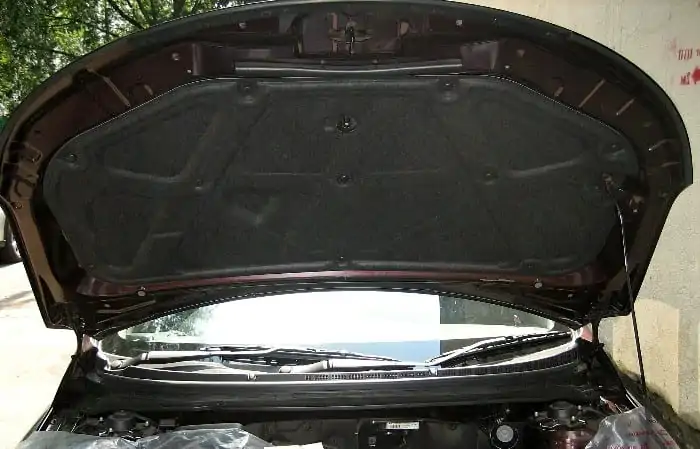
Soundproofing hood
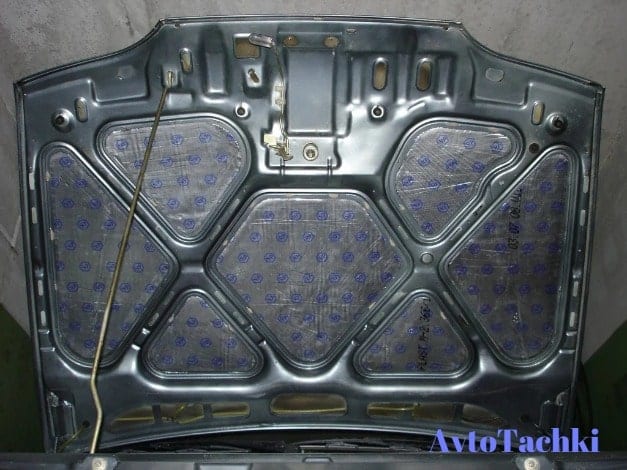 No need to think that the hood insulation is a panacea for all problems. Even with perfect execution, you will only reduce the sounds that penetrate into the interior, but not get rid of them completely.
Note that in this case we are talking more about thermal insulation, which is extremely important during cold weather. During the selection of materials, pay attention to their weight, since it is not recommended to heavily weight the hood - this can cause shock absorbers to leak. Often vibroplast silver and an accent of 10 mm are used for noise and heat insulation of the hood.
Please note that if there is factory noise insulation on the hood, you do not need to tear it off. What you lay on top of it has a helper function, not a main one.
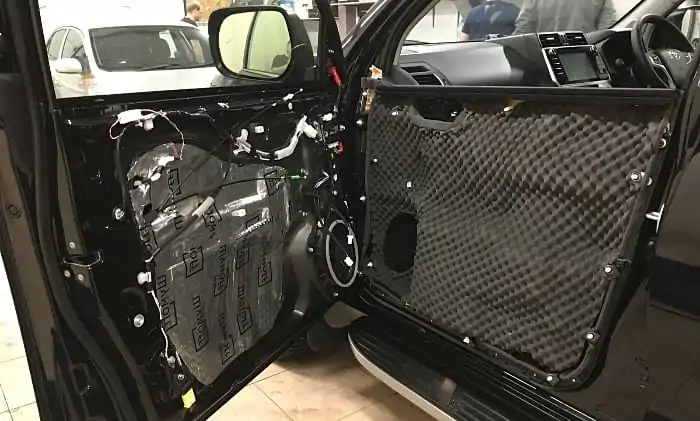
Soundproofing doors
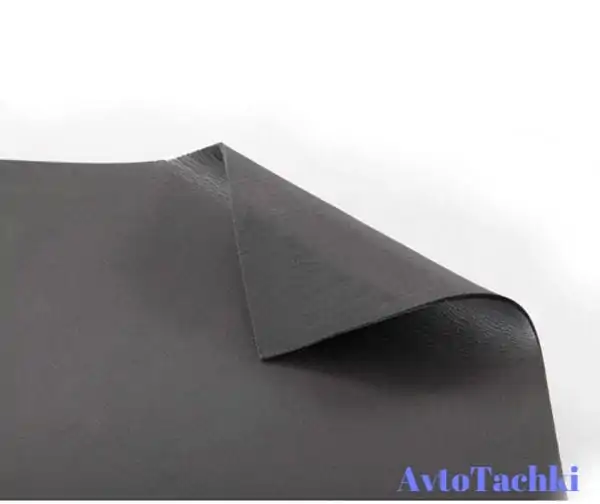
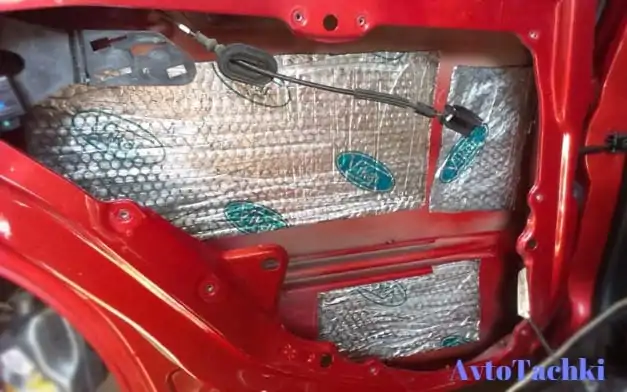 Pasting "Shumka" this part of the body will save you most of the extraneous sounds. To fulfill the "minimum plan", one vibration isolation with the help of "vibroplast-silver" or "gold" is enough. Apply material to the inside of the door, opposite the speaker. Remember that for the best effect you need to process the maximum area.
In order for the acoustics to sound “in a new way”, at least 4 layers will have to be applied. You can take the same “vibroplast-silver” or “gold” as a basis, we glue it on the inside of the door. On top of it lay "splen" 4-8 mm. Further, under the skin we glue “Shumko”, be sure to close all the holes. At this stage, you need to seal the volume of the door in which the speaker is located. We glue the outer part with “vibroplast-silver”, and over it again “splen”.
There is a drain inside the bottom of the doors, so the Shumkov cannot be glued to the bottom.
After that, you can proceed to the isolation of door cards. Here you will find the material “bitoplast” useful, which will relieve squeaks and other noises.
During operation, carefully monitor the weight so that the doors do not become too heavy. Otherwise, you will have to change the loops much more often, since the load on them will increase accordingly.
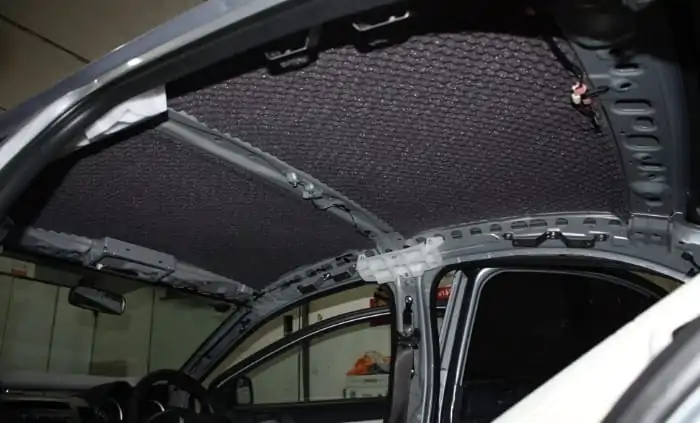
Soundproofing the ceiling and floor of the machine
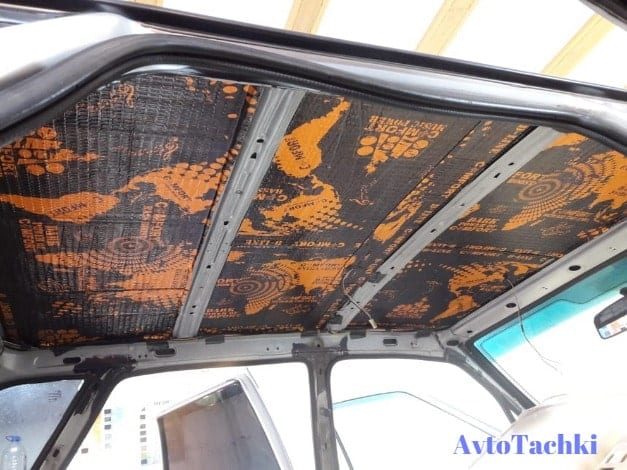 The roof of the car is isolated in order to save people in the cabin from a loud “drum roll” in the rain. Muffled bumps can, in a sense, even increase comfort inside the cabin.
Of course, this type of sound insulation also protects from other sources of sound, but this is not so significant.
In this case, the basis will again serve as "vibroplast silver" or "gold", and over it you can stick a 4-8 mm splen.
When working with a car roof, be careful not to overload it with extra weight. This may impair machine handling.
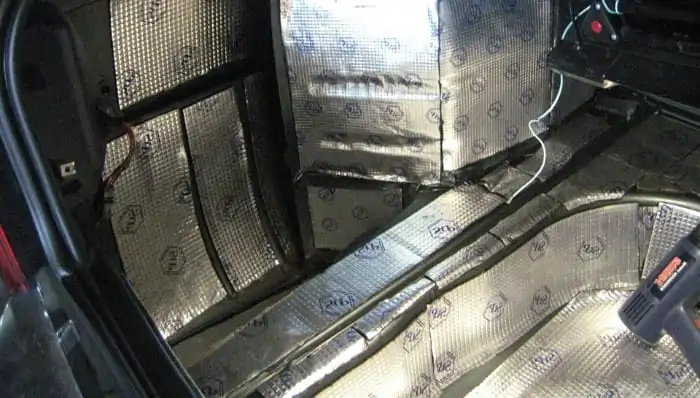
In order to isolate yourself from the sounds of the road and, in particular, from the sound of small pebbles hitting the bottom of the car, you can make the soundproofing of the floor of your vehicle. For this, two layers of insulator will be enough. The first will be a bimast of bombs, and on top of it a 4–8 mm splen.
You need to be careful with the wiring: you can not get it under sound insulation.
Work with wheel arch locations especially carefully. It is a question of their part from inside. They need to be pasted in one layer, since a thick slotted spoon may not allow fixing the plastic into place.
Noise isolation of the trunk, wheel arches, arches
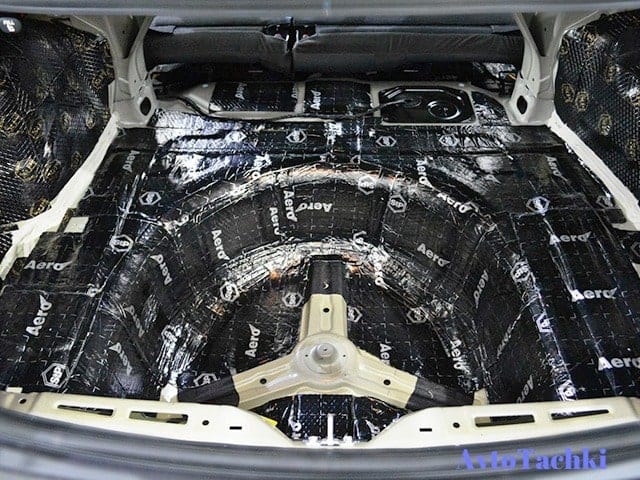 To get less noise into the interior of your car, cover the plastic boot trim with “bitoplast”, which will muffle squeaks. Particular attention should be paid to the niche of the "reserve" - it is completely treated with vibration isolation.
Of course, in order not to listen to the notorious “road sounds” in the car, you should make noise in the wheel niches. To do this, remove the wing flaps and apply “vibroplast gold” to the inside of the arch, and apply “silver.”
By the way, wheel niches can also be treated with gravel. Firstly, it will improve the sound insulation in the car, and secondly, it will protect the body from corrosion.
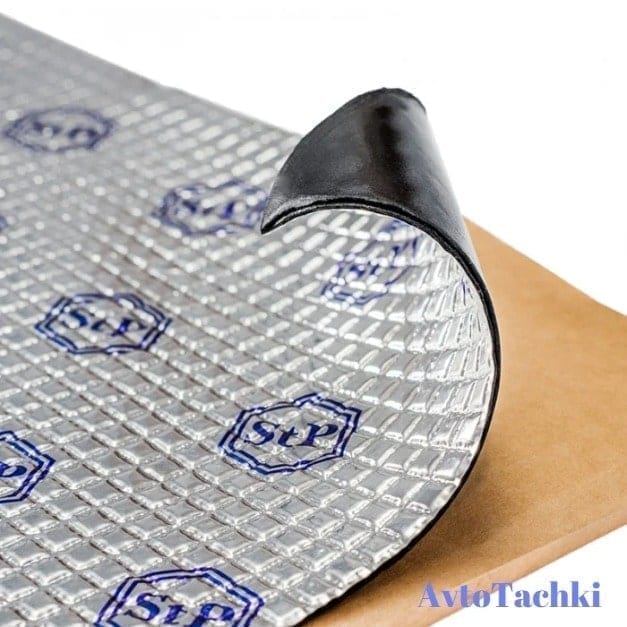
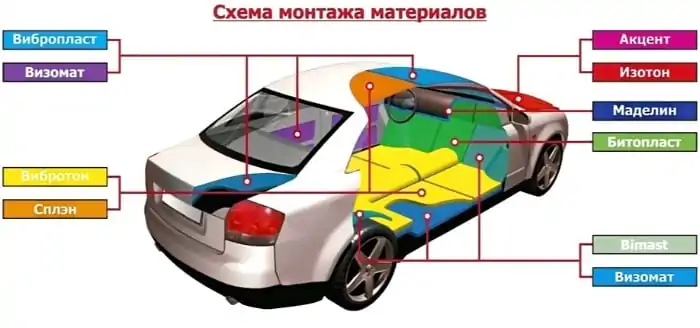
The best noise insulation materials
If you really want to improve sound insulation, then we do not recommend saving on materials. With a small budget, it is better to “stretch” the process in time and glue the body parts in turn: first, the hood, two months later the door, and later the roof and floor. Well, or in another order.
Below we consider the most popular insulation materials.
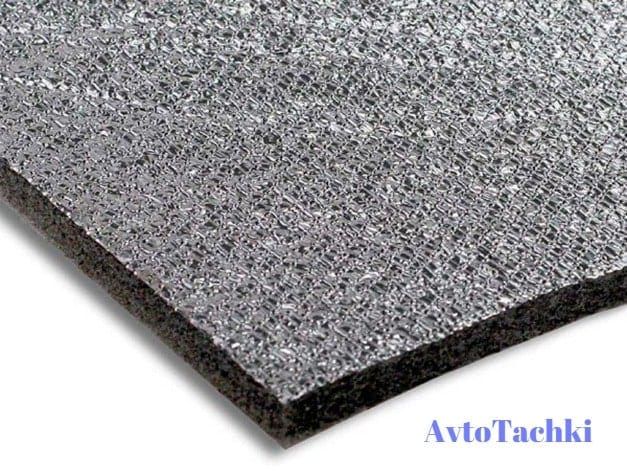
Silver vibroplast
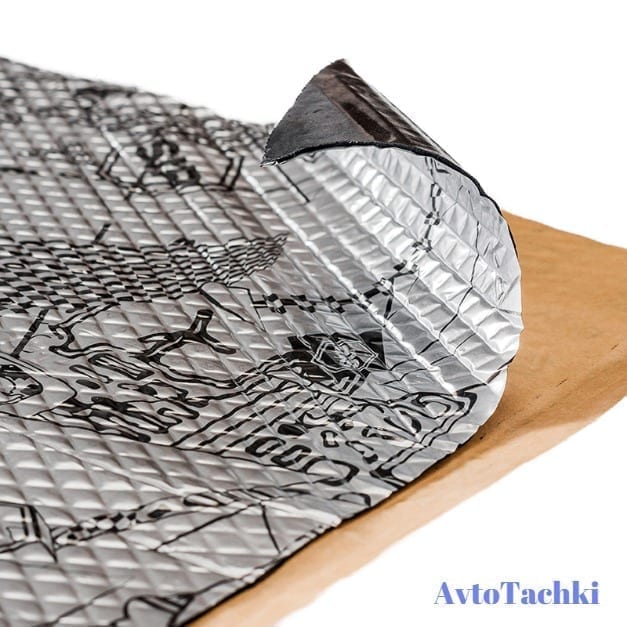 This is an elastic material used for noise isolation. It has the form of an aluminum foil with a self-adhesive base. Of the pluses, it is worth noting the ease of installation, anti-corrosion properties and water resistance. In some cases, “silver” can act as a sealant. Does not require heating during installation. The weight of the material is 3 kilograms per square meter, and the thickness is 2 millimeters.
Vibroplast Gold
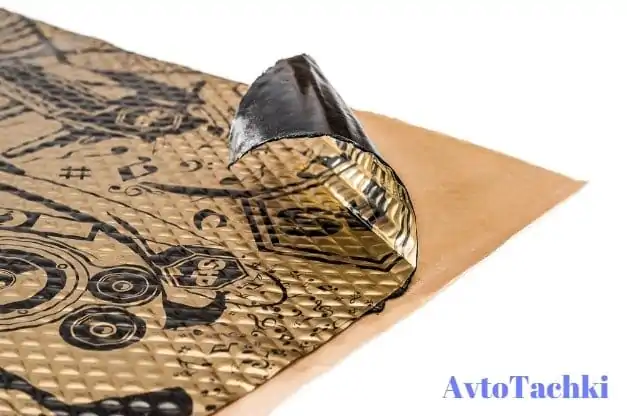
This is the same "silver", only thicker - 2,3 mm, heavier - 4 kilograms per square meter and, accordingly, with higher insulation performance.
BiMast Bomb
 This is the material with the highest efficiency in vibration isolation. It is a multi-layer, waterproof design. Perfect for audio training speakers.
During installation, it needs to be heated up to 40-50 degrees Celsius, so you will need a building hair dryer.
The material is quite heavy: 6 kg / m2 with a thickness of 4,2 mm, but also the insulation properties at the highest level.
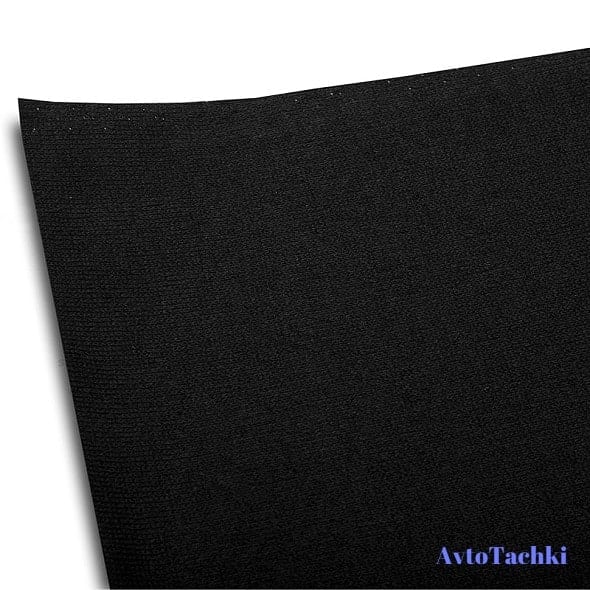
Splen 3004
This material has high sound and heat insulation properties. It is waterproof and can withstand extreme temperatures - from -40 to +70 Celsius. This is about operation. But it is forbidden to mount “Splen” at temperatures below +10 degrees, due to poor initial adhesion.
It is 4 mm thick and weighs 0,42 kg / m2. This material is also available on the market in other thicknesses of 2 and 8 mm, with the corresponding names Splen 3002 and Splen 3008.
Bitoplast 5 (antiskrip)
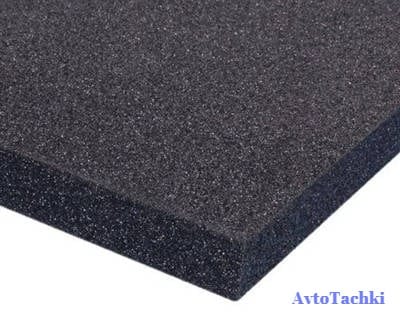 This polymer material has amazing sound absorbing and insulating properties. It can be used as a sealant. It perfectly eliminates bounce and creaks in the car interior, is characterized by durability, resistance to decomposition and water resistance. It has an adhesive base, which simplifies its installation.
"Antiskrip" is light - only 0,4 kg per square meter, with a thickness of half a centimeter.
Accent 10
 This is a flexible material that is used for noise and heat insulation. It is capable of absorbing up to 90% of sounds, which makes it very practical. It has an adhesive layer for easier installation. Withstands colossal temperature fluctuations - from -40 to +100 degrees, so it can be used on the partition of the engine compartment of a car.
The thickness of the "accent" is 1 centimeter, weight 0,5 kg / m2.
Madeleine
 This material performs sealing and decorative functions. Has a release pad and adhesive layer.
Thickness can vary between 1-1,5 mm.
How to disassemble and where to use what material?
Before dismantling the interior elements, you must remember where which part is installed. Otherwise, you can incorrectly assemble the lining back or spend a lot of time on it. For simplicity, you can take detailed photographs.
Sound insulation preparation work:
- Hood. Many modern cars have a protective cover on the back of the hood. It is attached with clips. To remove it, experts recommend using a puller designed for these works. If the procedure is performed for the first time, then there will be two such tools (inserted with forks on both sides). The clip is removed with a sharp and confident upward movement. Do not be afraid that the plastic clips will break - you can buy them in the car shop. Windshield washer hoses pass under the hood. For convenience, they should be disconnected.
- Doors To get to the inside, you will need to remove the door cards. They also hold on to the clips, and handles (sometimes pockets) are fixed with bolts. First, the bolts are unscrewed, and then clips are clicked around the perimeter of the card. Each brand of the machine has its own clamps, so first you need to clarify how they are attached and removed. Typically, the card can be removed by holding both hands on one side (near the clip), and yanking yourself. This will make it less likely that the latch will break. After disconnecting the acoustics and wiring windows.
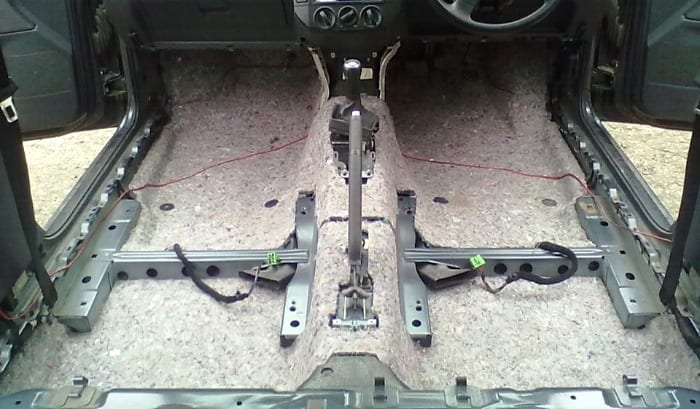
- Floor. First, all seats are removed (bolted to the floor). This procedure must be performed carefully so as not to scratch the panel, otherwise you will have to carry out additional work (how to remove scratches from plastic, you can read here) Then, all plastic plugs are removed throughout the cabin, the seat belt fasteners are unscrewed, and the plastic door sills are removed. Seals should only be removed where they are adjacent to the plastic sill plates. Then the interior carpet is curled.
- The trunk. First, the seat belt drums are unscrewed, then the plastic clips on the rear arches snap off. Due to the fact that there are no longer any seats in the cabin, the carpet can be removed through the trunk.
- Ceiling. If there is a hatch in it, then it is better not to touch it. The ceiling sheathing is fastened with clips along the perimeter and bolts on the handles on the sides. In the center at the place of mounting of the ceiling, the ceiling is fixed in different ways, so you need to see what the manual says for a particular model. Sheathing can be removed from the passenger compartment through the back door (or the back lade if the car station wagon or hatchback).
Technology works
During the execution of work, it is important to pay attention to the following subtleties:
- Bolts and nuts from individual elements of the passenger compartment must be folded into different containers so as not to waste time choosing the right one during assembly;
- If rust is detected, it must be removed and treated with a converter;
- All metal parts must be degreased, but before that remove dust and dirt (maybe wash the car from the inside), because Shumka will not stick to the metal;
- Factory vibration isolation is not removed and does not degrease (it consists of bitumen, which under the influence of alcohol-containing substances spreads);
- Factory noise insulation is removed if it interferes with gluing vibration isolation or does not allow the interior elements to be replaced;
- For adhesion with metal, vibration isolation is heated (maximum temperature +160 degrees, if higher - it boils and loses its effectiveness). For web with a thickness of more than 4 mm, this procedure is required;
- Vibration isolation must be qualitatively pressed with a roller (as far as there is enough strength to make it difficult to tear off) - so it will not peel off during prolonged vibration;
- When processing the floor and ceiling, you should try to use solid webs (with the exception of stiffeners - they must be left without insulation);
- Cloths need to be cut outside the cabin so as not to scratch the body (because of this, rust will appear);
- In order not to stain the interior, the work must be done with clean hands - washed and degreased;
- Sealing gum should not be completely removed, but only where they will interfere with gluing Shumkov;
- Vibration insulation must be glued where it can be tightly pressed with a roller to the metal, and noise insulation - where the hand will get out to press the adhesive base;
- All openings must be made as soon as they are closed with a canvas (otherwise this will complicate the process of assembling the cabin);
- Clips must be removed only with direct movements (either vertically or horizontally), otherwise they will break;
- The thicker the layer - the denser the interior element will be installed, so there is no need to be too zealous, otherwise you will have to cut off the excess.
Despite the fact that the process of car isolation is laborious, its result is increased comfort even in a budget car.
Common questions:
What kind of sound insulation to choose for a car? Sound and vibration isolation materials are more practical. This is a versatile option that both absorbs and isolates external noise.
How to glue vibration isolation? Due to the large weight, it is better to glue vibration isolation in strips, and not in a solid sheet. Of course, this reduces the effectiveness of the material, but it has a positive effect on the weight of the car.
How to improve sound insulation in a car? Choosing quality material. Unlike vibration isolation, we glue the slotted spoon over the entire body area (in accordance with the manufacturer's recommendations). In addition to sound insulation, you need to periodically check the quality of door and window seals.


One comment
Mahazil
sorry, where is the store?