We remove and install the VAZ-2107 checkpoint ourselves
Content
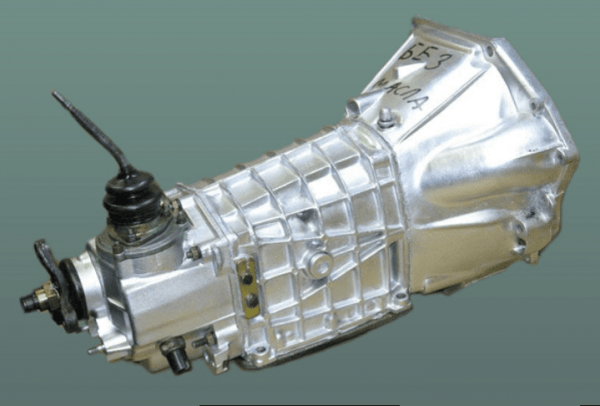
The gearbox is one of the most important components of the car, the smooth operation of which depends on the durability and reliability of the car. If it becomes necessary to remove the gearbox for its replacement or repair work, you should be sure that you cannot do without dismantling the box in this case, since removing the gearbox is a rather complicated and time-consuming process, especially if it is performed for the first time. Replacing or repairing a box at a service station is an expensive undertaking, so many VAZ-2107 car owners prefer to do this work on their own. What should a motorist know when he removes the GXNUMX checkpoint for the first time without outside help?
When it may be necessary to dismantle the VAZ-2107 gearbox
Dismantling of the VAZ-2107 gearbox may be required, if necessary:
- replace or repair the clutch;
- replace the oil seals of the crankshaft and the input shaft of the box;
- replace or repair the checkpoint itself.
In the case of replacing the clutch, the box may not be completely removed, but only shifted to the side so that the input shaft of the gearbox comes out of the clutch basket, but access to the clutch parts in this case will be limited. Complete dismantling of the gearbox allows in this case to carry out a visual inspection of such components as the clutch housing, as well as the oil seals of the input shaft of the gearbox and crankshaft, and, if necessary, replace them.
Signs that repair or replacement of the gearbox itself is required, there may be oil leaks, extraneous noise, wheel blocking while driving, etc. When the first symptoms appear, do not delay the repair in order to prevent the gearbox from failing.
Fastening the gearbox VAZ-2107
The front of the box is fixed to the engine with bolts securing the clutch housing. When removing the gearbox, these bolts are unscrewed last. From below, the box is supported by a cross member or bracket, which is attached to the body with 13 bolts and nuts. The cross member has such a detail as a pillow: it is on it that the gearbox body lies. When the cushion is worn, vibration may occur during movement, so it must fit snugly against the gearbox housing. The pillow is attached to the bracket with two 13 bolts. The rear of the gearbox is connected to the driveshaft with three 19 bolts.
Video: how to remove and put in place the checkpoint pillows VAZ-2107

How to independently remove the VAZ-2107 checkpoint
Before proceeding with the dismantling of the checkpoint, you should prepare the tools and materials that may be required during work, as well as determine the location for the disassembly.
You can remove it (even easier for one - no one interferes), put a board across the pit, drag the box onto this board.
But it’s probably very difficult to stick one alone, the problem is not even the weight of the gearbox, but put the gearbox on the shaft so that the box “sits down”
What tools will be required
To remove and reinstall the VAZ-2107 gearbox, you will need:
- a set of open-end and spanner keys, among which there must be keys for 10, 13, 19;
- a set of heads of the same dimensions as the keys, as well as cardan joints with an extension;
- pliers, screwdrivers, tweezers;
- funnel and container for oil;
- jack and wooden beams;
- rags.
Preparatory work
Work on the removal of the VAZ-2107 gearbox is carried out, as a rule, in an inspection pit, on an overpass or using a hoist... The sequence of actions in this case can be as follows:
- the car is jacked up on both sides, wooden bars are placed so that the rear part remains suspended;
 Before starting work, the car is jacked up on both sides, wooden beams are placed so that the rear part remains on weight
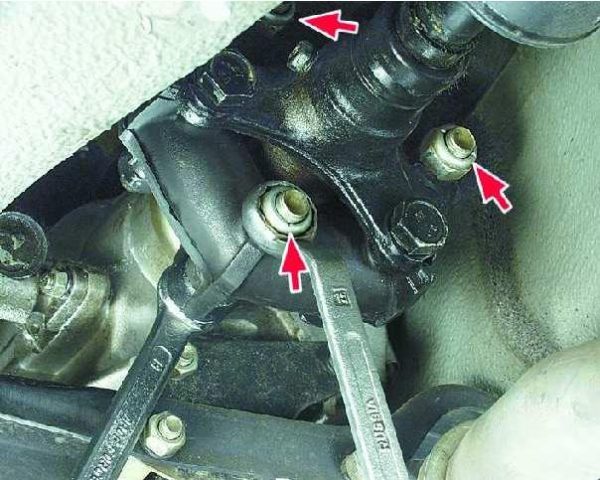
 - the driveshaft is disconnected. To do this, the gear lever must be moved to the neutral position so that the propeller shaft can be rotated by hand. After that, three nuts are unscrewed, with which the cardan coupling is attached to the gearbox flange;Three nuts are unscrewed with which the cardan coupling is attached to the gearbox flange
- by rotating the cardan shaft, it is necessary to remove the bolts that were held by the nuts and disconnect the cardan coupling from the gearbox flange;By rotating the cardan shaft, it is necessary to remove the bolts that were held by the nuts and disconnect the cardan coupling from the gearbox flange
- four nuts are unscrewed, with which the cardan shaft is attached to the rear axle, the cardan is disconnected and retracted to the side;The cardan is disconnected from the rear axle and retracted to the side
- the car battery is disconnected (or completely removed);
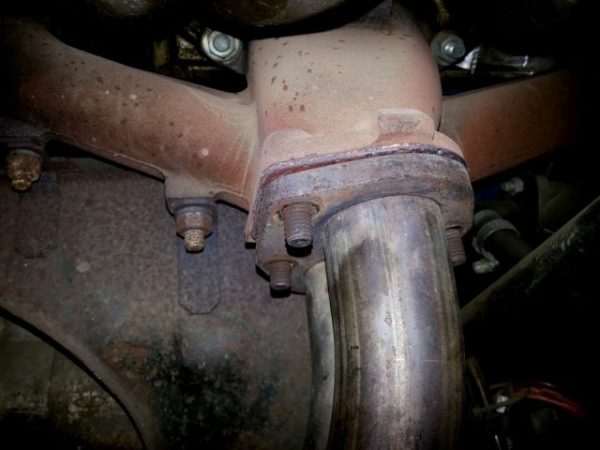
- the entire muffler is removed, i.e. its rear part, the resonator and the exhaust pipe located in the front part.The muffler is removed completely, including the exhaust pipe to the exhaust manifold


After that it is necessary:
- disconnect the oxygen sensor;The oxygen sensor is disabled by disconnecting the shoe
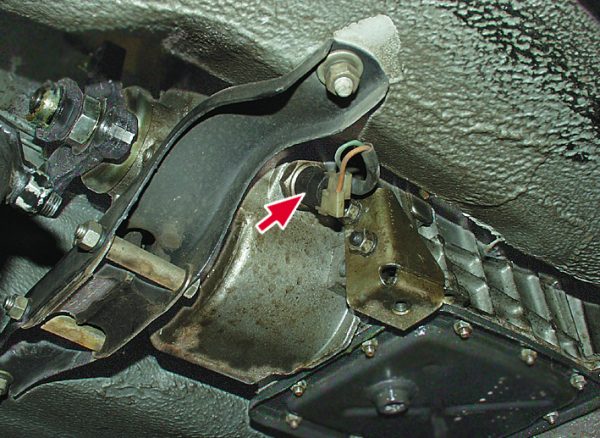
- disconnect the electrical wire that feeds the reversing lamp;It is necessary to disconnect the electrical wire that feeds the reverse lamp lamp
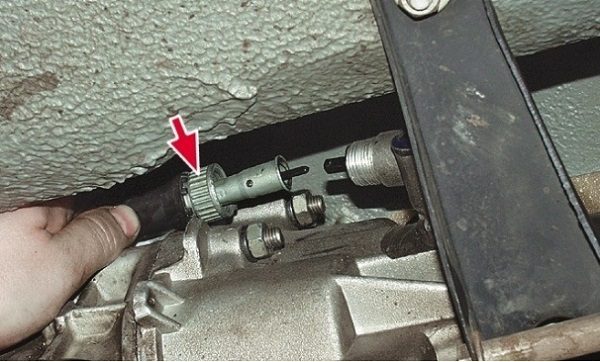
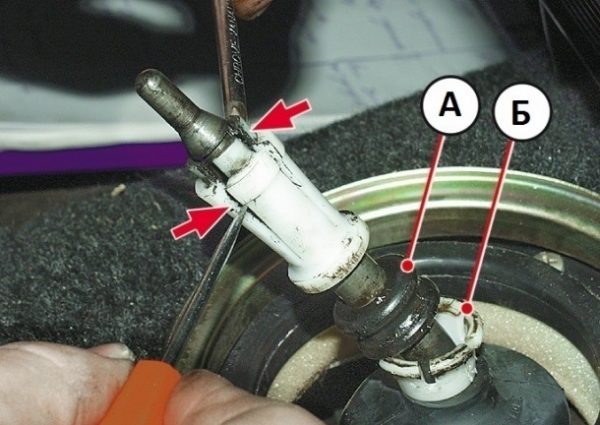
- loosen the speedometer cable nut and disconnect the cable;The speedometer cable nut must be loosened, the cable disconnected and set aside
- remove the clutch slave cylinder, and the cylinder only needs to be removed from the bracket without unscrewing the cylinder hose nut;The slave cylinder only needs to be removed from the bracket without unscrewing the cylinder hose nut
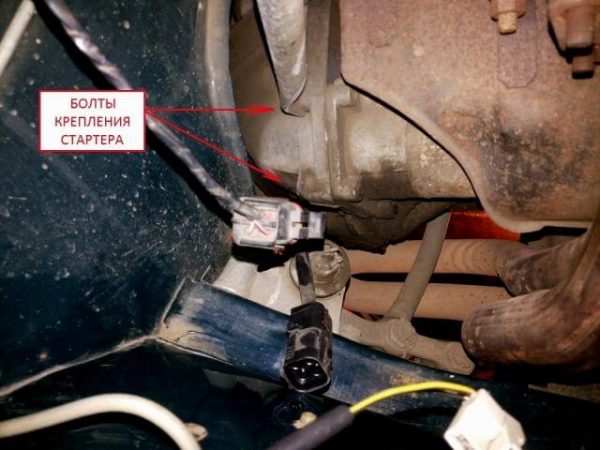
- remove the starter by unscrewing the two upper mounting bolts and one lower.Having unscrewed the fixing bolts, it is necessary to remove the starter

Removing the gearshift control lever and other work in the cabin
Inside the car, it is necessary to disassemble the gearbox control lever. To do this, lift the handle cover and at the very bottom of the lever fix the locking sleeve with a screwdriver. Then you need to remove the bushing from the lever, and remove the lever from the mechanism. Using tweezers, remove the rubber damper of the lever from the pulled out rod. Further it is necessary:
- remove the three bushings remaining on the so-called backstage;It is necessary to remove the three bushings remaining on the so-called backstage
- unscrew the bolts that secure the lever cover to the floor and remove the cover;The next step is to remove the gearshift lever cover.
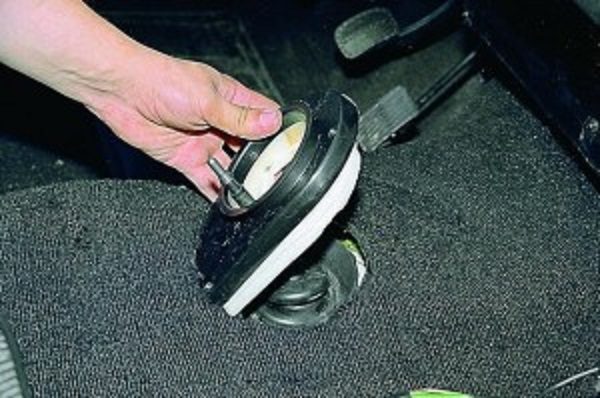
- unscrew the bolts on which the cover of the parking brake handle is attached;After that, it is necessary to unscrew the bolts on which the cover of the parking brake handle is mounted.
- remove the parking brake cover and unscrew the screws holding the mat;
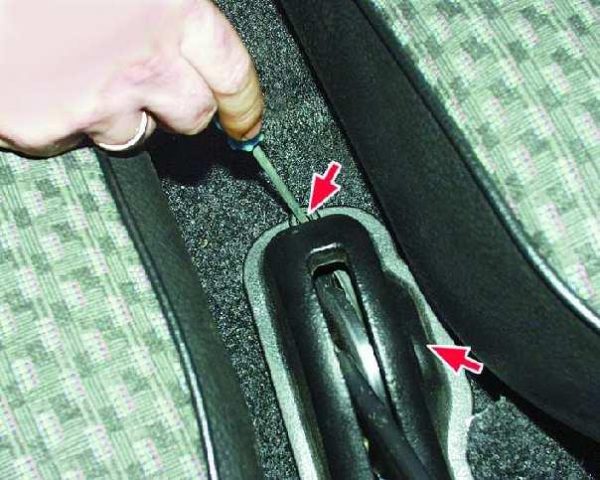
- unscrew the nuts that secure the front seat slides to the brackets;It is necessary to unscrew the nuts that secure the front seat slides to the brackets
- remove the metal trim by unscrewing the bolts holding it;Next, you need to remove the metal trim by unscrewing the bolts holding it.
- lift and roll up the mat so that it does not interfere;
- remove the hose for supplying warm air to the air filter.
Dismantling the gearbox
Then you need to go down under the car again, drain the used oil from the box into a previously prepared container, and then do the following:
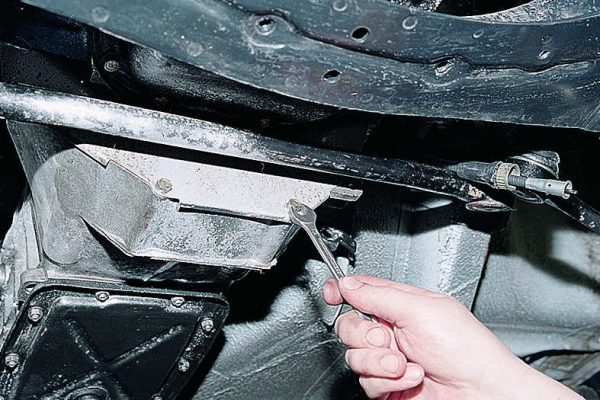
- unscrew the bolts on which the protective cover of the clutch housing is attached;It is necessary to remove the protective cover of the clutch housing
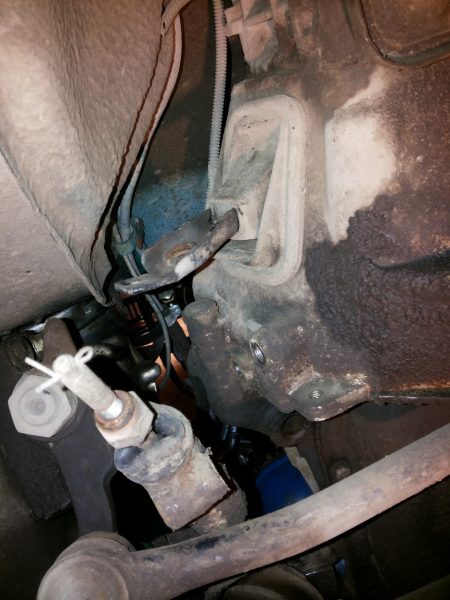
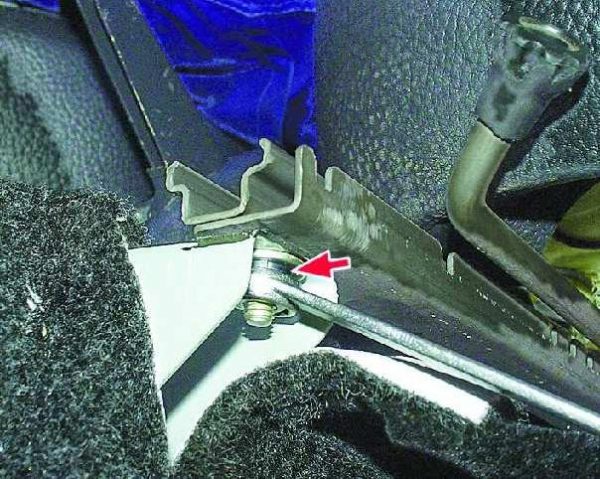
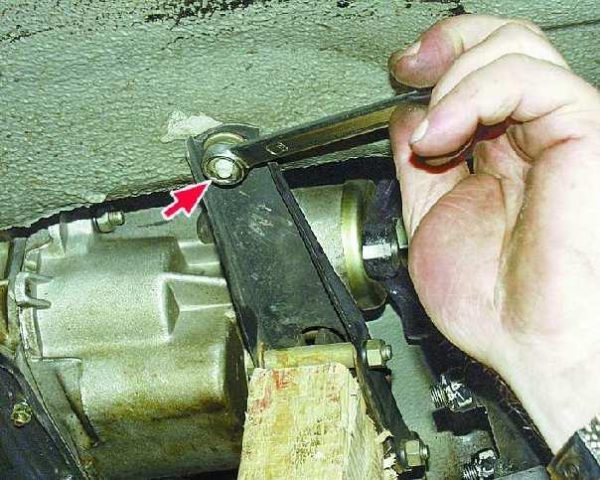
- support the bracket (or cross member) with a wooden bar, and unscrew the two nuts that secure the bracket to the body;Before removing the bracket, place a wooden support under it
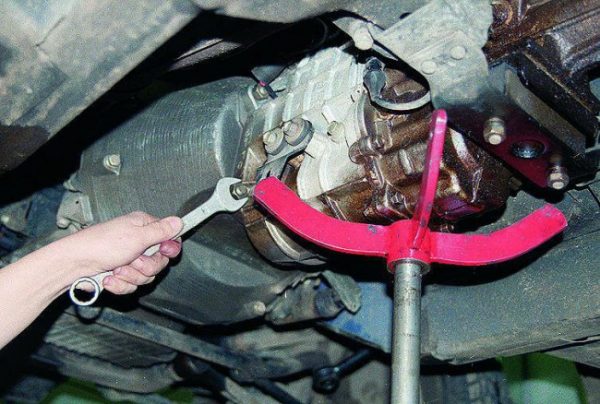
- substitute a jack or a wooden beam under the box and unscrew the 4 bolts holding the clutch housing mounted on the cylinder block;Supporting the box with a jack or a wooden beam, you need to unscrew the four bolts with which the clutch housing is attached to the cylinder block
- remove the crankcase from the cylinder block with a screwdriver;
- move the gearbox back and remove the input shaft from the hub of the driven disk.To release the box, you should move the gearbox back and remove the input shaft from the hub of the driven disk
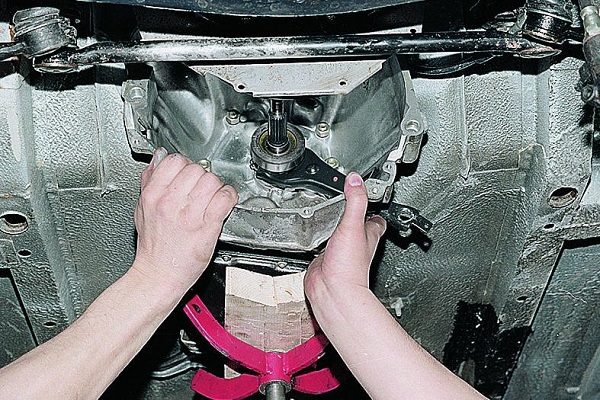
The gearbox weighs more than 50 kilograms, this should be taken into account when removing the fasteners so as not to get injured.
All classic fasteners for 4 bolts. Check if the car is new and the gearbox has not been removed yet, then the upper bolts can be covered with factory shipping washers! The bolts are not visible in the Murzilka, but look from the side of the candles just above the lower bolt, it is very clearly visible, the other is above the starter.
How to put the checkpoint in place
Installed in place of the checkpoint in the reverse order.
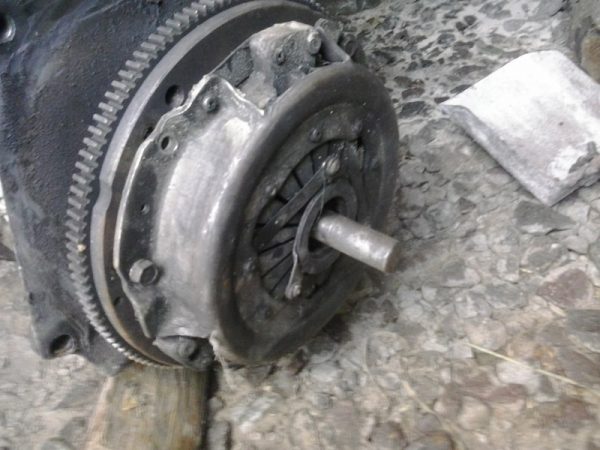
Clutch disc centering
If the clutch was removed during the dismantling of the box, then before installing the gearbox in its place, centering of the clutch disc will be required. It is known that on the “seven” (as well as on the rest of the “classic”), the input shaft of the box protrudes beyond the gearbox and is driven by a feredo - a driven clutch disc using splines. Even further, the input shaft is located in the crankshaft bearing. The meaning of centering is that the feredo should hit the center of the crankshaft bearing. If this does not happen, the installation of the input shaft of the box will be impossible: even if you get on the splines, the shaft will not sit in the bearing.
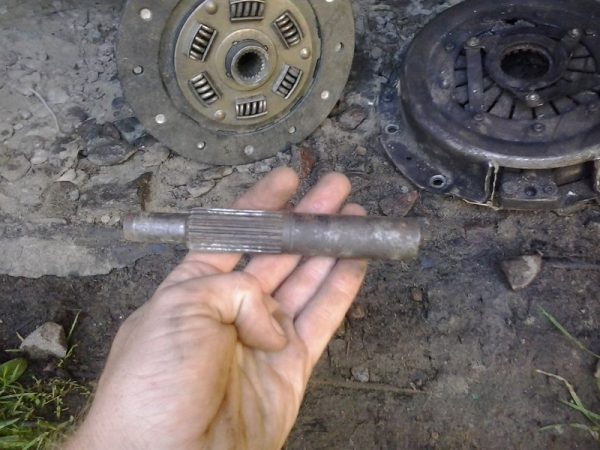
To center the disc, you need any metal rod (ideally a piece of the old input shaft of the gearbox). Feredo is placed inside the basket, after which the basket is suspended from the motor housing. The rod is inserted into the hole and sits in the bearing. In this position, the basket is firmly fixed to the body.
The fact is that, as I said, checkpoints from the classics are almost eternal. Bridges can change, engines, bodies, and the box lives the longest. And it doesn’t happen that it works halfway, either it works or it doesn’t, therefore, from a disassembly, you can buy a gearbox in good condition without any defects at all. You can buy, of course, a new one, but it is already made in Russia, and those from the showdown are taken from Soviet-made cars, so I would trust them more.
Installing the box and the gearbox control lever
Before putting the gearbox in place, it is necessary to clean the input shaft of the gearbox and apply a layer of SHRUS-4 grease to it. All steps for installing the box in its place are a mirror image of the steps taken during disassembly, i.e., the reverse sequence of actions is carried out. After installation, pour the required amount of oil into the box.
To reinstall the transmission control lever, it is necessary to place all previously removed bushings inside the lever housing in the reverse order. After that, the lever is pushed onto the gearshift mechanism and, with the help of packing, is fixed on it. Next, the lever covers are restored and the removed rug is laid.
Video: removal and installation of the VAZ-2107 gearbox control lever

If the VAZ-2107 gearbox is removed (especially installed) for the first time, it is better to do this with the help of an experienced specialist so as not to disable any expensive part and injure yourself. If the driver is concerned about any noise, vibration or other malfunctions of the car, you should try to eliminate them in more accessible ways, and only if the measures taken have not worked, proceed to repair the gearbox. The VAZ-2107 box is considered to be quite reliable, but at the same time a complex unit, so it is not recommended to disassemble it without an experienced specialist.

