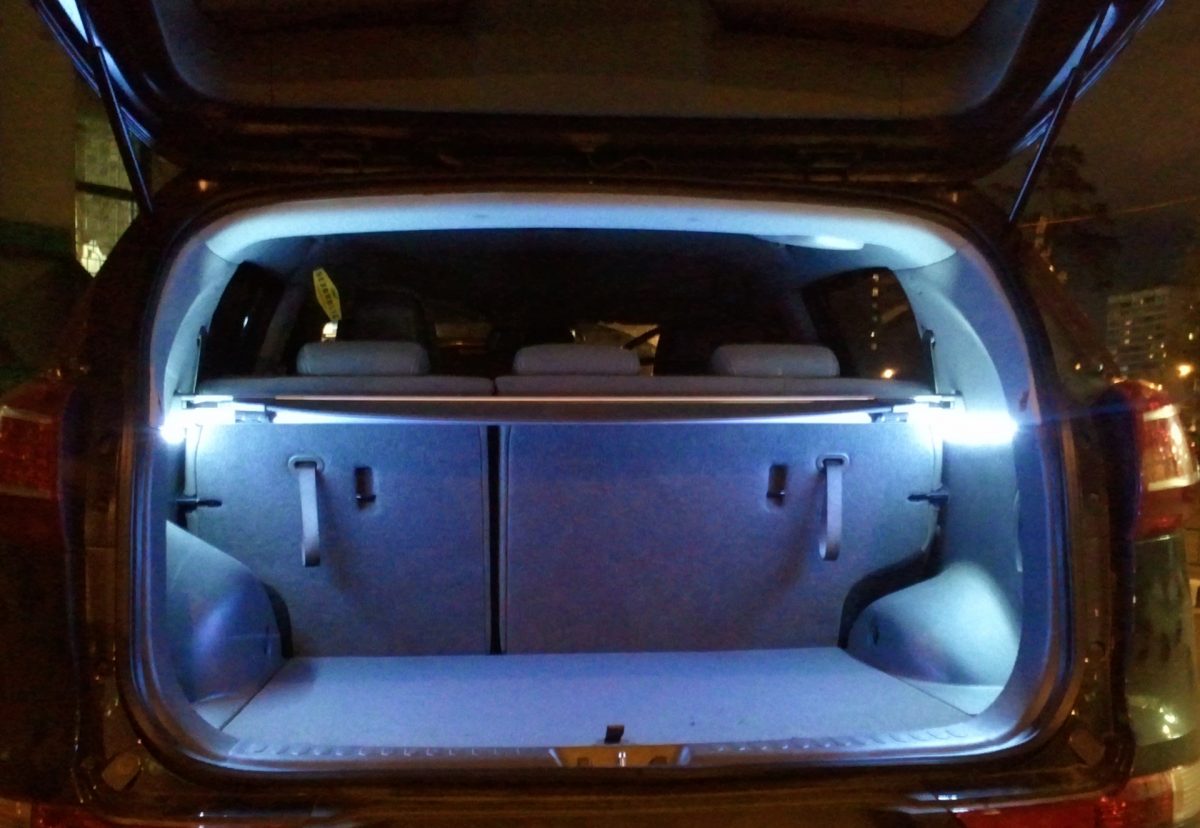
LED strip in the trunk of a car: overview, selection, installation
Content
LEDs are popular because of their decorative properties, energy savings, durability and practicality - the trunk will always be lit. One installation of such a backlight solves the problem with lighting the desired section of the car for 2-3 years.
The LED strip in the trunk of the car is installed for organizing lighting and as a decorative element. Such illumination is used for the bottom, turn signals, interior and other parts of the vehicle. The popularity of LED is due to ease of installation, energy efficiency and a variety of choices. To install LEDs, it is not necessary to contact service centers; you can carry out the entire procedure yourself.
What is LED tail light
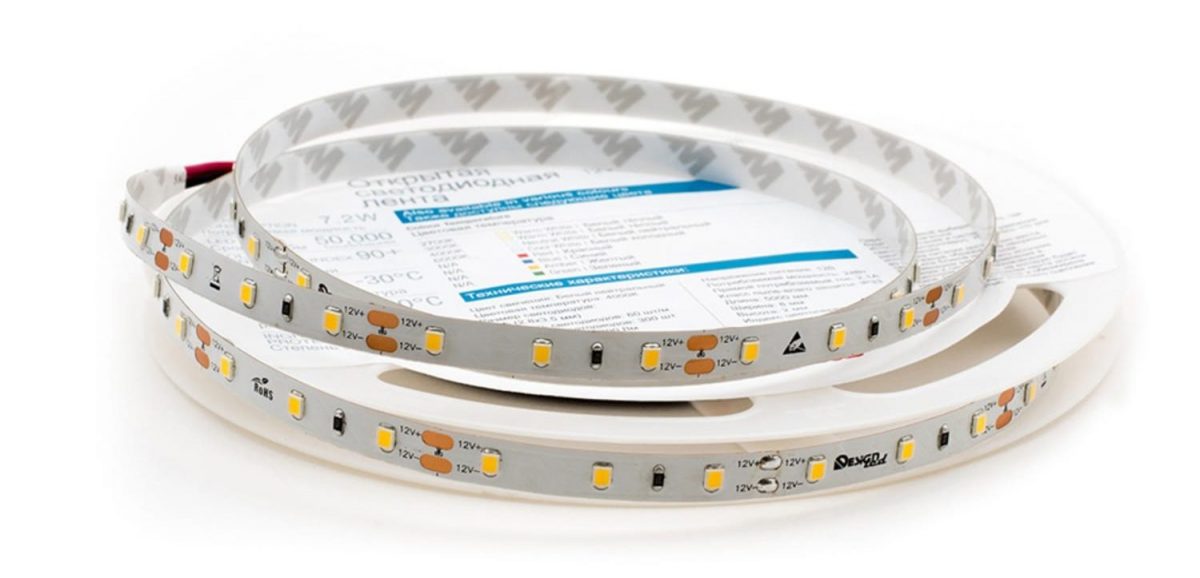
The LED strip in the trunk of a car is an elastic module with LED elements. The surface of the back side has an adhesive layer - this helps with self-assembly.
Elasticity allows the strip to be bent, it can also be cut in pieces - following the cut line. These properties allow the installation of LED elements in hard-to-reach areas.
For vehicles, multi-color models (RGB) are more often used. They are an analogue of single-color ones, changing the glow automatically or through the control panel.
The models also differ in the backlight system (color, flashing frequency). Main settings:
- type and size of the LED (example: SMD 3528 or SMD 5050);
- the number of LEDs, measured in pieces per 1 m (from 39 to 240).
Cheaper models may be exposed, which reduces safety and can lead to critical damage. glow type:
- frontal (90° angle);
- lateral (parallel to the frontal type).
In the trunk, you can combine the types of lighting, creating a unique architecture.
Overview of LED strips in the trunk of a car
The LED strip in the trunk of a car is presented by different developers. General advantages inherent in models of all categories:
- work longer than similar light sources;
- there is no heating of the lighting element;
- low power consumption;
- resistance to vibrations and mechanical stress, the presence of dust and moisture protection.
LED Strip Light
Products of different cost differ primarily in the level of protection, light output and a set of LEDs.
Budget
The LED strip in the trunk of a car from the budget category comes mainly with low dust and moisture protection. They often have a class B light output and a small number of LEDs per meter. Examples:
- LED SMD 2828;
- IEK LED LSR 5050;
- URM 5050.
The solution is recommended only if you need to save money. If the backlight is selected without moisture protection, any water ingress can damage the LEDs. The low ingress protection rating also causes critical damage risks.
Medium segment
They differ from the budget ones in an increased indicator of protection against dust and moisture. More density of LEDs is observed. Models:
- Navigator NLS 5050;
- ERA LS5050;
- URM 2835.
Dear
Outperforms analogues in LED density, protection class and durability. There are brands with a wireless connection type. Some of the popular brands:
- URM 2835-120led-IP65;
- Feron LS606 RGB;
- Xiaomi Yeelight Aurora Lightstrip Plus.
Xiaomi backlights are connected to the ecosystem of this brand, can be extended up to 10 m and support intelligent voice control.
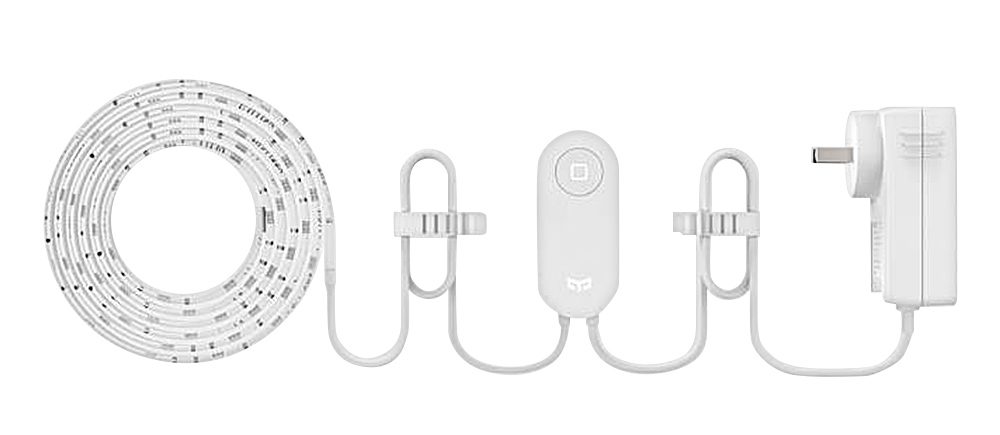
Xiaomi LED Lightstrip Plus
How to connect the tape with your own hands
The LED strip can be easily installed in the trunk of a car using the LED connectors. This is a quick method that does not require soldering. First, the tape is cut into the desired number of segments. After that, the elements are applied to the connector contacts - to complete the installation, you need to close the cover.
Before installation, it is recommended to remove the rear seat - it is more convenient to work with the wire that needs to be run from the trunk to the front panel. Sequencing:
- Measure the sections into which you want to cut the tape. During the cutting process, the LEDs must not be touched, as there is a risk of damaging them.
- Solder the wires to the tape (on the plus side of the red, and on the minus - black).
- Treat the areas where soldering was performed with hot glue.
- Stretch the soldered wire to the button, connect the second wire from the toggle switch to the body iron.
- Install the LED with the adhesive side in the area previously allocated for it.
After completing all the steps, you need to make sure that the wires drawn are invisible to the eye. They need to be hidden not only for security purposes, but also for aesthetics. The whole process takes no more than 1-2 hours, so it is not necessary to contact the masters.
LEDs are popular because of their decorative properties, energy savings, durability and practicality - the trunk will always be lit. One installation of such a backlight solves the problem with lighting the desired section of the car for 2-3 years.