We tune the interior of the VAZ "penny": what and how can be finalized
Content
VAZ 2101, despite its advanced age, can give pleasure to its owner. To do this, the interior needs to be made more comfortable by reducing the level of external noise, using modern finishing materials and elements. This work is within the power of every Zhiguli owner who wants to transform his car and make it different from standard models.
Salon VAZ 2101 - description
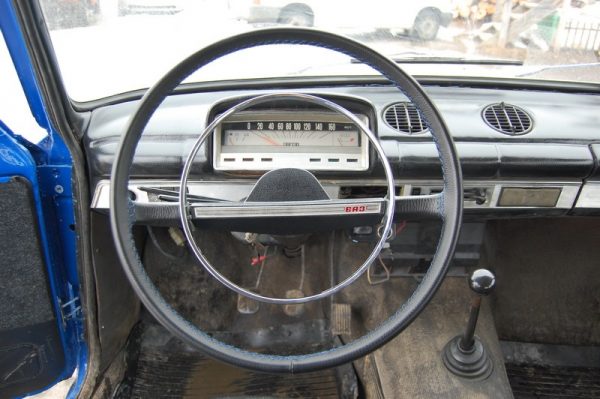
In the interior of the VAZ 2101, the principle of minimalism can be traced. The front panel is made of a metal frame with a decorative finish. The torpedo is equipped with an instrument panel opposite the steering wheel. Somewhat to the right are the controls for the interior heating system, namely:
- deflectors;
- heater controls.
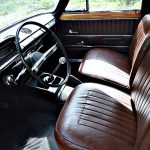
With the help of deflectors, you can direct the air flow in any direction, and the levers allow you to adjust the desired temperature in the cabin. On the front panel, as a finishing element, there is a metallized frame, in the plane of which there is a hole for the radio, a glove box and an ashtray. A stalk is mounted on the steering shaft, which allows you to control turn signals, head optics and windshield wipers (on later models). To the left of the steering wheel is a block of keys that turn on the backlight tidy, wipers and outdoor lighting. To the left of the key block is a windshield washer button. Leatherette is used as a finishing material for doors and seats. Armchairs are equipped with adjustment elements that allow you to move them back and forth and transform the back into a bed.
Photo salon VAZ 2101
-

- When designing the cabin, the goals were to make everything simple and intuitive, as evidenced by the few instruments and controls.
-
- The standard interior of the VAZ "penny" is made in a classic style and does not have any hint of design solutions.
-
- Improvements and improvements to the interior make it possible to increase the comfort of the VAZ 2101 for both the driver and passengers
Interior trim
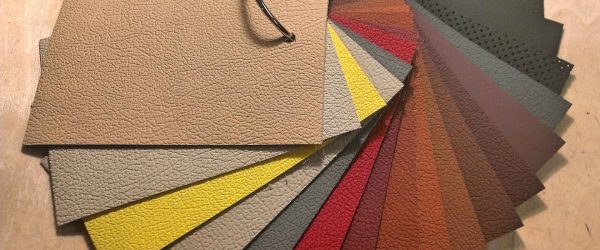
Salon "Zhiguli" of the first model does not have any peculiarities both in terms of the used finishing materials and in general in interior design. The ordinary and often shabby interior does not give any pleasure from driving. However, a wide selection of modern finishing materials allows you to change the interior beyond recognition, bring something new into it, create your own unique style. Some of the most common upholstery materials are:
- flock;
- velours;
- alcantara;
- suede;
- leather.
Seat upholstery
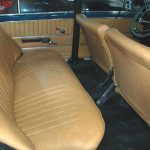
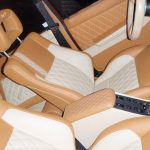
Many owners have to think about the upholstery of the "penny" seats, because over time the material becomes unusable. If possible, you can install chairs from a foreign car, thereby obtaining comfort and an attractive appearance. The budget option includes replacing the upholstery of native seats. Most often, the color of the material is selected in accordance with the color scheme of the rest of the interior elements. However, it should be borne in mind that the combination of materials of different colors allows you to get a more attractive and non-standard interior, compared to a plain finish. The most wear-resistant material for the upholstery of the seats is genuine leather. However, it has the following downsides:
- high price;
- low level of comfort in hot and cold weather.
The most budgetary finishes include velor and leatherette. However, the final choice depends only on the wishes and capabilities of the owner. For the upholstery of car seats, you will need the following list of necessary items, which will differ depending on the materials used:
- a hammer;
- glue in a can;
- foam rubber about 5 mm thick;
- scissors;
- pen or marker.
The seat upholstery procedure consists of the following steps:
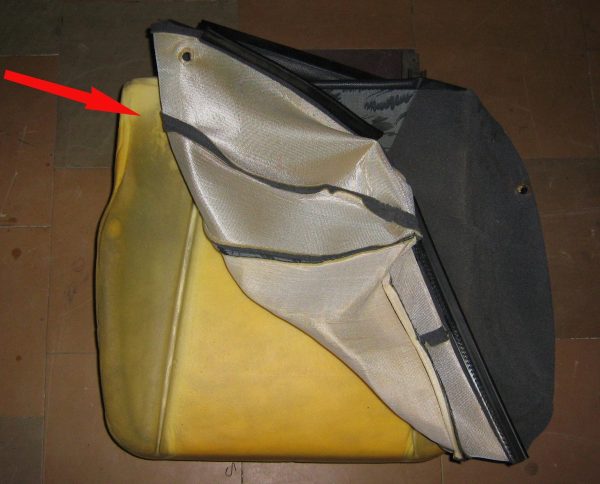
- We unscrew the mount and remove the seats from the passenger compartment.
- We take off the old covers.We remove the old trim from the seats and backs of the chairs
- We carry out measurements of the old skin to calculate the amount of new material, increasing the result by 30% (error and stitching).
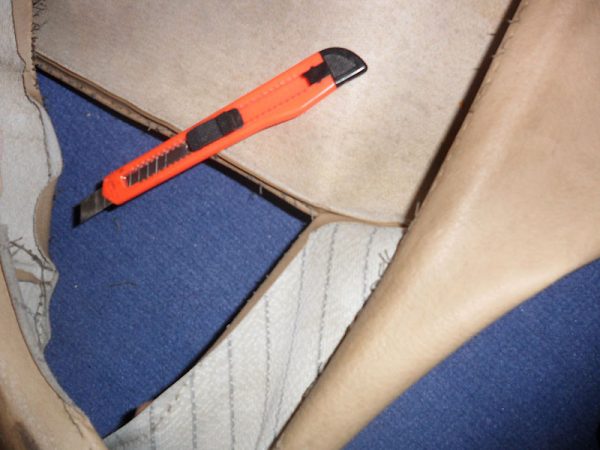
- We divide the old cover at the seams into separate elements.We divide the old skin into elements at the seams
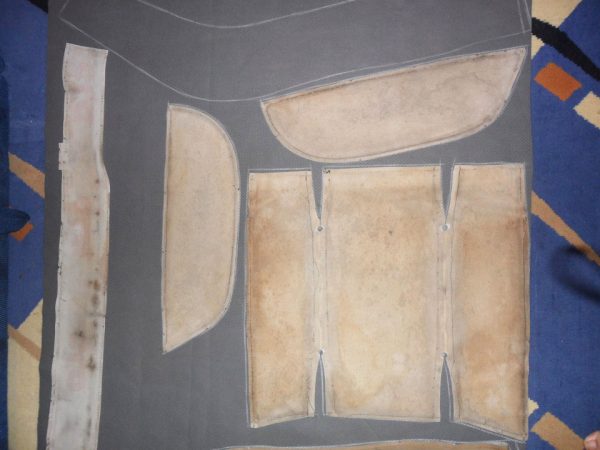
- We apply each element to a new material, circle it with a pen or marker and cut it out.We apply the skin elements and circle them with a marker on the new material
- We strengthen the elements of the new cover with foam rubber using glue in an aerosol.
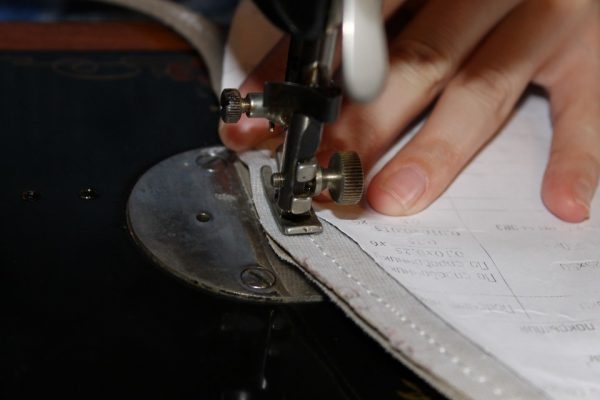
- We sew all parts of the cover on a sewing machine, carefully combining the edges of neighboring elements.We sew the elements of the covers with a sewing machine
- We glue the lapels of the seams, having previously cut off the excess foam rubber and material.
- After the glue dries, we beat off the seams with a hammer.
- We pass the machine lapels with a double finishing line.
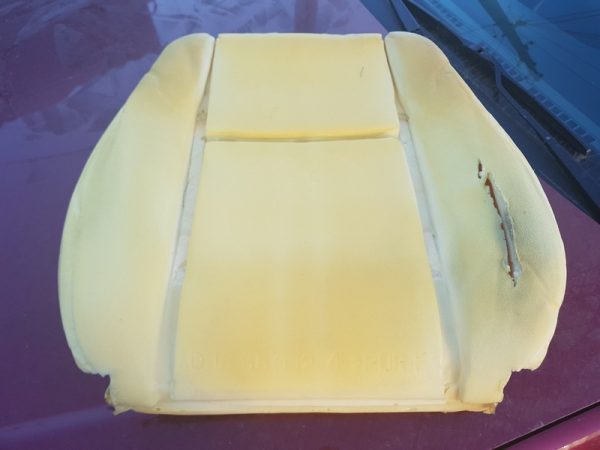
- If the foam rubber is damaged, replace it with a new one.Damaged seat foam should be replaced with a new one.
- We put on seat covers and mount the latter in the car interior.
Video: seat upholstery on the "classic"

Door trim
As a door skin, you can use one of the materials listed above or a combination of them. Tools and materials will need the following:
- plywood sheet 4 mm;
- hauling material;
- flat screwdriver;
- drill;
- electric jigsaw;
- foam;
- sandpaper;
- knife;
- a stapler;
- marker or pen.
The door card update process is performed as follows:
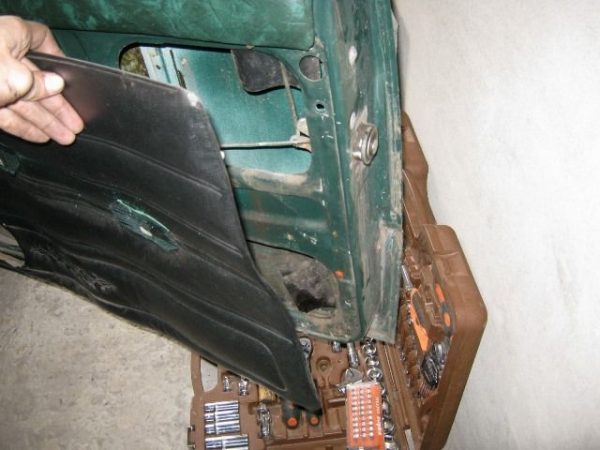
- We remove all the elements from the inside of the door, and then the trim itself.The old trim is removed from the doors to make a new card
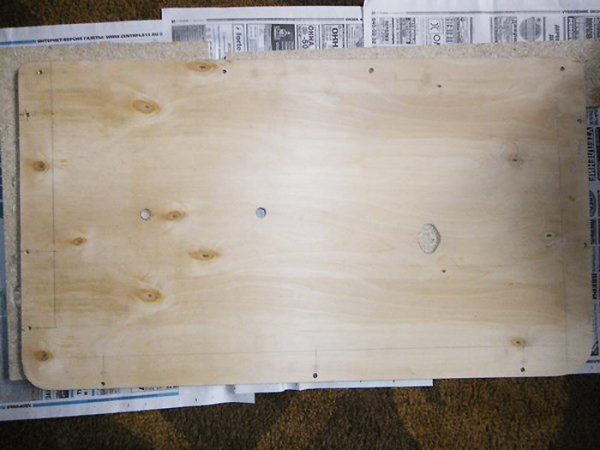
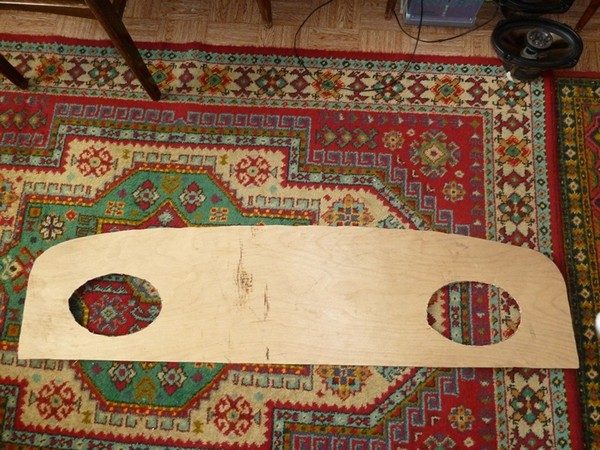
- We place the old door card on top of the plywood sheet and outline it with a pencil.
- We cut out the future door element and process the edges with sandpaper, after which we make holes for the handle, power window, armrest, fasteners.The basis of the door card is plywood of the appropriate size and shape
- According to the size of the plywood blank, we cut out the substrate from the foam rubber.
- We cut out the finishing material and sew the elements together.According to the given templates, the finishing material is made and sewn together
- Glue the foam rubber to the finish.As a substrate, thin foam rubber is used, which is glued to plywood.
- We impose a door card on the finish, wrap the edges and fix them with a construction stapler on the reverse side.We bend the edges of the finishing material and fix it with a stapler
- We cut off excess material with a knife and make holes for the door elements.
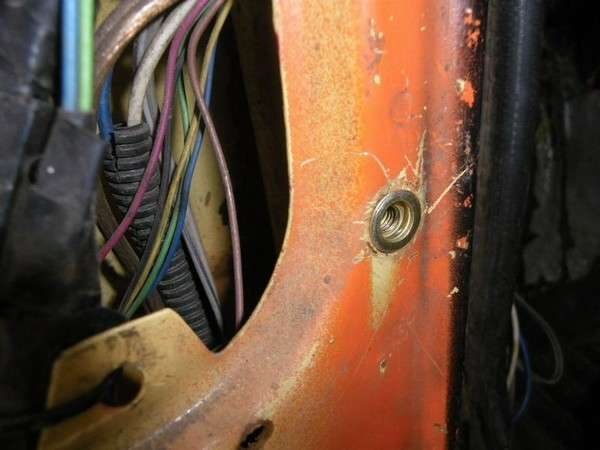
- We install fasteners in the door.For reliable fastening of the door upholstery, it is necessary to use rivet nuts.
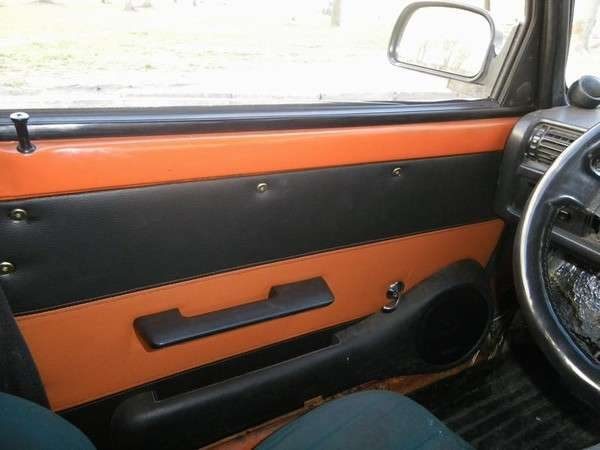
- We install the card on the door.When the door card is ready, mount it on the door


Rear trim
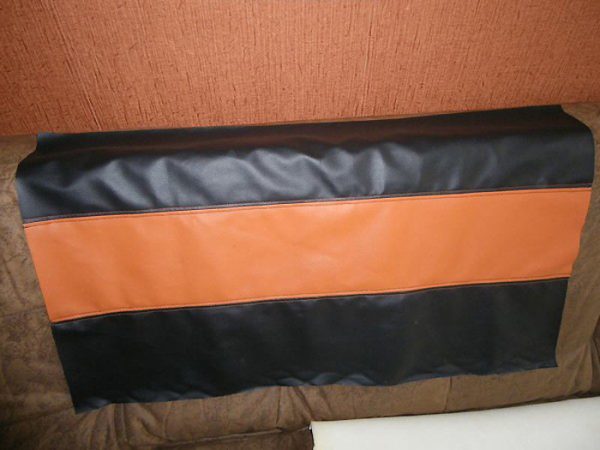
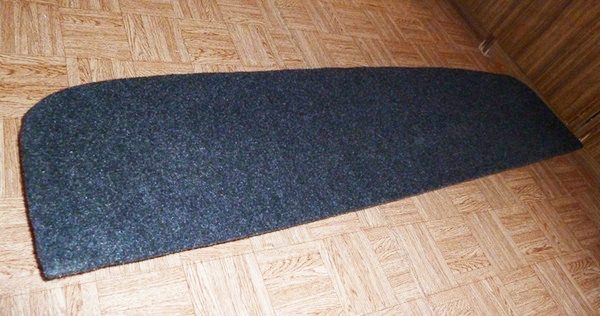
If the interior of the VAZ "penny" is being updated, then such an element as the rear shelf should also be given attention. If audio preparation of the car is planned, then it can be performed simultaneously with the hauling of the shelf. Finishing materials are selected at the discretion of the car owner, but Carpet is most often used for the classic Zhiguli. The sequence of actions for sheathing the shelf is performed in the following sequence:
- We dismantle the product from the passenger compartment and remove the old finishing material.
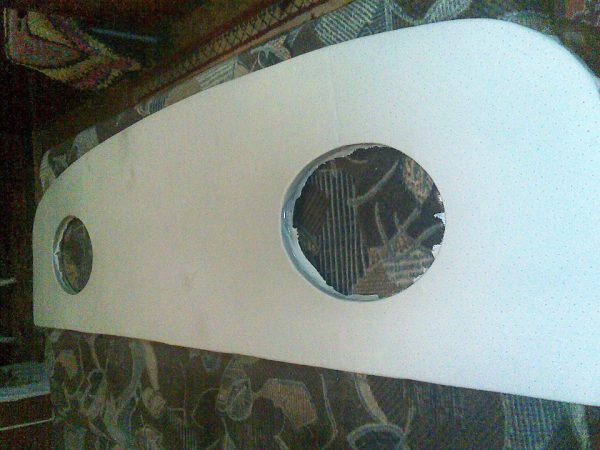
- If the shelf is in poor condition, we cut out a new blank from plywood and make holes in it for the speakers.From plywood we cut out the blank of the future shelf
- We cut out the finishing material with a margin and fix it to the shelf with glue.Cut out the trim with a margin and glue the material to the shelf
- On the reverse side, we fasten the trim with stapler brackets.
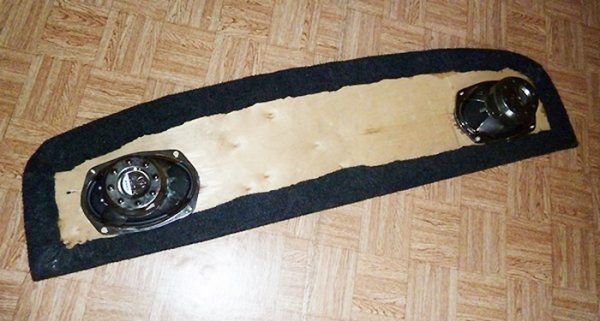
- After the glue dries, we cut holes for the speakers, wrap the edges and also fix them with a stapler.We cut holes for the speakers in the material, and fix the edges of the material with a stapler
- We fix the speakers to the shelf and mount it in the salon.Having fixed the speakers, we mount the shelf in the salon
Floor sheathing
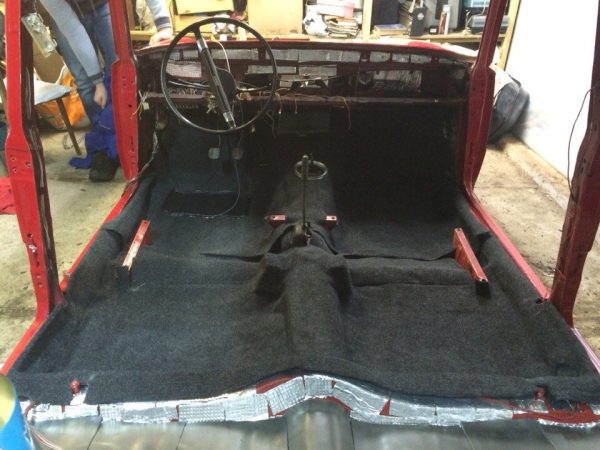
In the classic Zhiguli, linoleum is often used as a floor finish. The material is characterized by low cost and good wear resistance. However, under it, in case of moisture, the floor may simply rot over time. Therefore, for the purposes under consideration, it is better to choose carpet. Before finishing the floor, you need to measure the interior and determine the area, and then calculate the required amount of material with some margin. The essence of flooring consists of the following:
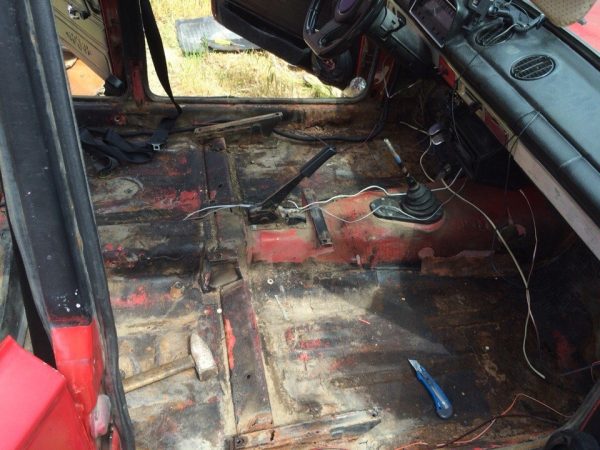
- We unscrew the fastening of all interior elements that are fixed to the floor (seat belts, seats, sills).
- We dismantle the old coating from the floor and remove all kinds of dirt. Then we clean the floor from rust, perform corrosion treatment, apply a layer of soil, and then bituminous mastic.Before processing the floor, we clean it from dirt and degrease
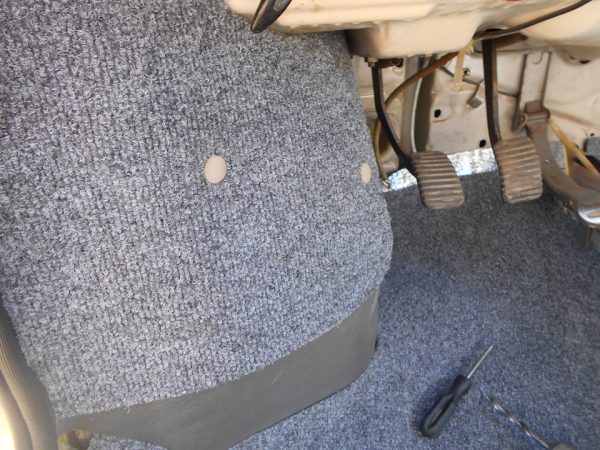
- After the mastic has dried, we lay the carpet and adjust it to the size of the cabin, cutting holes in the right places. To take the material of the desired shape, it is recommended to moisten it with water and allow to dry.We adjust the carpet on the floor, cutting holes in the right places
- We fix the finishing material with glue "88" or double-sided tape, and on the arches we use decorative fastening.We fix the carpet on the arches with glue or decorative fasteners
- We assemble the interior in the reverse order.
Video: laying floor carpet on the Zhiguli

Sound insulation of the cabin
Although there is sound insulation from the factory on the VAZ 2101, it practically does not fulfill its functions. To make the cabin more comfortable, it is necessary to use vibration and noise-absorbing materials, and they should cover all parts of the cabin (floor, ceiling, doors, etc.). Otherwise, it will not be possible to achieve maximum noise reduction. To process the interior, you will need the following list of tools and materials:
- a set of screwdrivers and wrenches;
- knife and scissors;
- solvent;
- roller for packing insulation;
- rags;
- vibration absorber, for example, "Vibroplast";
- noise absorber (felt, "Accent");
- sound reflector ("Splen");
- antiscrip ("Madelin", "Bitoplast").
Soundproofing ceiling
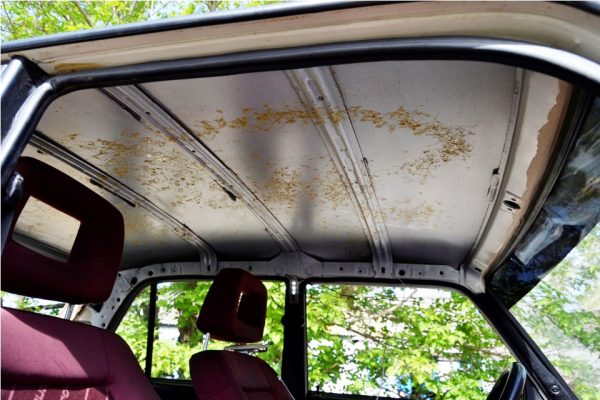
The ceiling is soundproofed to eliminate aerodynamic noise and rain sounds. The processing is carried out as follows:
- We remove the upholstery of the ceiling, having previously dismantled the windshield and rear glass, as well as door seals and handles above the doorways.We remove finishing material from the ceiling
- Carefully remove glass wool, which is used as soundproofing material from the factory.
- Degrease the surface, if necessary, clean it from rust and primer.
- We apply a layer of vibration isolation. For the ceiling, you can use "Vibroplast" 2 mm thick.We apply vibration isolation to the prepared surface
- We glue the sound insulation (“Splen”, etc.) with a thickness of 10 mm. Materials are applied quite simply, because they have an adhesive base.On top of the vibration isolation we glue a layer of sound insulation
- We mount the ceiling trim in place.
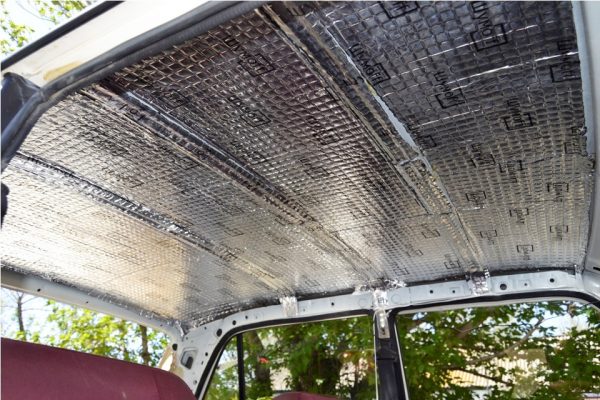
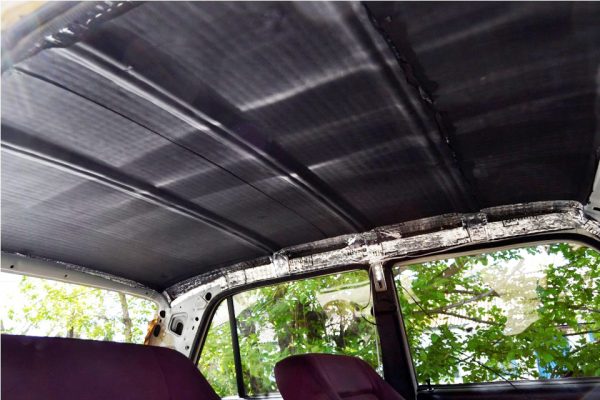
During the installation of vibration isolation, it is necessary to cover at least 70% of the ceiling surface, and the entire surface is treated with sound insulation.
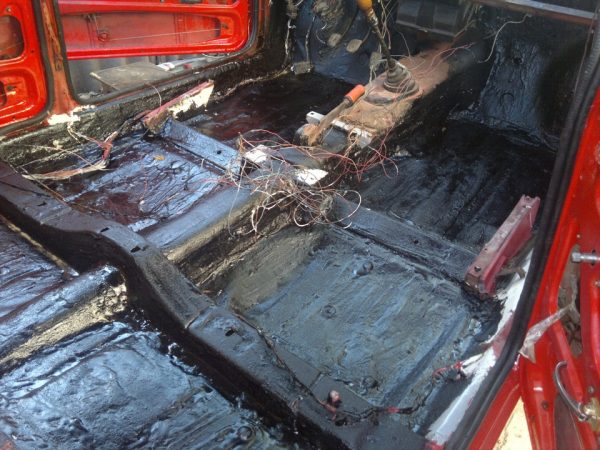
Soundproofing trunk and floor
To reduce the level of noise penetrating through the floor, wheel arches and trunk, sheet or liquid materials can be used. The processing sequence is as follows:
- We dismantle the floor covering and all interior elements that are attached to the floor.
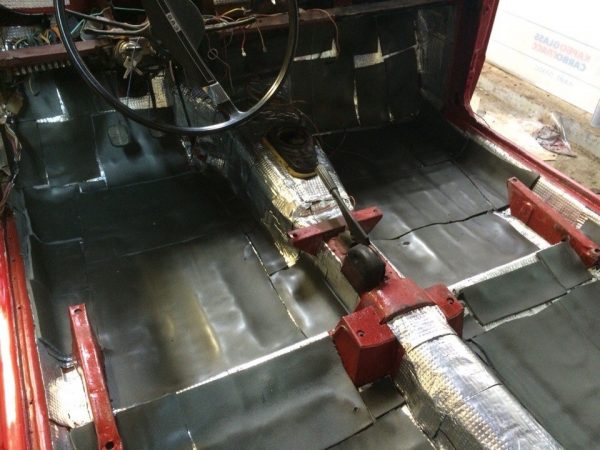
- We clean the floor of debris and dirt, degrease and apply a layer of mastic.We apply mastic on the prepared floor
- We install soundproofing.A layer of sound insulation is applied on top of the vibration isolating material
- To process the arches, we use a thicker material or apply it in two layers.
- The trunk is processed in the same way.
Soundproofing the bottom and arches
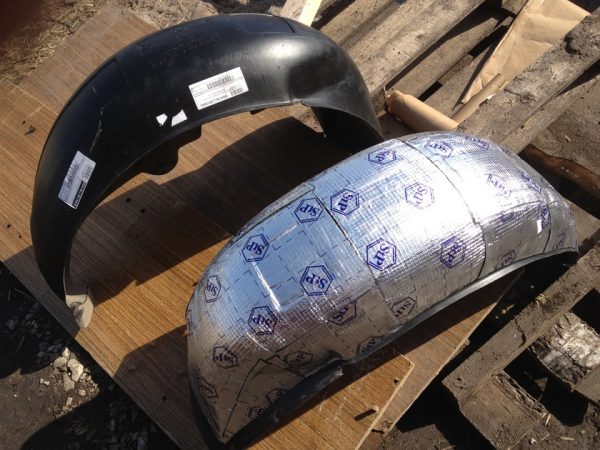
Processing the bottom of the car from the outside allows you to reduce the noise from the wheels and stones while driving. For these purposes, liquid materials are used, which are most often applied by means of a spray gun. The use of sheet materials is possible from the inside of the fender liner if protection is installed.
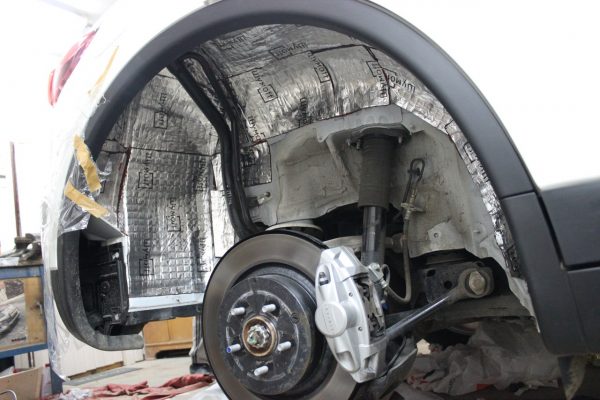
Before applying liquid materials, the bottom is washed from dirt and thoroughly dried. When the sound insulation is applied, after drying it takes the form of foamed rubber and performs not only soundproofing functions, but also anticorrosive ones.

Additionally, you can apply a layer of sheet noise insulation on the inside of the plastic protection of the wings.
Soundproofing doors
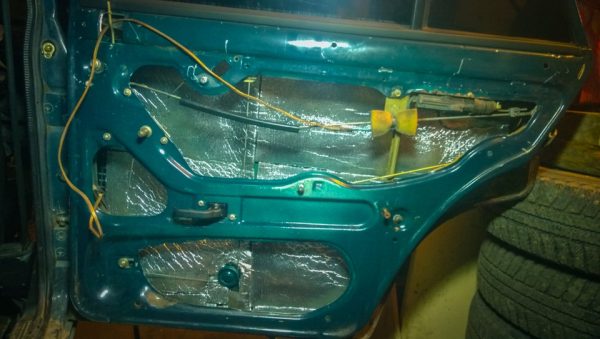
Processing doors with vibration and sound-absorbing materials improves the sound quality of the acoustics installed in them, makes door closing quieter and clearer, and gets rid of external noise. The essence of the door processing is as follows:
- We dismantle the door elements from the passenger compartment.
- We degrease the inner surface of the door and glue it with Vibroplast, having previously cut out pieces of the desired size. Do not forget that the ventilation and drainage holes must remain open.A layer of "Vibroplast" or a similar material is applied to the inner surface of the doors
- We apply a layer of soundproofing.A soundproofing layer is applied on top of the vibration isolation
- We wrap the door lock rods with Madeleine, which will eliminate the appearance of rattling.
- On the inner side of the door, facing the salon, we paste "Bitoplast", and on top of it a layer of "Accent", making holes for the door elements and the skin fasteners.“Accent” is applied to the salon side of the door, which will improve the fit of the skin
- We install all previously removed parts in their places.


Noise insulation of the motor shield
Since noise from the engine penetrates through the engine partition into the cabin, its processing does not go in vain. Soundproofing this body element consists of the following steps:
- We dismantle the torpedo.
- We prepare the surface for applying materials.
- We paste over about 70% of the surface of the motor shield with a layer of vibration isolation, for example, "Bimast Bomb". A large area of pasting does not give practically any result.
- We cover the maximum area with soundproofing (“Accent”).
- We also glue the inner side of the front panel with “Accent”. In places where the torpedo is in contact with the body, we apply Madeleine.
- We mount the panel in place.
Video: soundproofing the motor partition

Soundproofing the hood and trunk lid
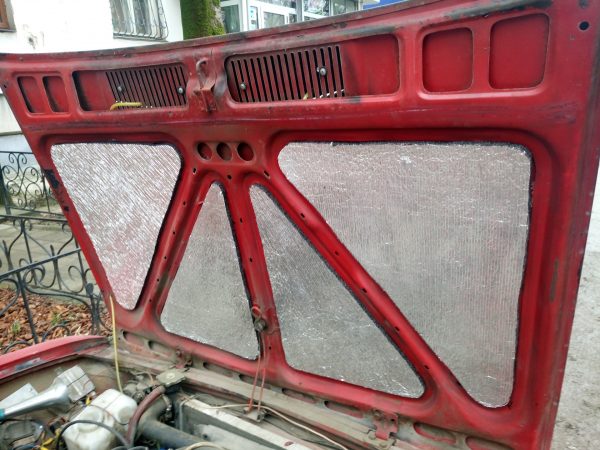
The “penny” hood is soundproofed using the same materials as the interior. The procedure consists of the following steps:
- We make patterns from cardboard or other suitable material that correspond to the depressions on the back of the hood.
- According to the patterns, we cut out the elements from the vibration isolator, after which we paste them on the hood.We apply vibration isolation in the hollows of the hood
- Apply the second layer of soundproofing, covering the entire inner surface.We cover the entire inner surface of the hood with soundproofing
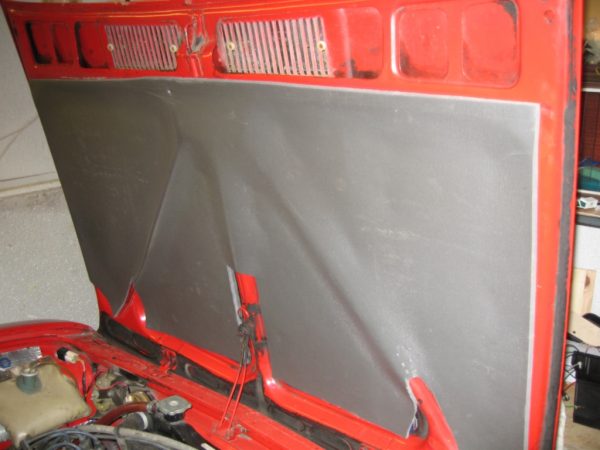
The trunk lid is processed by analogy with the hood.
Front Panel
To date, the VAZ 2101 torpedo looks rather boring. It is outdated both morally and practically. It is for these reasons that many car owners are considering options for various improvements and improvements to this element, which will noticeably transform the interior and make it different from regular cars.
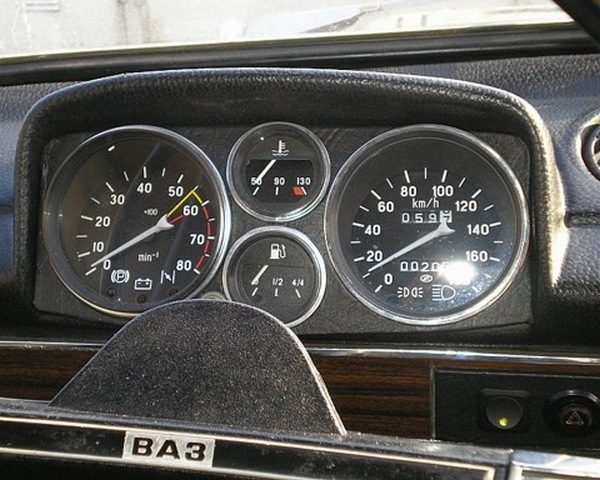
Dashboard
The “penny” dashboard contains a minimal set of instruments that allow the driver to control the state of the main vehicle systems (engine oil pressure, coolant temperature, speed). In order to somewhat improve the shield and make it more informative, you can modify it by installing additional devices, for example, from the VAZ 2106, or introduce a tidy from a foreign car. If in the first case there are no particular difficulties, then the second option will require the installation of a complete front panel.
Glove box
The main inconveniences of the VAZ 2101 glove box are poor lighting and rattling of the contents while driving. The light bulb is responsible for the illumination of the glove compartment, which practically does not illuminate anything. The best option for replacing it is to install an LED strip, which can be powered directly from the lamp.
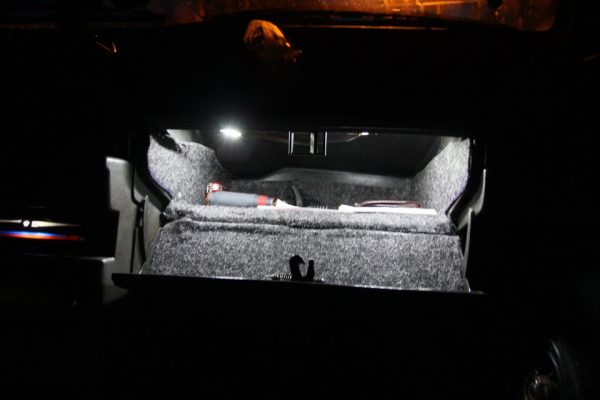
Extraneous sounds can be eliminated by finishing the glove compartment with Carpet or soundproofing material.

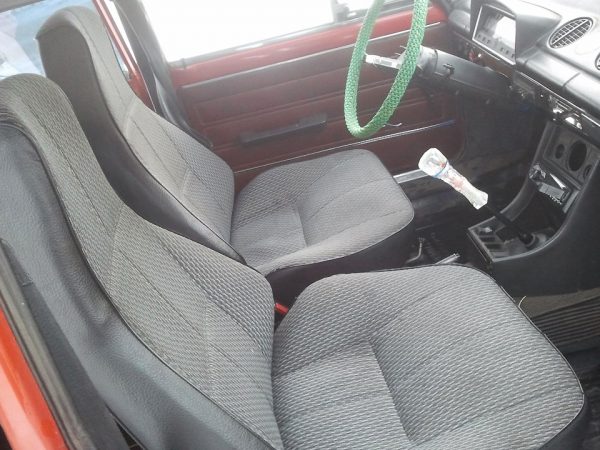
Seats "penny"
Standard VAZ 2101 seats cause a lot of inconvenience to car owners, because they have neither lateral support nor head restraints, and the material itself is not attractive in any way. Therefore, there is no need to talk about any comfort. All these negative factors lead to the fact that drivers seek to improve, modify or simply replace regular seats.
Which seats are suitable for VAZ 2101
On a "penny" you can put not only regular seats, but also products from the VAZ 2103-07 without major modifications.
If there is a great desire to increase the comfort of your car, you can introduce seats from foreign cars (Mercedes W210, SKODA, Fiat, etc.), but you need to measure the dimensions of the new seats in advance to understand whether they will fit in the size of the cabin.
Video: an example of installing seats from a foreign car to a "classic"

How to shorten the seat back
If for some reason it is required to shorten the back of the seats, then they will need to be removed from the car, disassembled and cut off with a grinder part of the frame. After that, you will need to adjust the foam rubber and the cover to the new dimensions of the back, and then assemble and install everything in its place.
Seat belts
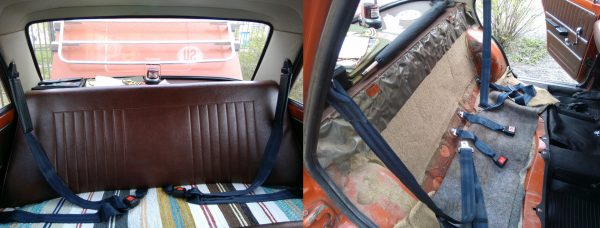
Owners of the first model Zhiguli may face the problem of the lack of rear seat belts. Their presence may be required to fix the child seat or during a technical inspection. The fact is that some "penny" from the factory had mounting holes, but the belts themselves were not completed. To finalize the VAZ 2101, you will need belts marked RB4-04.
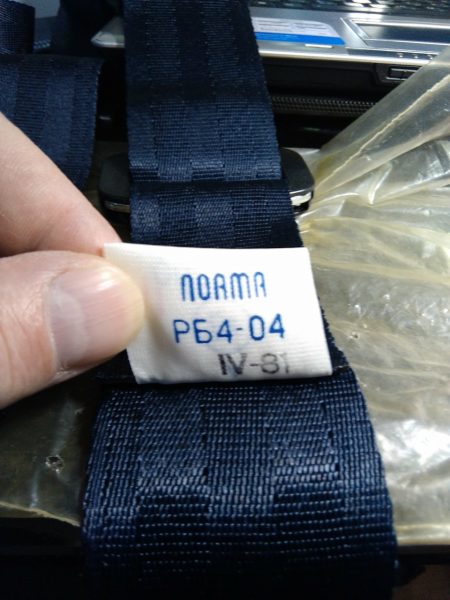
The installation of these elements does not raise questions. Mounting points are located on the rear side pillars and under the rear seat, which will have to be dismantled for refinement.
Video: installation of rear seat belts using the VAZ 2106 as an example

Interior lighting
From the factory on the VAZ 2101, lighting as such was not installed in the cabin. In the side pillars there are shades that signal the opening of the doors. They can be useful for rear passengers, and then only after installing LEDs instead of light bulbs. For the driver and front passenger, they are of no use. However, the situation can be corrected by installing a ceiling lining from the VAZ 2106 and introducing the Priorovsky ceiling into it.
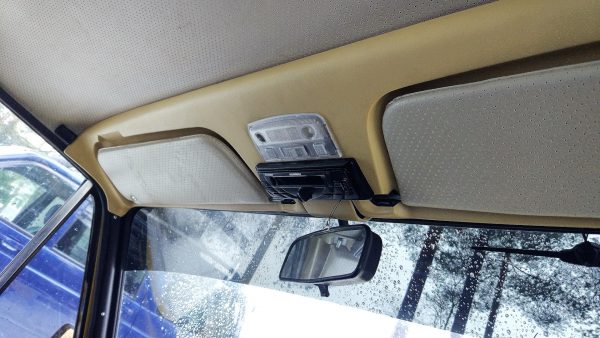
The ceiling lamp can also be mounted on a home-made metal plate, fixing it under the screws of the rear-view mirror.
Cabin fan
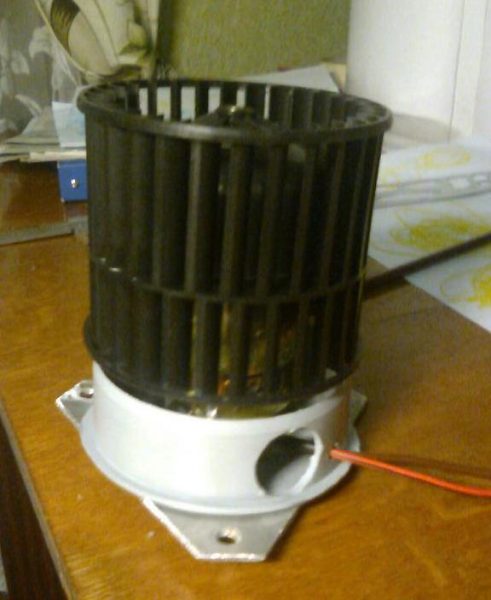
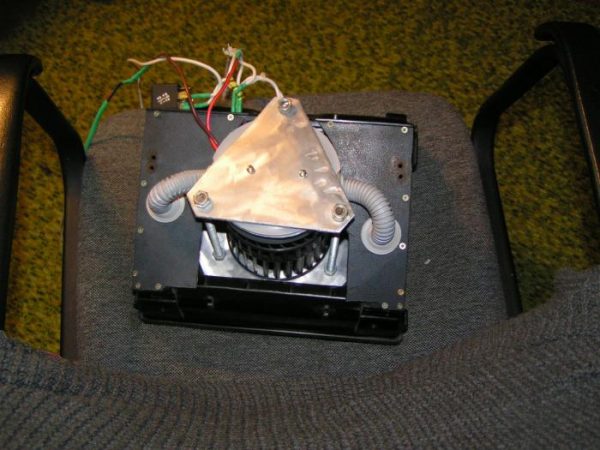
The owners of the classic Zhiguli are aware of such a feature of the heater as an increased noise level from the electric motor with low heat transfer. The situation can be improved by installing a fan from the VAZ 2108 in the stove housing, which has a higher power. The process itself involves the following steps:
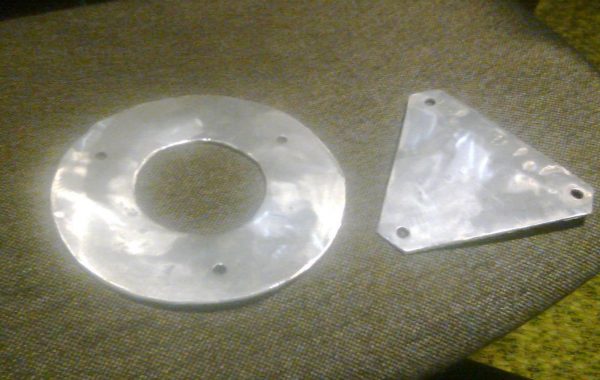
- We cut out the brackets from duralumin.From duralumin we cut out brackets for fixing the motor
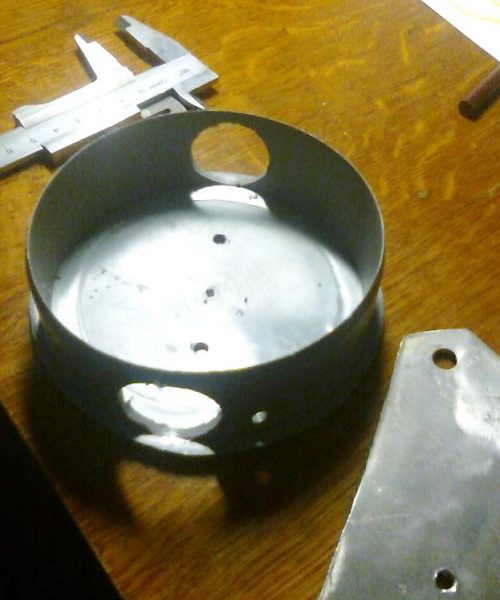
- We make holes in the plug for the electric motor.We drill holes in the motor cap
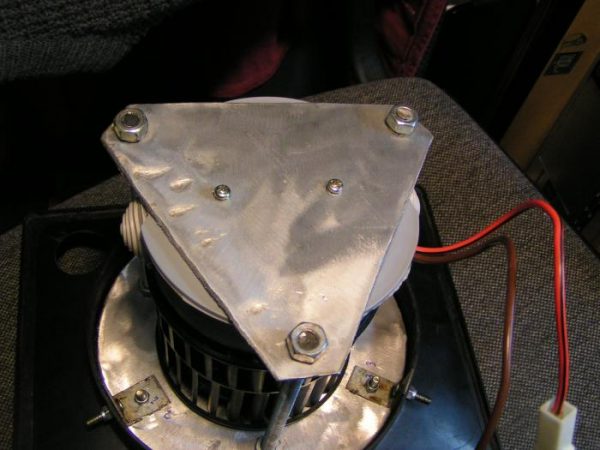
- We assemble the plug, bracket and motor into a single whole.We assemble the plug, bracket and motor into a single structure
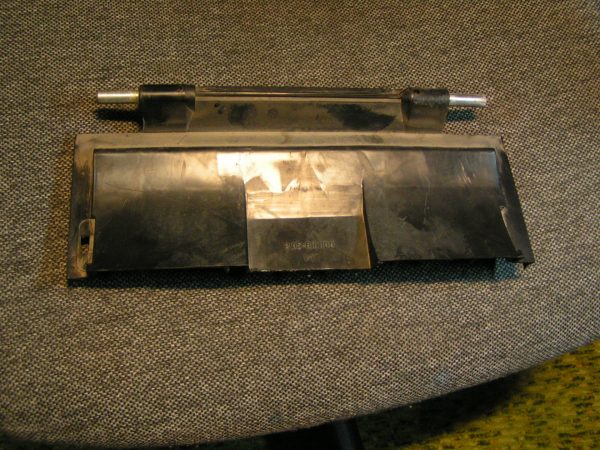
- We adjust the lower damper and the lower part of the stove.Correcting the bottom damper of the stock stove
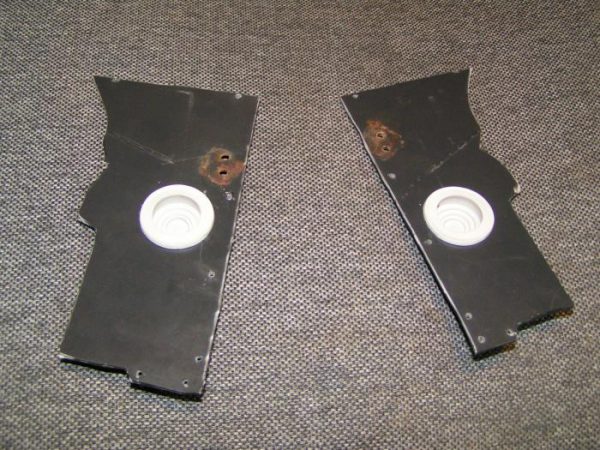
- From plastic we make plugs for the lower part of the heater.We cut out plugs for the bottom of the heater from plastic
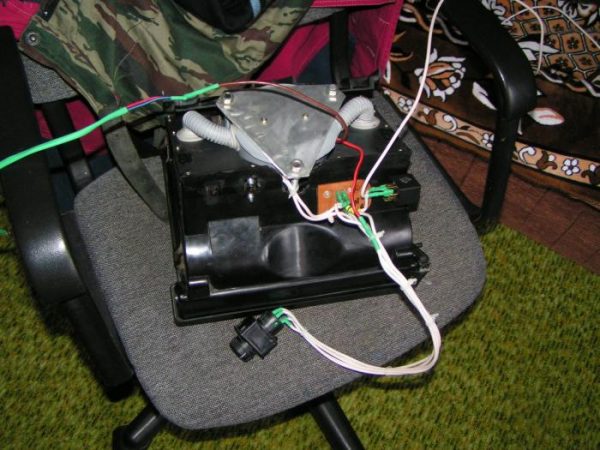
- We remove the old motor mounts and mount a new electric motor.We install the stove motor in the case
- In the lower part of the stove, we install plugs and thread the corrugation through the body.We close the lower part of the stove with plugs, fasten them in place with self-tapping screws, and thread the corrugation through the body
- We mount the lower damper, and then the case itself with the fan in place.We put in place the modified lower damper, and then the heater body itself in place
To improve the interior of the VAZ "penny" you need to invest a lot of money, effort and time. Depending on the tasks, you can simply apply soundproofing materials, slightly increasing the level of comfort. With a more serious approach, all elements of the cabin are subjected to constriction, finishing materials are arranged to your liking. All work to improve the interior can be done with your own hands, having prepared the necessary tools and materials, having read the step-by-step instructions.

