Installing engine protection on a motorcycle
Content
This mechanic guide is brought to you at Louis-Moto.fr.
Fitting an engine guard to a roadster can in many cases significantly improve the appearance of a motorcycle. Assembly is quick and effortless.
If you want to personalize your roadster and keep it as cool as possible, install a spoiler on the engine. This is a very popular and easy to use setting. This type of deflector complements and energizes almost all street bike models without a fairy tale. Thus, the painted surfaces are pleasantly balanced around the heart of your vehicle: the engine. Bodystyle offers engine spoilers for a variety of models in an elegant, subtle design, with TÜV approval and assembly kits, some of which are even painted in your car's color.
Assembly is really simple and does not require any special tools (often Phillips screwdrivers and regular-sized hex wrenches are sufficient). So you can safely do this in your garage while listening to your favorite music. Raise the motorcycle safely before starting work. We also recommend using a soft surface (eg woolen blanket, workshop rug) for the painted engine protection parts to avoid scratching them.
If you have purchased an engine guard that is not yet painted the same color as the car, you must first install it on the car during a test drive. Make sure it fits before taking it to a trusted craftsman to give it the finish you want. In most cases, the original color code of your motorcycle is located under the seat on a small metal plate. If not, refer to your vehicle manual or contact your dealer.
Then start editing. As an example, we decided to install Bodystyle engine protection on a Kawasaki Z 750 motorcycle built in 2007:
Installing engine protection - let's get started
01 - Fasten the support without tightening
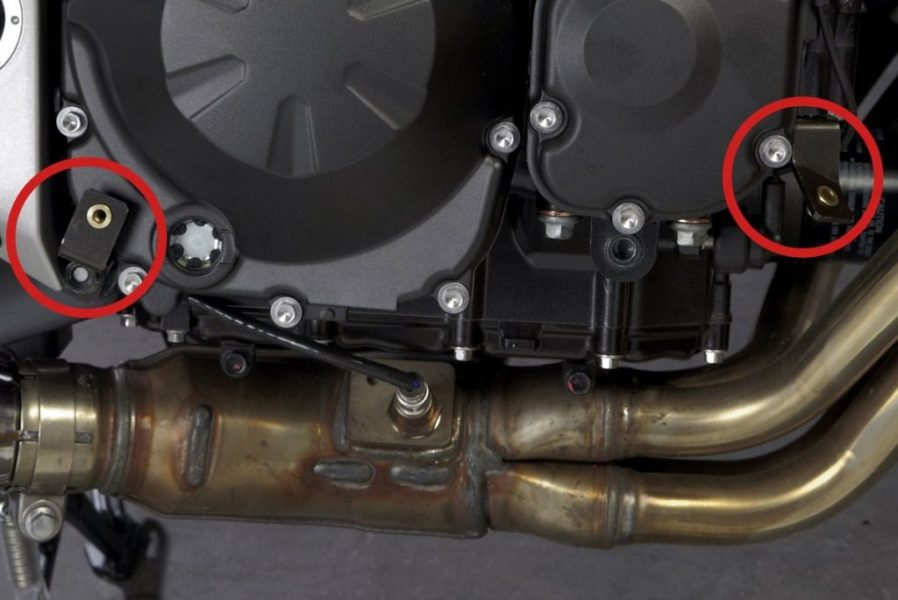
Start by locking the supplied brackets into the original engine block shrouds to the right of the travel direction without tightening so you can still adjust them when you re-orient the engine guard later. Each motorcycle has specific instructions for attachment points!
02 - Install the rubber spacers.
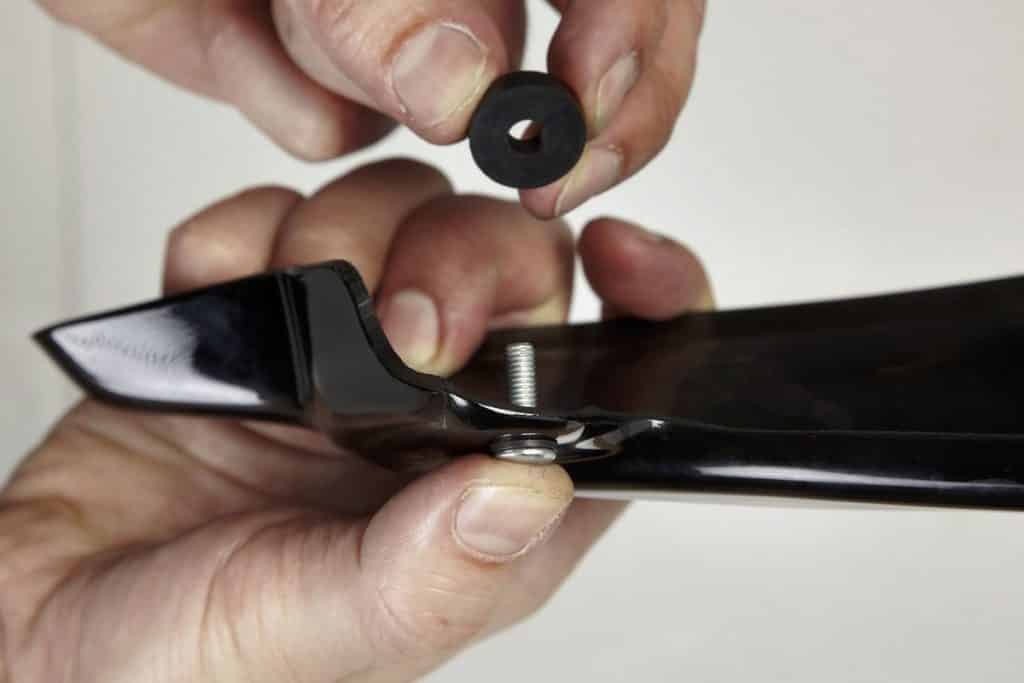
Insert rubber grommets between the bracket and the engine cover. The rubber spacer rings are important to damp the generated vibrations and therefore to ensure the durability of the motor protection.
03 - Fix the right side of the engine cover
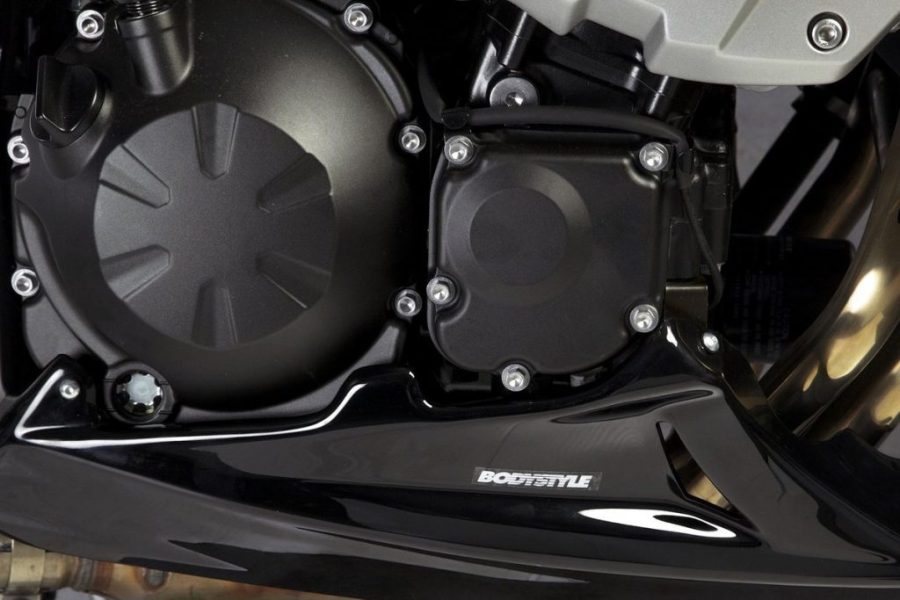
Then manually fasten the right side of the motor guard (relative to the direction of travel) to the brackets using the supplied Allen screws.
04 - Fix the support
Then repeat step 01 on the left side.
05 - Install the connection panel.
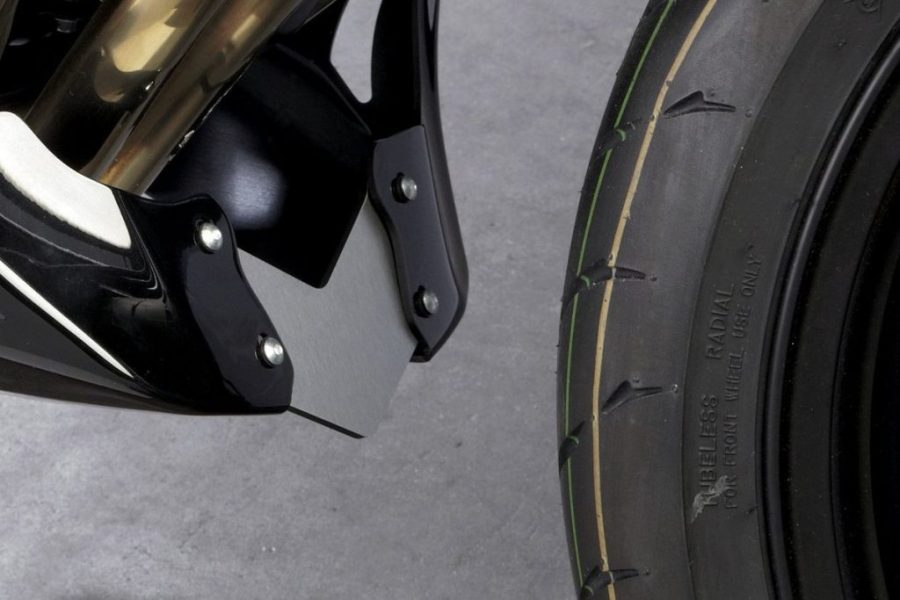
Finally, fit the connector panel between the halves of the engine cover. If desired, you can install the junction panel on the front or rear engine guard. You have ample leeway to customize.
06 - Tighten all screws
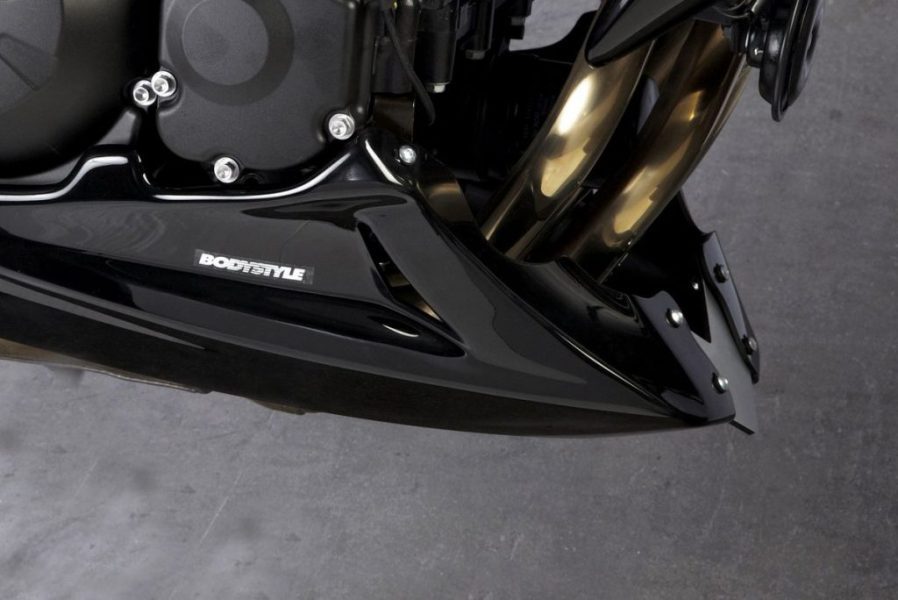
Finally, make the final orientation of the two halves of the engine shroud so that they are symmetrical and no part rests on the exhaust manifold or moving parts.
Be sure to install loosely. If necessary, it is better to slightly rotate the mounting tab or use a spacer ring than to tighten the plastic parts at the fastening points with screws. After all the elements are in the desired position, you can finally tighten all the screws.
The note : do not use excessive force to tighten the screws to avoid material damage. Also note that the oil overpressure and fuel drain lines must never pass through the engine shroud. This is because oil or gasoline leaking from these pipes can damage the plastic and make it porous and brittle.