Do-it-yourself device and repair of the VAZ 2107 body
Content
VAZ 2107 has a fairly strong and durable body, consisting of a number of elements welded to each other. Body work is one of the most complex and costly. Therefore, proper care and timely maintenance of the body will avoid the cost of its restoration and increase its service life.
Body characteristic VAZ 2107
The body of the VAZ 2107 has not only contours similar to all classic VAZ models, but also a number of characteristic features.
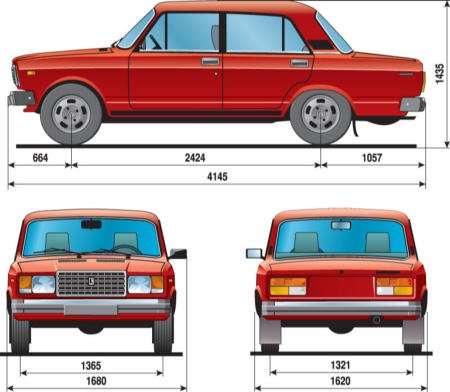
Body dimensions
The body of the VAZ 2107 has the following dimensions:
- length - 412,6 cm;
- width - 162,0 cm;
- height - 143,5 cm.
Body weight
A distinction is made between the mass of a clean body and the mass of a body with equipment and passengers. These parameters for the VAZ 2107 are:
- net body weight - 287 kg;
- curb weight (with all equipment and materials) - 1030 kg;
- gross weight (with all equipment, materials and passengers) - 1430 kg.
Body number location
The body of any car has its own number. The plate with the body data of the VAZ 2107 is located under the hood on the lower shelf of the air intake box.
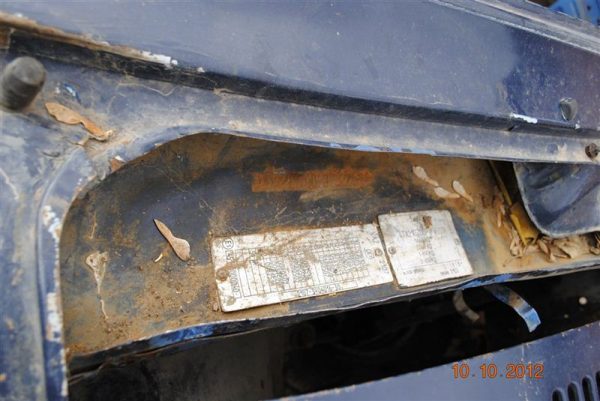
The same plate contains data on the engine model, body weight and vehicle equipment, and the VIN code is stamped next to the plate.
Basic and additional body elements
Allocate the main and additional elements of the body. The main elements include:
- front part (front);
- back (rear)
- wings;
- roof;
- hood.
Additional elements of the VAZ 2107 body include mirrors, linings (moldings) and some other details. They are all made of plastic, not metal.
Mirrors
Mirrors are designed to provide the driver with complete control over the traffic situation. They are often damaged, as they go beyond the dimensions of the body and, if driven carelessly, can touch various obstacles.
The side mirrors of the VAZ 2107 are mounted on a rubber gasket and fixed to the door pillar with screws. By modern standards, regular mirrors of the seven do not differ in a successful design. Therefore, they are often refined, improving the appearance, increasing functionality and increasing the viewing angle. Part of the space around the VAZ 2107 (the so-called dead zone) remains invisible to the driver. To minimize this zone, spherical elements are additionally installed on the mirrors, which significantly expand the view.
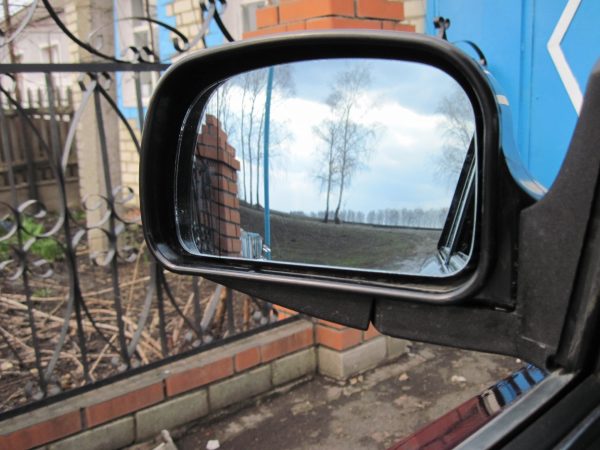
Residents of the northern regions often carry out tuning of heated mirrors. To install the system, a self-adhesive heating film is used. It is available for free. You can install it with your own hands, it is enough to arm yourself with a screwdriver, a ruler, wires and masking tape.
Moldings
Plastic door sills are called moldings. VAZ 2107 owners usually install them on their own. It is quite simple to do this - no special skills or special tools are required. Moldings perform exclusively decorative functions. Some craftsmen make them with their own hands, constructing something like a body kit. However, it is much easier to pick up ready-made overlays in the store or leave regular decorative inserts.
Moldings must meet a number of requirements.
- Moldings should not be made of very rigid material such as fiberglass. Otherwise, they may crack.
- The molding material must withstand temperature changes and be inert to the effects of chemicals that are sprinkled on roads in winter.
- It is advisable to purchase moldings from a reputable manufacturer.
- There should be no gaps between the molding and the threshold, otherwise the thresholds may corrode.
The ideal option is moldings made of impact-resistant synthetic resin.
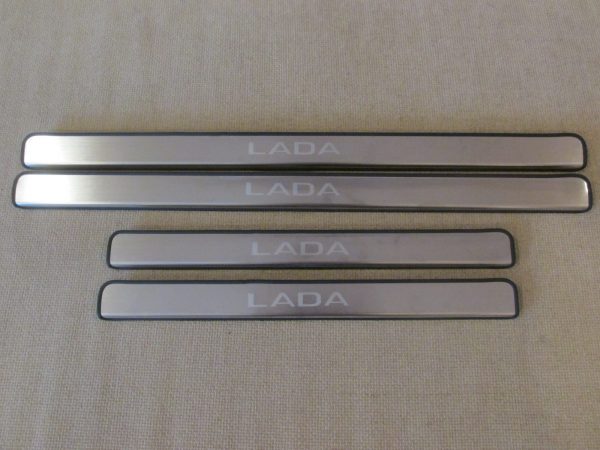
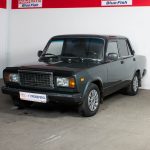
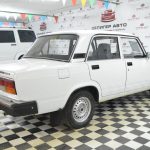
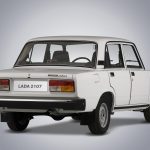
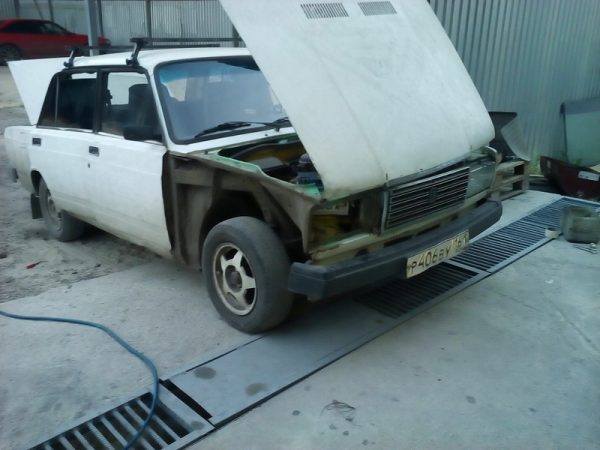
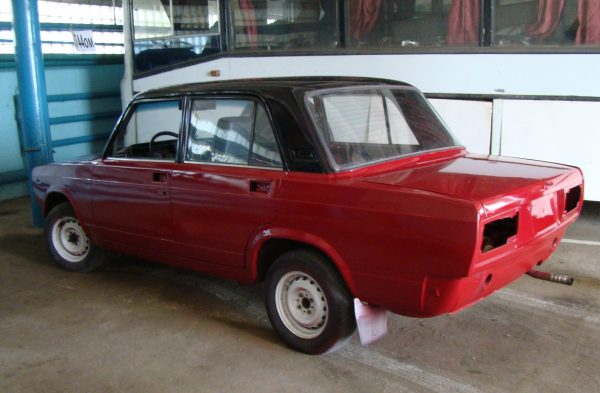
Photo gallery: VAZ 2107 in a new body
-

- VAZ 2107 at the exhibition
-
- VAZ 2107 at one time was a fairly popular car
-
- The new body of the VAZ 2107 noticeably distinguishes it from its predecessors
-
- The body of the VAZ 2107 is quite strong and durable
Body repair VAZ 2107
Almost all owners of the VAZ 2107 with experience know the technology of body repair. This allows them to save on service stations and extend the life of the body. The repair involves a number of measures to improve and modernize the skeleton.
The following tools are required for body work.
- A chisel with a sharp tip.
- Bulgarian.
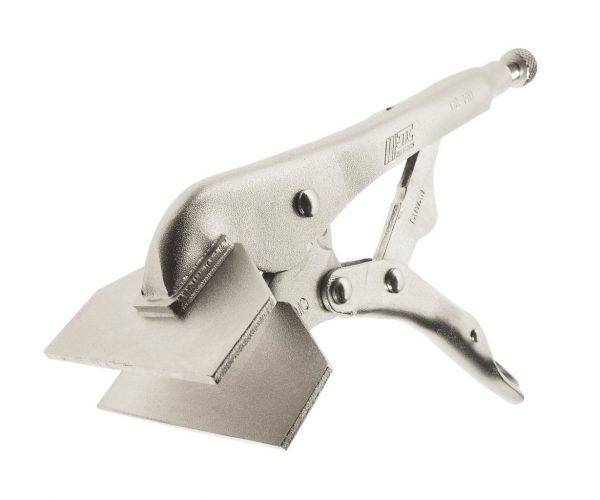
- Clamp or pliers to hold new parts in place before welding or bolting.When carrying out welding body work, clamp pliers are used
- A set of screwdrivers and wrenches.
- Metal scissors.
- Drill.
- Straightening hammers.
- Welding machine.When repairing the body, you will need a gas welding machine

Installation on the VAZ 2107 plastic wings
The main task of the wings is to protect the passenger compartment from the ingress of dirt and stones through the open glass while driving. In addition, they improve aerodynamics. It is the wings of many cars that are most often restyled and become more streamlined. The wings of the VAZ 2107 are an element of the body and imply the presence of an arched cutout for the wheel. They are attached to the body by welding. Sometimes, to reduce the weight of the car, the front metal fenders are changed to plastic ones. Moreover, plastic is not subject to corrosion. On the other hand, plastic fenders are less durable and can shatter on impact.

Buying a plastic fender for the VAZ 2107 is easy. You can even do this through an online store with home delivery. Before installation, you must first remove the metal fender. For this you need:
- Use a sharp chisel to detach the wing at the welding points.
- Pull out the wing.
- With a grinder, clean up the remains of the wing and welding remaining on the body.
To install the plastic wing, follow these steps.
- Apply a layer of special automotive putty to the joints of the plastic wing with the body.
- Fasten the plastic fender with bolts.
- Wait for the putty to harden.
- Remove the mounting bolts from the wing.
- Remove excess putty from the edges of the wing, squeezed out during fastening.
- Lubricate the wing with a layer of graviton and laminate.
- Putty the entire structure and paint in body color.
Video: replacing the front wing VAZ 2107

Body welding VAZ 2107
Usually damage to the body of the VAZ 2107 is associated with corrosion or is the result of an accident. In these cases, it is optimal to carry out welding with a carbon dioxide semi-automatic device, which uses wire to connect individual elements. Electrode welding is not recommended, since it is almost impossible to make a high-quality seam on the body with its help. Moreover, electrodes can burn through thin sheets of metal, and the device itself is large and does not allow working in hard-to-reach places.
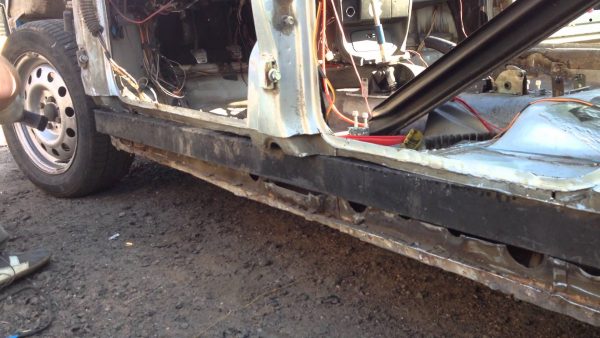
Repair of thresholds
Restoring thresholds is recommended to start with an inspection of the door hinges.. If the doors sag, then it will be extremely difficult to establish the correct gap. It is also impractical to restore an old rust-eaten threshold - it is better to immediately replace it with a new one. Work is recommended to be performed in the following order.
- Cut off the outer part of the threshold with a grinder or chisel.The outer part of the threshold is cut off by a grinder
- Remove the threshold amplifier - a wide metal plate with holes in the middle.
- Clean the surfaces that will be welded with a grinder.
- Check for compliance with the new threshold amplifier. Trim it if necessary.The threshold amplifier VAZ 2107 can be made independently
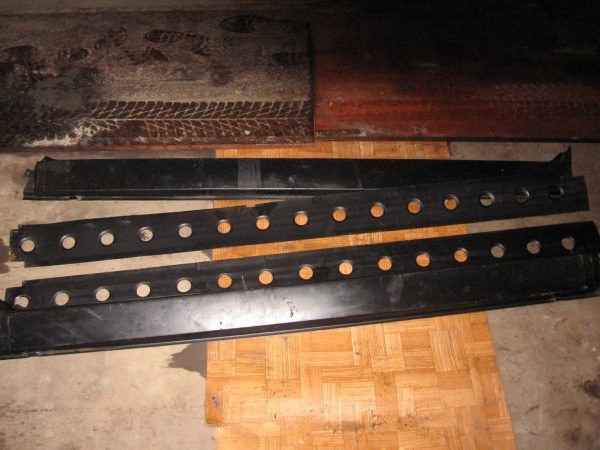
The threshold amplifier can be made independently from a metal strip. It is imperative to make holes in the middle of the tape with a hardened drill every 7 cm. You can fix the part before welding with a clamp or clamps.
When welding the threshold, the following steps must be performed.
- Weld the amplifier with two parallel seams - first from below, then from above.
- Thoroughly clean the welds to a mirror finish with a grinder.
- Try on the outer part of the threshold. In case of discrepancy - cut or bend.
- Remove the transport soil from the new threshold.
- Cover the threshold from the inside with an acid or epoxy compound.
- Fix the threshold with self-tapping screws.
- Hang doors.
- Check gap size.
The new threshold should be strictly in the door arch, not protrude anywhere and not drown. After a careful inspection of the gap, welding of the outer part of the threshold begins, doing this from the middle pillar in both directions. Then the threshold is primed and painted in body color.
Video: replacement of thresholds and repair of the VAZ 2107 rack

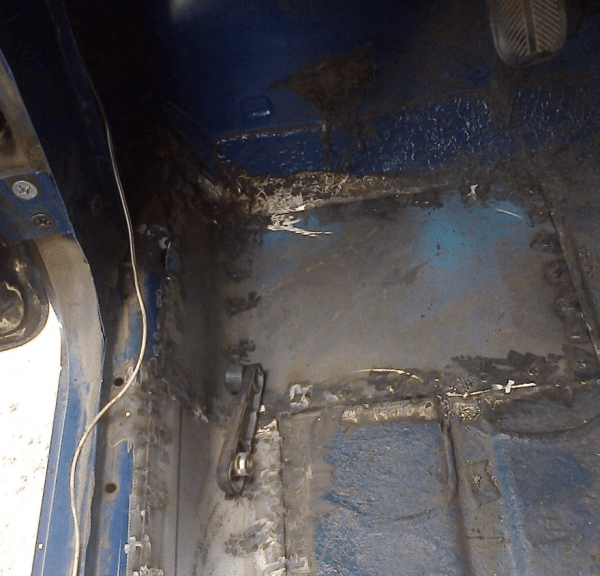
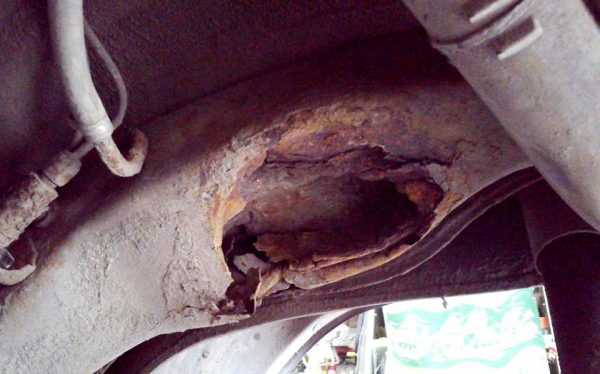
Repair of the bottom of the body
The bottom of the body, more than other elements, is exposed to the aggressive influence of the external environment and mechanical damage. The poor condition of the roads also has a noticeable effect on its wear. Therefore, the bottom often has to be completely digested. This can be done on your own - you only need a viewing hole or overpass and good lighting to inspect the bottom. Of the tools you will need:
- gas welding or semi-automatic welding machine;
- scissors for metal;
- Bulgarian;
- straightening hammers.
It is extremely important to find sheet metal of optimal thickness - thin iron is sensitive to temperature (gas welding will be required), and thick iron is difficult to machine.
The bottom is restored as follows.
- All problem areas of the floor are cleaned of dirt and rust by a grinder.
- Metal patches are cut out.
- The patches are fixed in the right places and welded.The metal patch on the bottom of the body of the VAZ 2107 must be welded around the entire perimeter
- The seams are cleaned and covered with an anti-corrosion compound.
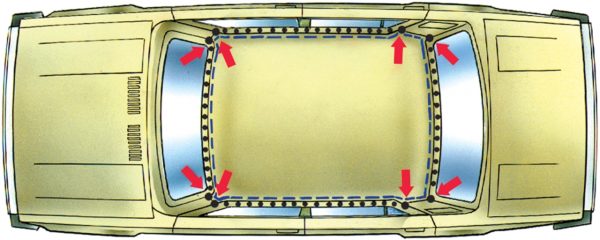
Replacement of the roof of the body VAZ 2107
Roof replacement is usually required after a rollover accident. This is also necessary in case of a serious violation of the geometry of the body and in case of severe corrosion damage to the metal. The work is carried out in the following order.
- Gutter linings, glass and roof upholstery are dismantled.
- The roof is cut along the perimeter with an indent of 8 mm from the edge of the panel. The ceiling is cut along the bends of its connection with the panels of the frames of the front and rear openings. Cutting is also carried out on the side panels.When replacing the roof of the VAZ 2107, it is cut along the perimeter with an indent of 8 mm from the edge of the panel
- Body elements at the joints are cleaned and straightened.
- After fitting, a new roof is cut out of a sheet of metal.
- The new roof is fastened by resistance welding in 50 mm increments.
- The side panels are welded by gas welding.
Video: VAZ 2107 roof replacement

Spars replacement
At the junction with the steering mechanism, the beam cross member and the anti-roll bar mounts, the VAZ 2107 spars are rather weak and often fail. Even the amplifiers provided in these nodes do not help. Due to the poor condition of the roads, cracks form on the spars, most often in the places of bolted joints. Any crack on the spar is a reason for urgent repair. The spars are restored from the inside, which can only be reached from the side of the mudguard. Work is carried out in the following order.
- Drilled out several points for welding. The number of points depends on the size of the damaged area.
- Cut out the damaged part with a grinder.
- To provide access to the inner side of the crack, the amplifier is removed along with the plate.
- A new reinforcing plate is installed and carefully boiled around the entire perimeter.
- Places of welding are treated with an anti-corrosion compound.
In critical cases, the front spar is changed entirely. Such cases include the simultaneous failure of the studs and beams.
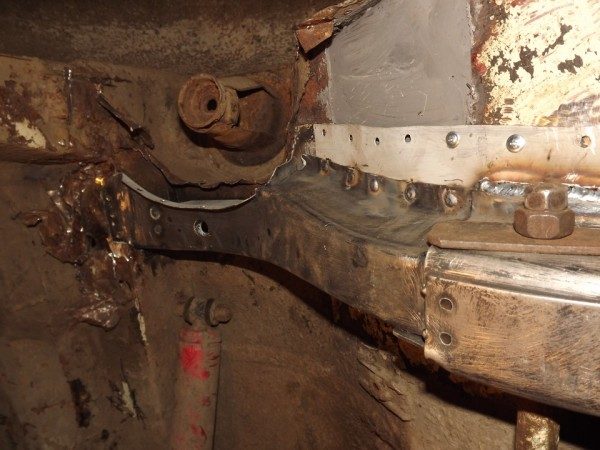
Replacement of the spar is carried out as follows.
- The suspension is disassembled, its fastenings are loosened.
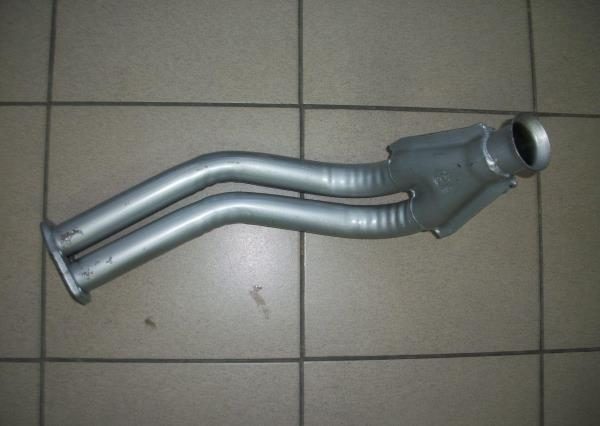
- The oil filter and exhaust system pants are dismantled.When replacing the VAZ 2107 spar, it is necessary to dismantle the exhaust system pants
- The axis of the lower arm is knocked off the beam.
- The damaged part of the spar is cut off.The damaged part of the spar is cut out by a grinder
- The new part is cut to size and overlapped.
Video: replacement and repair of spars

Hood VAZ 2107
Owners of the VAZ 2107 often modify the hood of the car. First of all, the stop of the lid changes, which is extremely inconvenient at the factory. First you need to remove it from the latch and only then close it. On the VAZ 2106, the same emphasis is designed much simpler and more functional.
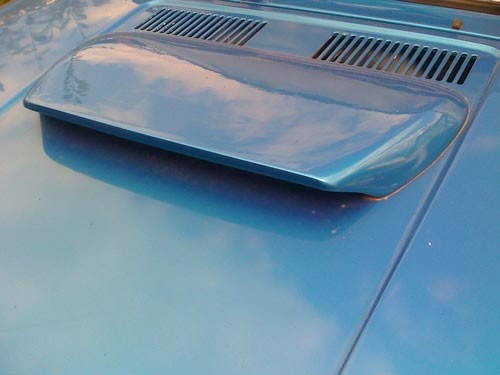
Installation on the air intake hood
An air intake or snorkel is often installed on the hood of the VAZ 2107, which improves the appearance of the car and helps cool the engine. It is mounted so that air flows directly onto the air filter. Sometimes additional pipes are installed to the main air intake, which increase the cooling efficiency.
The snorkel is usually made by hand. In this case, it is better to use durable plastic or metal as a material. The air intake is mounted as follows.
- A U-shaped hole is cut in the hood with a grinder.
- The cut-out part of the hood is folded over to form the profile of the snorkel.
- Triangular metal pieces are welded along the edges, covering the ends of the part.
- The hood is puttied and painted in body color.
When cutting the hood, it is important not to touch the stiffening ribs provided for by the design. Otherwise, the strength of the body will noticeably decrease.
Hood lock
Sometimes car owners modify the VAZ 2107 hood lock. If it does not work well or is out of order, the mechanism is dismantled. It is preliminary recommended to circle the lock along the contour with a marker - this will avoid adjusting a new or restored lock. The mechanism is removed in the following order.
- The hood opens.
- The lock cable clips come out of their seats.
- The bent tip of the cable is straightened with pliers. The fixing sleeve is removed.
- With a 10 key, the lock nuts are unscrewed.
- The lock is removed from the studs.
- A well-oiled new lock is put in.
When replacing the cable, it is first disconnected from the lever handle. This is done from the salon. Then the cable is pulled out of its shell. Now often cables are sold complete with a sheath. In this case, the old cable is pulled out together with the casing when replacing.
Body painting VAZ 2107
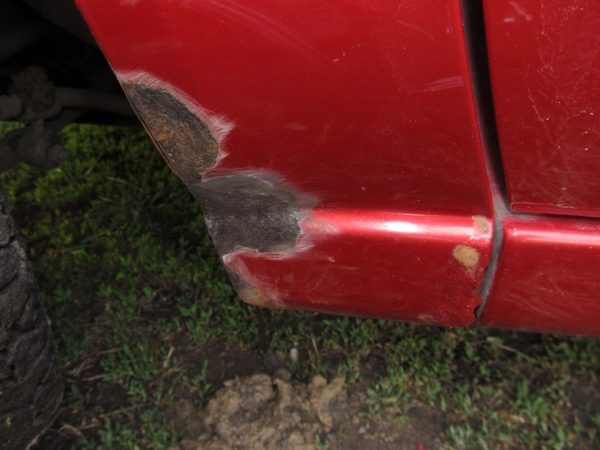
Over time, the factory paintwork loses its original appearance due to the chemical and mechanical effects of the external environment and ceases to protect the non-galvanized metal of the VAZ 2107 body. Corrosion begins. Damaged areas should be quickly puttied and painted. The fastest paint comes off the doors, sills and wings - these elements of the body are affected by the environment as intensely as possible.
The preparation of the body for painting is carried out in a certain order.
- Additional body elements are removed (bumpers, grille, headlights).
- The body is thoroughly washed from dust and dirt.
- Exfoliated paint is removed with a spatula or brush.Areas with peeling paint are cleaned with a spatula and brush
- Wet grinding is carried out with an abrasive composition. If the place is severely damaged by corrosion, the coating is cleaned to the metal.
- The body is washed and dried with compressed air.
The painting process itself is carried out as follows.
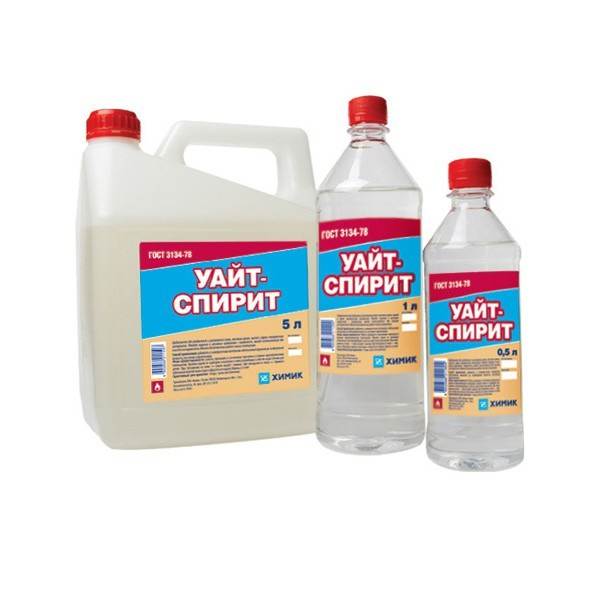
- A degreaser (B1 or White Spirit) is applied to the surface of the body.Before painting, the surface of the body is treated with a degreaser
- Joints and welds are treated with special mastic.
- Body parts that will not be painted are covered with masking tape or plastic wrap.Body parts that do not need to be painted are covered with masking tape or plastic wrap
- The surface of the body is primed with the composition VL-023 or GF-073.
- After the primer has dried, wet grinding of the surface with an abrasive composition is carried out.
- The surface of the body is washed, blown and dried.
- An auto enamel of a suitable color is applied to the body.Automotive enamel is applied to a pre-treated and dry surface of the body

Before use, it is desirable to mix the enamel with the DGU-70 catalyst and dilute it with maleic anhydride.
The harsh climate and the poor condition of domestic roads have a noticeable effect on the paintwork of almost all cars. The VAZ 2107 is no exception, the body of which requires constant care and maintenance. Even a minor defect can lead to the rapid spread of corrosion. However, most of the work can be done by hand. To do this, you just need to carefully follow the recommendations of professionals.

