Replacement lamps Mazda 6 GH

Lamps Mazda 6 GH provide comfortable and safe movement in the dark. Require periodic maintenance. Let's consider what modifications of lighting devices are used, as well as how the dipped, main and other lights are replaced on the Mazda 6 GH 2008-2012.
Lamps used on Mazda 6 GH
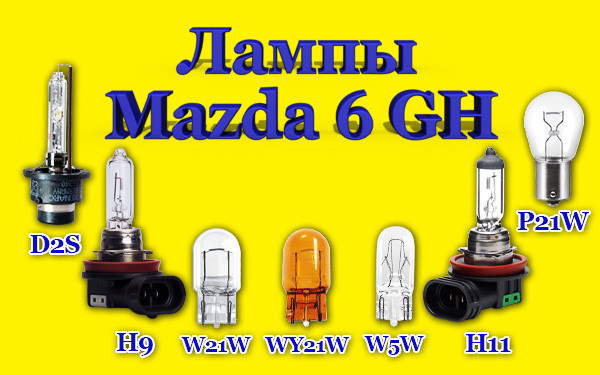
Mazda 6 GH is equipped with the following types of lighting fixtures:
- D2S - low beam Mazda 6 GH with bi-xenon optics and high beam - when equipped with side lighting (AFS);
- H11 - dipped beam in versions with halogen optics, foglights, turning light in block headlights with an active cornering lighting system;
- H9 - high beam headlights without AFS;
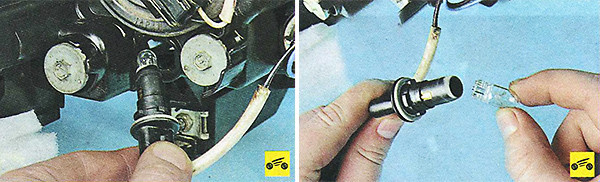
- W5W - front tail lights, license plate lighting;
- P21W - front direction indicators;
- WY21W - rear direction indicators;
- W21W - reversing lamp and rear fog lamps;
- LED - brake lights and position lights, additional brake light.
Replacing bulbs Mazda 6 GH 2008-2012
It is recommended to change the bulbs on your Mazda 6 GH regularly, especially the headlights with filament lighting fixtures. During operation, the flask gradually becomes cloudy, which is accompanied by a decrease in brightness. Visually, the driver will not notice a deterioration in the level of luminous flux, since the process of fogging the bulb does not occur quickly.
When replacing xenon and halogen discharge lamps, clean gloves or cloth should be worn to avoid direct glass contact with fingers.

During operation, the flask becomes very hot, and the presence of greasy spots on it will lead to its cloudiness. If during the shift it was not possible to avoid greasy stains on the glass, you will need to remove them with alcohol.
Consider the procedure for changing light sources at various nodes of a Japanese car. Initially, you will have to de-energize the on-board network by disconnecting the negative terminal of the battery. Below is a detailed diagram of the elimination of devices that create a luminous flux. Installation is in the reverse order.
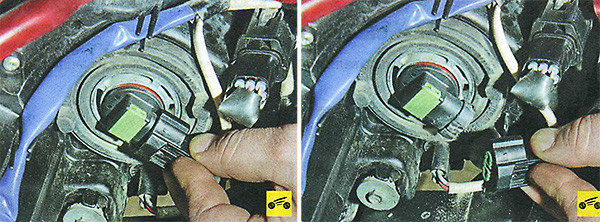
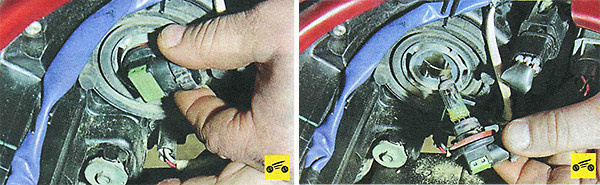
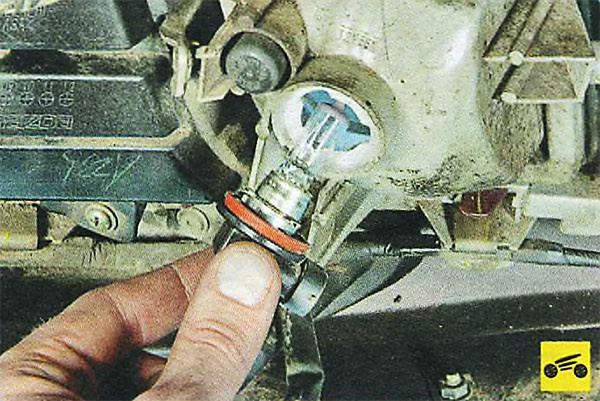
Changing low and high beam bulbs
Replacing the dipped and main beam lamp Mazda 6 GH is as follows:
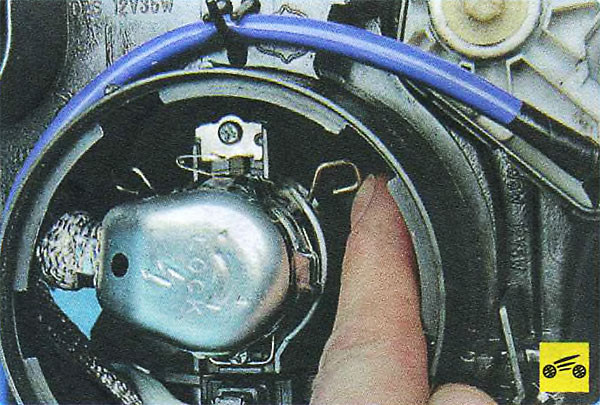
- The protective casing of the light device turns to the left and is removed.

- The spring clips holding the cartridge are pressed in.
- The cartridge is removed from the reflector.
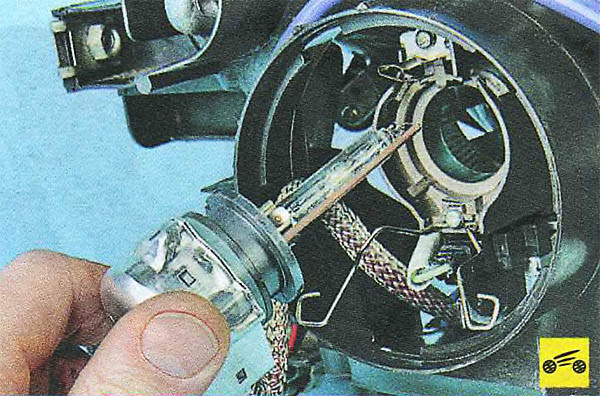
- Turning the light bulb forty-five degrees to the left, it is removed from the contact part.
- When installing, be sure to connect the power connector.

Front markers, turn signal and side turn signal
To replace the bulbs in the headlights of the Mazda 6 GH, you will need to perform the following operations:
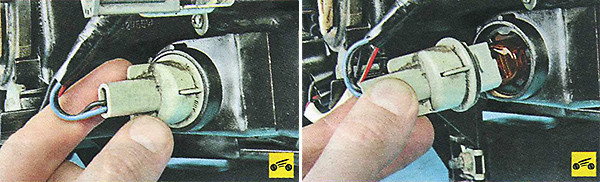
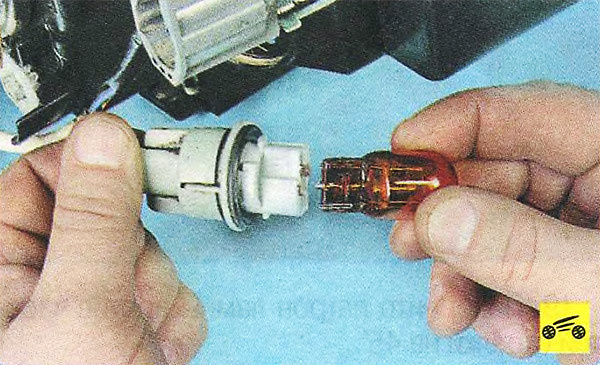
- The turn signal cartridge rotates counterclockwise and is removed from the socket.
- The turn signal light source lamp is removed from the contact part.
- Side lights are removed in the same way as turn indicators.
- The sidelight power connector Mazda 6 of the 2nd generation of 2008 is disconnected by depressing the plastic retainer.
- The cartridge is rotated counterclockwise by forty-five degrees and then removed from the reflector.
- The lamp attracts a side light source from the contact part.
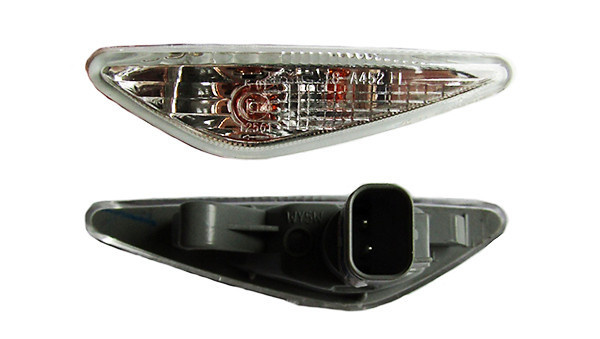
Light bulbs that cannot be replaced separately
Replacement of some light sources of the Mazda 6 GH is planned exclusively assembled with a lamp. These include:
- side turn signals;
The side turn signals have been replaced with a bulb. - brake lights and side lights LED type in the taillights.
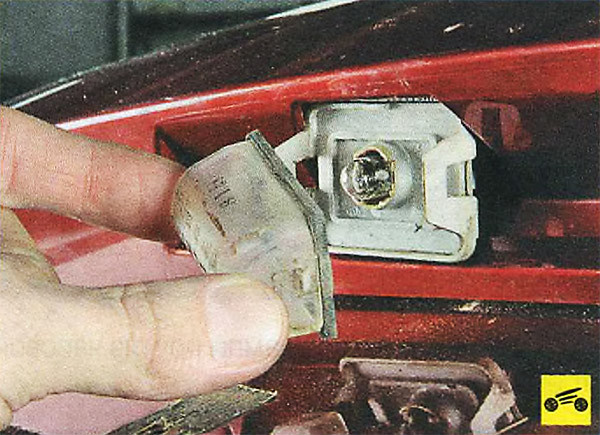
Tail light indicator
Replacing the rear turn signal light sources on a Mazda 6 GH consists of the following steps:
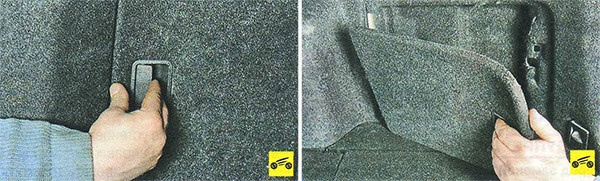
- The trunk opens.
- By pulling the special handle, the luggage compartment niche opens.
Pull the trunk lid handle and remove it. - The upholstery flap retracts to the side.
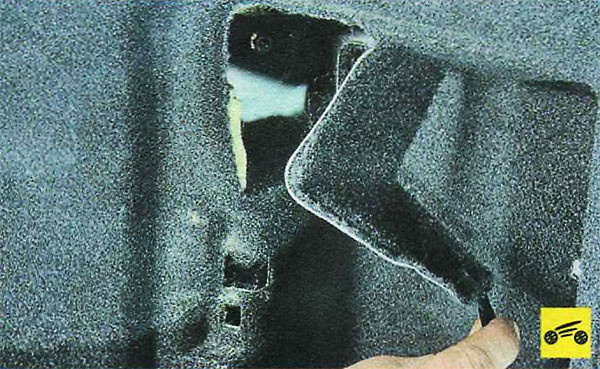
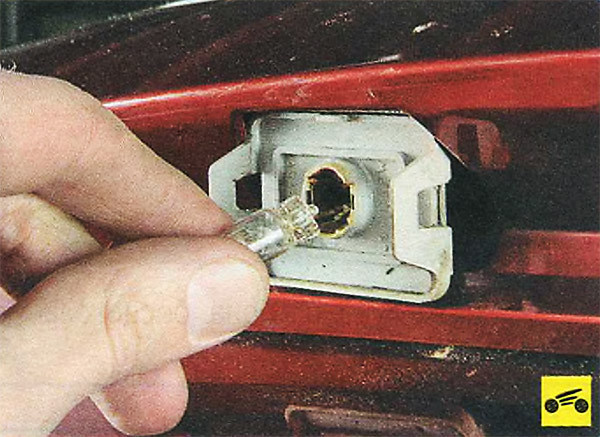
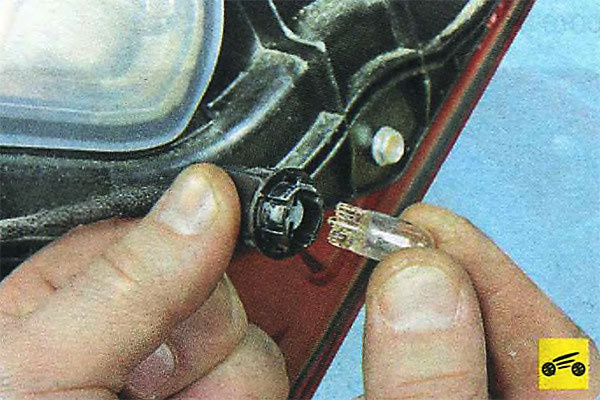
Remove the trunk lining. - In the hole formed, the turn signal cartridge turns counterclockwise by forty-five degrees and is removed from the headlight.
Through the resulting hole, turn the turn signal cartridge counterclockwise by 45 ° - The lamp is removed from the contact elements.
Remove the bulb holder from the headlight. Remove the baseless lamp from the socket.
Replacing tail light bulbs on trunk lid
Replacing the taillights on the trunk lid of the Mazda 6 2011 consists of the following steps:
- The trunk lid is up.
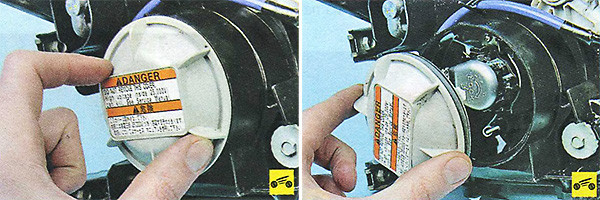
- At the rear of the Mazda 6 GH, a service hatch opens to service the lamp on the trunk lid. The hatch will need to be pry off with a flathead screwdriver and removed.
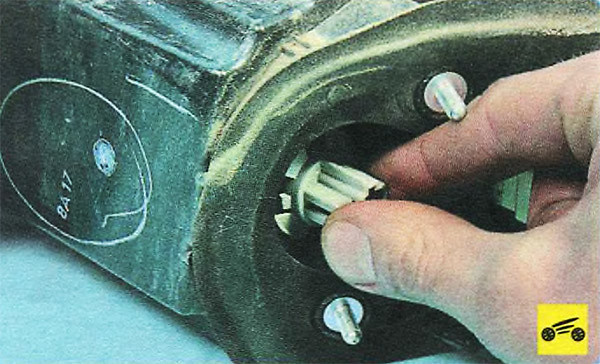
Use a screwdriver to pry the headlight hatch cover on the tailgate and remove the cover. - Next, you need to turn the cartridge to the left forty-five degrees and remove it.
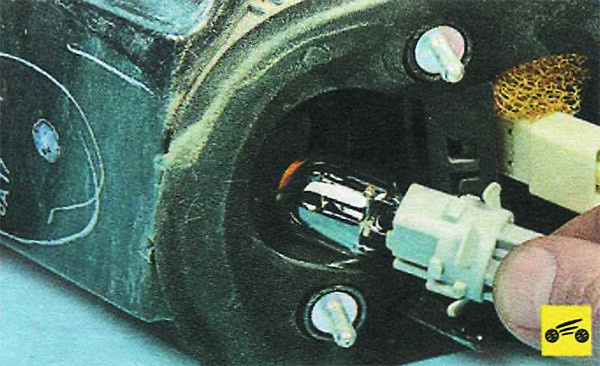
Rotate the socket 45° counterclockwise and remove the socket assembly. - Pull the light bulb without cartridge out of the contact element.
Remove the baseless lamp from the socket.
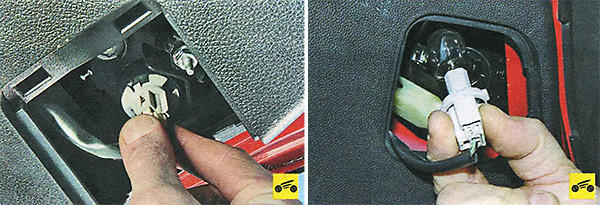
Change the light source in PTF
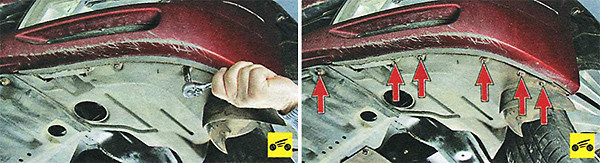
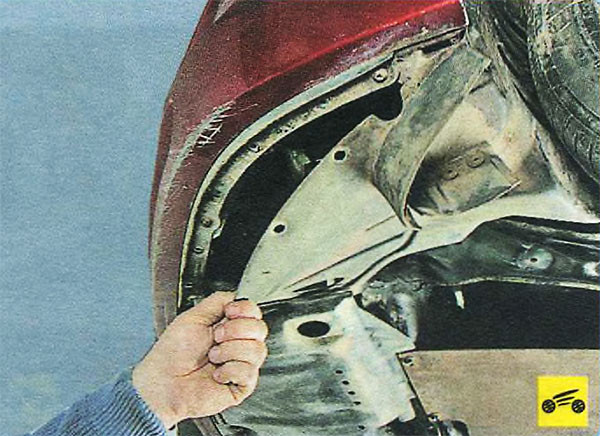
When replacing a Mazda 6 GH fog light, you will first need to raise the corresponding side of the vehicle. Next, the following operations are performed:
- Fasteners (bolts and screws) from the fender liner to the bumper are unscrewed in the amount of six pieces
Remove the screws and bolts securing the bottom of the mudguard to the front bumper. On the right is the location of the bolts and screws that attach the lower fender liner to the front bumper. - Pull the fender liner down until it stops.
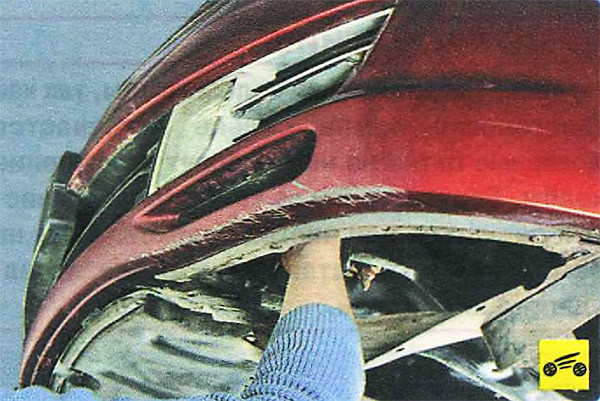
Bend the bottom of the fender liner - Insert the PTF hand into the gap.
Run your hand through the hole in the PTF - While holding the latch, disconnect the power connector.
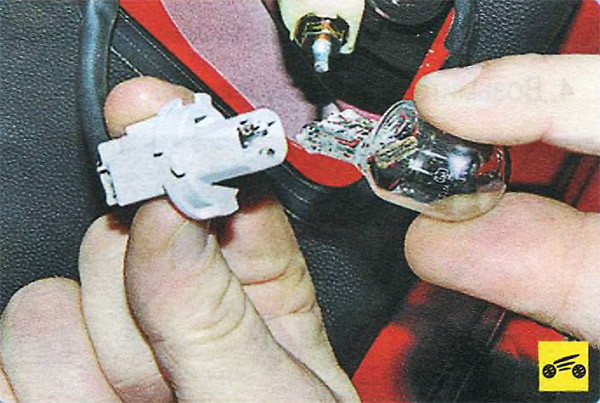
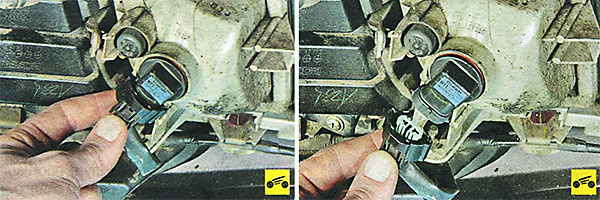
While pressing the tab on the fog light harness assembly, disconnect the assembly from the base. - The cartridge is rotated counterclockwise by forty-five degrees and removed.
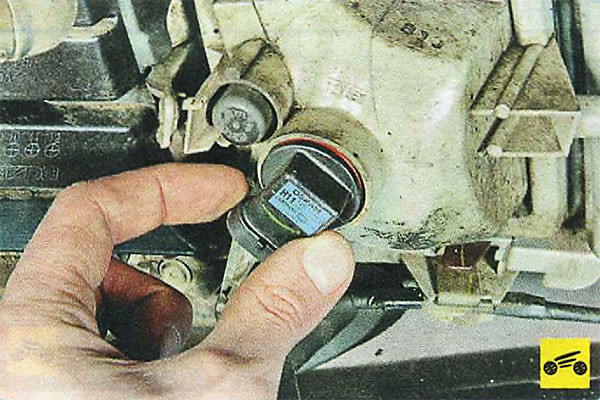
Rotate the socket counterclockwise by approximately 45° - The fog lamp light source has been removed.
Remove the fog light bulb.
Number illumination
To remove the rear lamp of the license plate Mazda 6 2nd generation, the following operations are performed:
- Use a flat-blade screwdriver to pry off the dome light spring retainer.
Use a screwdriver to press the spring clip on the license plate light - The ceiling has been removed.
Remove the ceiling. - Grasping the flask, you need to pull it out of the contact part.
Grasp the light bulb and remove the baseless light source from the license plate light.

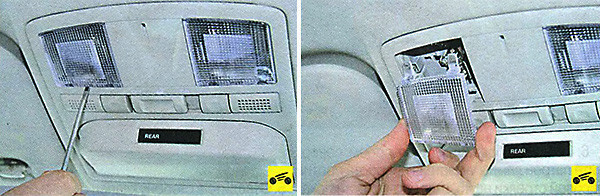
Replacing lamps in the Mazda 6 GH cabin
All bulbs in the Mazda 6 GH cabin change according to the algorithm. Below is a detailed action plan:
- Initially, you will have to de-energize the on-board network by disconnecting the negative terminal of the battery.
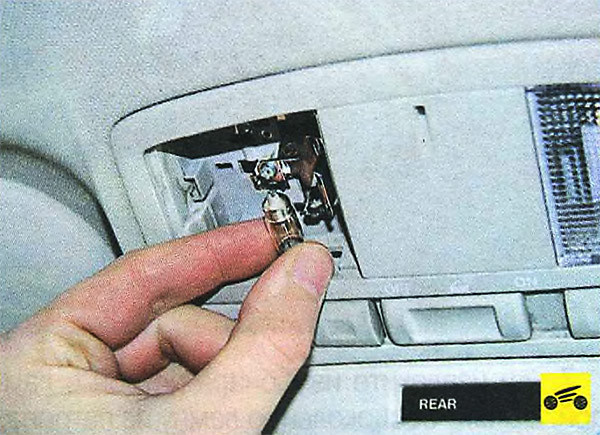
- Using a flat blade screwdriver, pry up and remove the diffuser cover.
Use a screwdriver to pry up the driver's side light diffuser and remove the diffuser. - The light source is pulled out from the contact part of the spring type.
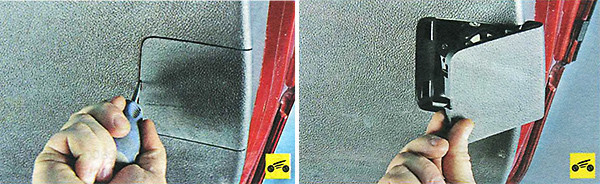
Illumination in the doors
Replacing the backlight bulbs in the doors of the Mazda 6 GH is carried out in the following order:
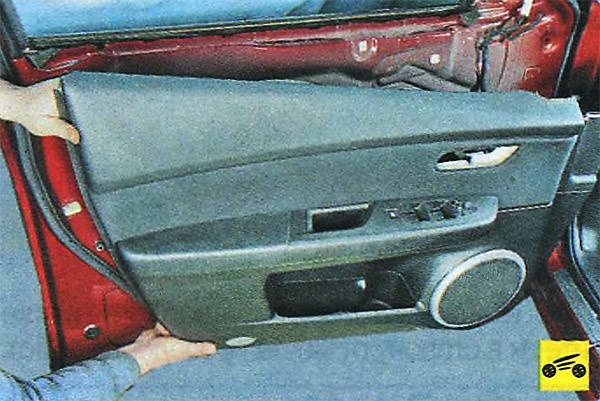
- The card facing the door is removed and set aside.
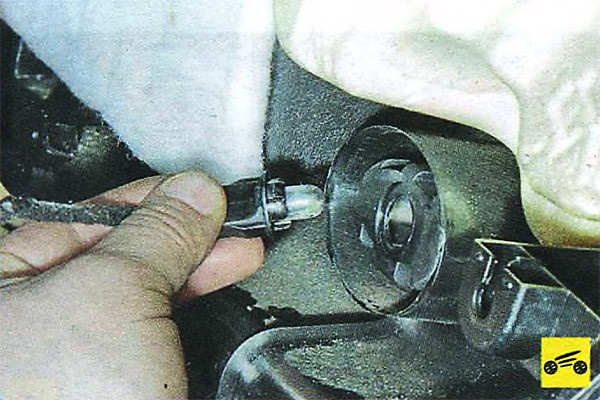
Remove the door trim and set it aside. - From inside the card, you will need to pull out the cartridge.
Remove the cartridge together with the light bulb from the ceiling. - The defective element is removed from the contact part.
Remove the baseless light bulb from the ceiling light.
Before you start working on changing the Mazda 6 GH lighting fixtures, you need to find out which lamps are used in specific lamps. This will prevent problems with the contact part, and also eliminate the overload of the electrical network. Replacing light bulbs is easy to do on your own.