Replacing car license plate lamps
Content
Signs and causes of a malfunctioning license plate light
The main sign that the license plate light needs to be replaced is the lack of brightness when the side lights or low / high beams are on. Along with this, there are a few more indications that the license plate lighting system needs to be repaired:
- corresponding error message on the dashboard or on-board computer;
- uneven brightness (flickering) of the lighting level while driving;
- lack of brightness of one of several elements of the light structure;
- uneven license plate lighting.
Video - quick replacement of a license plate lamp for a Kia Rio 3:
The reasons for the malfunction of the license plate backlight are:
- export of light emitters;
- violation of the contacts of the structure;
- light filter and ceiling opacity;
- damage to electrical wiring, blown fuses;
- malfunction of the body control unit.
What lamps are usually installed
Most of the existing car makes and models use W5W bulbs for license plate lighting. But there are manufacturers who complete their cars with C5W lamps, which differ significantly from the previous ones in terms of the type of base. Therefore, before buying light bulbs, you need to find out what devices are installed in your car.
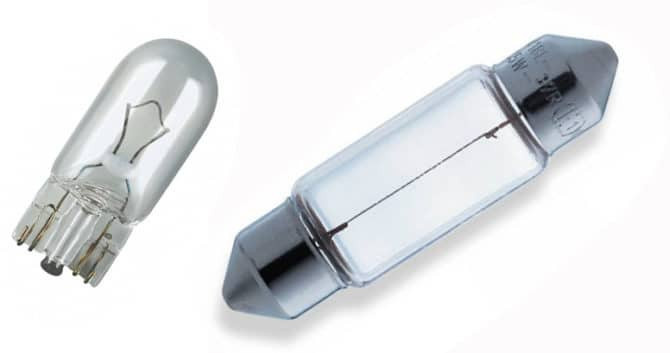
W5W (left) and C5W bulbs used for license plate lighting
Naturally, there are LED analogues of these devices.
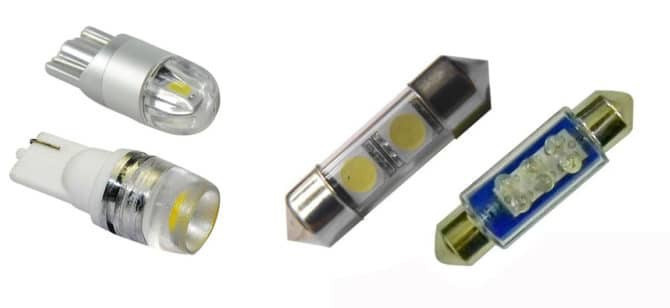
LED bulbs W5W (left) and C5W
Important! Replacing conventional incandescent bulbs with LED ones in license plate lights is legal in principle. It is only important that the LEDs are white, the license plate is well read from a distance of 20 m, while the backlight should illuminate only the license plate, and not completely behind the car.
We check the possible reasons for the lack of backlight
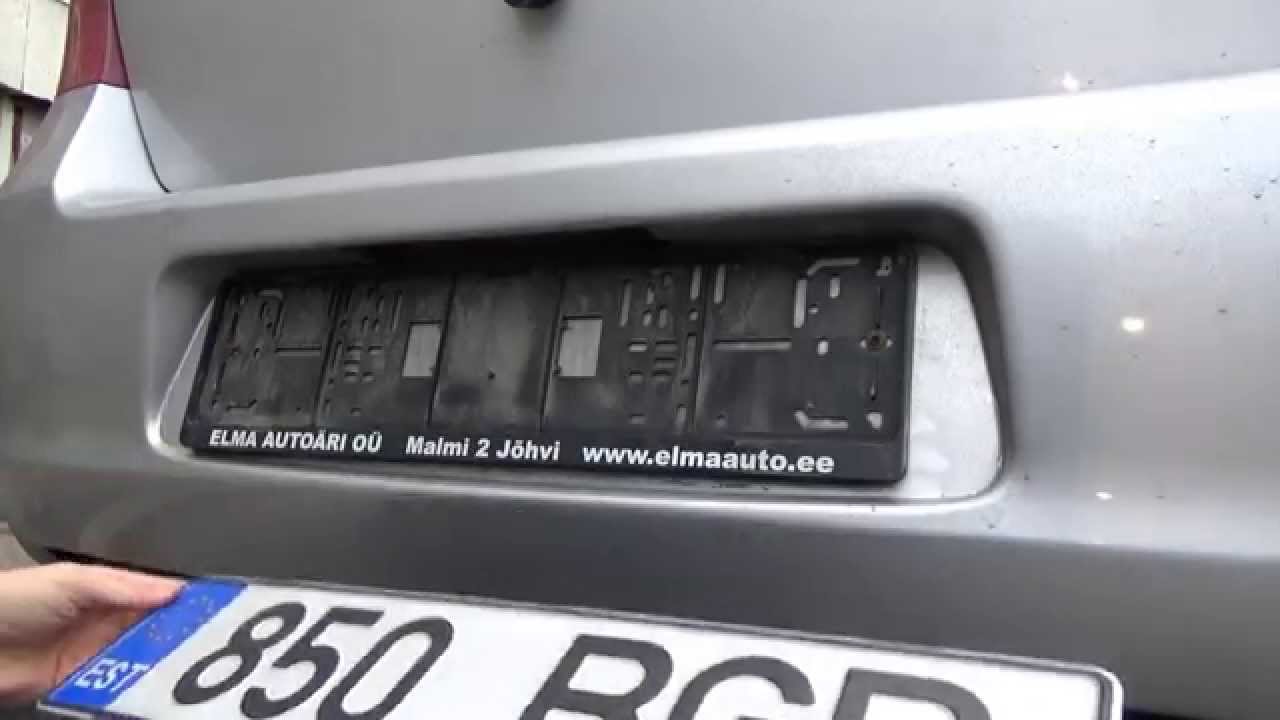
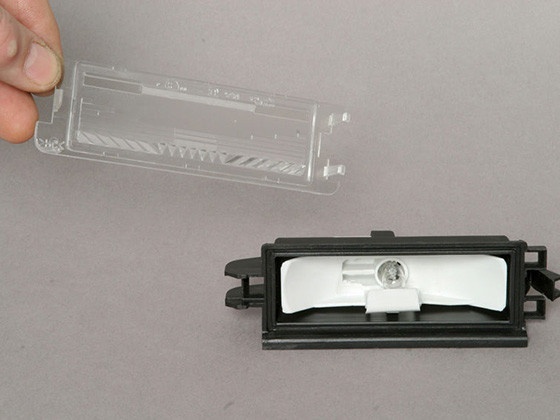
The factory assembly provides for the installation of lighting screens in the lower crate of the trunk. The panel is attached to the frame designed for the license plate of the car.
If the lighting device initially works within normal limits, the following problems may appear over time:
- lighting is completely absent;
- the backlight does not work properly;
- the lighting device is faulty;
- replacement of lamps or shades was carried out in violation of the rules.
Vibration and shaking are considered the main causes of indoor lighting problems. The light fixture is burnt out or its filaments are damaged. In addition to vibration, damage can be caused by:
- incorrect operation of the generator (leads to an increase in voltage in the on-board network and the simultaneous burnout of all backlight lamps);
- severe contamination of the roof installation site;
- penetration of liquids and subsequent corrosion of contacts;
- body movements leading to fractures of the spokes in the places of inflection;
- short circuit in one of the circuits.
To eliminate the malfunction, it is required to check the possible causes of the lack of backlight according to the principle “from simple to complex”:
- establish the darkening of the lighting fixture, the possible deformation of the plastic casing of the ceiling, the accumulation of condensate by wiping the surface with a rag;
- check the wiring and fuses by turning on the low beam (one lamp should work);
- by tapping on the surface of the ceiling, try to light the lamp for a short period of time.
If the cause of the non-working backlight turned out to be faulty devices, they must be replaced.
Troubleshooting algorithm
At the first sign of a malfunctioning license plate light, you should immediately begin to establish the cause and eliminate it. An inoperative license plate lighting system is one of the significant reasons for stopping a car at night.
For traffic police officers, the lack of illumination of the number can be regarded as an attempt to hide the ownership of the car, information about its registration. In most cases, this ends in a fine.
Trying to make excuses like "I don't know, it just happened" will get you nowhere. The driver is obliged to check the car before leaving, especially when driving at night. In addition, two redundant light sources are usually used for illumination. As soon as the emitter fails, the car owner must immediately fix the problem.
Video - replacing a license plate lamp with a Mitsubishi Outlander 3:
At the first stage, it is desirable to carry out a complete computer diagnostics of the car, including checking the multifunctional unit (body control unit). In most cases, it will indicate the cause of the malfunction. But it can also give a more concise interpretation of the error, such as "license plate light failure". This is understandable and without diagnostics.
Usually, an algorithm for solving the inverse problem is used, i.e. from the final control element, i.e. from the emitter (lamp or LED system). To do this, you need to have the simplest measuring tool - a multimeter.
In many cases, getting and removing the emitter lamp is quite difficult, especially if the license plate itself is mounted on the bumper: you need to get access under the car.
Just in case, it's best to check the license plate light fuse first.
You can find out the specific installation location in the owner's manual for your car or find this information using Internet search engines or special resources.
Next steps:
1. Remove the license plate light.
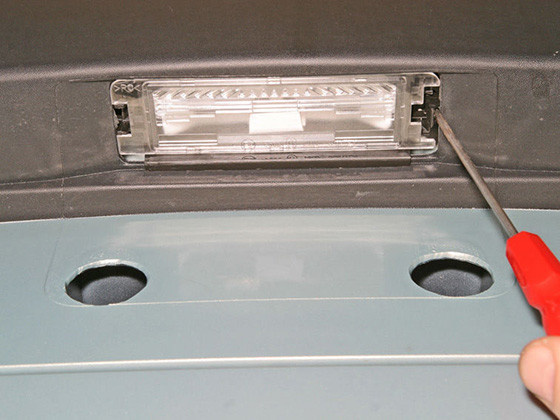
It is necessary to find detailed information on this topic, as intuitive actions can damage the latches or the connector.

2. Disconnect the connector.
3. Check the voltage at the connector with the parking lights on. To do this, turn on the ignition, dimensions. Then, using a multimeter in the position of measuring DC voltage within 20 volts, connect the multimeter probes to the connector pins. If there is no voltage, the problem is most likely not in the lamp emitter, but in the wiring, control unit or fuse.
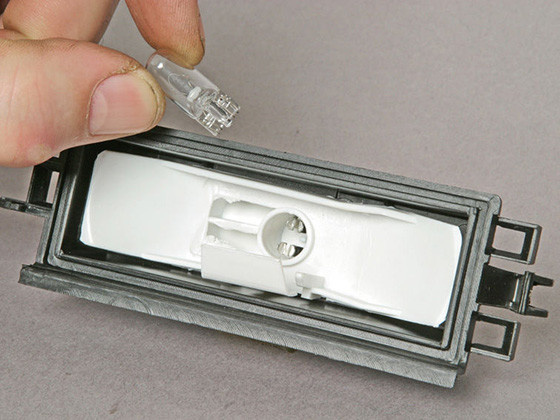
4. If voltage is applied, proceed to disassemble the lamp to remove the emitter.
The first step is usually to remove the diffuser, fixed on the latches.
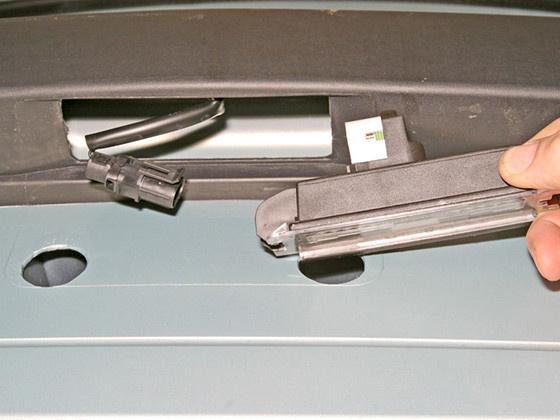
5. Next, remove the emitter. It can be of two types:
- incandescent lamp;
- led.
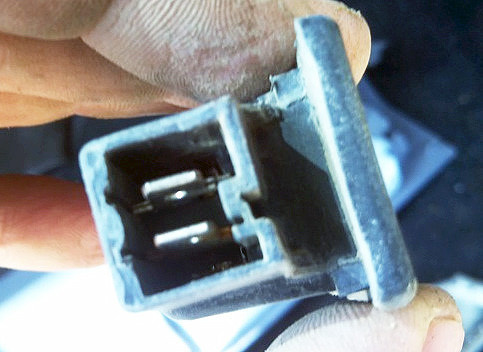
The incandescent lamp is easily removed from the cartridge.
Usually these are two thin wires bent on the sides. The cause of its malfunction may be a broken terminal or a worn filament. For greater certainty, you can ring with a multimeter in the resistance measurement mode at the limit of 200 ohms.
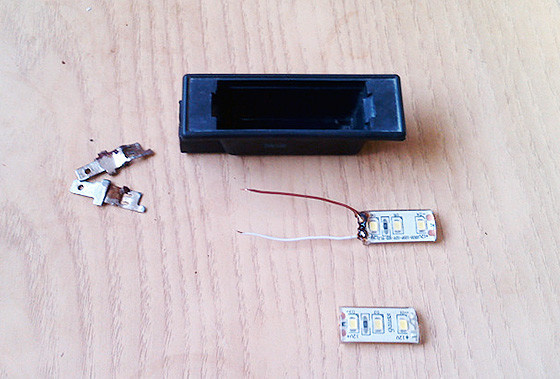
LED design is often more complex.

It is better to call from the connector.
To do this, put the multimeter in the "diode" control mode. The emitter LED should beep in one direction and display "1", i.e. infinity, when the probes are reconnected. If the design does not sound, then the flashlight often has to be “untangled”, as in the Lifan X60.
6. If the light emitter (bulb or LED design) is defective, it must be replaced. You cannot replace the lamp with an LED or vice versa. They have different streams of consumption. The body control module can determine the error. You can install an emulator, but this is an extra extra hassle.
7. If the emitters are working, they are not energized, you need to move along the wiring to the fuse. It is necessary to check if there is voltage at the fuse contacts when the dimensions are turned on. If not, then the problem is in the control unit. If there is, then the reason is in the wiring. The weakest point in the wiring is under the threshold near the driver's seat. It is necessary to dismantle the threshold and inspect the wiring harness. It will be good if the color of the wire used for the backlight is known. Another weak point is under the corrugation of the tailgate (if a license plate is installed on it).
8. Finally, the most unpleasant case is when the backlight is controlled directly from the MFP without a fuse in the circuit. In the event of a short circuit or connection of a non-native emitter, the control circuits of the electronic unit may fail. In this case, an expensive repair of the unit may be necessary. It is cheaper to turn to Kulibin, who will install a bypass circuit or connect the light directly to the parking lights.
Video: replacing the license plate light on the Skoda Octavia A7:
An example of replacing lamps on different cars
Let's move on to replacing the license plate light bulb. Of course, the replacement algorithm for different brands and even models is different, so as an example, consider the replacement process on the most popular cars in Russia.
Hyundai Santa Fe
First, let's look at how to replace the backlight on a Korean Hyundai. For work we need:
- Star screwdriver.
- 2 lamps W5W.
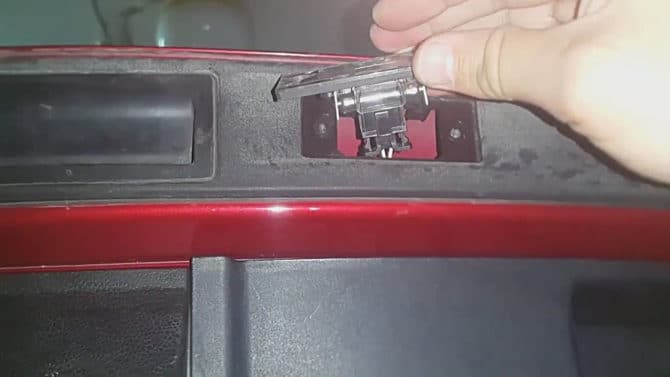
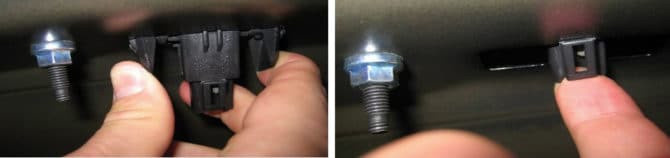
Each of the license plate lights on this car is attached with a self-tapping screw and an L-shaped retainer, I marked the location of the screws with red arrows, and the latches with green arrows.
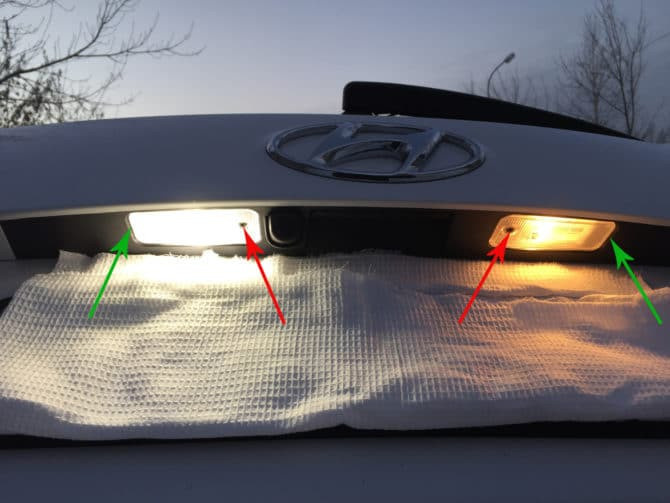
Mounting the license plate light
We unscrew the screw and take out the lantern by unhooking the latch. The cable that feeds the ceiling is rather short, so we pull out the illuminator carefully and without fanaticism.
 Removing the flashlight
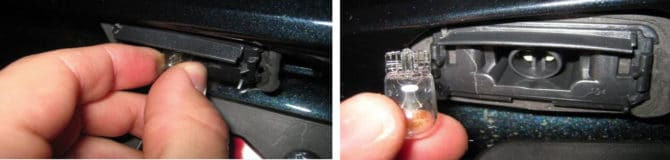
Now we see a cartridge with power cables (photo above). We turn it counterclockwise and remove it together with the lamp. The lamp is removed from the cartridge by simply pulling on it. We disassemble the burnt one and put a new one in its place. We install the cartridge in place, fix it by turning it clockwise. It remains to put the illuminator in place and fix it with a self-tapping screw.
In some Santa Fe trim levels, the license plate light is attached with two self-tapping screws and does not have an L-shaped retainer.
Mounting option for rear license plate lights
Nissan Qashqai
In this model, changing the license plate light is even easier as it is held in place by latches. We arm ourselves with a flat screwdriver (the author of the photo used a plastic card) and remove the lamp from the side located closer to the center of the car.
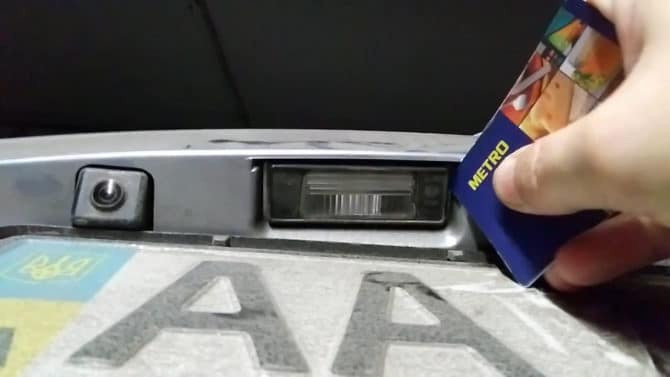
Remove the cap with a plastic card
Carefully remove the seat cover and access the cartridge.

Removed Nissan Qashqai license plate light
We turn the cartridge counterclockwise and take it out together with the W5W bulb. We take out the burnt device, insert a new one and install the cover in its place, making sure that the latches click into place.
Volkswagen Tiguan
How to change the license plate light on a car of this brand? To replace them you will need:
- Star screwdriver.
- Gloves (optional).
- 2 C5W bulbs.
First of all, open the trunk lid and remove the lights, for which we unscrew 2 screws on each.
Remove license plate light
The light bulb itself is installed in two spring-loaded clamps and removed by pulling. You will have to pull quite hard, but without fanaticism, so as not to crush the flask and cut yourself. I wear thick gloves during this operation.
License plate light location
Instead of the removed light bulb, we install a new one by simply snapping it into the latches. We insert the ceiling into place and fix it with self-tapping screws. Turn on the backlight and check the result of the work.
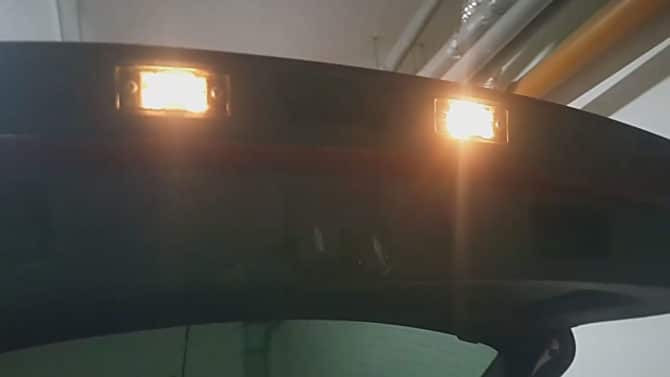
Lighting works, everything is in order
Toyota Camry V50
Replacing the license plate light bulb on this model is perhaps the most interesting. However, there is nothing strange here - everyone who has ever disassembled Japanese equipment into parts will agree to this if only to replace some kind of strap, belt or drive. For work, we need a flat screwdriver and, of course, W5W type lamps.
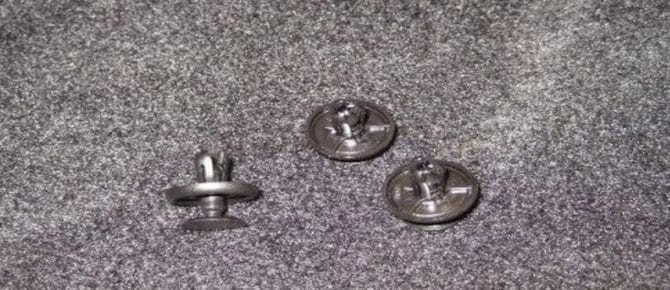
So, open the trunk lid and release part of the upholstery in front of the headlight. The upholstery is attached with the help of deceptive plastic plugs, which must be carefully and carefully removed.
piston design
We take a flat screwdriver, pry off the piston retainer (not the piston itself!) And push it out. We take the head and pull the piston out of the upholstery. We carry out the same operation with all the clamps that prevent the deflection of the upholstery in front of the ceiling.

Removing upholstery clips
We bend the upholstery and find the back of the lantern body with a protruding cartridge. The power supply is located on the cartridge.
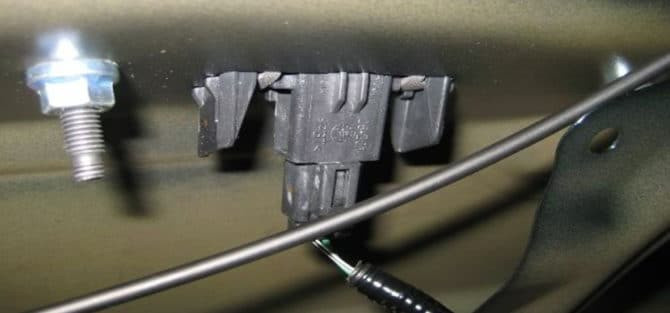
Number plate socket
Roof dismantling
We take out the block, and then, squeezing the latches on the lantern, we push it (the flashlight) out.
Pry off the protective glass with a screwdriver (carefully!) and remove it. Before us is a W5W bulb.

Remove protective glass
We take out the burnt one, in its place we install a new one.
Replacing the lamp
We break the protective glass, insert the flashlight into the standard socket and press until the latches click. We connect the power supply, check the operation of the headlights by turning on the dimensions. If everything is in order, return the upholstery to its place and secure it with plugs.
Installing the locking piston
Toyota Corolla
To easily access this brand of backlight, you will need to lower the lamp diffuser. This requires light pressure on the tongue.

Additional steps are performed in the following order:
- unscrew the cartridge by turning it counterclockwise;
- unscrew the screws;
- remove the lamp holder;
- take out the old one that doesn't work;
- install a new light bulb;
- assemble the structure in reverse order.
Recommended related videos:
Hyundai Solaris
Both lamps illuminating the interior are located in the Hyundai Solaris under the lining of the trunk lid. To remove them, you will need a flat and Phillips screwdrivers. The dismantling process looks like this:
- use a flat screwdriver to open the cover on the handle;
- remove the handle by unscrewing the screws with a Phillips screwdriver;
- remove the caps that hold the trim in place;
- remove the cover;
- unscrew the cartridge clockwise;
- remove the lamp, holding it by the glass bulb;
- install a new light bulb;
- reassemble in reverse order.

Interesting video on the topic:
Lada Priora
Here Lada Priora will act as a "guinea pig", which does not even need to disassemble the lamp to replace the license plate light bulb. Open the trunk lid and find the back of the lamp holders, focusing on the location of the lamps.
license plate light socket
We take the cartridge, turn it counterclockwise until it stops and take it out of the lantern along with the light bulb.

Removed license plate light socket
We take out the burnt device (W5W) and install a new one in its place. We turn on the dimensions and make sure that everything works. We return the cartridge to its place and fix it by turning it clockwise.
Important features
The main culprits for non-working room lighting are burnt out lamps. However, light bulbs that often dim can remain in good working order. In order to correctly determine the actual cause of the breakdown, you need to carefully examine the lamp removed from the cartridge. The main symptom of a malfunction is the darkening of the light bulb or damage to the filament, visible to the naked eye.
If the lamp works, but the lighting does not work, oxidized contacts are likely to be the culprits.
To resume operation of a cylindrical C5W lamp (equipped with end contacts), it is enough to carefully clean and bend them.
The spring contacts won't hold the bulb, another likely cause of the failure. Replacement is also not required. It is enough to return the light bulb to its place.