Replacing the semi-axle bearing on the VAZ 2101-2107
A fairly common breakdown on VAZ 2101-2107 cars is a failure of the semi-axle bearing, which is very bad and can have serious consequences (semi-axle exit from the seat, damage to the seat, damage to the arches, and even an accident). Symptoms of this disease are semi-axle backlash, both vertical and horizontal, the wheel can turn with jamming or simply tight. While driving, this breakdown can be determined by the fact that when braking, the brake pedal "floats" under the foot, gives back, this may mean that the axle shaft is loose and the distance between the brake pads and the drum changes, just as if a grinding sound is heard from behind, or the car slows down on one side, this can also be a negative symptom.
If such a breakdown, unfortunately, has occurred, there is no need to be very upset. The main thing is to diagnose the breakdown first, so that there is no warping and breakage of the semi-axle itself, if there are defects on it, then you will have to buy a new one, and its price is about 300-500 hryvnia (it is not very pleasant to dispossess the family budget).
What do we need for repair - a new bearing, preferably of high quality, and a new bushing that holds the bearing and a new axle shaft oil seal, which is installed in the groove where the axle shaft enters the axle. You will need the following tools:
1. Wrenches 17-19, preferably two (for loosening the bolts that hold the axle shaft in the axle).
2. A wrench for loosening the wheel nuts, a wrench for removing the guide pins (there are two of them, center the wheel and facilitate its installation, removal, and removal of the brake drum).
3. Grinder or torch (required to cut the old bushing that holds the bearing in place).
4. Gas torch or blowtorch (to warm up the new sleeve, it sits on the half shaft only when hot).
5. Pliers or something like that (you will need to remove the springs of the brake pads and a new bushing after warming up, put it on the axle shaft).
6. Screwdriver flat (to pull out the old oil seal, and put a new one).
7. Jack and supports (supports for safety, the car should never stand only on the jack, safety support is needed).
8. Stops to prevent the car from rolling during operation.
9. Hammer (just in case).
10. Rags to wipe everything, there should be no dirt anywhere.
And so, everything is there, let's get to work. To begin with, we put stops under the wheels to prevent the car from moving forward or backward. Further, we loosen the wheel bolts, raise the car on a jack (the right side), substitute additional safety stops (to avoid the car falling from the jack). We unscrew the wheel bolts completely, remove the wheel (set to the side so as not to interfere). We remove the brake pads (carefully with the springs), unscrew the 4 bolts securing the axle shaft to the brake shield. Gently pull out the axle shaft.
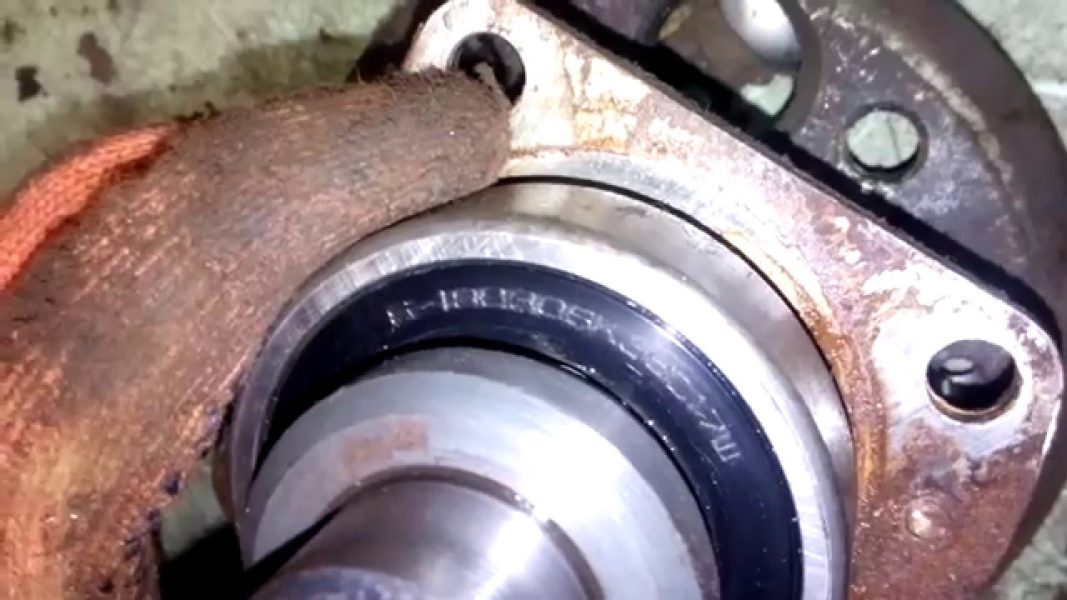
Everything, you have already reached the goal. With a screwdriver, remove the old oil seal, from its place, wipe the seat with a rag and insert a new oil seal (you can pre-lubricate with Tad-17, Nigrol or the liquid that is poured into your rear axle). Now, let's get down to the semi-axis. We take a gas cutter or grinder and cut off the old bushing that holds the old bearing on the axle. This action must be done carefully so as not to damage the axle shaft and not heat it up (the axle shaft, hardened, if you heat it up (in the case of a gas cutter) it will be released and will be unusable). When the bushing is cut, use a hammer and a screwdriver to knock it off the axis and remove the old bearing. We check the bearing seat and bushings on the axle, if all is well, proceed to the installation of new parts. We wipe the axle from dirt, install a new bearing, make sure that it sits all the way, you can easily help it with a hammer, but through a wooden spacer.
Next, we take a new sleeve, it needs to be put on a piece of tin or just a piece of iron so that it does not fall well. We turn on a blowtorch or a gas cutter, heat the sleeve to a crimson color, it should be completely red (if you do not heat it to the desired color, it will not sit all the way with the bearing, you will have to remove it and put a new one). Then, carefully, so as not to wrinkle and not make defects, we take this heated sleeve and put it on the axle, making sure that it sits close to the bearing. The bearing can be wrapped with a wet rag so that it does not get hot from the bushing and does not deteriorate, but this is not necessary. And well, we are at the finish line, the bearing is in place, the bushing is as it should be (wait for it to cool completely, check if the bearing has a free wheeling along the axis), it remains to assemble everything. The assembly must be carried out in the reverse order described above.
Well, now it remains for us, and it remains for us only to enjoy the good and well-coordinated work of the car. The main thing to remember is "Don't forget about the safety rules." Good luck !!!