Replacing the timing belt Ford Mondeo 2
Timing belt: a rubber or metal belt (timing chain) with a toothed profile that prevents it from rotating on the axles, is necessary to synchronize the rotation of the crankshaft and camshaft. In addition, the timing belt drives the water pump, which in turn circulates coolant (coolant) through the engine's cooling system. The belt is tensioned by a tension roller, which, as a rule, changes simultaneously with the timing belt. Untimely replacement of the belt is fraught with its rupture, after which such an unpleasant phenomenon as bending of the valves is possible, it occurs from the uncontrolled impact of the pistons on the valve in the event of a belt break.
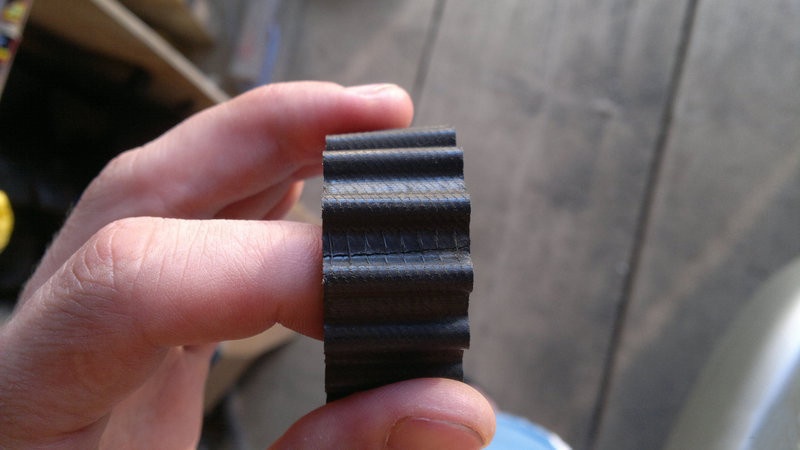
To avoid the development of such a scenario, it is necessary to regularly monitor the tension of the belt, its condition and change the timing belt in time if microcracks, threads, burrs and other traces of integrity are found on its surface.
In this article I will tell and show how to replace the timing belt on the Ford Mondeo 1.8I with my own hands as quickly and efficiently as possible.
Replacing the timing belt FordMondeo - step by step instructions
- Work is carried out in the gazebo or elevator. Hang the front right side of the car, then remove the right wheel.
- On the right side, under the crankcase, install a jack closer to the rib to the edge of the cover. Two jacks are needed so that the crankcase does not break under the weight of the engine. Gradually move up until you see a slight upward movement of the motor.
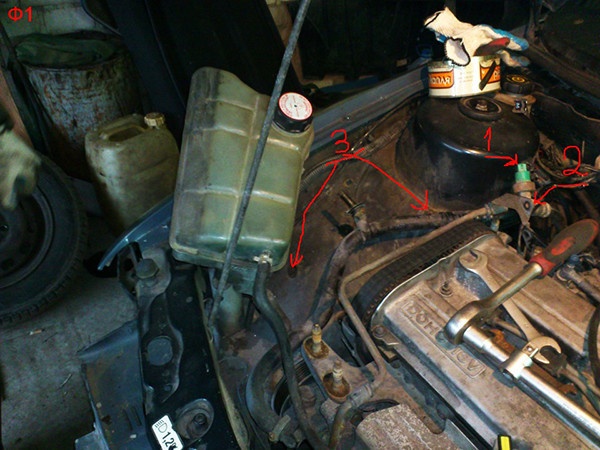
- Next, remove the air duct from the distributor. To do this, unscrew the four nuts on top, then bend the nearest clamp on the air tube, remove the hose at its bottom and set the air tube aside.
- Remove the chip from the power steering tube, which is just above the top timing belt cover, then unscrew the bolt and nut.
- Remove the expansion tank and tilt it to the side.
- Next, you need to unscrew the two screws in the wheel arch on the right side, which secure the plastic protection of the body.
- Engage fourth gear and, pressing the brake pedal all the way, loosen the bolt that holds the alternator and power steering belt pulley, as well as the timing belt pulley. Do not unscrew completely, this can only be done after removing the alternator belt and power steering.
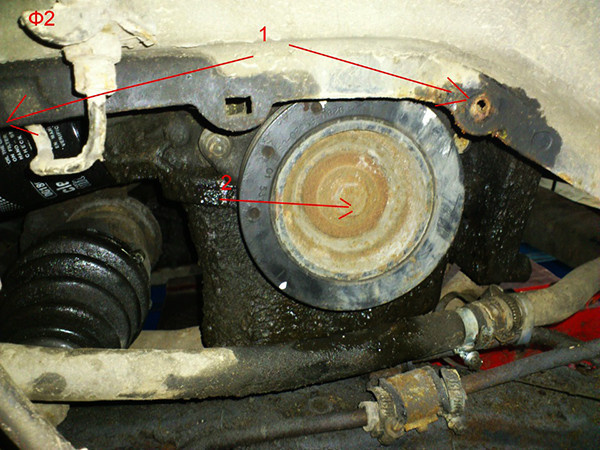
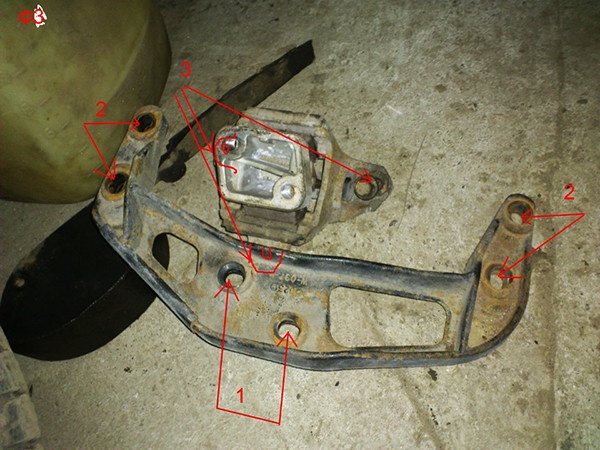
- Next, you need to loosen the studs and nuts on the right engine mount. Carefully check the stability of the raised engine, if everything is secure, unscrew them and remove the bracket.
- Remove the motor mount by removing the three screws.
- After unscrewing the two fastening screws, remove the top cover of the timing belt protection, slipping it under the power steering tube, set it aside.
- Now you need to remove the generator and power steering belt, for this you need to press the tensioner head in the “down” direction with a bracket or tube, so that the generator and power steering belt will be released with the help, after which it can be removed.
- Perform a quick check on the idler, alternator, power steering pump, and pump for poor play or hard rotation.
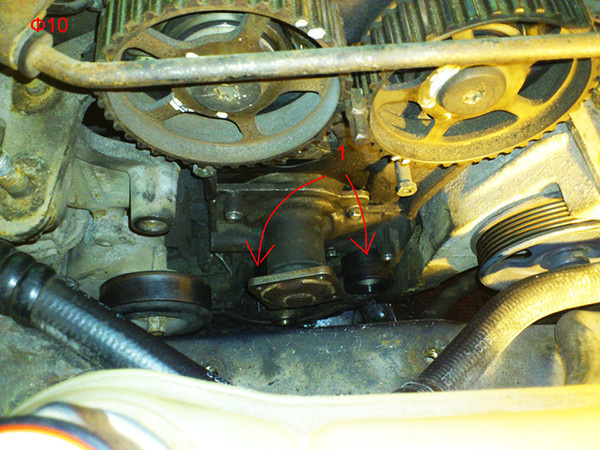
- Remove the bypass roller by unscrewing the bolt.
- Grab the pump pulley with your hand or a spatula, loosen the four pulley mounting bolts, then unscrew them completely.
- Next, unscrew the three screws that hold the second part of the timing belt cover.
- We unscrew the previously loosened bolt and remove the generator and power steering belt pulley.
- Loosen the two screws at the bottom of the timing belt cover, then remove it and set it aside.
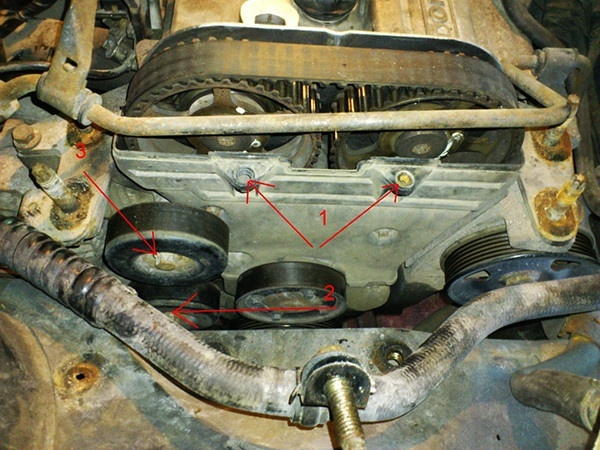
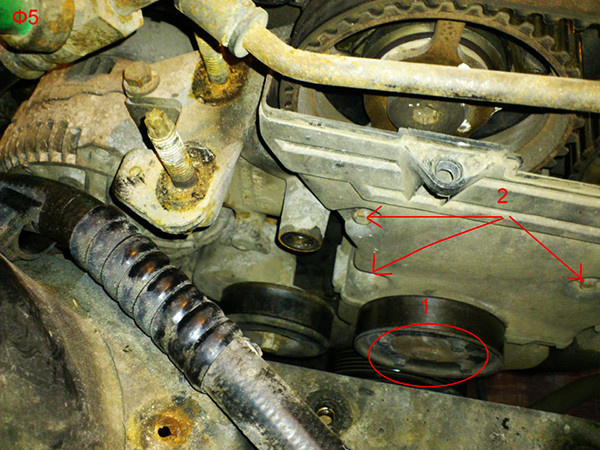
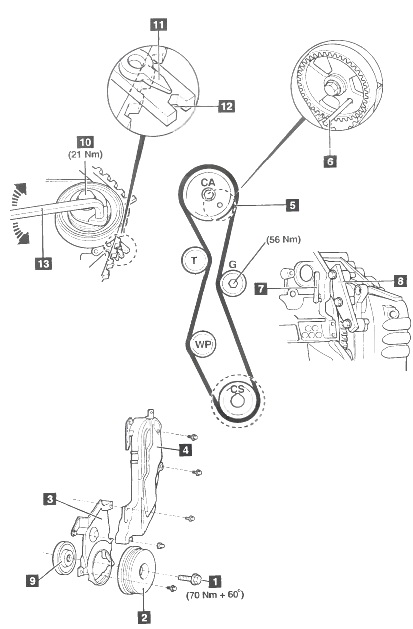
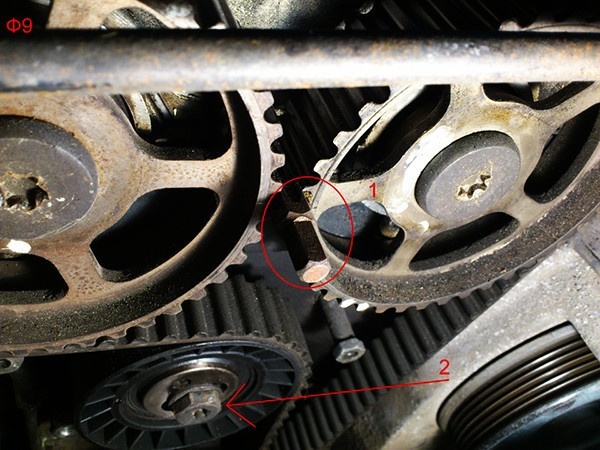
- Now that you have access to the belt, you need to find and match the markings.
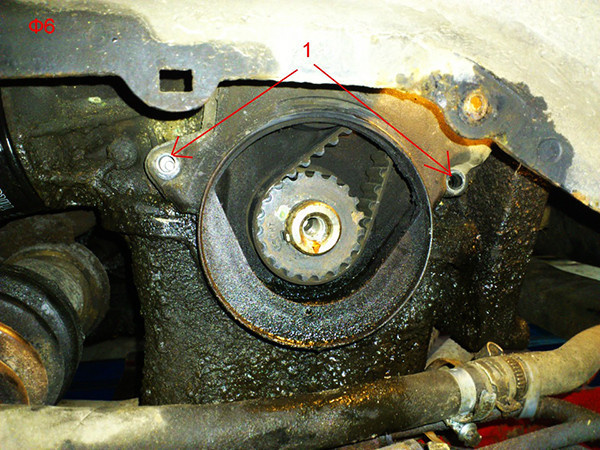
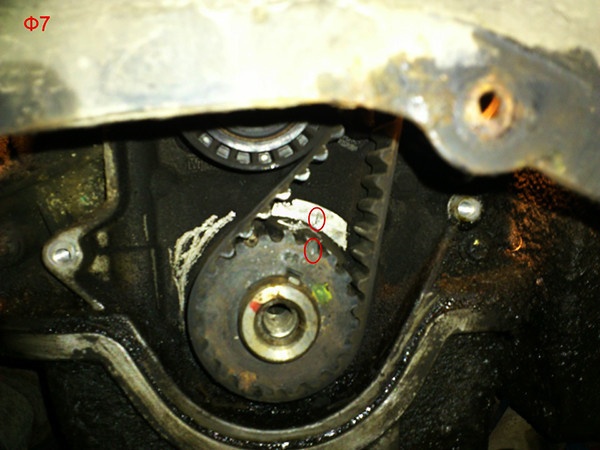
- Engage fifth gear and turn the wheel with the lever until the marks match. Sometimes it happens that there are simply no labels, and in this case you have to make them yourself. For this, a nail file for metal or a rod is suitable. Next, you need to find the TDC of the first cylinder and mark as shown in the photo.
- As for the upper cam pulleys, they are a little more complicated, personally I only marked them in relation to each other, as well as in relation to the engine head. For example, to fix the camshaft pulleys, you can use the "tip" of a T55 screwdriver or a set of screwdrivers. Although, unfortunately, this does not give a 100% guarantee against twisting.
- Next, loosen the bolt on the belt tensioner and carefully remove the belt, it is desirable that the pulleys do not slip. Then completely unscrew the tensioner bolt and remove it.
- If the kit you purchased has bypass rollers, unscrew them and replace them.
- After replacing the rollers, you can proceed to reassembly.
- Install a new tensioner pulley and put on a new Ford Modeo timing belt, pay attention to the presence of an arrow, if any, then install the belt so that the arrow points in the direction of rotation of the shaft.
- You need to put on the timing belt in the direction of its movement, first to the first, then to the second camshaft, observing the tension.
- Pull the tension roller and thread the belt behind it, then put the belt on all the pulleys and rollers one by one, it should not stick out and bite anywhere, the belt should be about 1-2 mm from the edge of the pulley.
- Check the correct tension of the front of the belt, as well as the location and coincidence of all marks, if everything is in order, you can proceed to tension the Ford Mondeo timing belt.
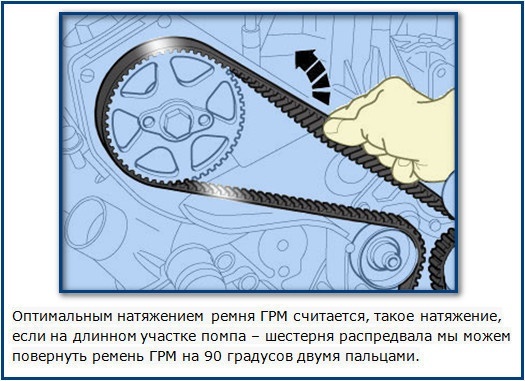
- For this, the manufacturer provides a special hexagon head and a wrench for tightening the locking bolt. Check the tension and fasten the strap, look at the markings. The tension is considered correct if it cannot be rotated by more than 70-90 ° in the gap between the bypass rollers °.
- Engage the fifth gear and take the support back, turn the engine until the marks match. Everything must match. Make sure that there are no extraneous noises or squeaks during rotation.
Further assembly, as I said, is done in the reverse order. I hope that everything was agreed with you and the replacement of the Ford Mondeo timing belt with your own hands was successful.