Replacing the timing belt on a Ford Fusion car
For the normal functioning of the car, all its components must be in good condition. And although foreign cars do not break down as often as domestic ones, they still require maintenance and repair from time to time. So, now we will tell you how to replace the timing belt on a Ford Fusion, how often it needs to be done and what is needed for this.
In what cases is replacement necessary?
When should the timing belt be changed? Such a replacement question occurred to every Ford Fusion owner. And not in vain, because the gas distribution mechanism is a very important part of the car. If the timing belt is not changed in time, it is possible that it will simply break, which will make the operation of the car impossible. So when should you switch? The replacement period is specified in the car's owner's manual.
 Ford Fusion car
The manufacturer recommends changing the belt at least once every 160 thousand kilometers.
However, domestic dealers advise Ford Fusion car owners to do this at least every 120 or even 100 thousand kilometers. But sometimes it is necessary to change the element before that. When? In the following cases:
- if the timing belt is already heavily worn and this can be seen from its outer surface;
- it's time to change when cracks appeared on the strap (this is especially noticeable when it is bent);
- when oil stains began to appear on the product;
- you need to change it when other defects are visible on the surface of the element (for example, the strap has begun to peel off).
Replacement Instructions
Preparing the toolkit
To replace the timing belt you will need:
- asterisk key;
- a set of keys;
- screwdrivers;
- headdress;
- wrench.
star tip
Keys and bones
Long screwdriver
Wrench
Stages
To carry out the replacement work, you will need an assistant:
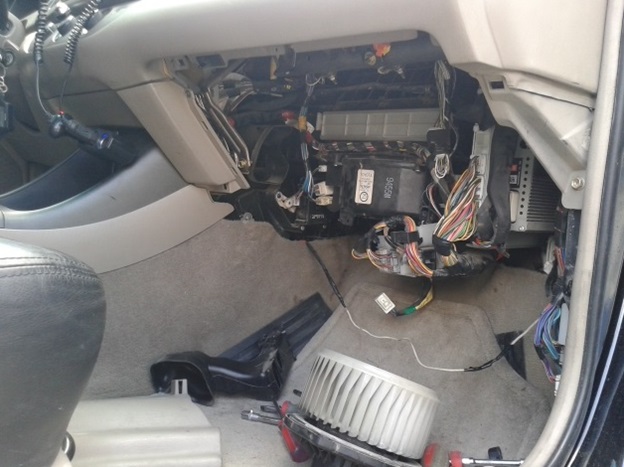
- First lift the right front wheel and remove it. Then remove the engine protection and lift it up a little, replacing the bracket.
- Using an asterisk wrench, unscrew the screws that secure the fender liner and remove it. Using a screwdriver, unscrew the screws from the anther, behind which the crankshaft disc is hidden.
- Loosen the air filter housing mounting bolts. When you're done, slide the clip aside and then remove the air tube. Remove the filter cover.
- Using a wrench, unscrew the bolts that hold the antifreeze tank, remove it. You will also need to remove the reservoir that contains the power steering fluid.
- Using a socket wrench, unscrew the nuts on the engine mount, as well as the bolts with which it is attached to the body. The engine mount can be removed. After that, unscrew the screws that hold the antifreeze pump. Then unscrew the screws holding the generator and disassemble the device or turn it slightly to the side.
- Now you need to unscrew the nine screws that secure the belt cover. The protective cover can be removed. Then, when the motor mount is disassembled, unscrew the screws that hold it and remove the mount to the side.
- Then remove and set aside the high voltage wires from the spark plugs. Unscrew the plastic guides from the air filter. We also unscrew the screws that hold the valve cover. The spark plug of the first cylinder must be removed, and a plastic tube (at least 25 cm long) should be inserted in its place. Now you need to turn the crankshaft disk clockwise, while observing the movement of the tube. The piston of the cylinder in which the tube is installed must be at top dead center.
- Next, you need to unscrew the screw-plug, which is located in the area of \u4,5b\uXNUMXbthe hole for draining the engine fluid. Instead, you need to insert a screw XNUMX cm long, while the crankshaft must be turned, and the screw must be turned until the crankshaft hits it. Timing pulleys must be fixed with metal plates.
- Now put the assistant behind the wheel and turn on the first gear, while the assistant's foot should be on the accelerator pedal. In this case, it is necessary to remove the crankshaft disk mounting bolt. After that, the disc can be disassembled, and then remove the lower timing belt guard. Then the screw unscrewed from the crankshaft must be tightened again and the pulley must be turned clockwise until it stops against the fixing screw (turn on the neutral speed).
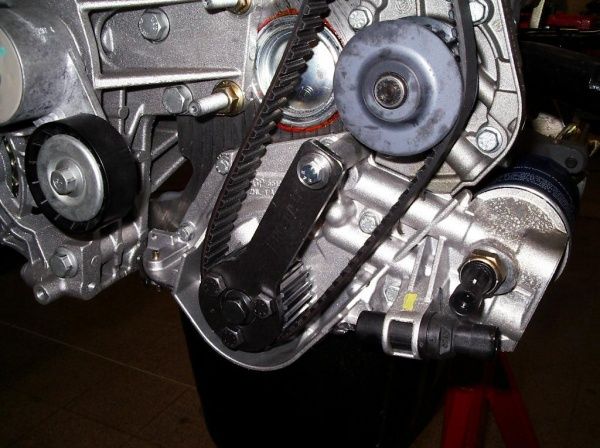
- The timing pulley sprockets and the mechanism belt, as well as the sprocket and crankshaft belt, must be marked.
- Loosen the roller fixing screw and remove it. Tags from the old strap should be transferred to the new one.
- Next, you need to install a new element. Pay special attention to all markings - they must match not only on the belt, but also on the pulley gears. Press the roller and pull the belt over the teeth.
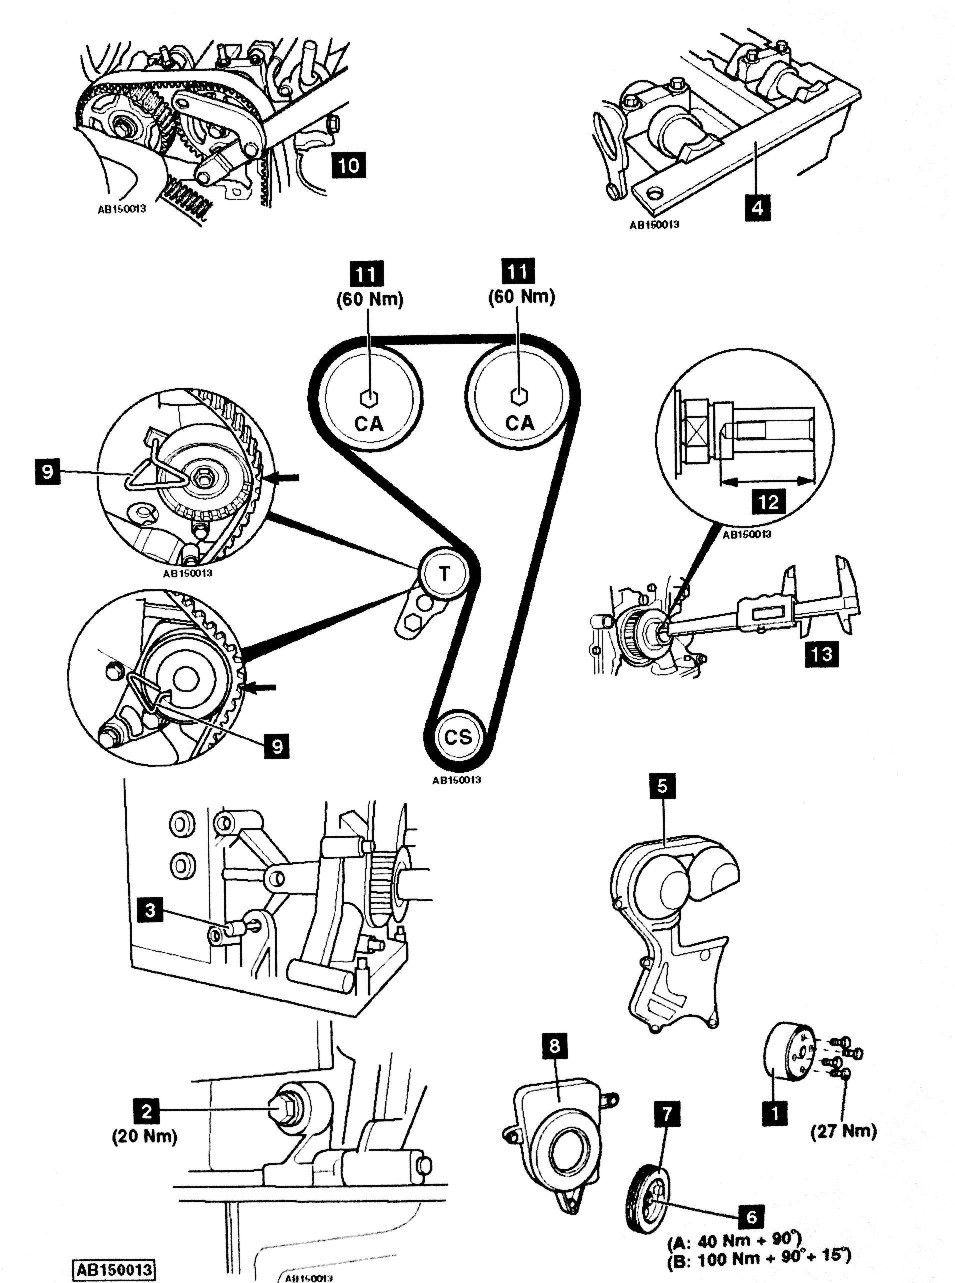
- Now you need to install the lower part of the protective cover in place. Install the pulley, then tighten the screw. Be careful when doing this as there is a chance of bending the set screw so don't use too much force.
- Next, you will need to turn on the first speed. Having done this, unscrew the fixing screw, and then remove the plate, which also served as a fixer. When you are done, you can fully tighten the crankshaft pulley bolt. Here you will need a torque wrench to correctly calculate the moment. The tightening torque should be 45 Nm, after which the screw should be tightened again by 90 degrees.
- Give the crankshaft a few revolutions and return the piston to its highest point. On this, in principle, all the main work is completed. Carry out all installation steps in reverse order.
- Remove a few bolts from the air cleaner cover
- Then we unscrew the screws of the right engine mount, remove it
- After that, unscrew the bolts securing the antifreeze pump
- Unscrew the bolt and nut securing the oscillator and take it aside
- Lock the first piston at top dead center
- After installing a new timing belt, we assemble the generator and tighten the belt
As you can see, replacing a timing belt on a Ford Fusion is quite labor intensive. Before proceeding with the replacement of a part, many procedures must be performed. Therefore, immediately decide: can you afford it? Can you do everything on your own? Or maybe it makes sense to seek help from professionals?