Hyundai Solaris clutch replacement
Tools:
- L-shaped socket wrench 12 mm
- mounting blade
- caliper
- Driver for centering the driven disc
Spare parts and consumables:
- Marker
- Driver for centering the driven disc
- Refractory grease
The main malfunctions, the elimination of which requires the removal and disassembly of the clutch:
- Increased noise (compared to normal) when disengaging the clutch;
- jerks during clutch operation;
- incomplete engagement of the clutch (clutch slip);
- incomplete disengagement of the clutch (the clutch "leads").
Note:
If the clutch fails, it is recommended to replace all its elements at the same time (driven and pressure plates, release bearing), since the work of replacing the clutch is laborious and the service life of undamaged clutch elements is already reduced, reinstall them, you may need to remove / install the clutch again after a relatively short run.
1. Remove the gearbox as described here.
Note:
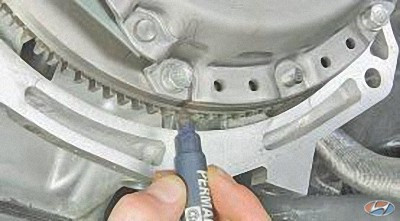
If an old pressure plate is installed, mark in any way (for example, with a marker) the relative position of the disc housing and the flywheel to set the pressure plate to its original position (for balancing).
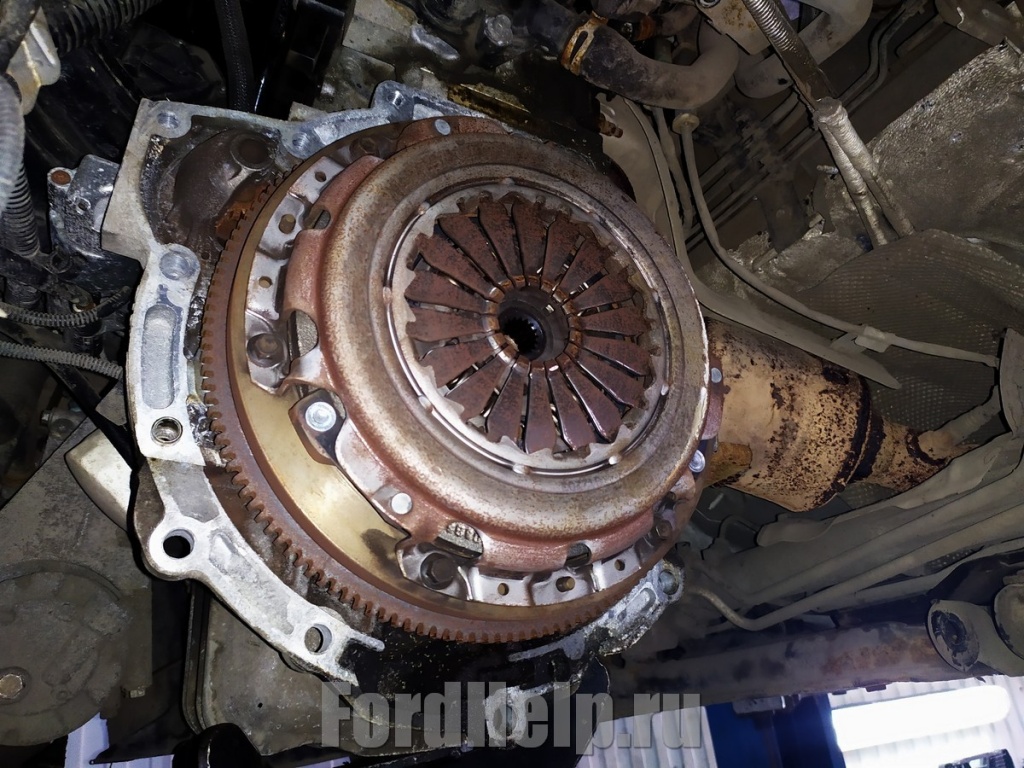
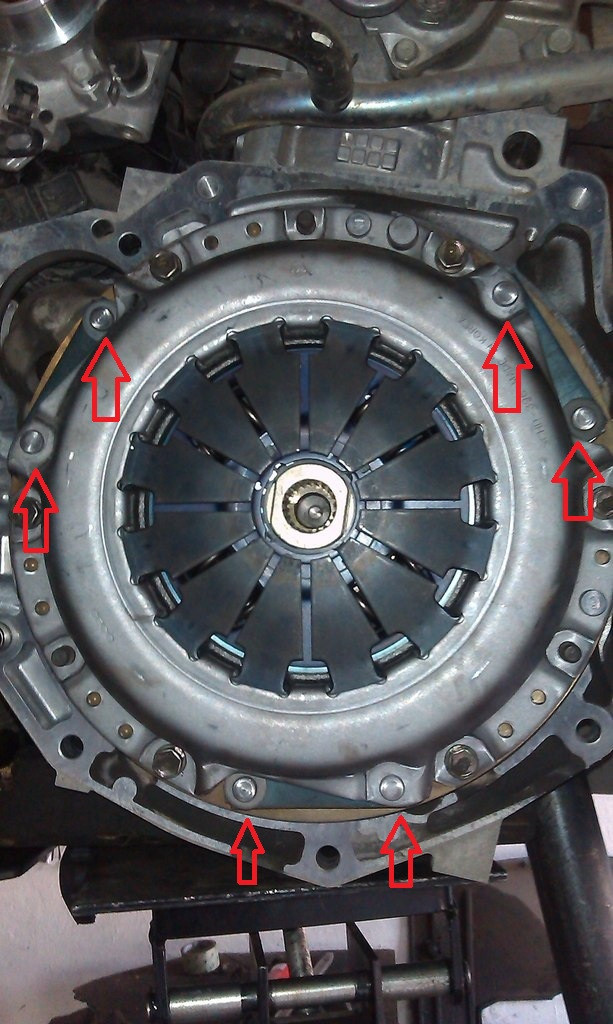
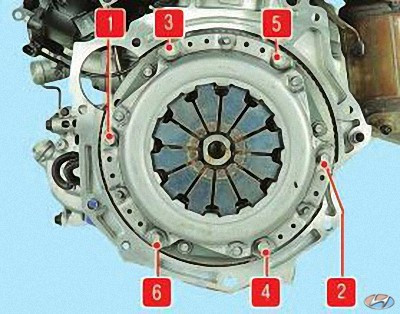
2. While holding the flywheel with a mounting spatula (or large screwdriver) so that it does not turn, unscrew the six bolts that secure the clutch pressure plate housing to the flywheel. Loosen the bolts evenly: each bolt makes two turns of the wrench, going from bolt to bolt in diameter.
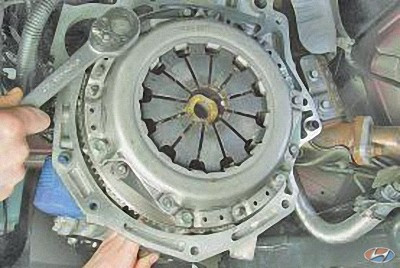
Note:
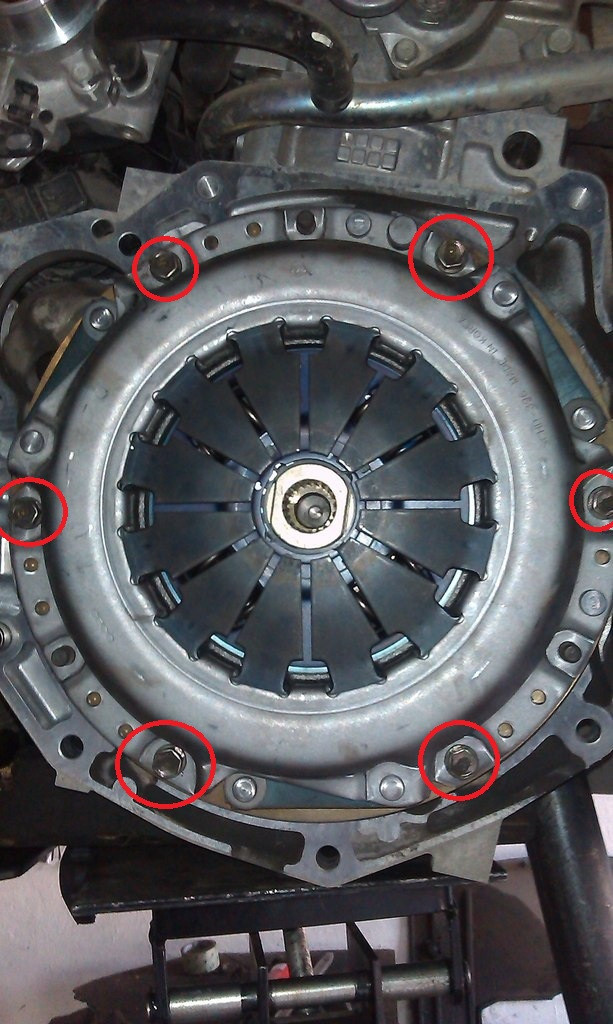
The photo shows the mounting of the clutch pressure plate housing.
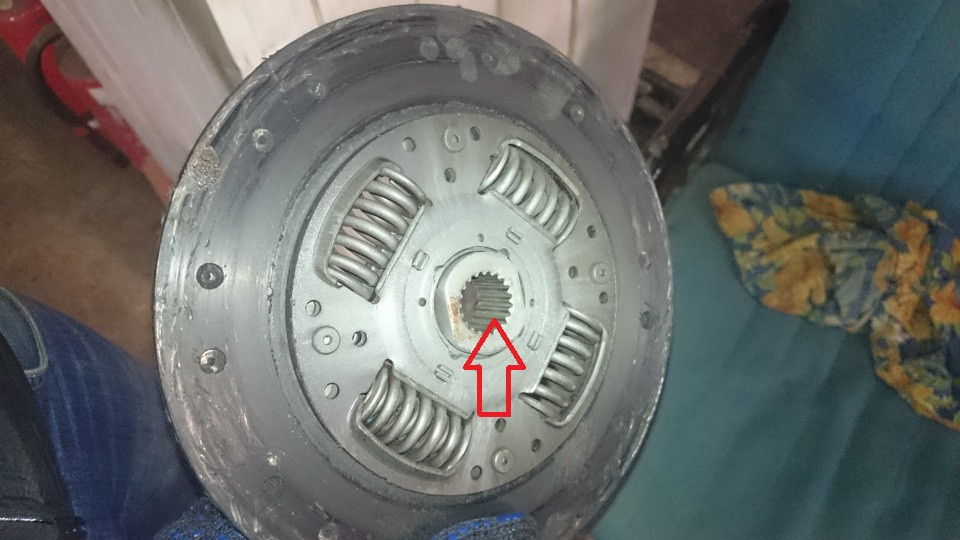
3. Relieve pressure from the clutch and clutch discs from the flywheel by holding the clutch disc.

4. Examine a conducted disk of coupling. Cracks in the details of the driven disk are not allowed.
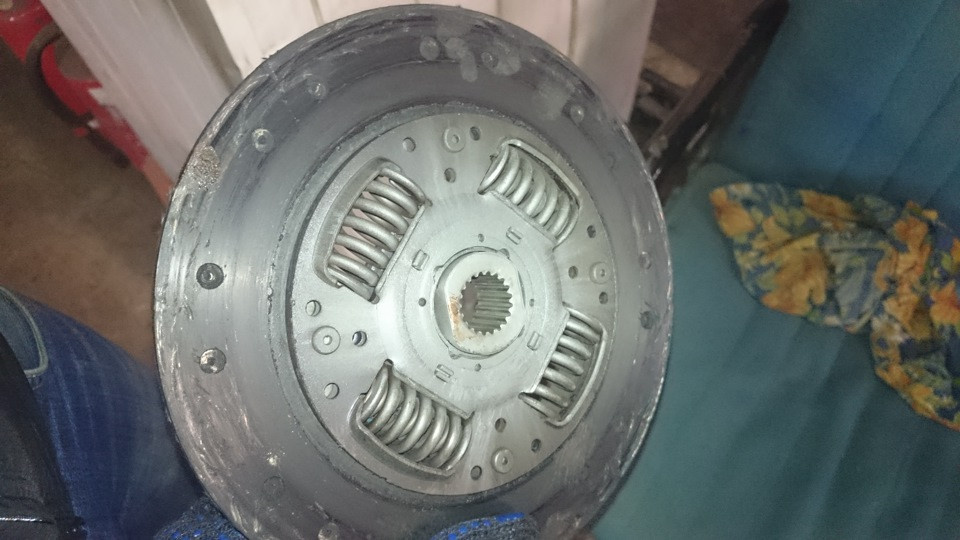
Note:
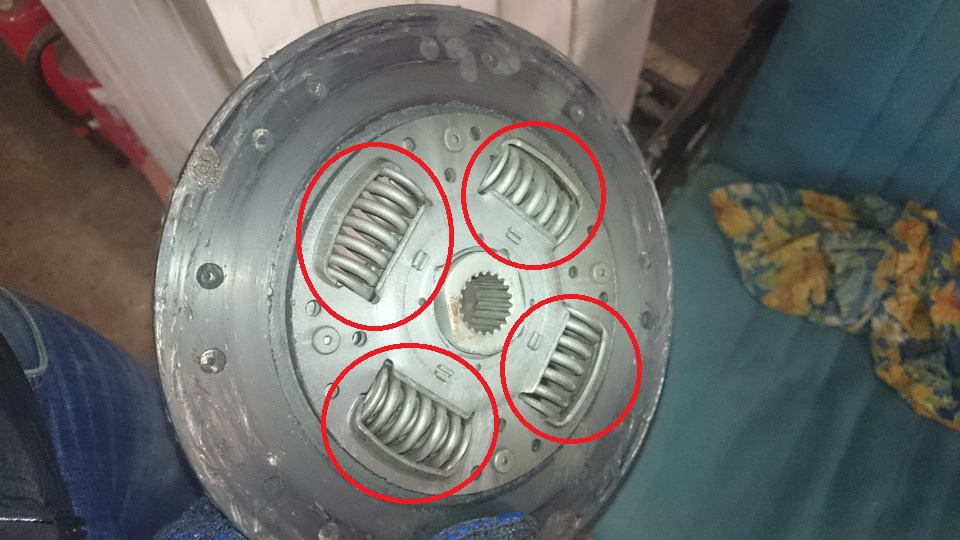
The driven disk consists of two annular friction linings, which are attached to the disk hub through damping springs. If the lining of the driven disk is oily, then the cause may be wear of the gearbox input shaft oil seal. It may need to be replaced.
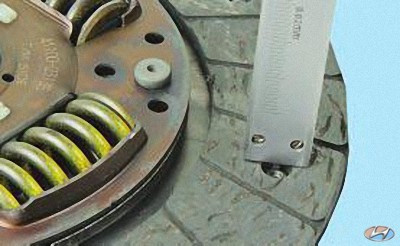
5. Check up degree of wear of friction linings of a conducted disk. If the rivet heads are sunk less than 1,4 mm, the friction lining surface is oily, or the rivet connections are loose, the driven disk must be replaced.
6. Check up reliability of fastening of springs of the shock-absorber in nests of a nave of a conducted disk, trying to move them in nests of a nave manually. If the springs move easily in place or are broken, replace the disc.
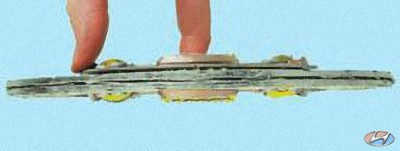
7. Check up beating of a conducted disk if its deformation is found out at visual survey. If the runout is greater than 0,5 mm, replace the disc.
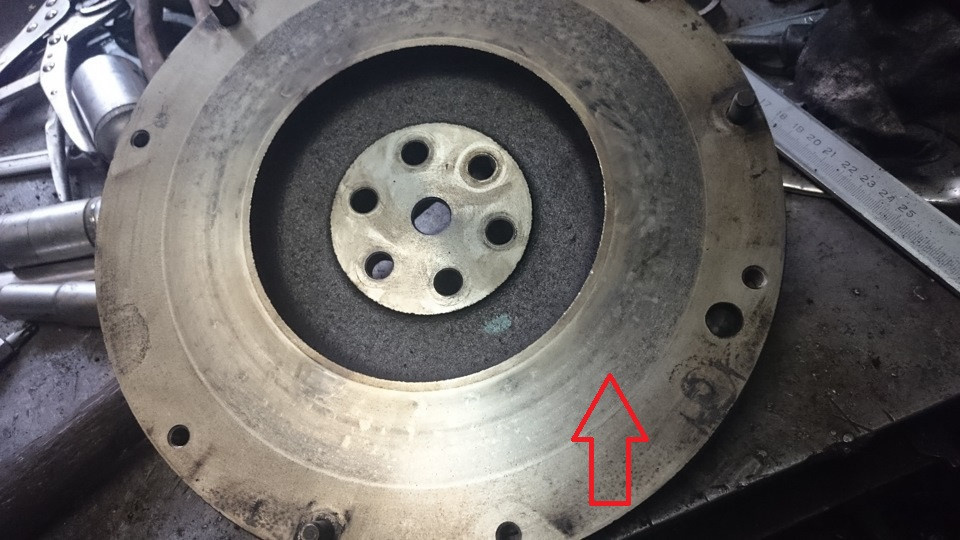
8. Inspect the friction surfaces of the flywheel, paying attention to the absence of deep scratches, scuffs, nicks, obvious signs of wear and overheating. Replace defective blocks.
See also: Iveco bearings on Chevrolet Niva reviews
9. Inspect the working surfaces of the pressure plate, paying attention to the absence of deep scratches, scuffs, nicks, obvious signs of wear and overheating. Replace defective blocks.
10. If the rivet connections between the pressure plate and body parts are loose, replace the pressure plate assembly.
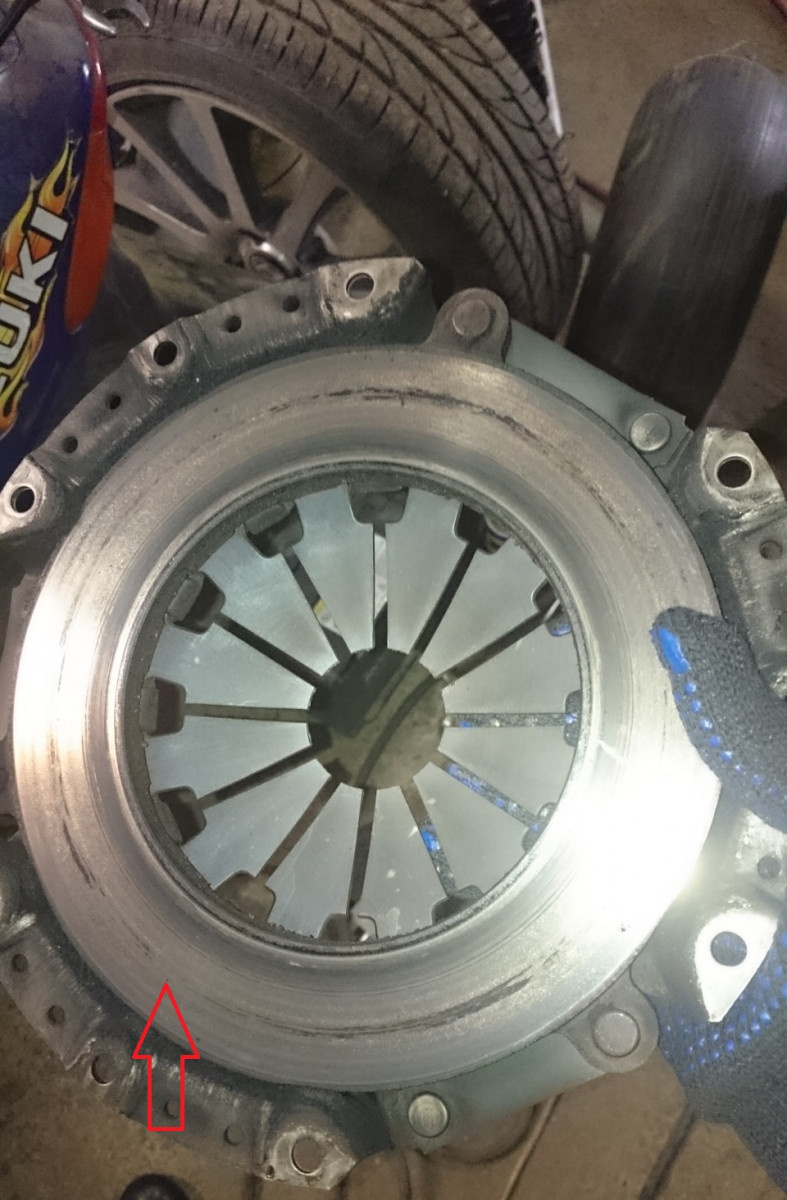
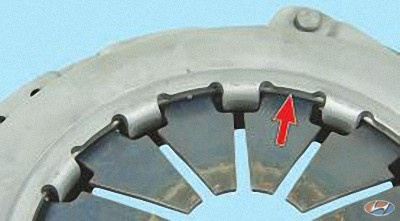
11. Visually assess the condition of the pressure plate diaphragm spring. Cracks in the diaphragm spring are not allowed. Places are highlighted in the photo, these are the contacts of the spring petals with the release bearing, they should be in the same plane and not have obvious signs of wear (wear should not be more than 0,8 mm). If not, replace the pressure plate, complete.

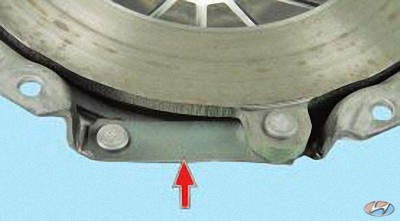
12. Inspect the connecting links of the casing and disc. If the links are deformed or broken, replace the pressure plate assembly.
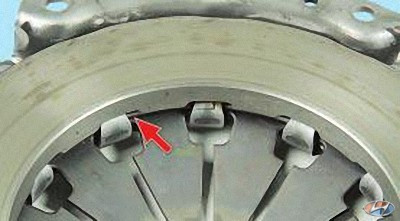
13. Visually assess the condition of the compression spring support rings from the outside. Rings must be free of cracks and signs of wear. If not, replace the pressure plate, complete.
14. Visually assess the condition of the compression spring support rings inside the spring. Rings must be free of cracks and signs of wear. If not, replace the pressure plate, complete.
15. Before installation of coupling check up ease of a course of a conducted disk on splines of a primary shaft of a transmission. If necessary, eliminate the causes of jamming or replace defective parts.
16. Apply high melting point grease to the driven disc hub splines.
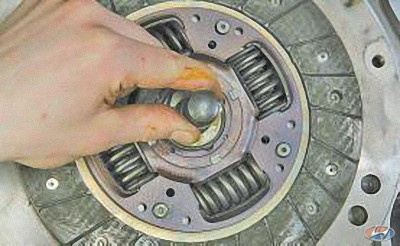
17. When assembling the clutch, first install the driven disc with a punch.
18. Next, install the pressure plate housing, aligning the marks made before removal, and screw in the bolts securing the housing to the flywheel.

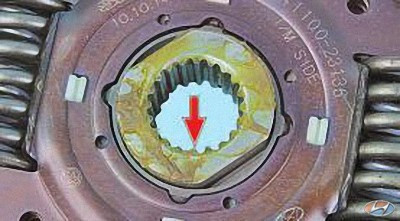
Note:
Install the driven disc so that the protrusion of the disc hub faces the diaphragm spring of the clutch housing.
19. Screw the bolts evenly, one turn of the key, in the sequence shown in the photo.
20. Remove the mandrel and install the reducer as described here.
21. Check clutch operation as described here.
Item missing:
- Tool photo
- Photo of spare parts and consumables
- High-quality repair photos
Clutch replacement in Hyundai Solaris takes from 3 to 8 hours. Hyundai Solaris clutch replacement is carried out only with the removal / installation of the gearbox. On some models, the subframe must be removed to remove the box. It is best to determine what exactly to change: a disk, a basket or a release bearing, best of all after the case has been removed.
See also: Scheme of the VAZ 2114 heating device
The decision to replace the clutch with a Hyundai Solaris should be made after a diagnosis in a car service. Some of the symptoms may look like a faulty gearbox or shift mechanism. In robotic gearboxes (robot, easytronic, etc.) after changing the clutch, the setting must be adapted. This can be done at our stations.
Hyundai Solaris clutch replacement cost:
| Options | Price |
|---|---|
| Hyundai Solaris clutch replacement, manual transmission, petrol | from 5000 rubles. |
| Clutch adaptation Hyundai Solaris | from 2500 rubles. |
| Removal/installation of Hyundai Solaris subframe | from 2500 rubles. |
If you notice that the clutch is starting to behave differently than before, we recommend that you immediately contact a car service for diagnostics. If this time starts, the flywheel will need to be replaced later. And the cost of the flywheel is several times higher than the cost of the clutch kit.
When replacing the clutch, we also recommend replacing the crankshaft rear oil seal and the axle oil seals. It is worth paying attention to the condition of the seal of the gear shift rod. The cost of oil seals is minimal and it is better to do everything at once, without overpaying in the future for the same work.
The cost of the work depends on the need to remove the subframe and remove the box. It happens that people try to replace the clutch on their own, nothing comes of it, and they bring us a semi-disassembled car.
Also, after replacing the clutch, we recommend changing the oil in the gearbox.
The main symptoms of a bad clutch are:
- Increased noise when engaging and disengaging the clutch;
- incomplete inclusion ("slips");
- incomplete shutdown ("fails");
- idiots
Clutch replacement warranty: 180 days.
The best clutch kits are produced by: LUK, SACHS, AISIN, VALEO.
As practice shows, in most models of foreign cars, the clutch calmly nurses about 100 thousand kilometers. The exception is cars for those who like to drive along city streets. But Solaris has become an unpleasant exception, the clutch kit for the Hyundai Solaris usually needs to be changed after 45-55 thousand. Fortunately, the problem is not in the poor quality of the parts, but in a special valve. It is designed to slow down the clutch and help novice drivers pull off more smoothly. But in the end, such modifications lead to slippage and accelerated wear of the friction discs.
You can determine that a clutch repair is required by the following symptoms:
- increased noise when the clutch is engaged;
- the pedal began to be pressed hard, the grip is too high or vice versa - too low;
- jerks and jerks at the beginning of the movement;
- when the pedal is pressed all the way down, a strange noise is heard.