Renault Duster clutch replacement
Content
The clutch is a structure that transmits torque from the engine to the wheels.
It contributes to the smooth connection of the engine and other mechanisms of the system, participates in gear shifting in vehicles equipped with a manual transmission.
The material step by step disassembled how to replace the Renault Duster clutch with the disassembly of the gearbox and without this stage. After repair, it is important to bleed the Duster clutch to remove air bubbles from the system. How to do this, read on.

Signs of a failing clutch
Malfunction of the Renault Duster clutch assembly manifests itself:
- Failure of the pedal, jamming when the gear is turned on.
- Burning smell emanates from the pads.
- Rapid gas formation in high gear causes the engine to rev up without increasing revs.
- The design makes noise, buzzes and rattles when you press the pedal.
- When starting off, as well as when shifting gears, the Duster vibrates.
- Gears are switched with difficulty; when switching to a higher or lower speed, the structure is frayed.
If problems arise, it is necessary to diagnose and replace the Renault Duster clutch.
Articles
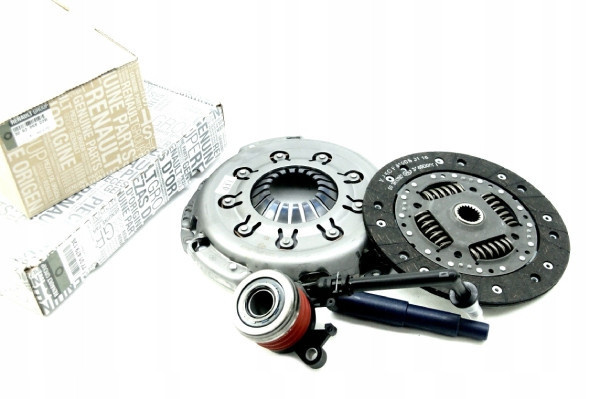
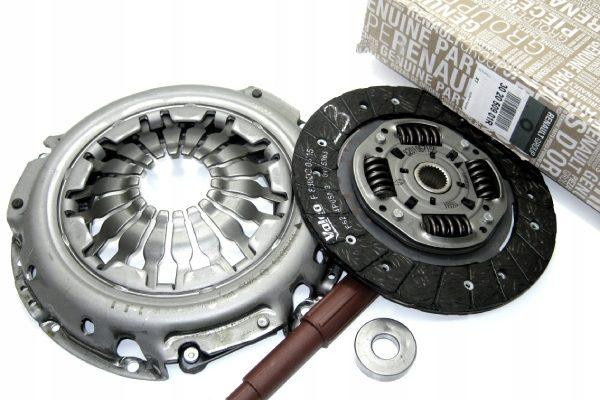
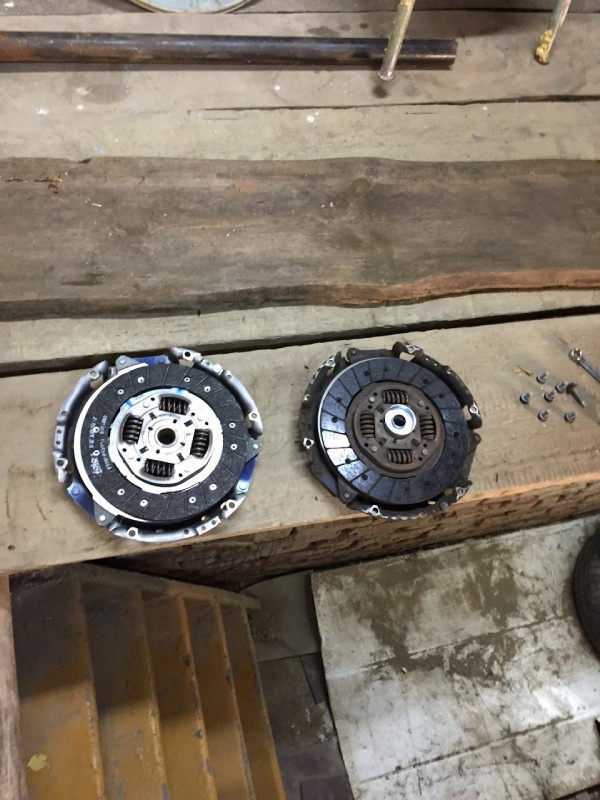
RENAULT 77014-79161 - Duster Diesel 1.5 clutch kit without compression bearing.
Analogues (also without disengaging the clutch):
- SACHS 3000950629
- LUKE 623332109
- VALEO 826862.
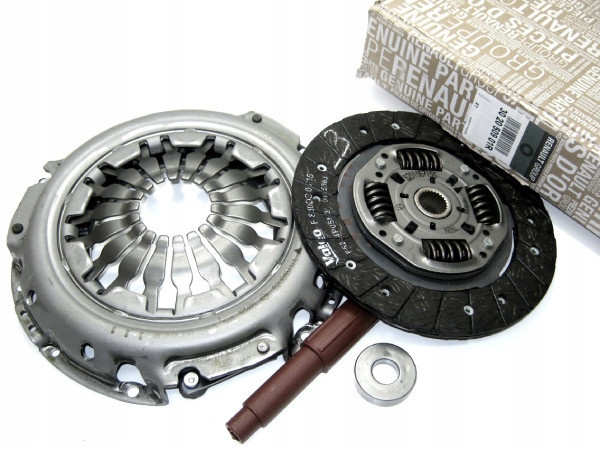
The original kit (disk and basket) for the 1.6 K4M engine with all-wheel drive - RENAULT article 7701479126.
Substitutes:
- VALEO 826303
- LUKE 620311909
- SASIK 5104046
- SACHS 3000951986.
Original clutch part for 1.6 K4M front wheel drive RENAULT 302050901R.
The catalog number of original spare parts (without disengaging the clutch) for the 2.0 engine with all-wheel drive and front-wheel drive is 302059157R. Analogues:
- MEKARM MK-10097D
- VALEO 834027 with release
- SACHS 3000950648
- LUKE 623370909
Detailed description of Renault Duster clutch replacement
When replacing a disc, basket, clutch on a Renault Duster, it is necessary to disassemble the gearbox. To do the job, the Duster is driven into a viewing hole or overpass.
For 2-liter and 1,6-liter engines, the workflow is identical.
Drain the oil from the gearbox
Before replacing the clutch on a Renault Duster, it is necessary to drain the lubricant from the gearbox. We find the plug of the control hole and remove the dirt around it. We remove the plug, inspect the gasket for tears, cracks and evaluate elasticity. A stretched or broken gasket must be replaced.
To drain the liquid, we dismantle the Renault Duster engine protection. After unscrewing the drain plug with an 8 mm square, drain the oil into a container located under the hole. We twist the drain.
After performing the necessary work, fresh fat is drained through the control neck.
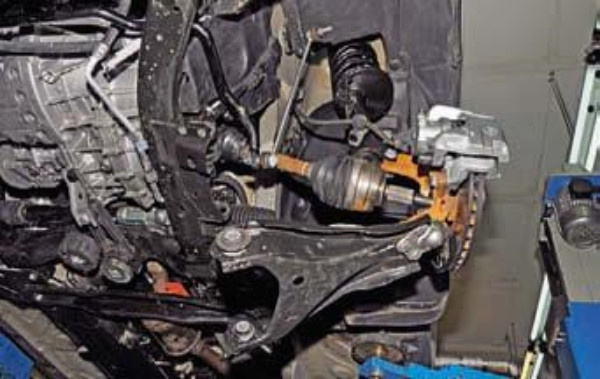
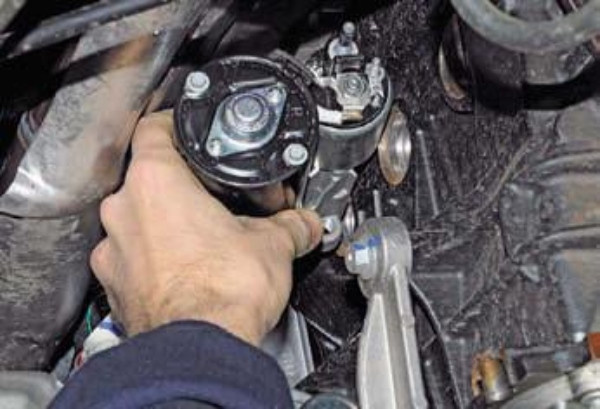
Removing the front wheel drive
You also need to remove the front drive wheels. To carry out work, it is necessary to use a viewing ditch or overpass.
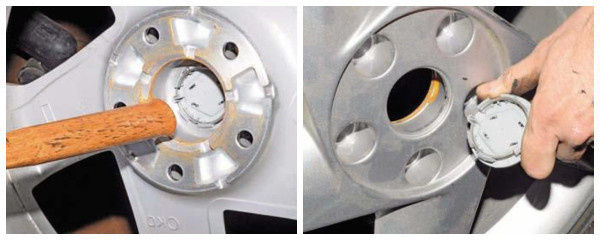
- We disassemble the wheel, get rid of the decorative plug of the disk by pressing on it from the inside.

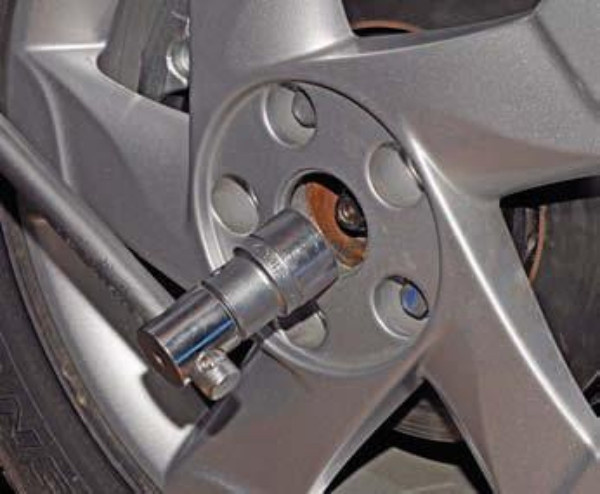
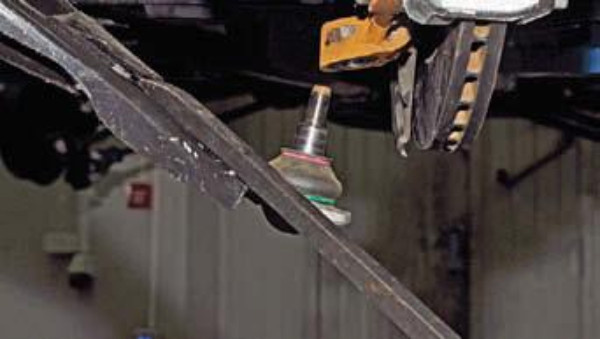
- To disassemble the nut that fixes the hub bearing, we put the wheel on two bolts, put the car on the ground, put it on the handbrake. With a 30mm head, unscrew the nut (not quite), after hanging the car, remove the wheel.
- Using a screwdriver inserted into the ventilation space of the brake disc, remove the wheel bearing fixing nut. When assembling, a new retainer is used. As a temporary solution, you can use the old element, the petals of which are pre-compressed with a vise.
- Having removed the wheel, we fix the Duster on the stands.
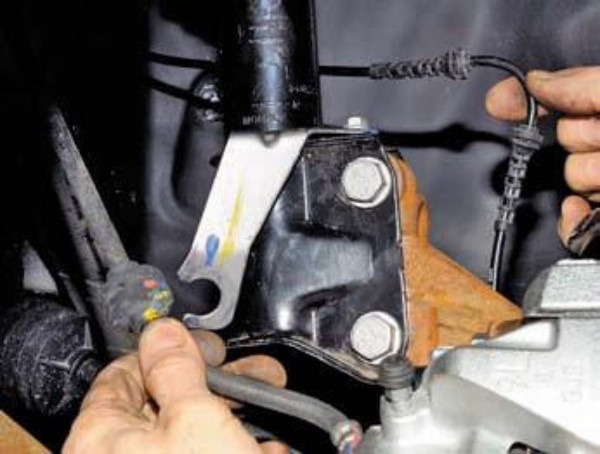
- From the shock absorber mount, remove the harness with wires that feed the front wheel speed sensor, brake hose.
- Remove the stabilizer bar bracket from the strut mount.
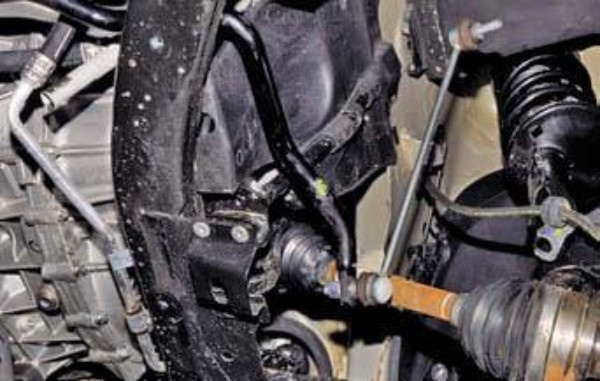
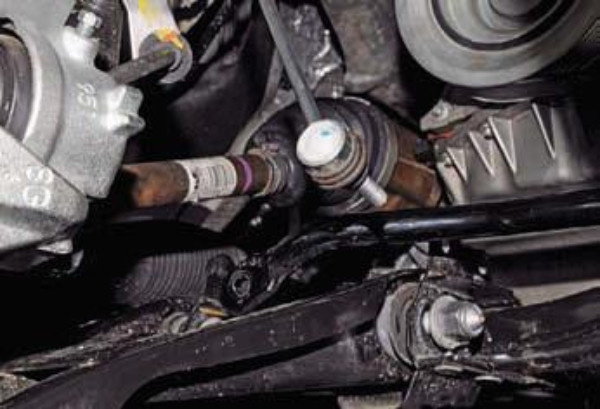
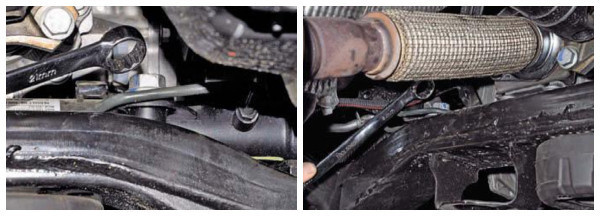
- We disassemble the screws securing the front suspension arm to the subframe.
- The above step can be replaced by removing the ball stud that attaches to the steering knuckle.
- We twist the fist with the rack, disconnect the external hinge, removing the hub by removing the knurled shank. Note that axial movement of the wheel drive shaft is not allowed as the three pin bearings may fall out of the inboard joint housing.
- With a mounting blade we rest against the gearbox housing, remove the inner hinge housing, which is included in the gearbox, remove the block.
- To remove the drive from the right wheel, it is necessary to lean with a mounting blade on the threaded tube through the bolt head and, applying force, release the body of the inner hinge from the splines located on the through axis of the distribution link. Grease will be required to lubricate the splines during installation.
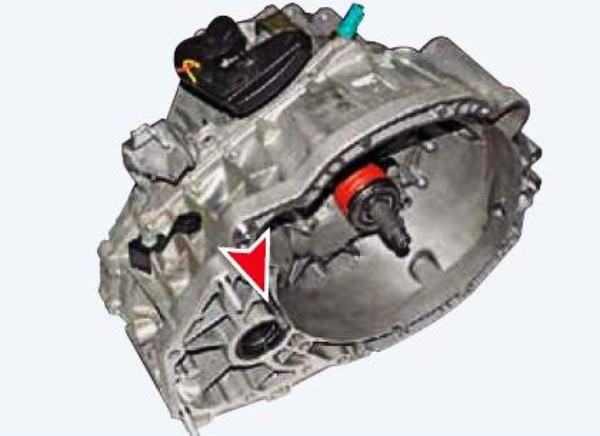
- No cracks, abrasions or an insufficiently elastic surface are allowed on the sealing ring of the Renault Duster transfer case through bridge. In the presence of these shortcomings, the element must be replaced.
- After replacing the Duster clutch, all components are assembled in the reverse order of disassembly.


Removing the transmission cables
Another step in preparing for replacing the Duster clutch is disassembling the gearbox cables.
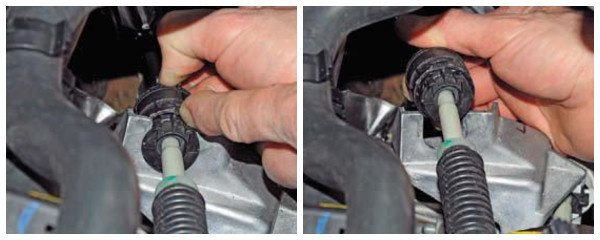
- The breather hose is attached to the top with a plastic spike. The sleeve with which the cable is installed in the sleeve on the gearbox support must be pressed out and removed from the support.
- Using needle-nosed pliers, we disassemble the tip mounted on the ball pin of the gear lever. To do this, bend the plastic cap of the handpiece.
- We carry out manipulations with the corresponding bushing, cable cover, Renault Duster gear selector.
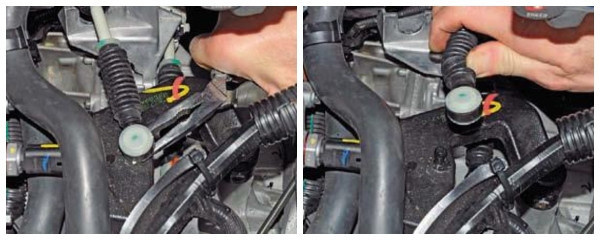
- From below, we disassemble the bolts that fix the intermediate transmission support support and the lower part, get rid of the stud connecting the transmission hinge support, the transmission gearbox output shaft flange. Turn out cardan shaft.
Dismantle the starter
Removing the starter before replacing the Renault Duster clutch must be done by first installing the car on a viewing or overpass.
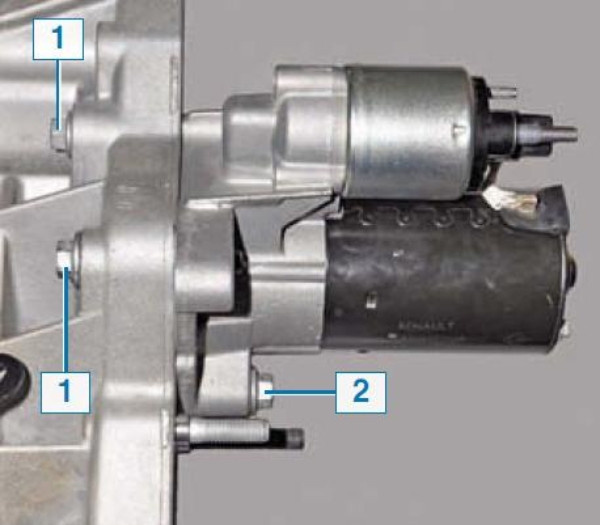
Location of starter mounting bolts
- Get rid of the air intake, resonator.
- We turn off the head by 13mm, remove the bolts securing the starter towards the engine compartment.
- From under the bottom, using an 8 mm head, unscrew the nut that secures the drive tip to the control output of the Duster traction relay.
- After dismantling the end of the cable from the relay output, using the “10” head, we get rid of the nut that fixes the end of the cable with the positive terminal of the battery.
- Weaken the contact pin of the retractor tip relay.
- We get rid of the starter mounting bolt from below with a 13mm head.
- We disassemble the starter.


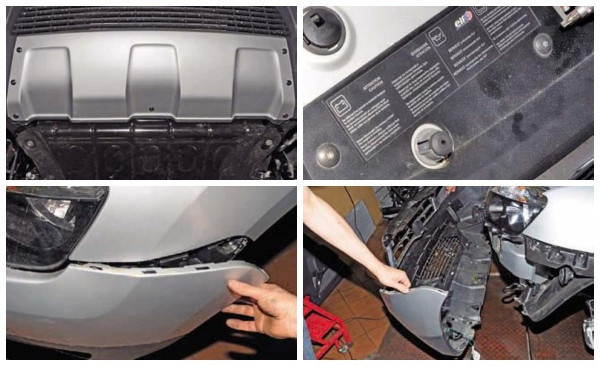
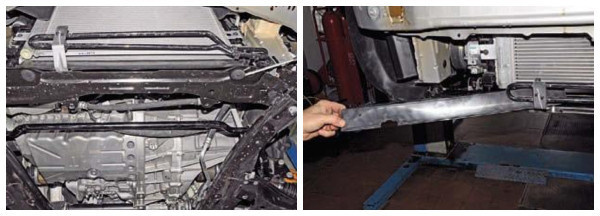
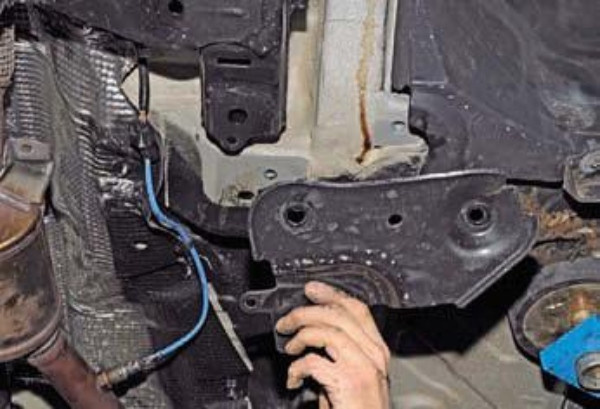
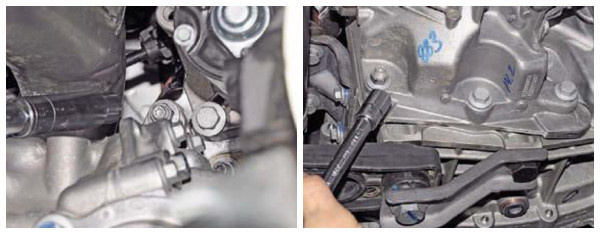
Remove the subframe
- We carry out disassembly of the front bumper, dust collectors of the engine compartment Duster.
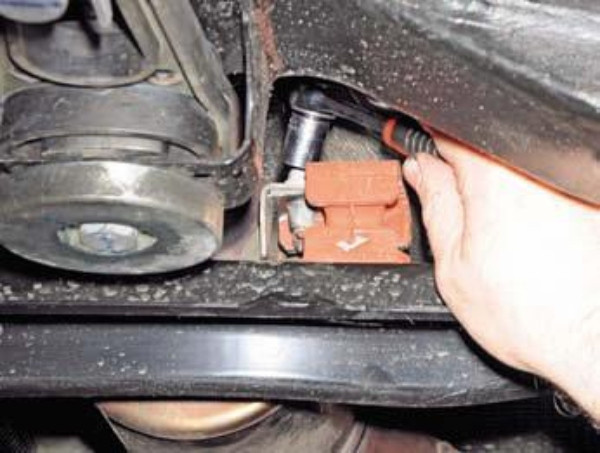
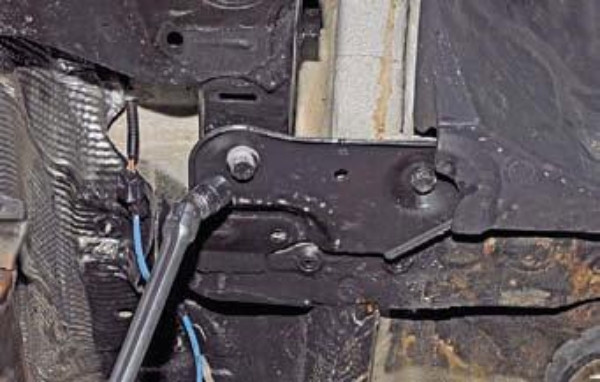
- Remove the retainer connecting the catalytic converter mount and converter bracket.
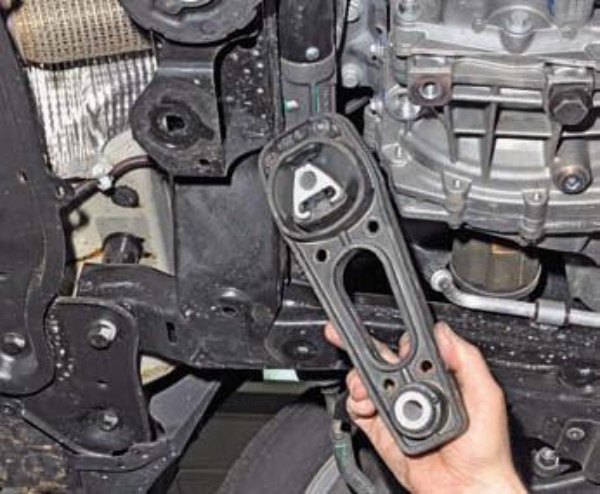
- Having unscrewed the two mounting bolts, remove the rear engine mount, catalyst suspension damper.
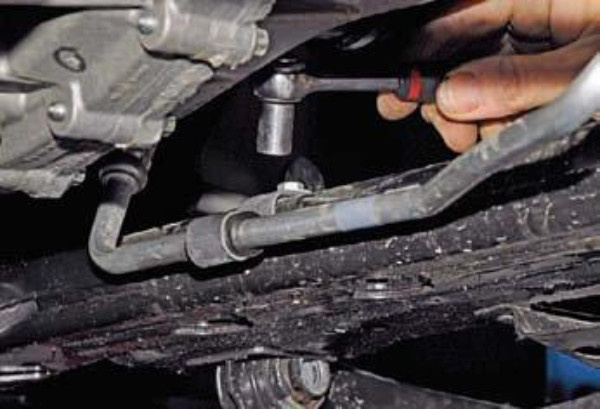
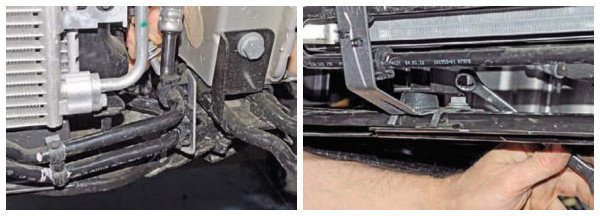
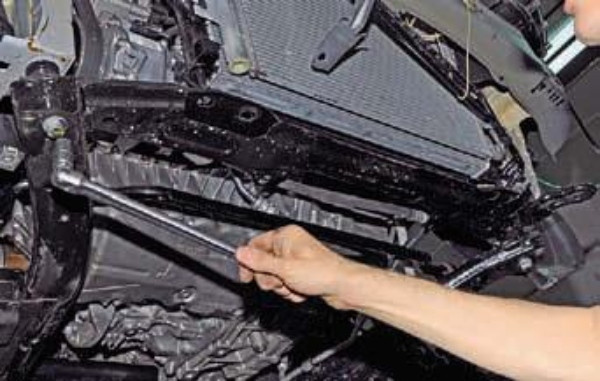
- Using a 10mm socket, loosen the bolt that secures the power steering tube bracket to the Renault Duster. It is on the subframe on the left.
- We unscrew the nuts securing the bolts of the lower and upper fastenings of the support of the left subframe.
- Remove the right holder in the same way.
- We disassembled the connection of the fingers of the lower hinges of the anti-roll bar struts and the stabilizer link.
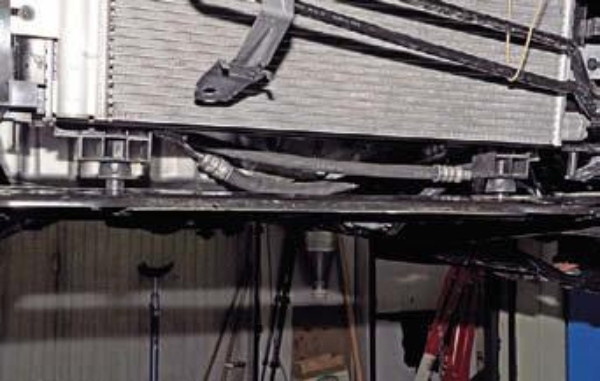
- We remove the lower radiator deflector by disconnecting the plugs with which it is attached to the air conditioner condenser with a screwdriver.
- We unscrew the screws that hold the power steering radiator on the left and right.
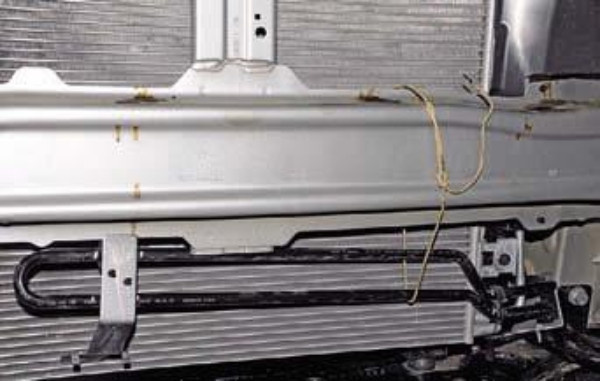
- Using wire, we attach the power steering radiator to the front bumper beam.
- Remove the fasteners holding the two upper supports of the fan housing.
- Having lifted the casing, radiator, condenser, we release the pillows on the lower supports of the casing from the recesses and fix the prefabricated structure on the upper crossbar of the radiator frame.
- On the left, on the right, we disconnect the subframe from the front suspension arms.
- On the left, on the right, we unscrew the bolts with which the subframe is connected to the body in front, behind. We also disconnect the amplifier from the body subframe.
- We disassemble the heat shield by removing the screws securing it to the sub frame and the screw securing the heat shield to the support.
- We loosen the fastenings of the steering assembly and subframe on the left and right. Before completely removing the rear bolts, we secured the subframe with adjustable stops.
- After unscrewing the rear mounting bolts, remove the amplifiers from the subframe.
- Using an adjustable stop, lower the subframe by 9-10 cm, remove the steering gear mounting bolts.
- We hang the steering mechanism to the right.
- We remove the clamps with which the auxiliary frame is connected to the body in front. We removed the structure of the subframe and anti-roll bar.
- When installing the assembly after replacing the clutch, proceed in reverse order. All fasteners are tightened to the specified torque.
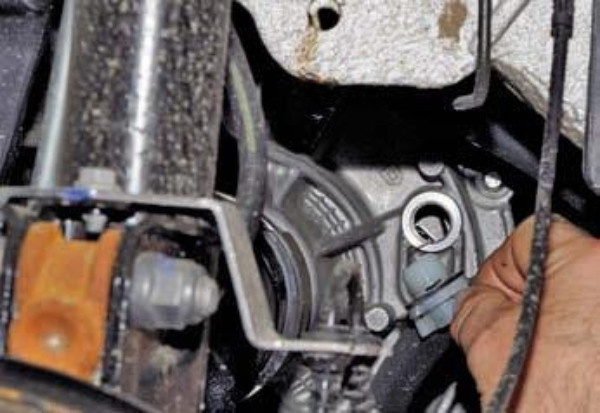
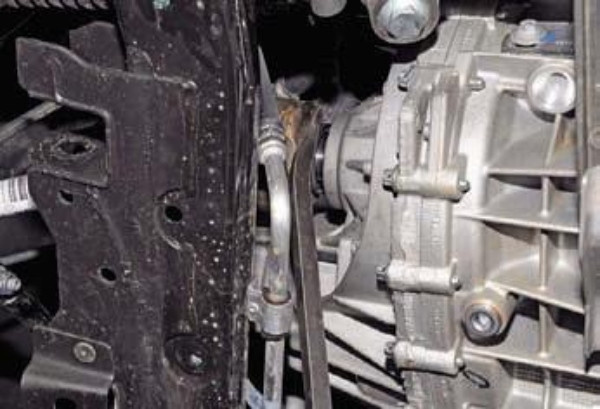
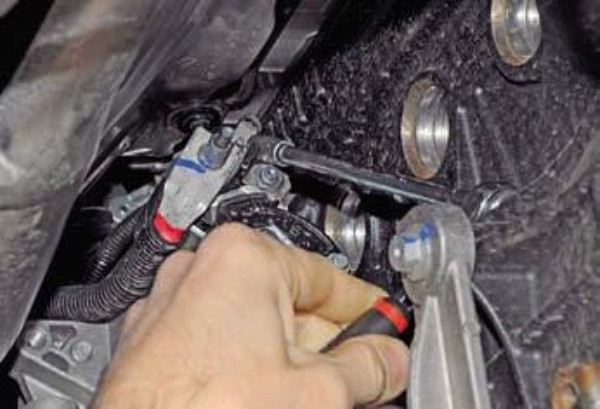
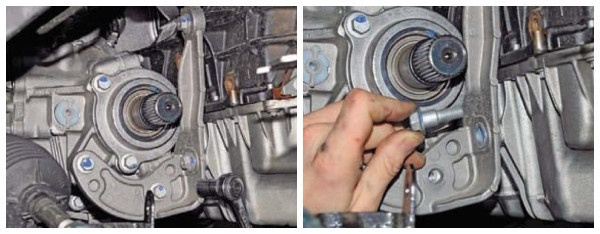
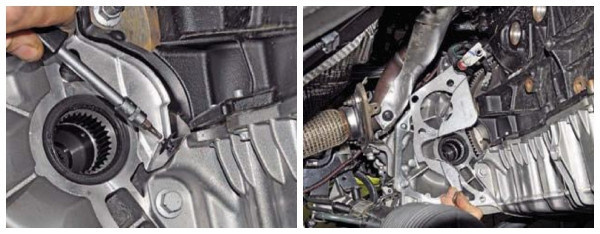
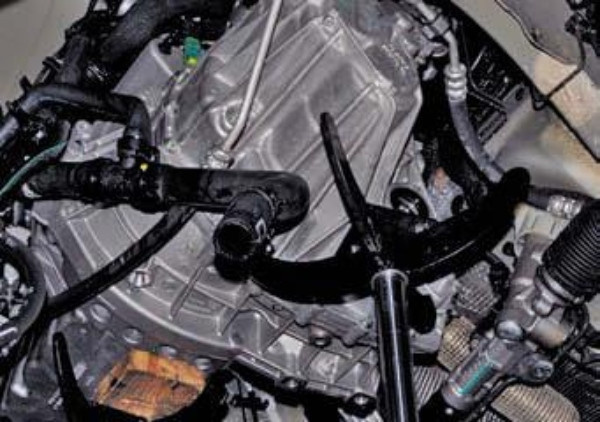
We dismantle the dispenser
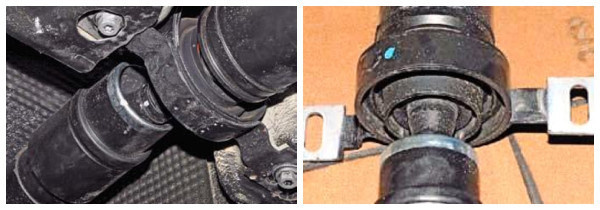
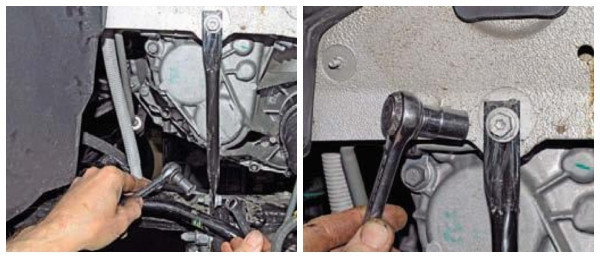
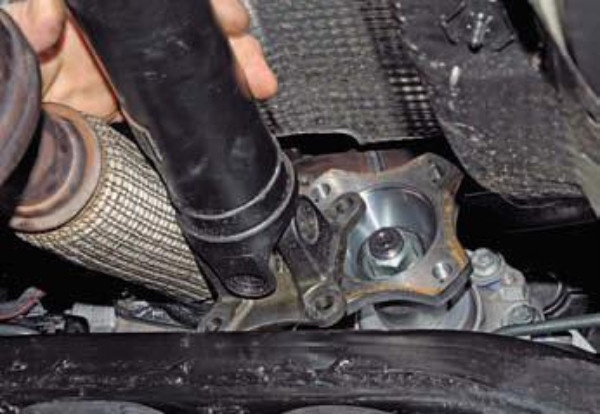
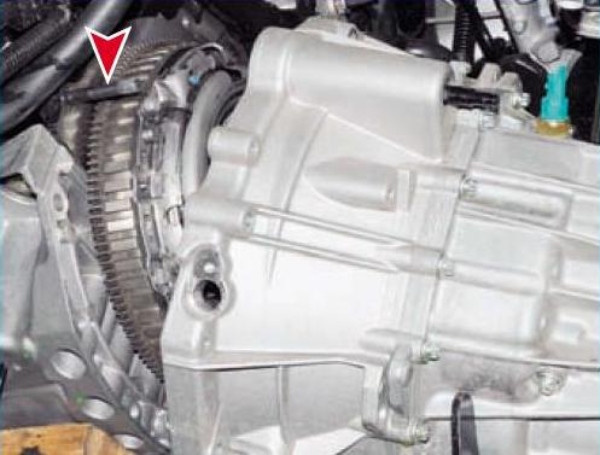
- After removing the centering collar of the flange of the driveshaft yoke from the flange of the output shaft of the transfer case, remove the bolts securing the transfer case bracket, the bracket connecting the cylinder block and the engine oil pan. We disassemble the bracket after unscrewing the screws.
- Remove the bolt securing the transfer case to the clutch housing.
- with a 13 mm head with an extension, unscrew the nut securing the transfer case fastening stud, Renault Duster clutch housing. By analogy, we get rid of the bottom nut and two bolts from the bottom.
- Understandable dispenser.
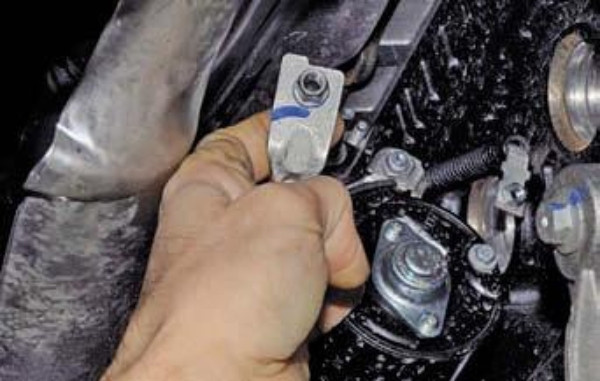
- After replacing the necessary components, we install the frame in place, combining the clutch housing bolts, the transfer case mounting holes.
- We fix the through axis of the transfer box link in the spaces of the differential axle shaft, and the drive shaft - in the splines of the differential housing. For proper installation, rotate the shafts of the gas distribution unit. Then place the transfer case on the clutch housing so that the centering of the transfer case is facing the mounting sleeves.
- Secure the assembly by tightening all removed fasteners so that the bracket does not deform.
Arrangement of studs for attaching the transfer case to the clutch housing
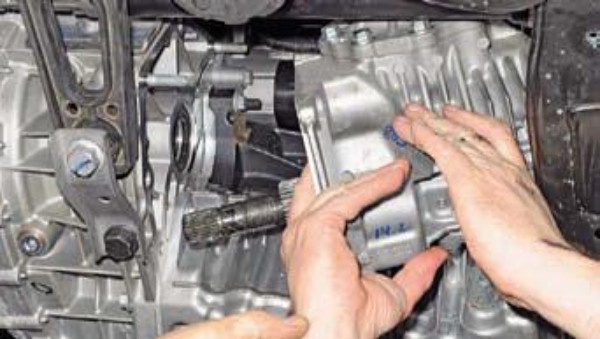
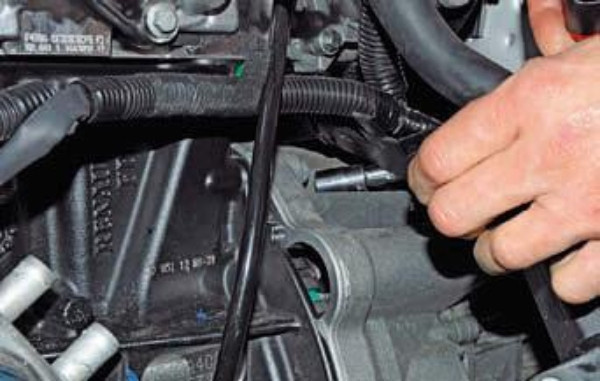
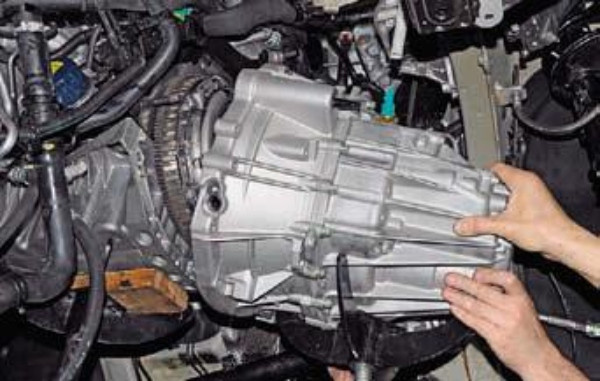
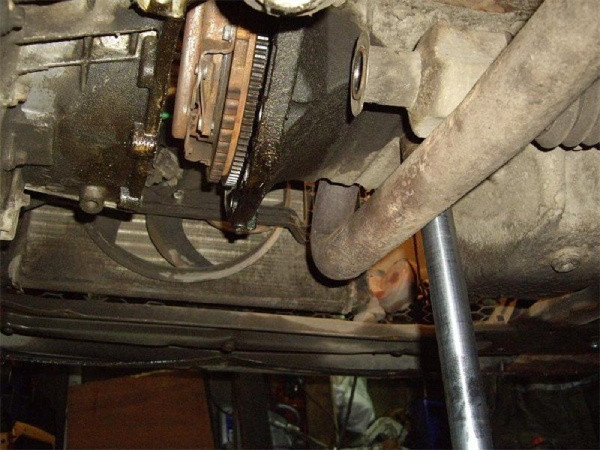
Removing the transmission
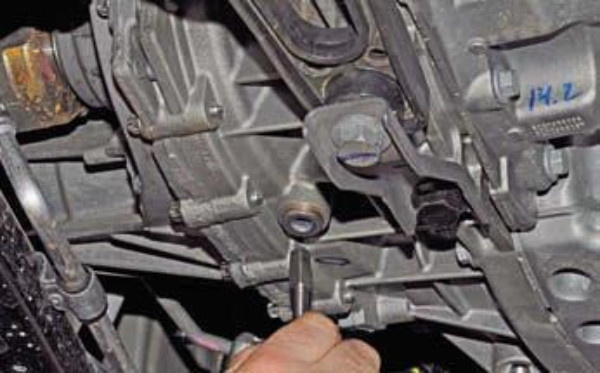
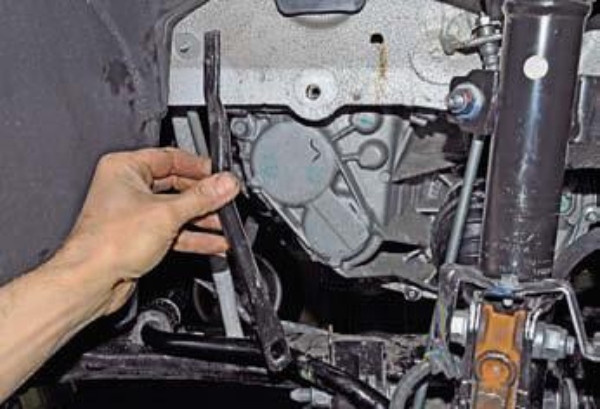
- Using the Torx T-20 wrench, we disassemble the protective cover, fixed by the piston.
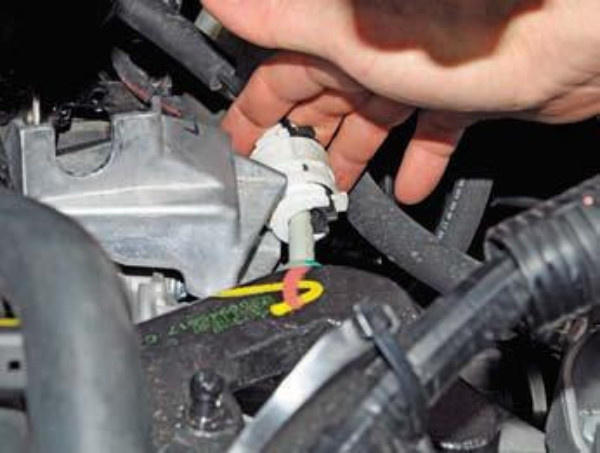
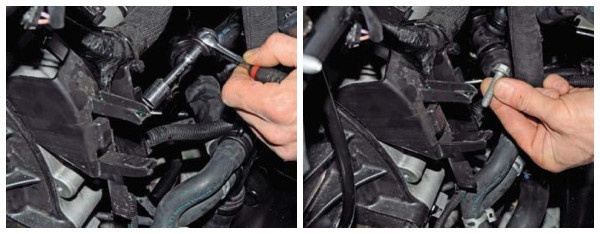
- We get rid of the bolt with which the plastic bracket of the wiring harnesses is attached to the body of the clutch parts. We take out the retainer from the harness bracket with piston wires from the thermostat, unscrew the bracket from the Renault Duster gearbox.
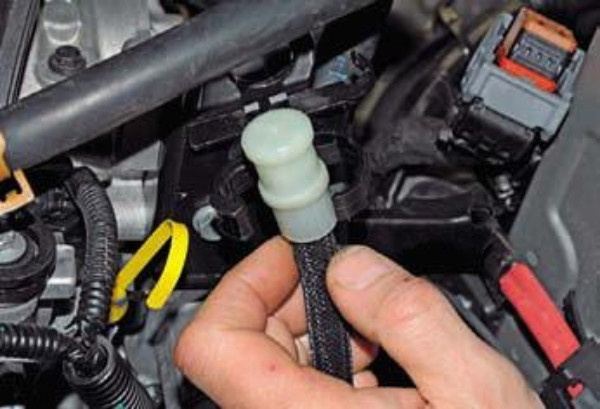
- Disconnect the adapter and the tip of the hydraulic drive tube. They also disconnected the circuit from the wiring block, the reverse light switch. Then we remove the latch from the bolt connecting the tip of the “mass” cable and the clutch housing.
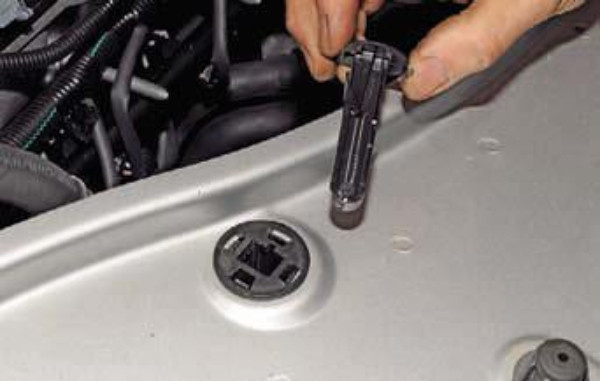
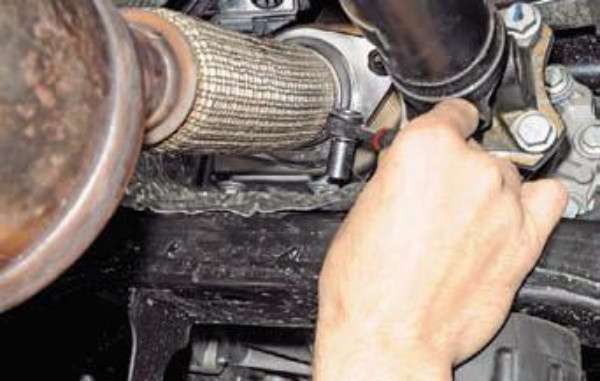
- We get rid of the crankshaft position sensor, which is installed in the hole in the gearbox housing.
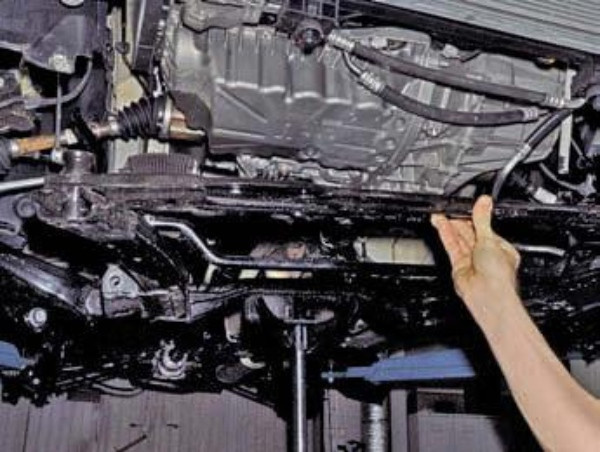
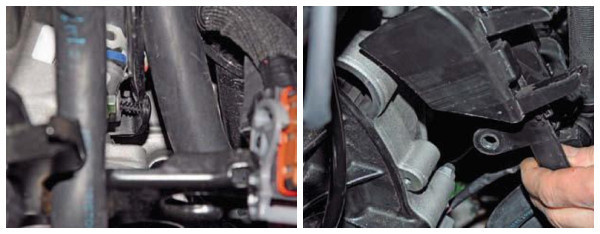
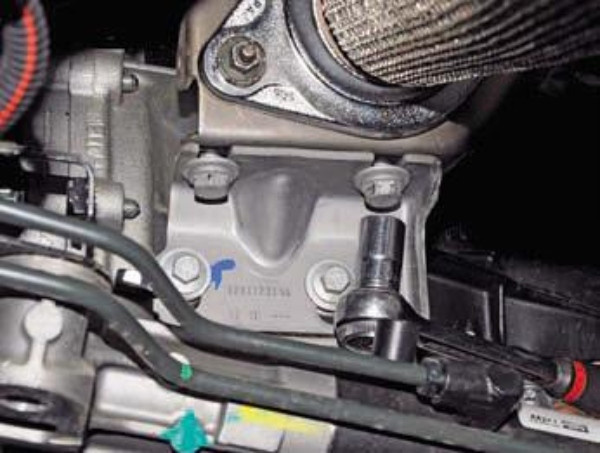
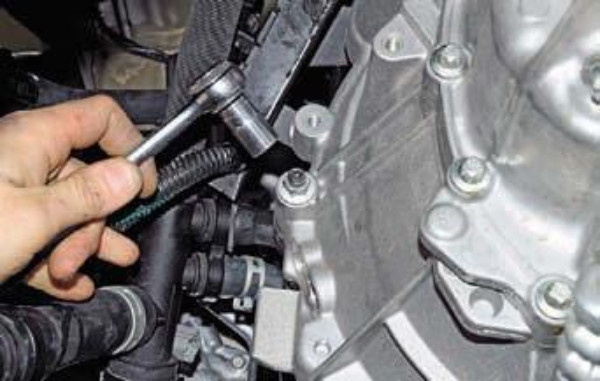
- We unscrew the bolts connecting the exhaust manifold flange, the gearbox mount. After that, we disassemble the gearbox support.
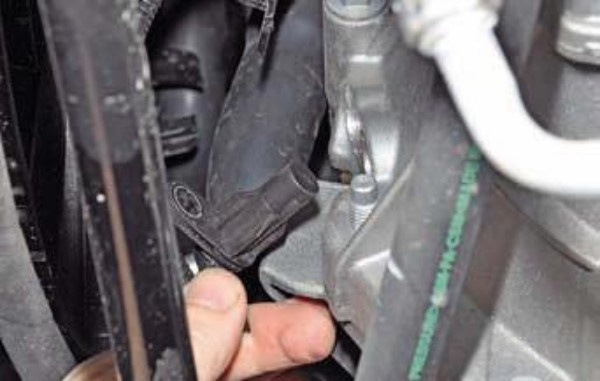
- We release the breather tube from the sleeve by removing its tip from the retainer.
- We remove the fasteners of the power steering tube, one of which is connected to the gearbox housing.
- We disassemble the eyebolt support using an elongated head of 13 mm.
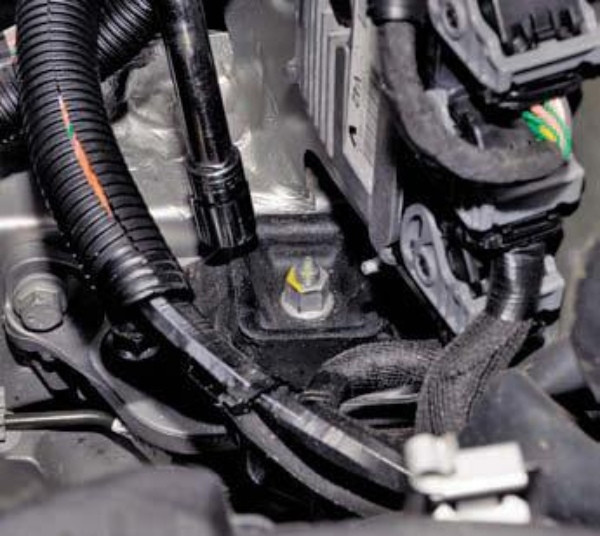
- Using a board, we attached the Duster's engine oil pan and gearbox housing with adjustable gantry mounts.
- We unscrew, remove the upper screw that holds the gearbox and BC from behind.
- We get rid of the fasteners connecting the gearbox and the engine oil pan in front, behind the engine.
- Behind, in front of the engine, we unscrew the clamps of the studs for connecting the gearbox and the BC.
- We turn the left bracket of the engine mount and gearbox mount, lower the engine onto the mount and remove the gearbox mount pin from the space of the support pad.
- We carry out the removal of the bolts connecting the bracket and the gearbox, as well as the bolts of the gearbox and the engine oil pan from below.
- We remove the gearbox from the engine, and then disconnect the hub of the clutch disc from the input shaft, disassemble the box.
- When installing the gearbox, the splines of the input shaft must correspond to the splines of the disc, turning the gearbox, insert the pins of the BC and the clutch housing into the corresponding grooves of the body, block. Then we install the gearbox, focusing on the landing sleeves.
- We fix all mechanisms with appropriate fasteners. When installing the intake manifold mounting bracket, we start with the crankcase mounting bolts and then move on to the manifold clamps.
- Make sure the bracket is installed without deformation.
- After replacing the clutch, assemble all components in the reverse order, fill the system with grease.


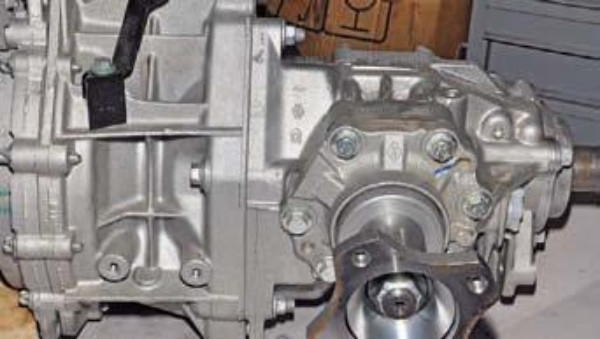
Duster replacement clutch
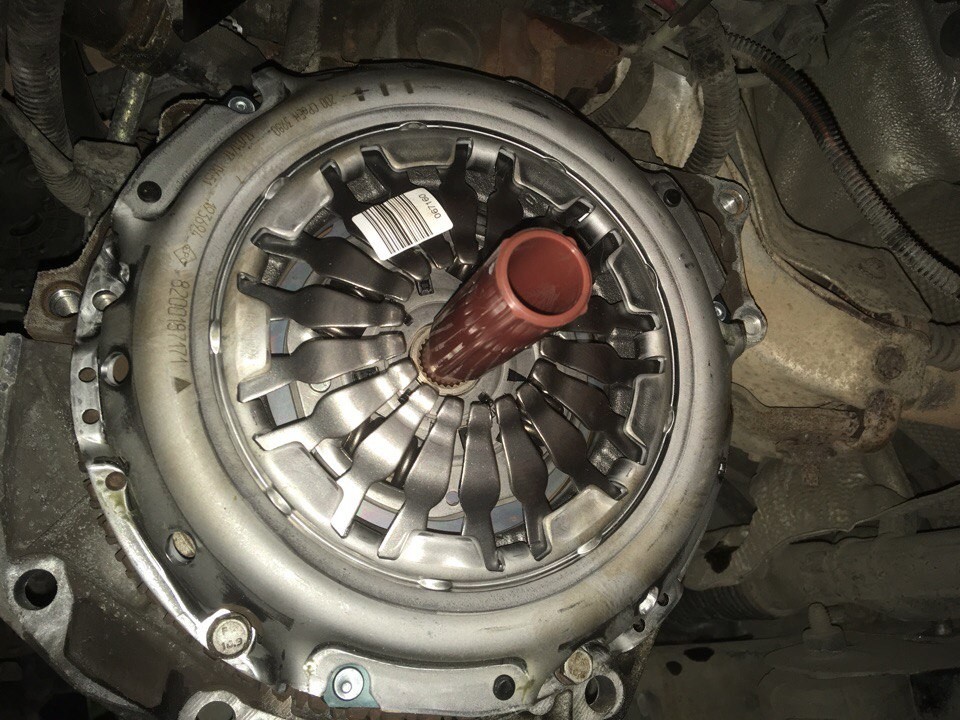
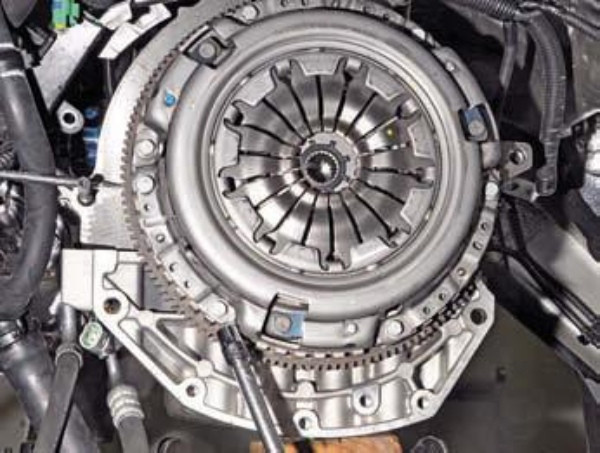
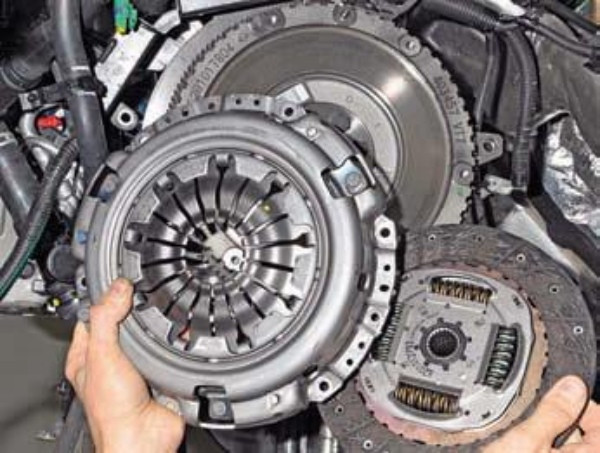
After disassembling the gearbox, we proceed to dismantle the Renault Duster basket and clutch disc. These works are carried out by pre-installing the car on an observation deck or overpass.
- The basket is connected to the steering wheel with six bolts - we turn them with a 11 mm head. We fix the flywheel by installing a screwdriver in the teeth, focusing on the fixing pin of the gearbox.
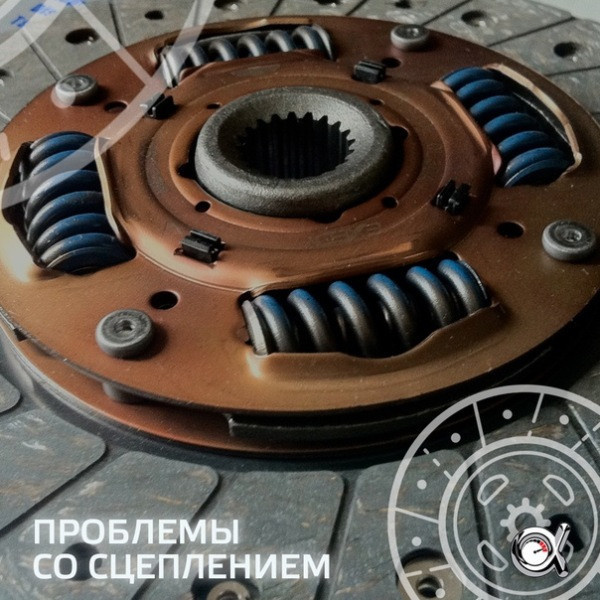
- Please note that at first the bolts are twisted evenly and alternately for one turn, since if the fasteners are unevenly removed, the diaphragm spring may be deformed. When the spring pressure is released, the retainers can be removed in any order. When we remove the sixth screw holding the basket with the disk, we disassemble them.
- We assemble the structure, following the reverse sequence of actions. The protruding part of the disc must be directed towards the basket. The slots in the basket must be aligned with the pins in the handlebar during installation.
- With the help of a turned cartridge, we center the driven disk on the crankshaft flange.
- In the same way as when removing, we fix the oppositely located bolts by turning them one turn at a time. We fix the tightening according to the moment specified in the instruction manual, we repair Renault Duster.
- We remove the mandrel, collect the remaining elements.
How to bleed a Duster clutch?
The clutch is bled to remove air that has entered the system due to depressurization of the structure during the replacement and repair of unit components.
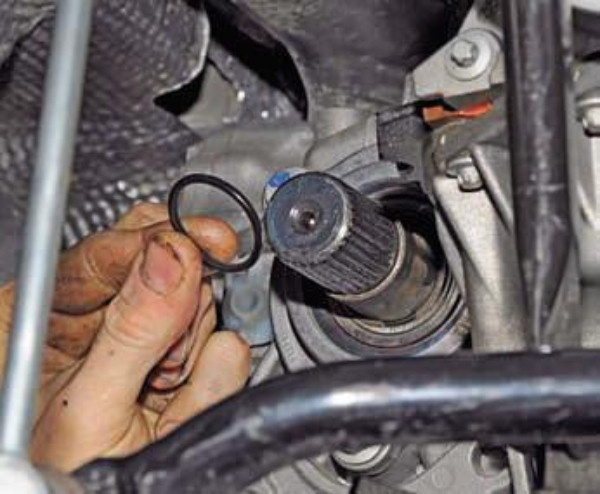
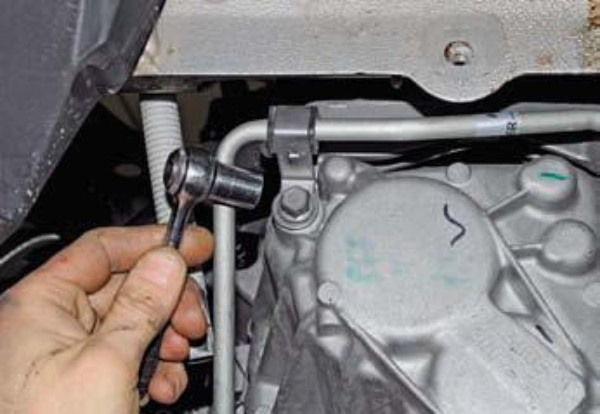
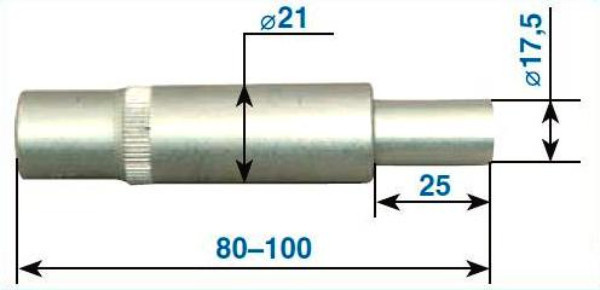
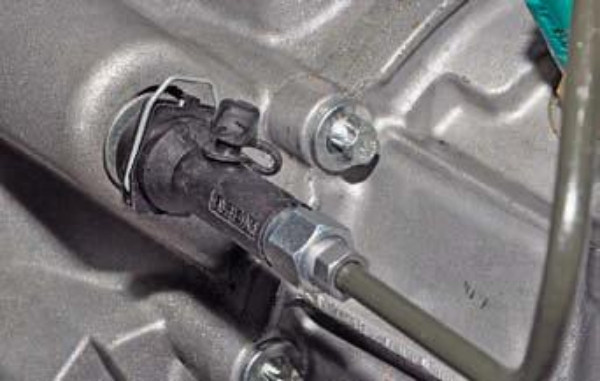
- Before performing the procedure, the adapter into which the plastic tip of the tube is poured must be fixed to the clutch housing with a lock washer. The thickness of such a latch is 1-1,2 mm, the outer diameter is 23 mm, the diameter of the hole for installation in the adapter is 10,5 mm. We install the device in the appropriate slot of the adapter.
- Before bleeding the hydraulic drive, make sure that the system is filled with a sufficient amount of fluid.
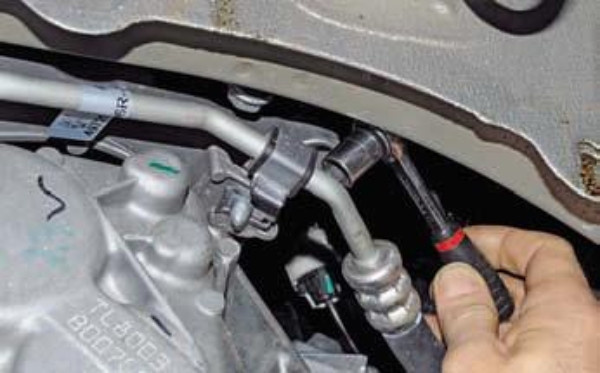
- Open the purge valve closed by the protective cap. One end of the transparent hose is immersed in the working fluid, the other is fixed on the fitting.
- The partner presses the clutch pedal several times, then squeezes it all the way and does not let go. By pressing the spring latch on the tip of the tube, we shift it by 0,4-0,6 cm from the adapter. This allows the brake fluid and excess air to escape into the mixing bowl. After pumping, fix the tip on the adapter. The partner takes his foot off the clutch pedal. It is necessary to carry out manipulations until air stops coming out of the hose (in the form of bubbles). Upon completion, you need to remove the hose, cover the fitting with a cap.


When bleeding the Renault Duster clutch, it is necessary to control the amount of fluid and top up if its level in the reservoir drops.
Change the clutch without removing the box
- Replacing the clutch on the Duster without removing the box is carried out on an inspection hole using a beam on which the power unit will be suspended, since for repair it is necessary to unscrew the pillow above the gearbox.
- We jack up the front of the car, remove the wheels, disassemble the hub on the right and the triangular lever on the left. We remove the cables going to the gearbox, and unscrew the screws that fix the gearbox.
- Then it is necessary to separate the box from the block at a sufficient distance for work, resting it on a subframe. Remove the basket in a circular motion. After replacement, we center the disk.
- Then you need to pump the hydraulic drive and remove the air that got into the system after depressurization. After draining the brake fluid, using a transparent hose connected to the drain cock, we squeeze out the air, adding the working fluid and sucking out the old fluid with bubbles through the syringe. After the liquid comes out without air, we break the tube by moving it to the second position. When disconnecting the syringe, pinch the hose.
Video